
As anyone who has played a game set in an outdoor environment in the last 15 years can tell you, the lens flare effect is used to simulate the incidence of bright lights over the player's field of view. Although it has become a bit overused, it is still very much present in all kinds of games. In this recipe, we will create and test our own lens flare texture.
In order to continue with this recipe, it's strongly recommended that you have access to image editor software such as Adobe Photoshop or GIMP. The source for lens texture created in this recipe can be found in the 0423_02_03 folder.
To create a new lens flare texture and apply it to the scene, follow these steps:
- Import Unity's Character Controller package by navigating to Assets | Import Package | Character Controller.
- Do the same for the Light Flares package.
- In the Hierarchy view, use the Create button to add a Directional Light effect to your scene.
- Select your camera and add a Mouse Look component by accessing the Component | Camera Control | Mouse Look menu option.
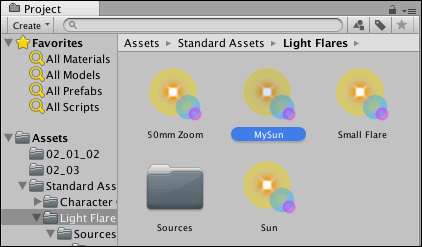
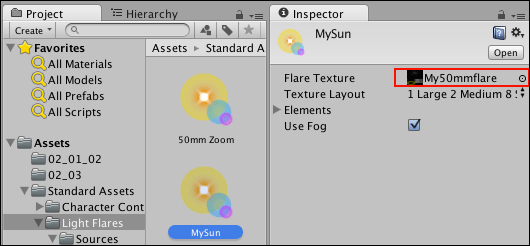
- In the Project view, locate the Sun flare (inside Standard Assets | Light Flares), duplicate it and rename it to MySun, as shown in the following screenshot:
- In the Inspector view, click Flare Texture to reveal the base texture's location in the Project view. It should be a texture named 50mmflare.
- Duplicate the texture and rename it
My50mmflare.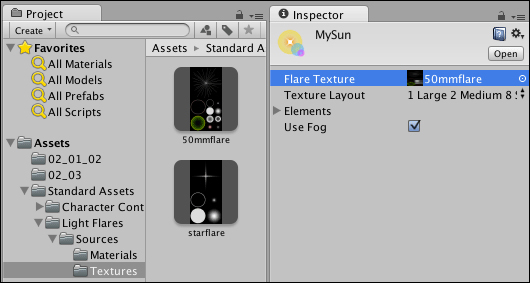
- Right-click My50mmflare and choose Open. This should open the file (actually a
.psd) in your image editor. If you're using Adobe Photoshop, you might see the guidelines for the texture, as shown here: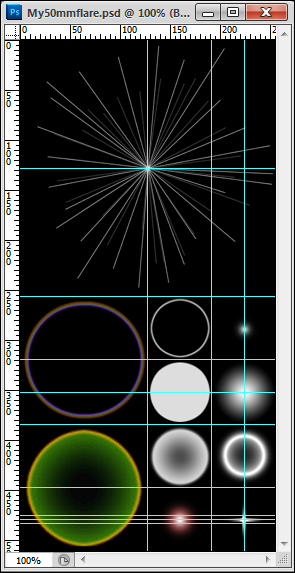
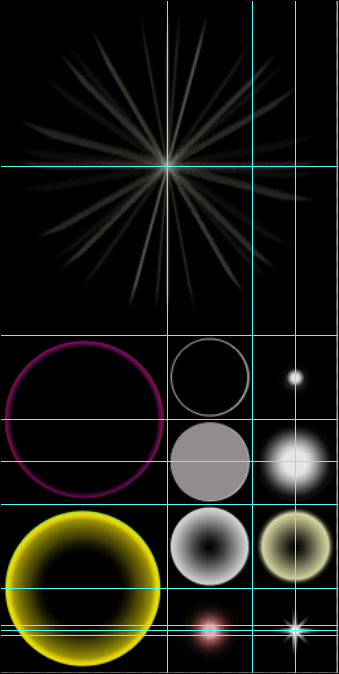
- To create the light rings, create new Circle shapes and add different Layer Effects such as Gradient Overlay, Stroke, Inner Glow, and Outer Glow.
- Recreate the star-shaped flares by editing the originals or by drawing lines and blurring them.
- Save the file and go back to the Unity Editor.
- In the Inspector view, select MySun, and set Flare Texture to My50mmflare:
- Select Directional Light and, in the Inspector view, set Flare to MySun.
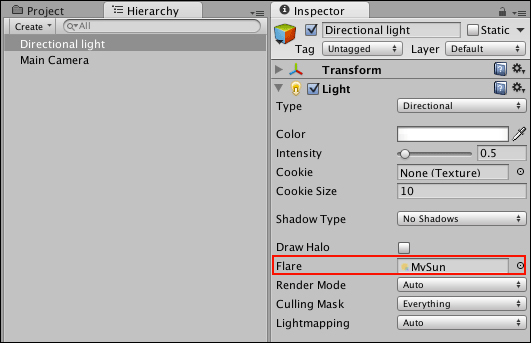
- Play the scene and move your mouse around. You will be able to see the lens flare as the camera faces the light.
We have used Unity's built-in lens flare texture as a blueprint for our own. Once applied, the lens flare texture will be displayed when the player looks into the approximate direction of the light.
Flare textures can use different layouts and parameters for each element. In case you want to learn more about the Lens Flare effect, check out Unity's documentation at http://docs.unity3d.com/Documentation/Components/class-LensFlare.html.