
Some surfaces can have both glossy and matte areas. In order to achieve that effect, we can use specular maps.
For illustration purposes, we will create a rusted metal material to demonstrate how the specular property can be used to enhance realism. If you don't have a base texture to develop into a specular material, please use the one included in the book's 0423_03_03 content folder.
To create a specular material, follow these steps:
- Create a new material called
rustyMetalMaterial. - Select your material. In the Inspector view, under the material's name, use the drop-down menu to change its Shader value to Specular:

- Open the base texture in your image editor (we'll use Adobe Photoshop to illustrate the next steps).
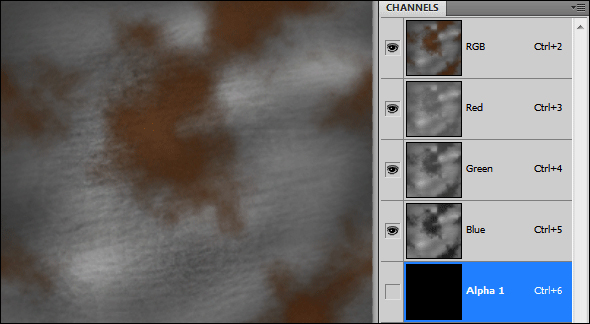
- Open the Channels window (in Photoshop this can be done by navigating to Window | Channels).
- There should be three channels: Red, Green, and Blue. Create a new channel. This will be the Alpha channel that controls the gloss level of our specular material:
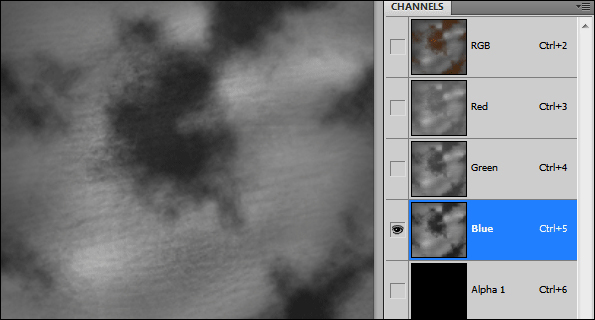
- We want our Alpha channel to emphasize the contrast between rust and metal. Since Blue is the channel with higher level of contrast, we will select it on the Channels window and make all the other channels invisible. The resulting image will be displayed in grayscale, as shown in the following screenshot:
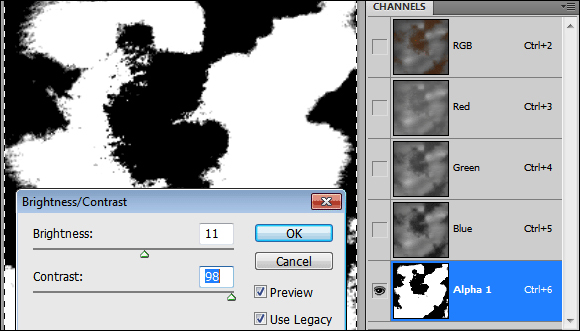
- Select and copy all the image pixels (using Ctrl + A/Ctrl + C on Windows, or Command + A/Command + C on Mac OS).
- In the Channels window, select the Alpha channel and paste the image you have copied.
- Now, intensify the contrast by going to Image | Adjustments | Brightness/Contrast:
- Still in the Channels window, bring the colors back by enabling all RGB channels.
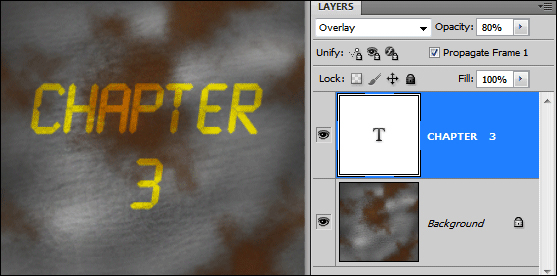
- In addition to the rusty metal plate, let's simulate a paint layer on the wall: create a type layer in yellow. You can type whatever you want.
- Change the type layer's blending mode to Overlay and set its Opacity to 80%:
- Flatten your image (this is necessary, or Unity might discard the alpha channel you created and use the image layer transparent pixels as the alpha channel instead).
- Save your work as a new image file (
.psdor.tgaformats are good options, as they keep the alpha channel). - Inside the Unity Editor, import your image file access through the Assets menu, clicking on Import New Asset....
- In the Project view, choose the
rustyMetalMaterialasset. Then, apply the texture you've made as a Base map (by either clicking on the Select button or dragging it from the Project view to the material slots). Your specular mapped material is ready: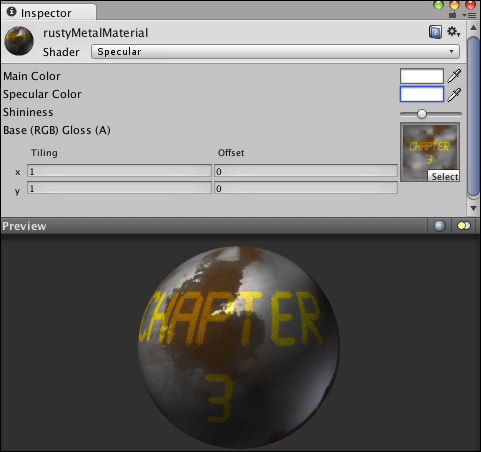
Unity is able to read four channels of a texture map: R (red), G (green), B (blue), and A (alpha). Specular shaders use RGB channels as the base texture (often called diffuse texture), while using the Alpha to set the specular brightness of the material according to each pixel's brightness level.
..................Content has been hidden....................
You can't read the all page of ebook, please click here login for view all page.