CHAPTER 20
Automating Tasks Using PowerShell Scripting
Shells are a necessity in using operating systems. They give the ability to execute arbitrary commands as a user and the ability to traverse the file system. Anybody who has used a computer has dealt with a shell by either typing commands at a prompt or clicking an icon to start a word processing application. A shell is something that every user uses in some fashion. It’s inescapable in whatever form when working on a computer system.
Until recently, Windows users and administrators primarily have used the Windows Explorer or command prompt (both are shells) to interact with most versions of the Windows operating systems. With Microsoft’s release of PowerShell, both a new shell and scripting language, the current standard for interacting with and managing Windows is rapidly changing. This change became very evident with the release of Microsoft Exchange Server 2007, which used PowerShell as its management backbone (often providing functions the GUI didn’t); the addition of PowerShell as a feature within Windows Server 2008, its inclusion in Windows 8 and Windows 10 and in Windows Server 2012 and later made PowerShell an indispensable tool in the management of all Windows operating systems. Version 5.0, now included with Windows Server 2016 operating systems, cements it as the de facto core OS management command interface, letting you manage the entire platform at speeds and levels of functionality not possible with the GUI interface.
PowerShell functionality is vast. The shell can be used to manage workflow, desired state configuration (DSC), web services, web access, and more. It has also become more object-oriented, supporting traditional OO concepts such as classes, enumerations, and variable assignment and access.
Many new modules have been added to the PowerShell library for almost every conceivable management and configuration scenario of the Windows operating systems and the services and roles that run on them, such as SQL Server and Microsoft Exchange. We won't list and describe all the modules here; please visit the website for Windows Server 2016 Unleashed for the latest list.
PowerShell 5.0 supports the latest version of the .Net Framework, the preinstallation, and more. It is also the critical tool for managing headless or GUIless instances such as Server Core and Nano Server. PowerShell’s session-based and remote access functionality is key to managing these headless systems, virtual server infrastructure, and the cloud . . . in particular, Azure-based infrastructure.
In this chapter, we take a closer look at what shells are and how they have developed. Next, we review Microsoft’s past attempts at providing an automation interface (Windows Script Host [WSH]), and then introduce PowerShell. From there, we step into understanding the basic PowerShell features and how to use it to manage Windows Server 2016. Finally, we review some best practices for using PowerShell.
Understanding Shells
A shell is an interface that enables users to interact with the operating system. A shell isn’t considered an application because of its inescapable nature, but it’s the same as any other process running on a system. The difference between a shell and an application is that a shell’s purpose is to enable users to run other applications. In some operating systems (such as UNIX, Linux, and VMS), the shell is a command-line interface (CLI); in other operating systems (such as Windows and Mac OS X), the shell is typically a graphical user interface (GUI).
Both CLI and GUI shells have benefits and drawbacks. For example, most CLI shells allow powerful command chaining (using commands that feed their output into other commands for further processing; this is commonly referred to as the pipeline). GUI shells, however, require commands to be completely self-contained. Furthermore, most GUI shells are easy to navigate, whereas CLI shells require a preexisting knowledge of the system to avoid attempting several commands to discern the location and direction to head in when completing an automation task. Therefore, choosing which shell to use depends on your comfort level and what’s best suited to perform the task at hand.
NOTE
Even though GUI shells exist, the term shell is used almost exclusively to describe a command-line environment, not a task that is performed with a GUI application, such as Windows Explorer. Likewise, shell scripting refers to collecting commands normally entered on the command line or into an executable file.
A Short History of Shells
The first shell in wide use was the Bourne shell, the standard user interface for the UNIX operating system; UNIX systems still require it for booting. This robust shell provided pipelines and conditional and recursive command execution. It was developed by C programmers for C programmers.
Oddly, however, despite being written by and for C programmers, the Bourne shell didn’t have a C-like coding style. This lack of similarity to the C language drove the invention of the C shell, which introduced more C-like programming structures. While the C shell inventors were building a better mousetrap, they decided to add command-line editing and command aliasing (defining command shortcuts), which eased the bane of every UNIX user’s existence: typing. The less a UNIX user has to type to get results, the better.
Although most UNIX users liked the C shell, learning a completely new shell was a challenge for some. So, the Korn shell was invented, which added a number of the C shell features to the Bourne shell. Because the Korn shell is a commercially licensed product, the open source software movement needed a shell for Linux and FreeBSD. The collaborative result was the Bourne Again shell, or Bash, invented by the Free Software Foundation.
Throughout the evolution of UNIX and the birth of Linux and FreeBSD, other operating systems were introduced along with their own shells. Digital Equipment Corporation (DEC) introduced Virtual Memory System (VMS) to compete with UNIX on its VAX systems. VMS had a shell called Digital Command Language (DCL) with a verbose syntax, unlike that of its UNIX counterparts. Also, unlike its UNIX counterparts, it wasn’t case sensitive, nor did it provide pipelines.
Somewhere along the way, the PC was born. IBM took the PC to the business market, and Apple rebranded roughly the same hardware technology and focused on consumers. Microsoft made DOS run on the IBM PC, acting as both kernel and shell and including some features of other shells. (The pipeline syntax was inspired by UNIX shells.)
Following DOS was Windows, which went from being a GUI to a full blown operating system quickly. Windows introduced a GUI shell, which has become the basis for Microsoft shells ever since. Unfortunately, GUI shells are notoriously difficult to script, so Windows provided a DOSShell-like environment. It was improved with a new executable, cmd.exe instead of command.com, and a more robust set of command-line editing features. Regrettably, this change also meant that shell scripts in Windows had to be written in the DOSShell syntax for collecting and executing command groupings.
Over time, Microsoft realized its folly and decided systems administrators should have better ways to manage Windows systems. Windows Script Host (WSH) was introduced in Windows 98, providing a native scripting solution with access to the underpinnings of Windows. It was a library that allowed scripting languages to use Windows in a powerful and efficient manner. WSH is not its own language, however, so a WSH-compliant scripting language was required to take advantage of it, such as JScript, VBScript, Perl, Python, Kixstart, or Object REXX. Some of these languages are quite powerful in performing complex processing, so WSH seemed like a blessing to Windows systems administrators.
However, the rejoicing was short-lived because there was no guarantee that the WSH-compliant scripting language you chose would be readily available or a viable option for everyone. The lack of a standard language and environment for writing scripts made it difficult for users and administrators to incorporate automation by using WSH. The only way to be sure the scripting language or WSH version would be compatible on the system being managed was to use a native scripting language, which meant using DOSShell and enduring the problems that accompanied it. In addition, WSH opened a large attack vector for malicious code to run on Windows systems. This vulnerability gave rise to a stream of viruses, worms, and other malicious programs that have wreaked havoc on computer systems, thanks to WSH’s focus on automation without user intervention.
The end result was that systems administrators viewed WSH as both a blessing and a curse. Although WSH presented a good object model and access to a number of automation interfaces, it wasn’t a shell. It required using Wscript.exe and Cscript.exe, scripts had to be written in a compatible scripting language, and its attack vulnerabilities posed a security challenge. Clearly, a different approach was needed for systems management; over time, Microsoft reached the same conclusion.
Introduction to PowerShell
The introduction of WSH as a standard in the Windows operating system offered a robust alternative to DOSShell scripting. Unfortunately, WSH presented a number of challenges, discussed in the preceding section. Furthermore, WSH didn’t offer the CLI shell experience that UNIX and Linux administrators had enjoyed for years, resulting in Windows administrators being made fun of by the other chaps for the lack of a CLI shell and its benefits.
Luckily, Jeffrey Snover (the architect of PowerShell) and others on the PowerShell team realized that Windows needed a strong, secure, and robust CLI shell for systems management. Enter PowerShell. PowerShell was designed as a shell with full access to the underpinnings of Windows via the .NET Framework, Component Object Model (COM) objects, and other methods. It also provided an execution environment that’s familiar, easy, and secure. PowerShell is aptly named, as it puts the power into the Windows shell. For users wanting to automate their Windows systems, the introduction of PowerShell was exciting because it combined “the power of WSH with the warm-fuzzy familiarity of a CLI shell.”
PowerShell provides a powerful native scripting language, so scripts can be ported to all Windows systems without worrying about whether a particular language interpreter is installed. In the past, an administrator might have gone through the rigmarole of scripting a solution with WSH in Perl, Python, VBScript, JScript, or another language, only to find that the next system that they worked on didn’t have that interpreter installed. At home, users can put whatever they want on their systems and maintain them however they see fit, but in a workplace, that option isn’t always viable. PowerShell solves that problem by removing the need for nonnative interpreters. It also solves the problem of wading through websites to find command-line equivalents for simple GUI shell operations and coding them into .cmd files. Last, PowerShell addresses the WSH security problem by providing a platform for secure Windows scripting. It focuses on security features such as script signing, lack of executable extensions, and execution policies (which are restricted by default).
For anyone who needs to automate administration tasks on a Windows system or a Microsoft platform, PowerShell provides a much-needed injection of power. As such, for Windows systems administrators or scripters, becoming a PowerShell expert is highly recommended. After all, PowerShell can now be used to efficiently automate management tasks for Windows, Active Directory, Terminal Services, SQL Server, Exchange Server, Internet Information Services (IIS), and even a number of different third-party products.
As such, PowerShell is the approach Microsoft had been seeking as the automation and management interface for their products. Thus, PowerShell is now the endorsed solution for the management of Windows-based systems and server products. Over time, PowerShell could even possibly replace the current management interfaces, such as cmd.exe, WSH, CLI tools, and so on, while becoming even further integrated into the Windows operating system. The trend toward this direction can be seen with the release of Windows Server 2008 R2 and Windows 7, in which PowerShell was part of the operating system.
PowerShell Uses
In Windows, an administrator can complete a number of tasks using PowerShell. The following list is a sampling of these tasks:
![]() Manage the file system—To create, delete, modify, and set permissions for files and folders.
Manage the file system—To create, delete, modify, and set permissions for files and folders.
![]() Manage services—To list, stop, start, restart, and even modify services.
Manage services—To list, stop, start, restart, and even modify services.
![]() Manage processes—To list (monitor), stop, and start processes.
Manage processes—To list (monitor), stop, and start processes.
![]() Manage the Registry—To list (monitor), stop, and start processes.
Manage the Registry—To list (monitor), stop, and start processes.
![]() Use Windows Management Instrumentation (WMI)—To manage not only Windows, but also other platforms such as IIS and Terminal Services.
Use Windows Management Instrumentation (WMI)—To manage not only Windows, but also other platforms such as IIS and Terminal Services.
![]() Use existing Component Object Model (COM) objects—To complete a wide range of automation tasks.
Use existing Component Object Model (COM) objects—To complete a wide range of automation tasks.
![]() Manage a number of Windows roles and features—To add or remove roles and features.
Manage a number of Windows roles and features—To add or remove roles and features.
![]() Perform administrative tasks—To perform tasks ranging from resetting passwords to adding DNS entries to modifying virtual machines.
Perform administrative tasks—To perform tasks ranging from resetting passwords to adding DNS entries to modifying virtual machines.
PowerShell Features
PowerShell is a departure from the current management interfaces in Windows. As such, it has been built from the ground up to include a number of features that make CLI and script-based administration easier. Some of PowerShell’s more key features are as follows:
![]() It has thousands of command-line tools (referred to as commandlets). Commandlets can be gathered into collections called modules. Thousands of modules have been created for PowerShell.
It has thousands of command-line tools (referred to as commandlets). Commandlets can be gathered into collections called modules. Thousands of modules have been created for PowerShell.
![]() The scripting language is designed to be readable and easy to use.
The scripting language is designed to be readable and easy to use.
![]() PowerShell supports existing scripts, command-line tools, and automation interfaces, such as WMI, ADSI, .NET Framework, ActiveX Data Objects (ADO), and so on.
PowerShell supports existing scripts, command-line tools, and automation interfaces, such as WMI, ADSI, .NET Framework, ActiveX Data Objects (ADO), and so on.
![]() It follows a strict naming convention for commands based on a verb-noun format.
It follows a strict naming convention for commands based on a verb-noun format.
![]() It supports a number all Windows operating systems from Windows XP SP2 through Windows 10 and Windows Server 2016.
It supports a number all Windows operating systems from Windows XP SP2 through Windows 10 and Windows Server 2016.
![]() It provides direct “access to and navigation of” the Windows Registry, certificate store, and file system using a common set of commands.
It provides direct “access to and navigation of” the Windows Registry, certificate store, and file system using a common set of commands.
![]() PowerShell is object based, which allows data (objects) to be piped between commands. Version 5.0 bring OO to PowerShell with the introduction of classes and enumeration. You are also able to work with variables and store and retrieve data during the running of your scripts.
PowerShell is object based, which allows data (objects) to be piped between commands. Version 5.0 bring OO to PowerShell with the introduction of classes and enumeration. You are also able to work with variables and store and retrieve data during the running of your scripts.
![]() It is extensible, which allows third parties (as noted earlier) to build upon and extend PowerShell’s already rich interfaces for managing Windows and other Microsoft platforms.
It is extensible, which allows third parties (as noted earlier) to build upon and extend PowerShell’s already rich interfaces for managing Windows and other Microsoft platforms.
![]() It is fully network-aware and can execute code against remote servers in both virtual and non-virtual environments.
It is fully network-aware and can execute code against remote servers in both virtual and non-virtual environments.
PowerShell Features
Many new PowerShell features and fixes were added since Version 3.0 was introduced. Version 5.0 is included with Windows Server 2016. Version 4.0 was supplied as part of the Windows Server 2012 R2 update that shipped in 2014. Consult the Microsoft PowerShell reference for all features, enhancements, and bug fixes, and the website for commandlet and module information.
Understanding PowerShell Fundamentals
To begin working with PowerShell, let’s start with the fundamentals: accessing PowerShell, working from the CLI, and understanding the basic commands.
Accessing PowerShell
After logging in to your Windows interactive session, there are several methods to access and use PowerShell. The first method is from the Start menu, as shown in the following steps:
1. Click Start. The menu appears along with a collection of useful Windows Server administration tiles.
2. Click the Windows PowerShell tile or the Windows PowerShell ISE tile.
You can also access PowerShell from the All Apps menus under Windows PowerShell.
Command-Line Interface
The syntax for using PowerShell from the CLI is similar to the syntax for other CLI shells. The fundamental component of a PowerShell command is, of course, the name of the command to be executed. In addition, the command can be made more specific by using parameters and arguments for parameters. Therefore, a PowerShell command can have the following formats:
![]() [command name]
[command name]
![]() [command name] -[parameter]
[command name] -[parameter]
![]() [command name] -[parameter] -[parameter] [argument1]
[command name] -[parameter] -[parameter] [argument1]
![]() [command name] -[parameter] -[parameter] [argument1],[argument2]
[command name] -[parameter] -[parameter] [argument1],[argument2]
When using PowerShell, a parameter is a variable that can be accepted by a command, script, or function. An argument is a value assigned to a parameter. Although these terms are often used interchangeably, remembering these definitions is helpful when discussing their use in PowerShell.
Navigating the CLI
As with all CLI-based shells, an understanding is needed in how to effectively navigate and use the PowerShell CLI. Table 20.1 lists the editing operations associated with various keys when using the PowerShell console.
TABLE 20.1 PowerShell Console Editing Features
Keys |
Editing Operation |
Left and right arrows |
Move the cursor left and right through the current command line. |
Up and down arrows |
Moves up and down through the list of recently typed commands. |
PgUp |
Displays the first command in the command history. |
PgDn |
Displays the last command in the command history. |
Home |
Moves the cursor to the beginning of the command line. |
End |
Moves the cursor to the end of the command line. |
Insert |
Switches between insert and overstrike text-entry modes. |
Delete |
Deletes the character at the current cursor position. |
Backspace |
Deletes the character immediately preceding the current cursor position. |
F3 |
Displays the previous command. |
F4 |
Deletes up to the specified number of characters from the current cursor. |
F5 |
Moves backward through the command history. |
F7 |
Displays a list of recently typed commands in a pop-up window in the command shell. Use the up and down arrows to select a previously typed command, and then press Enter to execute the selected command. |
F8 |
Moves backward through the command history with commands that match the text that has been entered at the command prompt. |
F9 |
Prompts for a command number and executes the specified command from the command history (command numbers refer to the F7 command list). |
Tab |
Autocompletes command-line sequences. Use the Shift+Tab sequence to move backward through a list of potential matches. |
Luckily, most of the features in Table 20.1 are native to the command prompt, which makes PowerShell adoption easier for administrators already familiar with the Windows command line. The only major difference is that the Tab key autocompletion is enhanced in PowerShell beyond what’s available with the command prompt. Tab key autocompletion is one of the most useful features in PowerShell as it allows administrators to find commandlets where they don’t remember the exact name. It also saves time by reducing the amount of typing needed to perform a task.
As with the command prompt, PowerShell performs autocompletion for file and directory names. So, if you enter a partial file or directory name and press Tab, PowerShell returns the first matching file or directory name in the current directory. Pressing Tab again returns a second possible match and enables you to cycle through the list of results. Like the command prompt, PowerShell’s Tab key autocompletion can also autocomplete with wildcards. The difference between Tab key autocompletion in the command prompt and PowerShell is that PowerShell can autocomplete commands. For example, you can enter a partial command name and press the Tab key, and PowerShell steps through a list of possible command matches.
PowerShell can also autocomplete parameter names associated with a particular command. Just enter a command and partial parameter name and press the Tab key, and PowerShell cycles through the parameters for the command that has been specified. This method also works for variables associated with a command. In addition, PowerShell performs autocompletion for methods and properties of variables and objects.
Command Types
When a command is executed in PowerShell, the command interpreter looks at the command name to figure out what task to perform. This process includes determining the type of command and how to process that command. There are four types of PowerShell commands: commandlets, shell function commands, script commands, and native commands.
Commandlet
The first command type is a commandlet (or cmdlet), which is similar to the built-in commands in other CLI-based shells. The difference is that commandlets are implemented by using .NET classes compiled into a dynamic link library (DLL) and loaded into PowerShell at runtime. This difference means there’s no fixed class of built-in commandlets; anyone can use the PowerShell Software Developers Kit (SDK) to write a custom commandlet, thus extending PowerShell’s functionality.
A commandlet is always named as a verb and noun pair separated by a “-” (hyphen). The verb specifies the action the commandlet performs, and the noun specifies the object being operated on. An example of a commandlet being executed is shown here:
PS C:> Get-Process
Handles NPM(K) PM(K) WS(K) VM(M) CPU(s) Id ProcessName
------- ------ ----- ----- ----- ------ -- -----------
425 5 1608 1736 90 3.09 428 csrss
79 4 1292 540 86 1.00 468 csrss
193 4 2540 6528 94 2.16 2316 csrss
66 3 1128 3736 34 0.06 3192 dwm
412 11 13636 20832 125 3.52 1408 explorer
...
While executing commandlets in PowerShell, you should take a couple of considerations into account. Overall, PowerShell was created such that it is both forgiving and easy when it comes to syntax. In addition, PowerShell also always attempts to fill in the blanks for a user. Examples of this are illustrated in the following items:
![]() Commandlets are always structured in a nonplural verb-noun format.
Commandlets are always structured in a nonplural verb-noun format.
![]() Parameters and arguments are positional: Get-Process winword.
Parameters and arguments are positional: Get-Process winword.
![]() Many arguments can use wildcards: Get-Process w*.
Many arguments can use wildcards: Get-Process w*.
![]() Partial parameter names are also allowed: Get-Process–P w*.
Partial parameter names are also allowed: Get-Process–P w*.
NOTE
When executed, a commandlet only processes a single record at a time.
Windows Server 2016 comes with a large number of new and recycled commandlets covering all major administrative functions, including the following:
![]() AD CS Administration Commandlets
AD CS Administration Commandlets
![]() AD CS Deployment Commandlets
AD CS Deployment Commandlets
![]() AD DS Administration Commandlets
AD DS Administration Commandlets
![]() AD DS Deployment Commandlets
AD DS Deployment Commandlets
![]() App Installation Commandlets
App Installation Commandlets
![]() AppLocker Commandlets
AppLocker Commandlets
![]() Best Practices Analyzer Commandlets
Best Practices Analyzer Commandlets
![]() BranchCache Commandlets
BranchCache Commandlets
![]() Cluster-Aware Updating Commandlets
Cluster-Aware Updating Commandlets
![]() Data Center Bridging (DCB) Quality of Service (QoS) Commandlets
Data Center Bridging (DCB) Quality of Service (QoS) Commandlets
![]() Deduplication Commandlets
Deduplication Commandlets
![]() Direct Access Client Commandlets
Direct Access Client Commandlets
![]() DISM Commandlets
DISM Commandlets
![]() DTC Diagnostics Commandlets
DTC Diagnostics Commandlets
![]() DTC Management Commandlets
DTC Management Commandlets
![]() Failover Clusters Commandlets
Failover Clusters Commandlets
![]() Group Policy Commandlets
Group Policy Commandlets
![]() Hyper-V Commandlets
Hyper-V Commandlets
![]() International Settings Commandlets
International Settings Commandlets
![]() iSCSI Commandlets
iSCSI Commandlets
![]() iSCSI Target Commandlets
iSCSI Target Commandlets
![]() Microsoft Online Backup Commandlets
Microsoft Online Backup Commandlets
![]() MSMQ Commandlets
MSMQ Commandlets
![]() MultiPath I/O (MPIO) Commandlets
MultiPath I/O (MPIO) Commandlets
![]() Network Connectivity Status Commandlets
Network Connectivity Status Commandlets
![]() Network Load Balancing Commandlets
Network Load Balancing Commandlets
![]() Network Quality of Service (QoS) Commandlets
Network Quality of Service (QoS) Commandlets
![]() Net TCP/IP Commandlets
Net TCP/IP Commandlets
![]() PKI Client Commandlets
PKI Client Commandlets
![]() Print Management Commandlets
Print Management Commandlets
![]() Remote Access Commandlets
Remote Access Commandlets
![]() Server Manager Commandlets
Server Manager Commandlets
![]() Storage Commandlets
Storage Commandlets
![]() VAMT Commandlets
VAMT Commandlets
![]() Windows Data Access Components (WDAC) Commandlets
Windows Data Access Components (WDAC) Commandlets
![]() Web Server (IIS) Administration Commandlets
Web Server (IIS) Administration Commandlets
![]() WHEA Commandlets
WHEA Commandlets
![]() Windows Assessment Services Commandlets
Windows Assessment Services Commandlets
![]() Windows PowerShell Web Access Commandlets
Windows PowerShell Web Access Commandlets
![]() Windows Server Update Services (WSUS) Commandlets
Windows Server Update Services (WSUS) Commandlets
Functions
The next type of command is a function. These commands provide a way to assign a name to a list of commands. Functions are similar to subroutines and procedures in other programming languages. The main difference between a script and a function is that a new instance of the shell is started for each shell script, and functions run in the current instance of the same shell.
NOTE
Functions defined at the command line remain in effect only during the current PowerShell session. They are also local in scope and don’t apply to new PowerShell sessions.
Although a function defined at the command line is a useful way to create a series of commands dynamically in the PowerShell environment, these functions reside only in memory and are erased when PowerShell is closed and restarted. Therefore, although creating complex functions dynamically is possible, writing these functions as script commands might be more practical. An example of a shell function command is as follows:
PS C:> function showFiles {Get-ChildItem}
PS C:> showfiles
Directory: C:
Mode LastWriteTime Length Name
---- ------------- ------ ----
d---- 3/4/2016 10:36 PM inetpub
d---- 3/17/2016 11:02 PM PerfLogs
d-r-- 3/5/2016 12:19 AM Program Files
d-r-- 3/5/2016 11:01 PM Users
d---- 4/14/2016 11:42 PM Windows
-a--- 3/26/2016 8:43 PM 24 autoexec.bat
-ar-s 5/13/2016 11:57 PM 8192 BOOTSECT.BAK
Advanced Functions
Advanced functions are a feature that was introduced in PowerShell v2.0. The basic premise behind advanced functions is to enable administrators and developers access to the same type of functionality as a compiled commandlet, but directly through the PowerShell scripting language. An example of an advanced function is shown here:
function SuperFunction {
<#
.SYNOPSIS
Superduper Advanced Function.
.DESCRIPTION
This is my Superduper Advanced Function.
.PARAMETER Message
Message to write.
#>
param(
[Parameter(Position=0, Mandatory=$True, ValueFromPipeline=$True)]
[String] $Message
)
Write-Host $Message
}
In the previous example, you will see that one of the major identifying aspects of an advanced function is the use of the CmdletBinding attribute. Usage of this attribute in an advanced function allows PowerShell to bind the parameters in the same manner that it binds parameters in a compiled commandlet. For the SuperFunction example, CmdletBinding is used to define the $Message parameter with position 0, as mandatory, and is able to accept values from the pipeline. For example, the following shows the SuperFunction being executed, which then prompts for a message string. That message string is then written to the console:
PS C:Userssheldon> SuperFunction
cmdlet SuperFunction at command pipeline position 1
Supply values for the following parameters:
Message: yo!
yo!
Finally, advanced functions can also use all the methods and properties of the PSCmdlet class, for example:
![]() Usage of all the input processing methods (Begin, Process, and End)
Usage of all the input processing methods (Begin, Process, and End)
![]() Usage of the ShouldProcess and ShouldContinue methods, which can be used to get user feedback before performing an action
Usage of the ShouldProcess and ShouldContinue methods, which can be used to get user feedback before performing an action
![]() Usage of the ThrowTerminatingError method, which can be used to generate error records
Usage of the ThrowTerminatingError method, which can be used to generate error records
![]() Usage of a various number of Write methods
Usage of a various number of Write methods
Scripts
Scripts, the third command type, are PowerShell commands stored in a PS1 file. The main difference from functions is that scripts are stored on disk and can be accessed any time, unlike functions that don’t persist across PowerShell sessions.
Scripts can be run in a PowerShell session or at the command prompt. To run a script in a PowerShell session, type the script name without the extension. The script name can be followed by any parameters. The shell then executes the first PS1 file matching the typed name in any of the paths located in the PowerShell $ENV:PATH variable.
To run a PowerShell script from a command prompt, first use the CD command to change to the directory where the script is located. Then run the PowerShell executable with the command parameter and specifying which script to be run, as shown here:
C:Scripts>powershell -command .myscript.ps1
If you don’t want to change to the script’s directory with the cd command, you can also run it by using an absolute path, as shown in this example:
C:>powershell -command C:Scriptsmyscript.ps1
An important detail about scripts in PowerShell concerns their default security restrictions. By default, scripts are not enabled to run as a method of protection against malicious scripts. You can control this policy with the Set-ExecutionPolicy commandlet, which is explained later in this chapter.
Native Commands
The last type of command, a native command, consists of external programs that the operating system can run. Because a new process must be created to run native commands, they are less efficient than other types of PowerShell commands. Native commands also have their own parameters for processing commands, which are usually different from PowerShell parameters.
.NET Framework Integration
Most shells operate in a text-based environment, which means you typically have to manipulate the output for automation purposes. For example, if you need to pipe data from one command to the next, the output from the first command usually must be reformatted to meet the second command’s requirements. Although this method has worked for years, dealing with text-based data can be difficult and frustrating.
Often, a lot of work is necessary to transform text data into a usable format. Microsoft has set out to change the standard with PowerShell, however. Instead of transporting data as plain text, PowerShell retrieves data in the form of .NET Framework objects, which makes it possible for commands (or commandlets) to access object properties and methods directly. This change has simplified shell use. Instead of modifying text data, you can just refer to the required data by name. Similarly, instead of writing code to transform data into a usable format, you can simply refer to objects and manipulate them as needed.
Reflection
Reflection is a feature in the .NET Framework that enables developers to examine objects and retrieve their supported methods, properties, fields, and so on. Because PowerShell is built on the .NET Framework, it provides this feature, too, with the Get-Member commandlet. This commandlet analyzes an object or collection of objects you pass to it via the pipeline. For example, the following command analyzes the objects returned from the Get-Process commandlet and displays their associated properties and methods:
PS C:> get-process | get-member
Developers often refer to this process as “interrogating” an object. This method of accessing and retrieving information about an object can be very useful in understanding its methods and properties without referring to MSDN documentation or searching the Internet.
Extended Type System
You might think that scripting in PowerShell is typeless because you rarely need to specify the type for a variable. PowerShell is actually type driven, however, because it interfaces with different types of objects from the less-than-perfect .NET to Windows Management Instrumentation (WMI), Component Object Model (COM), ActiveX Data Objects (ADO), Active Directory Service Interfaces (ADSI), Extensible Markup Language (XML), and even custom objects. However, you don’t need to be concerned about object types because PowerShell adapts to different object types and displays its interpretation of an object for you.
In a sense, PowerShell tries to provide a common abstraction layer that makes all object interaction consistent, despite the type. This abstraction layer is called the PSObject, a common object used for all object access in PowerShell. It can encapsulate any base object (.NET, custom, and so on), any instance members, and implicit or explicit access to adapted and type-based extended members, depending on the type of base object. Furthermore, it can state its type and add members dynamically. To do this, PowerShell uses the Extended Type System (ETS), which provides an interface that allows PowerShell commandlet and script developers to manipulate and change objects as needed.
NOTE
When you use the Get-Member commandlet, the information returned is from PSObject. Sometimes PSObject blocks members, methods, and properties from the original object. If you want to view the blocked information, use the BaseObject property with the PSBase standard name. For example, you could use the $Procs.PSBase | get-member command to view blocked information for the $Procs object collection.
Needless to say, this topic is fairly advanced, as PSBase is hidden from view. The only time you need to use it is when the PSObject doesn’t interpret an object correctly or you’re digging around for hidden jewels in PowerShell.
Static Classes and Methods
Certain .NET Framework classes cannot be used to create new objects. For example, if you try to create a System.Math typed object using the New-Object commandlet, the following error occurs:
PS C:> new-object system.math
New-Object : Constructor not found. Cannot find an appropriate constructor for
type system.math.
At line:1 char:1
+ new-object system.math
+ ~~~~~~~~~~~~~~~~~~~~~~
+ CategoryInfo : ObjectNotFound: (:) [New-Object], PSArgumentExce
ption
+ FullyQualifiedErrorId : CannotFindAppropriateCtor,Microsoft.PowerShell.C
ommands.NewObjectCommand
PS C:>
The reason this occurs is because static members are shared across all instances of a class and don’t require a typed object to be created before being used. Instead, static members are accessed simply by referring to the classname as if it were the name of the object followed by the static operator (::), as follows:
PS > [System.DirectoryServices.ActiveDirectory.Forest]::GetCurrentForest()
In the previous example, the DirectoryServices.ActiveDirectory.Forest class is used to retrieve information about the current forest. To complete this task, the classname is enclosed within the two square brackets ([...]). Then, the GetCurrentForest method is invoked by using the static operator (::).
NOTE
To retrieve a list of static members for a class, use the Get-Member commandlet: Get-Member -inputObject ([System.String]) -Static.
Type Accelerators
A type accelerator is simply an alias for specifying a .NET type. Without a type accelerator, defining a variable type requires entering a fully qualified classname, as shown here:
PS C:> $User = [System.DirectoryServices.DirectoryEntry]"LDAP: //CN=Sheldon
Cat,OU=Accounts,OU=Managed Objects,DC=companyabc,DC=com"
PS C:> $User
distinguishedname:{CN=Sheldon Cat,OU=Accounts,OU=Managed
Objects,DC=companyabc,DC=com}
path : LDAP: //CN=Sheldon Cat,OU=Accounts,OU=Managed
Objects,DC=companyabc,DC=com
PS C:>
Instead of typing the entire classname, you just use the [ADSI] type accelerator to define the variable type, as in the following example:
PS C:> $User = [ADSI]"LDAP://CN=Sheldon Cat,OU=Accounts, OU=Managed
Objects,DC=companyabc,DC=com"
PS C:> $User
distinguishedname:{CN=Sheldon Cat,OU=Accounts,OU=Managed
Objects,DC=companyabc,DC=com}
path : LDAP: //CN=Sheldon Cat,OU=Accounts,OU=Managed
Objects,DC=companyabc,DC=com
PS C:>
Type accelerators have been included in PowerShell mainly to cut down on the amount of typing to define an object type. However, for some reason, type accelerators aren’t covered in the PowerShell documentation, even though the [WMI], [ADSI], and other common type accelerators are referenced on many blogs.
Regardless of the lack of documentation, type accelerators are a fairly useful feature of PowerShell. Table 20.2 lists some of the more commonly used type accelerators.
TABLE 20.2 Important Type Accelerators in PowerShell
Name |
Type |
Int |
System.Int32 |
Long |
System.Int64 |
String |
System.String |
Char |
System.Char |
Bool |
System.Boolean |
Byte |
System.Byte |
Double |
System.Double |
Decimal |
System.Decimal |
Float |
System.Float |
Single |
System.Single |
Regex |
System.Text.RegularExpressions.Regex |
Array |
System.Array |
Xml |
System.Xml.XmlDocument |
Scriptblock |
System.Management.Automation.ScriptBlock |
Switch |
System.Management.Automation.SwitchParameter |
Hashtable |
System.Collections.Hashtable |
Type |
System.Type |
Ref |
System.Management.Automation.PSReference |
Psobject |
System.Management.Automation.PSObject |
System.Management.Automation.PSCustomObject |
|
Psmoduleinfo |
System.Management.Automation.PSModuleInfo |
Powershell |
System.Management.Automation.PowerShell |
runspacefactory |
System.Management.Automation.Runspaces.RunspaceFactory |
Runspace |
System.Management.Automation.Runspaces.Runspace |
Ipaddress |
System.Net.IPAddress |
Wmi |
System.Management.ManagementObject |
Wmisearcher |
System.Management.ManagementObjectSearcher |
Wmiclass |
System.Management.ManagementClass |
Adsi |
System.DirectoryServices.DirectoryEntry |
Adsisearcher |
System.DirectoryServices.DirectorySearcher |
The Pipeline
In the past, data was transferred from one command to the next by using the pipeline, which makes it possible to string a series of commands together to gather information from a system. However, as mentioned previously, most shells have a major disadvantage: The information gathered from commands is text based. Raw text needs to be parsed (transformed) into a format the next command can understand before being piped.
The point is that although most UNIX and Linux shell commands are powerful, using them can be complicated and frustrating. Because these shells are text based, often commands lack functionality or require using additional commands or tools to perform tasks. To address the differences in text output from shell commands, many utilities and scripting languages have been developed to parse text.
The result of all this parsing is a tree of commands and tools that make working with shells unwieldy and time consuming, which is one reason for the proliferation of management interfaces that rely on GUIs. This trend can be seen among tools Windows administrators use, too; as Microsoft has focused on enhancing the management GUI at the expense of the CLI.
Windows administrators now have access to the same automation capabilities as their UNIX and Linux counterparts. However, PowerShell and its use of objects fill the automation need Windows administrators have had since the days of batch scripting and WSH in a more usable and less parsing-intense manner. To see how the PowerShell pipeline works, take a look at the following PowerShell example:
PS C:> get-process powershell | format-table id -autosize
Id
--
3416
PS C:>
All pipelines end with the Out-Default commandlet. This commandlet selects a set of properties and their values and then displays those values in a list or table.
Modules and Snap-Ins
One of the main design goals behind PowerShell was to make extending the default functionality in PowerShell and sharing those extensions easy enough that anyone could do it. In PowerShell 1.0, part of this design goal was realized through the use of snap-ins. PowerShell snap-ins (PSSnapins) are dynamic-link library (DLL) files that can be used to provide access to additional commandlets or providers. By default, a number of PSSnapins are loaded into every PowerShell session. These default sets of PSSnapins contain the built-in commandlets and providers that are used by PowerShell. You can display a list of these commandlets by entering the command Get-PSSnapin at the PowerShell command prompt, as follows:
PS C:> get-pssnapin
Name : Microsoft.PowerShell.Core
PSVersion : 3.0
Description : This Windows PowerShell snap-in contains cmdlets used to manage compo-
nents of Windows Powershell.
PS C:>
In theory, PowerShell snap-ins were a great way to share and reuse a set of commandlets and providers. However, snap-ins by definition must be written and then compiled, which often placed snap-in creation out of reach for many IT professionals. In addition, snap-ins can conflict, which meant that attempting to run a set of snap-ins within the same PowerShell session might not always be feasible.
That is why in PowerShell 2.0, the product team decided to introduce a new feature called modules, which are designed to make extending PowerShell and sharing those extensions significantly easier. In its simplest form, a module is just a collection of items that can be used in a PowerShell session. These items can be commandlets, providers, functions, aliases, utilities, and so on. The intent with modules, however, was to allow “anyone” (developers and administrators) to take and bundle together a collection of items. These items can then be executed in a self-contained context, which will not affect the state outside of the module, thus increasing portability when being shared across disparate environments.
Remoting
With PowerShell 1.0, one of its major disadvantages was the lack of an interface to execute commands on a remote machine. Granted, you could use Windows Management Instrumentation (WMI) to accomplish this and some commandlets like Get-Process and Get-Service, which enable you to connect to remote machines. But, the concept of a native-based “remoting” interface was sorely missing when PowerShell was first released. In fact, the lack of remote command execution was a glaring lack of functionality that needed to be addressed. Naturally, the PowerShell product team took this functionality limitation to heart and addressed it by introducing a new feature in PowerShell 2.0, called “remoting.”
Remoting, as its name suggests, is a feature that is designed to facilitate command (or script) execution on remote machines. This could mean execution of a command or commands on one remote machine or thousands of remote machines (provided you have the infrastructure to support this). In addition, commands can be issued synchronously or asynchronously, one at time or through a persistent connection called a runspace, and even scheduled or throttled.
To use remoting, you must have the appropriate permissions to connect to a remote machine, execute PowerShell, and execute the desired command(s). In addition, the remote machine must have PowerShell 2.0 and Windows Remote Management (WinRM) installed, and PowerShell must be configured for remoting.
In addition, when using remoting, the remote PowerShell session that is used to execute commands determines execution environment. As such, the commands you attempt to execute are subject to a remote machine’s execution policies, profiles, and preferences.
WARNING
Commands that are executed against a remote machine do not have access to information defined within your local profile. As such, commands that use a function or alias defined in your local profile will fail unless they are defined on the remote machine as well.
How Remoting Works
In its most basic form, PowerShell remoting works using the following conversation flow between “a client” (most likely the machine with your PowerShell session) and “a server” (remote host) that you want to execute commands against, as shown in the following steps:
1. A command is executed on the client.
2. That command is transmitted to the server.
3. The server executes the command and then returns the output to the client.
4. The client displays or uses the returned output.
At a deeper level, PowerShell remoting is very dependent on WinRM for facilitating the command and output exchange between a “client” and “server.” WinRM, which is a component of Windows Hardware Management, is a web-based service that enables administrators to enumerate information about and manipulate a remote machine. To handle remote sessions, WinRM was built around a SOAP-based standards protocol called WS-Management. This protocol is firewall friendly, and was primarily developed for the exchange of management information between systems that might be based on a variety of operating systems on various hardware platforms.
When PowerShell uses WinRM to ship commands and output between a client and server, that exchange is done using a series of XML messages. The first XML message that is exchanged is a request to the server, which contains the desired command to be executed. This message is submitted to the server using the SOAP protocol. The server, in return, executes the command using a new instance of PowerShell called a runspace. Once execution of the command is complete, the output from the command is returned to the requesting client as the second XML message. This second message, like the first, is also communicated using the SOAP protocol.
This translation into an XML message is performed because you cannot ship “live” .NET objects (how PowerShell relates to programs or system components) across the network. So, to perform the transmission, objects are serialized into a series of XML (CliXML) data elements. When the server or client receives the transmission, it converts the received XML message into a deserialized object type. The resulting object is no longer live. Instead, it is a record of properties based on a point in time and, as such, no longer possesses any methods.
Remoting Requirements
To use remoting, both the local and remote computers must have the following:
![]() Windows PowerShell 2.0 or later
Windows PowerShell 2.0 or later
![]() Microsoft .NET Framework 2.0 or later
Microsoft .NET Framework 2.0 or later
![]() Windows Remote Management 2.0
Windows Remote Management 2.0
NOTE
Windows Remote Management 2.0 was built into all Windows operating systems from Windows 7 and later and Windows Server 2008 R2 and later. For down-level versions of Windows, an integrated installation package must be installed, which includes PowerShell 2.0.
Configuring Remoting
By default, WinRM is installed on all Windows Server 2008 R2 or later machines as part of the default operating system installation. However, for security purposes, PowerShell remoting and WinRM are, by default, configured to not allow remote connections. You can use several methods to configure remoting, as described in the following sections.
Method One
The first and easiest method to enable PowerShell remoting is to execute the Enable-PSRemoting commandlet as an Administrator rights. For example:
PS C:> enable-psremoting
Once executed, the following tasks are performed by the Enable-PSRemoting commandlet:
![]() Runs the Set-WSManQuickConfig commandlet, which performs the following tasks:
Runs the Set-WSManQuickConfig commandlet, which performs the following tasks:
![]() Starts the WinRM service
Starts the WinRM service
![]() Sets the startup type on the WinRM service to Automatic
Sets the startup type on the WinRM service to Automatic
![]() Creates a listener to accept requests on any IP address
Creates a listener to accept requests on any IP address
![]() Enables a firewall exception for WS-Management communications
Enables a firewall exception for WS-Management communications
![]() Enables all registered Windows PowerShell session configurations to receive instructions from a remote computer
Enables all registered Windows PowerShell session configurations to receive instructions from a remote computer
![]() Registers the Microsoft.PowerShell session configuration, if it is not already registered
Registers the Microsoft.PowerShell session configuration, if it is not already registered
![]() Registers the Microsoft.PowerShell32 session configuration on 64-bit computers, if it is not already registered
Registers the Microsoft.PowerShell32 session configuration on 64-bit computers, if it is not already registered
![]() Removes the Deny Everyone setting from the security descriptor for all the registered session configurations
Removes the Deny Everyone setting from the security descriptor for all the registered session configurations
![]() Restarts the WinRM service to make the preceding changes effective
Restarts the WinRM service to make the preceding changes effective
NOTE
To configure PowerShell remoting, the Enable-PSRemoting commandlet must be executed using the Run As Administrator option.
Method Two
Another method to configure remoting is to use GPO. Follow these steps to use this method:
1. Create a new GPO, or edit an existing one.
2. Expand Computer Configuration, Policies, Administrative Templates, Windows Components, Windows Remote Management, and then select WinRM Service.
3. Open the Allow Automatic Configuration of Listeners Policy, select Enabled, and then define the IPv4 filter and IPv6 filter as *.
4. Click OK.
5. Next, expand Computer Configuration, Policies, Windows Settings, Security Settings, Windows Firewall with Advanced Security, Windows Firewall with Advanced Security, and then Inbound Rules.
6. Right-click Inbound Rules, and then click New Rule.
7. In the New Inbound Rule Wizard, on the Rule Type page, select Predefined.
8. On the Predefined pull-down menu, select Remote Event Log Management. Click Next.
9. On the Predefined Rules page, click Next to accept the new rules.
10. On the Action page, select Allow the Connection, and then click Finish. Allow the Connection is the default selection.
11. Repeat steps 6 through 10 and create inbound rules for the following predefined rule types:
![]() Remote Service Management
Remote Service Management
![]() Windows Firewall Remote Management
Windows Firewall Remote Management
Background Jobs
PowerShell has the ability to use background jobs. By definition, a background job is a command that is executed asynchronously without interacting with the current PowerShell session. However, once the background job has finished execution, the results from these jobs can then be retrieved and manipulated based on the task at hand. In other words, by using a background job, you can complete automation tasks that take an extended period of time to run without impacting the usability of your PowerShell session.
By default, background jobs can be executed on the local computer. But, background jobs can also be used in conjunction with remoting to execute jobs on a remote machine.
NOTE
To use background jobs (local or remote), PowerShell must be configured for remoting.
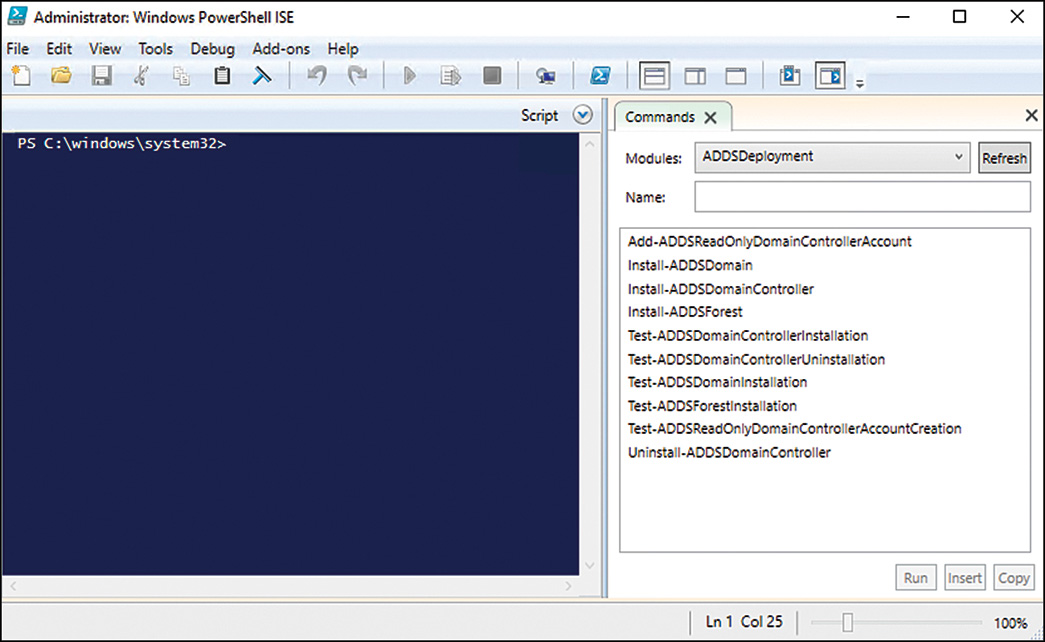
PowerShell ISE
The ISE, as shown in Figure 20.1, is a Windows Presentation Foundation (WPF)–based host application for Windows PowerShell. Using the ISE, an IT professional can both run commands and write, test, and debug scripts.
Additional features of the ISE include the following:
![]() A Command pane for running interactive commands.
A Command pane for running interactive commands.
![]() A Script pane for writing, editing, and running scripts. You can run the entire script or selected lines from the script.
A Script pane for writing, editing, and running scripts. You can run the entire script or selected lines from the script.
![]() A scrollable Output pane that displays a transcript of commands from the Command and Script panes and their results.
A scrollable Output pane that displays a transcript of commands from the Command and Script panes and their results.
![]() Multiple independent PowerShell execution environments in the same window, each with its own Command, Script, and Output panes.
Multiple independent PowerShell execution environments in the same window, each with its own Command, Script, and Output panes.
![]() Multiline editing in the Command pane, which lets you paste multiple lines of code, run them, and then recall them as a unit.
Multiline editing in the Command pane, which lets you paste multiple lines of code, run them, and then recall them as a unit.
![]() A built-in debugger for debugging commands, functions, and scripts.
A built-in debugger for debugging commands, functions, and scripts.
![]() Customizable features that let you adjust the colors, font, and layout.
Customizable features that let you adjust the colors, font, and layout.
![]() A scriptable object model that lets you further customize and extend the PowerShell ISE.
A scriptable object model that lets you further customize and extend the PowerShell ISE.
![]() Line and column numbers, keyboard shortcuts, tab completion, context-sensitive Help, and Unicode support.
Line and column numbers, keyboard shortcuts, tab completion, context-sensitive Help, and Unicode support.
![]() The ability to import a module and all its commandlets.
The ability to import a module and all its commandlets.
![]() The ability to populate switches and values into a script based on what that given commandlet supports.
The ability to populate switches and values into a script based on what that given commandlet supports.
![]() IntelliSense, which offers clickable menus of matching commandlets, parameters, values, folders, or files as you type.
IntelliSense, which offers clickable menus of matching commandlets, parameters, values, folders, or files as you type.
![]() Restart Manager and Auto-save, which allow for automatic saving of scripts to protect against unexpected system restarts.
Restart Manager and Auto-save, which allow for automatic saving of scripts to protect against unexpected system restarts.
To use the ISE, it first must be installed using Server Manager. Because the ISE requires the latest version of the .NET Framework, the Server Manager will also install this version of the .NET Framework if it is not already installed. Once installed, use any of the following methods to start it:
1. Launch if from the Windows PowerShell ISE tile from the Start menu.
2. Run the powershell_ise.exe executable.
3. Right-click the PowerShell Quick Launch icon from the desktop and select Windows PowerShell ISE.
ISE Requirements
The following requirements must be met to use the ISE:
![]() Windows 7 and Windows Server 2008 R2 or later versions of Windows
Windows 7 and Windows Server 2008 R2 or later versions of Windows
![]() Microsoft .NET Framework 3.0 or later
Microsoft .NET Framework 3.0 or later
![]() Windows Management Framework 3.0
Windows Management Framework 3.0
Being a GUI-based application, the PowerShell ISE does not work on Server Core installations of Windows Server.
Variables
A variable is a storage place for data. In most shells, the only data that can be stored in a variable is text data. In advanced shells and programming languages, data stored in variables can be almost anything, from strings to sequences to objects. Similarly, PowerShell variables can be just about anything.
To define a PowerShell variable, you must name it with the $ prefix, which helps delineate variables from aliases, commandlets, filenames, and other items a shell operator might want to use. A variable name can contain any combination of alphanumeric characters (a–z and 0–9) and the underscore (_) character. Although PowerShell variables have no set naming convention, using a name that reflects the type of data the variable contains is recommended, as shown in this example:
PS C:> $Stopped = get-service | where {$_.status -eq "stopped"}
PS C:> $Stopped
Status Name DisplayName
------ ---- -----------
Stopped ALG Application Layer Gateway Service
Stopped Appinfo Application Information
Stopped AppMgmt Application Management
Stopped aspnet_state ASP.NET State Service
Stopped AudioEndpointBu... Windows Audio Endpoint Builder
Stopped Audiosrv Windows Audio
...
As you can see from the previous example, the information that is contained within the $Stopped variable is a collection of services that are currently stopped.
NOTE
A variable name can consist of any characters, including spaces, provided the name is enclosed in curly braces ({ and } symbols).
Aliases
Like most existing command-line shells, command aliases can be defined in PowerShell. Aliasing is a method that is used to execute existing shell commands (commandlets) using a different name. In many cases, the main reason aliases are used is to establish abbreviated command names in an effort to reduce typing. For example:
PS C:> gps | ? {$_.Company -match ".*Microsoft*"} | ft Name, ID, Path–Autosize
The preceding example shows the default aliases for the Get-Process, Where-Object, and Format-Table commandlets.
Alias Commandlets
In PowerShell, several alias commandlets enable an administrator to define new aliases, export aliases, import aliases, and display existing aliases. By using the following command, an administrator can get a list of all the related alias commandlets:
PS C:> get-command *-Alias
Capability Name ModuleName
----------- ---- ----------
Cmdlet Export-Alias Microsoft...
Cmdlet Get-Alias Microsoft...
Cmdlet Import-Alias Microsoft...
Cmdlet New-Alias Microsoft...
Cmdlet Set-Alias Microsoft...
Use the Get-Alias commandlet to produce a list of aliases available in the current PowerShell session. The Export-Alias and Import-Alias commandlets are used to export and import alias lists from one PowerShell session to another. Finally, the New-Alias and Set-Alias commandlets allow an administrator to define new aliases for the current PowerShell session.
Creating Persistent Aliases
The aliases created when using the New-Alias and Set-Alias commandlets are valid only in the current PowerShell session. Exiting a PowerShell session discards any existing aliases. To have aliases persist across PowerShell sessions, they can be defined in a profile file, as shown in this example:
set-alias new new-object
set-alias time get-date
...
Although command shortening is appealing, the extensive use of aliases isn’t recommended. One reason is that aliases aren’t very portable in relation to scripts. For example, if a lot of aliases are used in a script, each alias must be included via a Set-Aliases sequence at the start of the script to make sure those aliases are present, regardless of machine or session profile, when the script runs.
However, a bigger concern than portability is that aliases can often confuse or obscure the true meaning of commands or scripts. The aliases that are defined might make sense to a scripter, but not everyone shares the logic in defining aliases. So if a scripter wants others to understand their scripts, they shouldn’t use too many aliases.
If aliases will be used in a script, use names that other people can understand. For example, there’s no reason, other than to encode a script, to create aliases consisting of only two letters.
Scopes
A scope is a logical boundary in PowerShell that isolates the use of functions and variables. Scopes can be defined as global, local, script, and private. They function in a hierarchy in which scope information is inherited downward. For example, the local scope can read the global scope, but the global scope can’t read information from the local scope. Scopes and their use are described in the following sections.
Global
As the name indicates, a global scope applies to an entire PowerShell instance. Global scope data is inherited by all child scopes, so any commands, functions, or scripts that run make use of variables defined in the global scope. However, global scopes are not shared between different instances of PowerShell.
The following example shows the $Processes variable being defined as a global variable in the ListProcesses function. Because the $Processes variable is being defined globally, checking $Processes.Count after ListProcesses completes returns a count of the number of active processes at the time ListProcesses was executed:
PS C:> function ListProcesses {$Global:Processes = get-process}
PS C:> ListProcesses
PS C:> $Processes.Count
46
NOTE
In PowerShell, an explicit scope indicator can be used to determine the scope a variable resides in. For instance, if a variable is to reside in the global scope, it should be defined as $Global:variablename. If an explicit scope indicator isn’t used, a variable resides in the current scope for which it’s defined.
Local
A local scope is created dynamically each time a function, filter, or script runs. After a local scope has finished running, information in it is discarded. A local scope can read information from the global scope but can’t make changes to it.
The following example shows the locally scoped variable $Processes being defined in the ListProcesses function. After ListProcesses finishes running, the $Processes variable no longer contains any data because it was defined only in the ListProcesses function. Notice how checking $Processes.Count after the ListProcesses function is finished produces no results:
PS C:> function ListProcesses {$Processes = get-process}
PS C:> ListProcesses
PS C:> $Processes.Count
0
PS C:>
Script
A script scope is created whenever a script file runs and is discarded when the script finishes running. To see an example of how a script scope works, create the following script and save it as ListProcesses.ps1:
$Processes = get-process
write-host "Here is the first process:" -Foregroundcolor Yellow
$Processes[0]
After creating the script file, run it from a PowerShell session. The output should look similar to this example:
PS C:> .ListProcesses.ps1
Here is the first process:
Handles NPM(K) PM(K) WS(K) VM(M) CPU(s) Id ProcessName
------- ------ ----- ----- ----- ------ -- -----------
105 5 1992 4128 32 916 alg
PS C:> $Processes[0]
Cannot index into a null array.
At line:1 char:12
+ $Processes[0 <<<< ]
PS C:>
Notice that when the ListProcesses.ps1 script runs, information about the first process object in the $Processes variable is written to the console. However, when you try to access information in the $Processes variable from the console, an error is returned because the $Processes variable is valid only in the script scope. When the script finishes running, that scope and all its contents are discarded.
What if an administrator wants to use a script in a pipeline or access it as a library file for common functions? Normally, this isn’t possible because PowerShell discards a script scope whenever a script finishes running. Luckily, PowerShell supports the dot-sourcing technique, a term that originally came from UNIX. Dot sourcing a script file tells PowerShell to load a script scope into the calling parent’s scope.
To dot source a script file, simply prefix the script name with a period (dot) when running the script, as shown here:
PS C:> .coolscript.ps1
Private
A private scope is similar to a local scope, with one key difference: Definitions in the private scope aren’t inherited by any child scopes.
The following example shows the privately scoped variable $Processes defined in the ListProcesses function. Notice that during execution of the ListProcesses function, the $Processes variable isn’t available to the child scope represented by the script block enclosed by { and } in lines 6–9:
PS C:> function ListProcesses {$Private:Processes = get-process
>> write-host "Here is the first process:" -Foregroundcolor Yellow
>> $Processes[0]
>> write-host
>>>> &{
>> write-host "Here it is again:" -Foregroundcolor Yellow
>> $Processes[0]
>> }
>> }
>>PS C:> ListProcesses
Here is the first process:
Handles NPM(K) PM(K) WS(K) VM(M) CPU(s) Id ProcessName
------- ------ ----- ----- ----- ------ -- -----------
105 5 1992 4128 32 916 alg
Here it is again:
Cannot index into a null array.
At line:7 char:20
+ $Processes[0 <<<< ]
PS C:>
This example works because it uses the & call operator. With this call operator, you can execute fragments of script code in an isolated local scope. This technique is helpful for isolating a script block and its variables from a parent scope or, as in this example, isolating a privately scoped variable from a script block.
Providers and Drives
Most computer systems are used to store data, often in a structure such as a file system. Because of the amount of data stored in these structures, processing and finding information can be unwieldy. Most shells have interfaces, or providers, for interacting with data stores in a predictable, set manner. PowerShell also has a set of providers for presenting the contents of data stores through a core set of commandlets. You can then use these commandlets to browse, navigate, and manipulate data from stores through a common interface. To get a list of the core commandlets, use the following command:
PS C:> help about_core_commands
...
ChildItem CMDLETS
Get-ChildItem
CONTENT CMDLETS
Add-Content
Clear-Content
Get-Content
Set-Content
...
To view built-in PowerShell providers, use the following command:
PS C:> get-psprovider
Name Capabilities Drives
---- ------------ ------
Alias ShouldProcess {Alias}
Environment ShouldProcess {Env}
FileSystem Filter, ShouldProcess {C, D, E}
Function ShouldProcess {Function}
Registry ShouldProcess, Transactions {HKLM, HKCU}
Variable ShouldProcess {Variable}
Certificate ShouldProcess {cert}
PS C:>
The preceding list displays not only built-in providers, but also the drives each provider currently supports. A drive is an entity that a provider uses to represent a data store through which data is made available to the PowerShell session. For example, the Registry provider creates a PowerShell drive for the HKEY_LOCAL_MACHINE and HKEY_CURRENT_USER Registry hives.
Administrators familiar with PowerShell 2.0 might notice that WSMan is no longer one of the built-in providers.
To see a list of all current PowerShell drives, use the following command:
PS C:> get-psdrive
Name Used (GB) Free (GB) Provider Root
---- --------- --------- -------- ----
Alias Alias
C 68.50 107.00 FileSystem C:
cert Certificate
D 8.98 1.83 FileSystem D:
E FileSystem E:
Env Environment
Function Function
HKCU Registry HKEY_CURRENT_USER
HKLM Registry HKEY_LOCAL_MACHINE
Variable Variable
PS C:>
Security
When WSH was released with Windows 98, it was a godsend for Windows administrators who wanted the same automation capabilities as their UNIX brethren. At the same time, virus writers quickly discovered that WSH also opened up a large attack vector against Windows systems.
Almost anything on a Windows system can be automated and controlled by using WSH, which is an advantage for administrators. However, WSH doesn’t provide any security in script execution. If given a script, WSH runs it. Where the script comes from or its purpose doesn’t matter. With this behavior, WSH became known more as a security vulnerability than an automation tool, and, as such, many administrative polices now require WSH to be restricted or blocked completely on Windows operating systems.
Execution Policies
Because of past criticisms of WSH’s security, when the PowerShell team set out to build a Microsoft shell, the team decided to include an execution policy to mitigate the security threats posed by malicious code. An execution policy defines restrictions on how PowerShell allows scripts to run or what configuration files can be loaded. PowerShell has four primary execution policies, discussed in more detail in the following sections: Restricted, AllSigned, RemoteSigned, and Unrestricted.
NOTE
Execution policies can be circumvented by a user who manually executes commands found in a script file. Therefore, execution policies are not meant to replace a security system that restricts a user’s actions and instead should be viewed as a restriction that attempts to prevent malicious code from being executed.
Restricted
By default, PowerShell is configured to run under the Restricted execution policy. This execution policy is the most secure because it allows PowerShell to operate only in an interactive mode. This means no scripts can be run, and only configuration files digitally signed by a trusted publisher are allowed to run or load.
AllSigned
The AllSigned execution policy is a notch under Restricted. When this policy is enabled, only scripts or configuration files that are digitally signed by a publisher you trust can be run or loaded. Here’s an example of what you might see if the AllSigned policy has been enabled:
PS C:Scripts> .happydancinghamsters.ps1
The file C:Scriptshappydancinghamsters.ps1 cannot be loaded. The file
C:Scriptshappydancinghamsters.ps1 is not digitally signed. The script will not
execute on the system. Please see "get-help about_signing" for more
details.
At line:1 char:16
+ .happydancinghamsters.ps1 <<<<
PS C:Scripts>
Signing a script or configuration file requires a code-signing certificate. This certificate can come from a trusted certificate authority (CA), or you can generate one with the Certificate Creation Tool (Makecert.exe). Usually, however, you want a valid code-signing certificate from a well-known trusted CA, such as VeriSign, Thawte, or your corporation’s internal public key infrastructure (PKI). Otherwise, sharing your scripts or configuration files with others might be difficult because your computer isn’t a trusted CA by default.
RemoteSigned
The RemoteSigned execution policy is designed to prevent remote PowerShell scripts and configuration files that aren’t digitally signed by a trusted publisher from running or loading automatically. Scripts and configuration files that are locally created can be loaded and run without being digitally signed, however.
A remote script or configuration file can be obtained from a communication application, such as Microsoft Outlook, Internet Explorer, Outlook Express, or Windows Messenger. Running or loading a file downloaded from any of these applications results in the following error message:
PS C:Scripts> .interscript.ps1
The file C:Scriptsinterscript.ps1 cannot be loaded. The file
C:Scriptsinterscript.ps1 is not digitally signed. The script will not execute on
the system. Please see "get-help about_signing" for more details.
At line:1 char:17
+ .interscript.ps1 <<<<
PS C:Scripts>
Unrestricted
As the name suggests, the Unrestricted execution policy removes almost all restrictions for running scripts or loading configuration files. All local or signed trusted files can run or load, but for remote files, PowerShell prompts you to choose an option for running or loading that file, as shown here:
PS C:Scripts> .
emotescript.ps1
Security Warning
Run only scripts that you trust. While scripts from the Internet can be useful,
this script can potentially harm your computer. Do you want to run
C:Scripts
emotescript.ps1?
[D] Do not run [R] Run once [S] Suspend [?] Help (default is "D"):
In addition to the primary execution policies, two new execution policies were introduced in PowerShell 2.0, as discussed in the following sections. These two additional policies still exist in PowerShell 3.0.
Bypass
When this execution policy is used, nothing is blocked, and there is no warning or prompts. This execution policy is typically used when PowerShell is being used by another application that has its own security model or a PowerShell script has been embedded into another application.
Undefined
When this execution policy is defined, it means that there is no execution policy set in the current scope. If Undefined is the execution policy for all scopes, the effective execution policy is Restricted.
Setting the Execution Policy
By default, when PowerShell is first installed, the execution policy is set to Restricted. To change the execution policy, you use the Set-ExecutionPolicy commandlet, shown here:
PS C:> set-executionpolicy AllSigned
Or, you can also use a Group Policy setting to set the execution policy for number of computers. In a PowerShell session, if you want to know the current execution policy for a machine, use the Get-ExecutionPolicy commandlet:
PS C:> get-executionpolicy
AllSigned
PS C:>
Execution policies can not only be defined for the local machine, but can also be defined for the current user or a particular process. These boundaries between where an execution policy resides is called an execution policy scope. To define the execution policy for a scope, you would use the Scope parameter for the Set-ExecutionPolicy commandlet. In addition, if you wanted to know the execution policy for a particular scope, you would use the Scope parameter for the Get-ExecutionPolicy commandlet. The valid arguments for the Scope parameter for both commandlets are Machine Policy, User Policy, Process, CurrentUser, and LocalMachine.
NOTE
The order of precedence for the execution policy scopes is Machine Policy, User Policy, Process, CurrentUser, and LocalMachine.
Using Windows PowerShell
PowerShell is a powerful tool that enables administrators to manage Windows platform applications and to complete automation tasks. This section sheds some light on how PowerShell’s many uses can be discovered and how it can be used to manage Windows Server 2016.
Exploring PowerShell
Before using PowerShell, you might want to become more familiar with its commandlets and features. To assist administrators with exploring PowerShell, the PowerShell team decided to do two things. First, they included a commandlet that functions very similar to how the UNIX man pages function. Second, they also included a commandlet that returns information about commands available in the current session. Together, these commandlets allow a novice to tap into and understand PowerShell without secondary reference materials; explanations of these commandlets are discussed in the following sections.
Getting Help
The Get-Help commandlet is used to retrieve help information about commandlets, aliases, and from help files. To display a list of all help topics this commandlet supports, enter Get-Help * at the PowerShell command prompt, as shown here:
PS C:> get-help *
Name Category Module Synopsis
---- -------- ------ --------
ac Alias Add-Content
asnp Alias Add-PSSnapin
clc Alias Clear-Content
cli Alias Clear-Item
clp Alias Clear-ItemProperty
clv Alias Clear-Variable
cpi Alias Copy-Item
cpp Alias Copy-ItemProperty
cvpa Alias Convert-Path
...
If that list seems too large to work with, it can be shortened by filtering on topic name and category. For example, to get a list of all commandlets starting with the verb Get, try the command shown in the following example:
PS C:> get-help -Name get-* -Category cmdlet
Name Category Module Synopsis
---- -------- ------ --------
Get-ADUser Cmdlet ActiveDirectory Get-ADUser...
Get-ADUserResultantPasswordPolicy Cmdlet ActiveDirectory Get-ADUserResult...
Get-AppLockerFileInformation Cmdlet AppLocker Get-AppLockerFil...
Get-AppLockerPolicy Cmdlet AppLocker Get-AppLockerPol...
Get-BpaModel Cmdlet BestPractices Get-BpaModel...
Get-BpaResult Cmdlet BestPractices Get-BpaResult...
Get-BitsTransfer Cmdlet BitsTransfer Get-BitsTransfer...
Get-CimAssociatedInstance Cmdlet CimCmdlets Get-CimAssociate...
...
PS C:>
After selecting a Help topic, that topic can be retrieved by using the topic name as the parameter to the Get-Help commandlet. For example, to retrieve help for the Get-Content commandlet, enter the following command:
PS C:> get-help get-content
After executing this command, a shortened view of the help content for the Get-Content commandlet is displayed. To view the full Help content, include the full switch parameter with the command:
PS C:> get-help get-content –full
After executing the command with the full switch parameter, you will find that the full Help content is divided into several sections. Table 20.3 describes each of these sections.
TABLE 20.3 PowerShell Help Sections
Help Section |
Description |
Name |
The name of the commandlet |
Synopsis |
A brief description of what the commandlet does |
Syntax |
Specific usage details for entering commands with the commandlet |
Description |
A detailed description of the commandlet’s behavior, usually including usage examples |
Parameters |
Valid parameters that can be used with this commandlet |
Inputs |
The type of input this commandlet accepts |
Outputs |
The type of data that the commandlet returns |
Notes |
Additional detailed information about using the commandlet, including specific scenarios and possible limitations or idiosyncrasies |
Examples |
Common usage examples for the commandlet |
Related Links |
References other commandlets that perform similar tasks |
Get-Command
The Get-Command is used to gather basic information about commandlets and other commands that are available. For example, when executed, the Get-Command lists all the commandlets available to the PowerShell session:
PS C:> get-command
Capability Name ModuleName
---------- ---- ----------
Unknown Add-ProvisionedAppxPackage Dism
Unknown Add-WindowsFeature ServerManager
Unknown Apply-WindowsUnattend Dism
Unknown Begin-WebCommitDelay WebAdministration
Unknown End-WebCommitDelay WebAdministration
Unknown Get-GPPermissions GroupPolicy
Unknown Get-ProvisionedAppxPackage Dism
Unknown Initialize-Volume Storage
Unknown Remove-ProvisionedAppxPackage Dism
Unknown Remove-WindowsFeature ServerManager
Unknown Set-GPPermissions GroupPolicy
Script A:
Script Add-AppxPackage Appx
CIM Add-BCDataCacheExtension BranchCache
CIM Add-DnsClientNrptRule DnsClient
CIM Add-DnsServerConditionalForwarderZone DnsServer...
...
PS C:>
Next, to retrieve basic information about a particular commandlet, you would then include that commandlet’s name and argument. For example:
PS C:> Get-Command Get-Process
Capability Name ModuleName
---------- ---- ----------
Cmdlet Get-Process Microsoft.PowerShell.Management
PS C:>
The Get-Command commandlet is more powerful than Get-Help because it lists all available commands (commandlets, scripts, aliases, functions, and native applications) in a PowerShell session, as shown in this example:
PS C:> get-command note*
Capability Name ModuleName
---------- ---- ----------
Application notepad.exe
PS C:>
When using Get-Command with elements other than commandlets, the information returned is a little different from information you see for a commandlet. For example, with an existing application, the value of the Definition property is the path to the application. However, other information about the application is also available, as shown here:
PS C:> get-command ipconfig | format-list *
HelpUri :
FileVersionInfo : File: C:Windowssystem32ipconfig.exe
InternalName: ipconfig.exe
OriginalFilename: ipconfig.exe.mui
FileVersion: 6.2.8250.0 (winmain_win8beta.120217-1520)
FileDescription: IP Configuration Utility
Product: Microsoft® Windows® Operating System
ProductVersion: 6.2.8250.0
Debug: False
Patched: False
PreRelease: False
PrivateBuild: False
SpecialBuild: False
Language: English (United States)
Path : C:Windowssystem32ipconfig.exe
Extension : .exe
Definition : C:Windowssystem32ipconfig.exe
Visibility : Public
OutputType : {System.String}
Name : ipconfig.exe
Capability : Application
CommandType : Application
ModuleName :
Module :
RemotingCapability : PowerShell
Parameters :
ParameterSets :
With a function, the Definition property is the body of the function:
PS C:> get-command Prompt
Capability Name ModuleName
---------- ---- ----------
Script prompt
PS C:>
With an alias, the Definition property is the aliased command:
PS C:> get-command write
Capability Name Versions Source
---------- ---- ----------
Cmdlet write -> Write-Output
PS C:>
With a script file, the Definition property is the path to the script. With a non-PowerShell script (such as a BAT or VBS file), the information returned is the same as other existing applications.
Managing Services
In PowerShell, a number of commandlets can be used to manage services on a local machine, including the following:
![]() Get-Service—Used to gather service information from Windows
Get-Service—Used to gather service information from Windows
![]() New-Service—Used to create a new service in Windows
New-Service—Used to create a new service in Windows
![]() Restart-Service—Used to restart services
Restart-Service—Used to restart services
![]() Resume-Service—Used to resume suspended services
Resume-Service—Used to resume suspended services
![]() Set-Service—Used to modify service configurations
Set-Service—Used to modify service configurations
![]() Start-Service—Used to start services
Start-Service—Used to start services
![]() Stop-Service—Used to stop services
Stop-Service—Used to stop services
![]() Suspend-Service—Used to suspend services
Suspend-Service—Used to suspend services
Getting Service Information
When the Get-Service commandlet is executed, it returns a collection of objects that contains information about all the services that are present on a Windows system. A representation of that object collection is then outputted into a formatted table, as shown in the following example:
PS C:> get-service
Status Name DisplayName
------ ---- -----------
Running AeLookupSvc Application Experience
Stopped ALG Application Layer Gateway Service
Running AppHostSvc Application Host Helper Service
Stopped Appinfo Application Information
Stopped AppMgmt Application Management
Stopped aspnet_state ASP.NET State Service
Stopped AudioEndpointBu... Windows Audio Endpoint Builder
Stopped AudioSrv Windows Audio
...
To filter the information returned based on the service status, the object collection can be piped to the Where-Object commandlet, as shown in the following example:
PS C:> get-service | where-object {$_.Status -eq "Stopped"}
Status Name DisplayName
------ ---- -----------
Stopped ALG Application Layer Gateway Service
Stopped Appinfo Application Information
Stopped AppMgmt Application Management
Stopped aspnet_state ASP.NET State Service
Stopped AudioEndpointBu... Windows Audio Endpoint Builder
Stopped AudioSrv Windows Audio
...
As shown in the preceding example, the Where-Object commandlet is used in conjunction with a code block {...}, which is executed as the filter. In this case, the code block contained an expression that filtered the object collection based on services that were “stopped.” The same type of logic can also be applied to return information about a particular service. For example:
PS C:> get-service | where-object {$_.Name -eq "DNS"} | fl
Name : DNS
DisplayName : DNS Server
Status : Running
DependentServices : {}
ServicesDependedOn : {Afd, Tcpip, RpcSs, NTDS}
CanPauseAndContinue : True
CanShutdown : True
CanStop : True
ServiceType : Win32OwnProcess
PS C:>
In the preceding example, the object collection from the Get-Service commandlet is piped to the Where-Object commandlet. The filter statement defined script block then instructs the Where-Object commandlet to return an object for the DNS service. The object that is returned by this commandlet is then piped to the Format-List commandlet, which writes a formatted list (containing information about the object) back to the console session.
NOTE
A shorter method for performing the preceding action is to use the name switch, as shown in the following command: get-service–name DNS.
Managing Service Statuses
To stop a service in PowerShell, the Stop-Service commandlet is used, as shown in this example:
PS C:> stop-service -name dns
Notice that when the commandlet has finished executing, no status information about the service’s status is returned. To gather that information, the pass-through switch parameter can be used to pass the object created by a commandlet through to the pipeline. For example:
PS C:> start-service -name dns -pass | ft
Status Name DisplayName
------ ---- -----------
Running DNS DNS Server
In the preceding example, the pass-through switch parameter is used in conjunction with the Start-Service commandlet. When the commandlet has finished executing, thus starting the DNS service, the object is piped to the Format-Table commandlet, which then displays status information about the DNS service.
Modifying Services
The Set-Service commandlet is used to change a service’s properties (such as its description, display name, and start mode). To use this commandlet, either pass it a service object or specify the name of the service to be modified, plus the property to be modified. For example, to modify the startup type of the DNS service, use the following command:
PS C:> set-service -name DNS -start "manual"
A startup type can be defined as Automatic, Manual, or Disabled. To change a service’s description, a command might look as follows:
PS C:> set-service -name DNS -description "My Important DNS Service"
NOTE
The service management commandlets in PowerShell are not end-alls for managing Windows services. There are a number of areas in which these commandlets are lacking—for example, not being able to define a service’s logon account or report on its startup type. Luckily, if a more in-depth interface is needed, an administrator can always fall back onto WMI.
Gathering Event Log Information
In PowerShell, the Get-EventLog commandlet can be used to gather information from a Windows event log and list the event logs that are present on a system. To gather event log information, the name of the event log must be specified, as shown in the following example:
PS C:> get-eventlog -logname application
Index Time Type Source EventID Message
----- ---- ---- ------ ------- -------
1778 Oct 05 19:44 Info MSExchangeFBPublish 8280 When initializing ses...
1777 Oct 05 19:38 Info MSExchangeIS 9826 Starting from 10/5/20...
1776 Oct 05 19:38 Info MSExchange ADAccess 2080 Process MSEXCHANGEADT...
1775 Oct 05 19:16 Info MSExchange ADAccess 2080 Process MAD.EXE (PID=...
...
To create a list of all the event logs on the local system, use the list switch parameter, as shown in the following command:
PS C:> get-eventlog -list
Max(K) Retain OverflowAction Entries Name
------ ------ -------------- ------- ----
20,480 0 OverwriteAsNeeded 1,778 Application
15,168 0 OverwriteAsNeeded 44 DFS Replication
512 0 OverwriteAsNeeded 1,826 Directory Service
16,384 0 OverwriteAsNeeded 38 DNS Server
20,480 0 OverwriteAsNeeded 0 Hardware Events
512 7 OverwriteOlder 0 Internet Explorer
20,480 0 OverwriteAsNeeded 0 Key Management Service
512 7 OverwriteOlder 155 PowerShell
131,072 0 OverwriteAsNeeded 9,596 Security
20,480 0 OverwriteAsNeeded 3,986 System
15,360 0 OverwriteAsNeeded 278 Windows PowerShell
PS C:>
To gather in-depth information about a particular set of events or event, the information returned from the Get-EventLog commandlet can be further filtered. For example:
PS C:> $Errors = get-eventLog -logname application | where {$_.eventid -eq 8196}
PS C:> $Errors[0] | fl -Property *
EventID : 8196
MachineName : dc1.companyabc.com
Data : {}
Index : 1772
Category : (0)
CategoryNumber : 0
EntryType : Information
Message : License Activation Scheduler (SLUINotify.dll) was not able
to automatically activate. Error code:
0x8007232B
Source : Software Protection Platform Service
ReplacementStrings : {0x8007232B}
InstanceId : 1073750020
TimeGenerated : 4/5/2016 6:56:36 PM
TimeWritten : 4/5/2016 6:56:36 PM
UserName :
Site :
Container :
PS C:>
In the preceding example, the Get-EventLog commandlet is used in conjunction with the Where-Object commandlet to create a collection of objects that all have an EventID equal to 8196. This collection is then defined as the variable $Errors. In the next command, the first object in the $Errors variable is passed to the Format-List commandlet, which then writes a list of all the object’s properties to the console.
Managing the Files and Directories
As mentioned earlier in this chapter, specifically in the section “Providers,” a set of core commandlets can be used to access and manipulate PowerShell data stores. Because the Windows file system is just another PowerShell data store, it is accessed through the FileSystem provider. Each mounted drive or defined location is represented by a PSDrive and can be managed by using the core commandlets. Details about how these core commandlets are used are discussed in the following sections.
Listing Directories of Files
In PowerShell, you can use several commandlets to explore the file system. The first commandlet, Get-Location, is used to display the current working location:
PS C:> get-location
Path
----
C:
PS C:>
To get information about a specified directory or file, you can use the Get-Item commandlet, as demonstrated in this example:
PS C: emp> get-item autorun.inf
Directory: C: emp
Mode LastWriteTime Length Name
---- ------------- ------ ----
-a--- 8/7/2011 11:06 PM 63 autorun.inf
PS C: emp>
To get information about directories or files under a specified directory, you can use the Get-ChildItem commandlet:
PS C:> get-childitem c:inetpubwwwroot
Directory: C:inetpubwwwroot
Mode LastWriteTime Length Name
---- ------------- ------ ----
d---- 10/4/2011 11:09 PM aspnet_client
-a--- 10/4/2011 2:10 PM 689 iisstart.htm
-a--- 10/4/2011 2:10 PM 184946 welcome.png
PS C:>
Creating Directories or Files
Creating a directory or file in PowerShell is a simple process and just involves the use of the New-Item commandlet:
PS C:> new-item -path c: -name work -type dir
Directory: C:
Mode LastWriteTime Length Name
---- ------------- ------ ----
d---- 10/7/2011 11:44 AM work
PS C:>
In the preceding example, it should be noted that the itemtype parameter is a parameter that must be defined. If this parameter is not defined, PowerShell prompts you for the type of item to be created. An example of this is shown here:
PS C:work> new-item -path c:work -name script.log
Type: file
Directory: C:work
Mode LastWriteTime Length Name
---- ------------- ------ ----
-a--- 10/7/2011 8:58 PM 0 script.log
PS C:work>
In the previous example, PowerShell prompts you to define the value for the itemtype parameter. However, because you wanted to create a file, the value is defined as “file.”
NOTE
With files, in addition to using the New-Item commandlet, you can use several other commandlets to create files. Examples of these are Add-Content, Set-Content, Out-Csv, and Out-File. However, the main purpose of these commandlets is for adding or appending content within a file.
Deleting Directories and Files
To delete directories and files in PowerShell, the Remote-Item commandlet is used. Usage of this commandlet is shown in the next example:
PS C:work> remove-item script.log
Notice how PowerShell doesn’t prompt you for any type of confirmation. Considering that the deletion of an item is a very permanent action, you might want to use one of the PowerShell common parameters to confirm the action before executing the command. For example:
PS C:work> remove-item test.txt -confirm
Confirm
Are you sure you want to perform this action?
Performing operation "Remove File" on Target "C:work est.txt".
[Y] Yes [A] Yes to All [N] No [L] No to All [S] Suspend [?] Help
(default is "Y"):
In the preceding example, the confirm common parameter is used to verify the deletion of the test.txt file. Usage of this parameter can help prevent you from making mistakes when executing commands that might or might not be intended actions.
NOTE
In addition to the Remove-Item commandlet, you can use the Clear-Content commandlet to wipe content from a file instead of deleting it.
Renaming Directories and Files
To rename directories and files in PowerShell, use the Rename-Item commandlet:
PS C:> rename-item c:work scripts
When using the Rename-Item commandlet, the argument for the first parameter named path is defined as the path to the directory or file being renamed. The secondary parameter, newName, is then defined as the new name for the directory or file.
Moving or Copying Directories and Files
To move and copy directories or files in PowerShell, you can use either the Move-Item or Copy-Item commandlets. An example of using the Move-Item commandlet is as follows:
PS C:> move-item -path c:scripts -dest c:work
PS C:> get-childitem c:work
Directory: C:work
Mode LastWriteTime Length Name
---- ------------- ------ ----
d---- 10/7/2011 9:20 PM scripts
PS C:>
The syntax for using the Copy-Item commandlet is very similar, as shown in the next example:
PS C:work> copy-item 4444.log .logs
PS C:work> gci .logs
Directory: C:worklogs
Mode LastWriteTime Length Name
---- ------------- ------ ----
-a--- 10/7/2011 10:41 PM 6 4444.log
PS C:work>
Reading Information from Files
To read information from a file, you can use the Get-Content commandlet. An example of using this commandlet is as follows:
PS C:worklogs> get-content 4444.log
PowerShell was here!
When the Get-Content commandlet is executed, it reads content from the specified file line-by-line and returns an object for each line that is read. For example:
PS C:worklogs> $logs = get-content 4444.log
PS C:worklogs> $logs[0]
PowerShell was here!
PS C:worklogs>
Managing the Registry
PowerShell has a built-in provider, Registry, for accessing and manipulating the Registry on a local machine. The Registry hives available in this provider are HKEY_LOCAL_MACHINE (HKLM) and HKEY_CURRENT_USER (HKCU). These hives are represented in a PowerShell session as two additional PSDrive objects named HKLM: and HKCU:.
NOTE
The WshShell object has access to not only the HKLM: and HKCU: hives, but also HKEY_CLASSES_ROOT (HKCR), HKEY_USERS, and HKEY_CURRENT_CONFIG. To access these additional Registry hives in PowerShell, you use the Set-Location commandlet to change the location to the root of the Registry provider.
Because the Windows Registry is treated as a hierarchy data store, like the Windows file system, it can also be managed by the PowerShell core commandlets. For example, to read a Registry value, you use the Get-ItemProperty commandlet:
PS C:> $Path = "HKLM:SoftwareMicrosoftWindows NTCurrentVersion"
PS C:> $Key = get-itemproperty $Path
PS C:> $Key.ProductName
Windows Server 2016
PS C:>
To create or modify a Registry value, you use the Set-ItemProperty commandlet:
PS C:> $Path = "HKCU:Software"
PS C:> set-itemproperty -path $Path -name "PSinfo"–type "String" –value
"PowerShell_Was_Here"
PS C:>
PS C:> $Key = get-itemproperty $Path
PS C:> $Key.PSinfo
PowerShell_Was_Here
PS C:>
Remember that the Windows Registry has different types of Registry values. You use the Set-ItemProperty commandlet to define the Type parameter when creating or modifying Registry values. As a best practice, you should always define Registry values when using the Set-ItemProperty commandlet. Otherwise, the commandlet defines the Registry value with the default type, which is String. Other possible types are as follows:
![]() ExpandString
ExpandString
![]() Binary
Binary
![]() DWord
DWord
![]() MultiString
MultiString
![]() Qword
Qword
Depending on the Registry value you’re creating or modifying, the data value you set the named value needs to be in the correct format. So, if the Registry value is type REG_BINARY, you use a binary value, such as $Bin = 101, 118, 105.
To delete a Registry value, you use the Remove-ItemProperty commandlet, as shown here:
PS C:> $Path = "HKCU:Software"
PS C:> remove-itemproperty -path $Path -name "PSinfo"
PS C:>
Managing Processes
In PowerShell, you can use two commandlets to manage processes. The first commandlet, Get-Process, is used to get information about the current processes that are running on the local Windows system:
PS C:> get-process
Handles NPM(K) PM(K) WS(K) VM(M) CPU(s) Id ProcessName
------- ------ ----- ----- ----- ------ -- -----------
782 12 2500 4456 113 4.02 448 csrss
237 10 3064 6228 113 76.70 488 csrss
292 26 20180 14632 356 12.94 1496 dfsrs
160 13 3020 5536 55 0.34 2696 dfssvc
203 24 6368 5888 64 1.75 3220 dns
...
To filter the object collection that is returned by the Get-Process commandlet to a particular process, you can specify the process name or ID, as shown in the following example:
PS C:> get-process dns
Handles NPM(K) PM(K) WS(K) VM(M) CPU(s) Id ProcessName
------- ------ ----- ----- ----- ------ -- -----------
203 24 6368 5888 64 1.77 3220 dns
PS C:> get-process -id 3220
Handles NPM(K) PM(K) WS(K) VM(M) CPU(s) Id ProcessName
------- ------ ----- ----- ----- ------ -- -----------
203 24 6368 5888 64 1.77 3220 dns
PS C:>
In addition to the preceding examples, you could also combine the Get-Process commandlet with the Where-Object commandlet. For example:
PS C:> get-process | ? {$_.workingset -gt 100000000} | sort ws -descending
Handles NPM(K) PM(K) WS(K) VM(M) CPU(s) Id ProcessName
------- ------ ----- ----- ----- ------ -- -----------
471 29 108608 104972 658 95.88 4208 mmc
629 39 130716 104208 705 108.58 4332 mmc
PS C:>
By using these commandlets together, a more robust view of the current running processes based on a specified filter statement can be created. In the previous example, the resulting object collection includes processes that only have a working set greater than 100,000,000 bytes. In addition, the Sort-Object commandlet is used to sort the formatted table’s WS(K) column in descending order.
The second commandlet that is used to manage processes is the Stop-Process commandlet. Usage of this commandlet is as follows:
PS C:worklogs> stop-process -name notepad
The process that is being stopped can either be defined by its name, ID, or as an object that is passed to the Stop-Process commandlet via the pipeline.
Using WMI and CIM
Using WMI in PowerShell has similar conceptual logic as in WSH. The main difference is that the PowerShell methods are based on WMI .NET instead of the WMI Scripting API. You have three methods for using WMI in PowerShell: WMI .NET (which is the .NET System.Management and System.Management.Instrumentation namespaces), the Get-WmiObject commandlet, and the PowerShell WMI type accelerators: [WMI], [WMIClass], and [WMISearcher].
The first method, using the System.Management and System.Management.Instrumentation namespaces, isn’t discussed in this chapter because it’s not as practical as the other methods. It should be only a fallback method in case PowerShell isn’t correctly encapsulating an object within a PSObject object when using the other two methods.
The second method, the Get-WmiObject commandlet, retrieves WMI objects and gathers information about WMI classes. This commandlet is fairly simple. For example, getting an instance of the local Win32_ComputerSystem class just requires the name of the class, as shown here:
PS C:> get-wmiobject "Win32_ComputerSystem"
Domain : companyabc.com
Manufacturer : Microsoft Corporation
Model : Virtual Machine
Name : DC1
PrimaryOwnerName : Mark Weinhardt
TotalPhysicalMemory : 1167642624
PS C:>
The next example, which is more robust, connects to the remote machine named Jupiter and gets an instance of the Win32_Service class in which the instance’s name equals Virtual Server. The result is an object containing information about the Virtual Server service on Jupiter:
PS C:> get-wmiobject -class "Win32_Service" -computerName "Jupiter" -filter
"Name='W32Time'"
ExitCode : 0
Name : W32Time
ProcessId : 1016
StartMode : Auto
State : Running
Status : OK
PS C:>
The following command returns the same information as the previous one but makes use of a WQL query:
PS C:> get-wmiobject -computerName "Jupiter" -query "Select *From Win32_Service
Where Name='W32Time'"
ExitCode : 0
Name : W32Time
ProcessId : 1016
StartMode : Auto
State : Running
Status : OK
PS C:>
Finally, here’s an example of using Get-WmiObject to gather information about a WMI class:
PS C:> get-wmiobject -namespace "root/cimv2" -list | where {$_.Name -eq "Win32_
Product"} | format-list *
Name : Win32_Product
__GENUS : 1
__CLASS : Win32_Product
__SUPERCLASS : CIM_Product
__DYNASTY : CIM_Product
__RELPATH : Win32_Product
__PROPERTY_COUNT : 12
__DERIVATION : {CIM_Product}
__SERVER : PLANX
__NAMESPACE : ROOTcimv2
__PATH : \PLANXROOTcimv2:Win32_Product
...
PS C:>
Although using Get-WmiObject is simple, using it almost always requires typing a long command string. This drawback brings you to the third method for using WMI in PowerShell: the WMI type accelerators.
[WMI] Type Accelerator
This type accelerator for the ManagementObject class takes a WMI object path as a string and gets a WMI object bound to an instance of the specified WMI class, as shown in this example:
PS C:> $CompInfo = [WMI]"rootcimv2:Win32_ComputerSystem.Name='DC2'"
PS C:> $CompInfo
Domain : companyabc.com
Manufacturer : Microsoft Corporation
Model : Virtual Machine
Name : DC2
PrimaryOwnerName : William James Worden
TotalPhysicalMemory : 2145566720
PS C:>
NOTE
To bind to an instance of a WMI object directly, you must include the key property in the WMI object path. For the preceding example, the key property is Name.
[WMIClass] Type Accelerator
This type accelerator for the ManagementClass class takes a WMI object path as a string and gets a WMI object bound to the specified WMI class, as shown in the following example:
PS C:> $CompClass = [WMICLASS]"\.
ootcimv2:Win32_ComputerSystem"
PS C:> $CompClass
NameSpace: ROOTcimv2
Name Methods Properties
---- ------- ----------
Win32_ComputerSystem {SetPowerState, R... {AdminPasswordSt...
PS C:> $CompClass | format-list *
Name : Win32_ComputerSystem
__GENUS : 1
__CLASS : Win32_ComputerSystem
__SUPERCLASS : CIM_UnitaryComputerSystem
__DYNASTY : CIM_ManagedSystemElement
__RELPATH : Win32_ComputerSystem
__PROPERTY_COUNT : 54
__DERIVATION : {CIM_UnitaryComputerSystem, CIM_ComputerSystem, CIM_System,
CIM_LogicalElement...}
__SERVER : DC2
__NAMESPACE : ROOTcimv2
__PATH : \DC2ROOTcimv2:Win32_ComputerSystem
...
PS C:>
[WMISearcher] Type Accelerator
This type accelerator for the ManagementObjectSearcher class takes a WQL string and creates a WMI searcher object. After the searcher object is created, you use the Get( ) method to get a WMI object bound to an instance of the specified WMI class, as shown here:
PS C:> $CompInfo = [WMISearcher]"Select * From Win32_ComputerSystem"
PS C:> $CompInfo.Get()
Domain : companyabc.com
Manufacturer : Microsoft Corporation
Model : Virtual Machine
Name : DC2
PrimaryOwnerName : William James Worden
TotalPhysicalMemory : 2145566720
PS C:>
AuthenticationLevel and ImpersonationLevel
When using the Get-WmiObject commandlet in PowerShell 1.0 in conjunction with the IIsWebService class to manage the W3SVC service on a remote machine, the following error would be encountered:
PS > get-wmiobject -class IIsWebService -namespace "rootmicrosoftiisv2" -Computer
sc1-app01
Get-WmiObject : Access denied
At line:1 char:14
+ Get-WMIObject <<<< -class IIsWebService -namespace "rootmicrosoftiisv2" -
computer sc1-app01
This is normal behavior for any of the IIS WMI classes because they require the AuthenticationLevel property defined as PacketPrivacy. The AuthenticationLevel property is an integer, which defines the COM authentication level that is assigned to an object and in the end determines how DCOM will protect information sent from WMI. In this case, the IIS WMI classes require that data is encrypted, which is not the default behavior of WMI.
Although defining the AuthenticationLevel property in WSH was a simple line of code, in PowerShell 1.0’s version of the Get-WmiObject commandlet, there was no method to define this property. In addition, there wasn’t a way to change either the ImpersonationLevel property or enable all privileges, both of which are often requirements when working with WMI. To correct this problem, the product team has updated the Get-WmiObject commandlet in PowerShell 2.0 to include new parameters to define the AuthenticationLevel and ImpersonationLevel properties, as well as enable all privileges. In addition, these parameters also work with the new WMI commandlets (Invoke-WMIMethod, Remove-WMIObject, and Set-WMIInstance), which were also introduced in PowerShell 2.0. For example:
PS > get-wmiobject -class IIsWebService -namespace "rootmicrosoftiisv2" -Computer
sc1-app01–Authentication 6
In the preceding example, the Authentication parameter is used to define the AuthenticationLevel property. In this case, the value is defined as 6 (PacketPrivacy).
Set-WMIInstance Commandlet
The Set-WMIInstance commandlet was developed to reduce the number of steps needed to change a read-write WMI property (or property that allows direct modification). For example, in PowerShell 1.0, the following set of commands might be used to change the LoggingLevel for the WMI service:
PS C:> $WMISetting = Get-WMIObject Win32_WMISetting
PS C:> $WMISetting.LoggingLevel = 2
PS C:> $WMISetting.Put()
By using the Set-WMIInstance commandlet, you can complete the same task using a single command:
PS > set-wmiinstance–class "Win32_WMISetting"–argument @{LoggingLevel=2}
In the preceding example, the class parameter is defined as a Win32_WMISetting, and the argument parameter is defined as a HashTable and contains the property and the value the property will be set to. In addition, because this parameter requires an argument that is a HashTable, then to define multiple property and value pairs, you would separate the pairs with a semicolon, as shown here:
–argument @{LoggingLevel=1;MaxLogFileSize=1000}
However, the true power of this commandlet is to use the computername parameter to change read-write WMI properties on multiple machines simultaneously. For example:
PS > set-wmiinstance–class "Win32_WMISetting"–argument @{LoggingLevel=1}–
computername sc1-app01,sc1-app02
The arguments for the computername parameter can be either a NetBIOS name, fully qualified domain name (FQDN), or IP address. In addition, each argument must be separated by a comma.
Invoke-WMIMethod Commandlet
With WMI, there are two different types of methods: instance and static. With static methods, you must invoke the method from the class itself, whereas instance methods are invoked on specific instances of a class. In PowerShell 1.0, working with instance methods were fairly straightforward and only involved creating an object of a particular instance of a WMI class. However, to work with a static method required a fairly complex and unintuitive WQL statement, as shown in the following example:
PS > $ProcFac = get-wmiobject -query "SELECT * FROM Meta_Class WHERE __Class =
'Win32_Process'" -namespace "rootcimv2"
PS > $ProcFac.Create("notepad.exe")
Granted, you could also use the [WMIClass] type accelerator, as shown here:
PS > $ProcFac = [wmiclass]"Win32_Process"
PS > $ProcFac.Create("notepad.exe")
But, if you wanted to use the Get-WMIObject commandlet or were having problems with the [WMIClass] type accelerator, employing the use of the noted WQL statement wasn’t very command-line friendly. To fill this noted gap, the PowerShell product team has introduced the Invoke-WMIMethod commandlet in PowerShell 2.0.
As its name suggests, the purpose of the Invoke-WMIMethod commandlet is to make it easier to directly invoke WMI methods. To use this commandlet to invoke a static method, you use the following command:
PS > invoke-wmimethod -path "Win32_Process" -name "create" -argumentList
“notepad.exe”
In the preceding command example, the path parameter requires the name of the WMI class from which the method is to be invoked. In this case, the method being invoked is the Create method as defined for the name parameter. If you were invoking an instance method, the argument for the path parameter would need to be the complete path to an existing WMI instance. For example:
PS > invoke-wmimethod -path "Win32_Process.Handle='42144'" -name terminate
Finally, the argumentList parameter is used to define any arguments that a method requires when it is invoked. In cases where the method requires multiple values or you want to pass multiple values, you must assign those values into an array. Then, the array must be defined as the argument for the argumentList parameter.
NOTE
Values for methods are not in the same order as used with the WMI’s scripting API. Instead, values are ordered such as they appear in Wbemtest.exe.
Remove-WMIObject Commandlet
The last new commandlet to be introduced in PowerShell 2.0 is the Remove-WMIObject commandlet. This commandlet is used to remove instances of WMI objects. For example, to terminate a process using WMI in PowerShell 1.0, you might use the following set of commands:
PS > $Proc = get-wmiobject -class "Win32_Process" -filter "Name='wordpad.exe'"
PS > $Proc.Terminate()
However, depending on the type of WMI object that you are trying to remove, there can be any number of methods that would need to be used. For instance, to delete a folder using WMI in PowerShell 1.0, you would use the following command:
PS > $Folder = get-wmiobject -query "Select * From Win32_Directory Where
Name ='C:\Scripts'"
PS > $Folder.Delete()
Conversely, using the Remove-WMIObject commandlet, you can remove instances of any type of WMI object. For example, to remove an instance of the Win32_Process class, you use the following commands:
PS > $Proc = get-wmiobject -class "Win32_Process" -filter "Name=’wordpad.exe'"
PS > $Proc | remove-wmiobject
The following commands are used to remove a directory:
PS > $Folder = get-wmiobject -query "Select * From Win32_Directory Where
Name ='C:\Scripts'"
PS > $Folder | remove-wmiobject
CIM, or Common Information Model, is the DMTF standard for describing the structure and behavior of managed resources such as network, storage, or software components. CIM replaces WMI commandlets and expands Windows Server 2016’s ability to manage non-Windows devices. Historically, WMI was Microsoft’s original implementation of CIM. Moving toward CIM as a replacement, Windows Server 2016 includes many commandlets involving CIM, including the following:
![]() Get-CimAssociatedInstance
Get-CimAssociatedInstance
![]() Get-CimClass
Get-CimClass
![]() Get-CimInstance
Get-CimInstance
![]() Get-CimSession
Get-CimSession
![]() Invoke-CimMethod
Invoke-CimMethod
![]() New-CimInstance
New-CimInstance
![]() New-CimSession
New-CimSession
![]() New-CimSessionOption
New-CimSessionOption
![]() Register-CimIndicationEvent
Register-CimIndicationEvent
![]() Remove-CimInstance
Remove-CimInstance
![]() Remove-CimSession
Remove-CimSession
![]() Set-CimInstance
Set-CimInstance
These commandlets allow administrators to use PowerShell to perform tasks such as these:
![]() Enumerating instances of a class
Enumerating instances of a class
![]() Enumerating associated instances
Enumerating associated instances
![]() Getting instances by running a query on a server
Getting instances by running a query on a server
![]() Getting a specific instance of a class
Getting a specific instance of a class
![]() Creating a new instance of a class
Creating a new instance of a class
![]() Modifying an instance of a class
Modifying an instance of a class
![]() Deleting an instance of a class
Deleting an instance of a class
![]() Invoking extrinsic methods on a class or instance
Invoking extrinsic methods on a class or instance
![]() Enumerating classes in a namespace
Enumerating classes in a namespace
![]() Getting a class schema
Getting a class schema
![]() Subscribing to indications
Subscribing to indications
![]() Unsubscribing from indications
Unsubscribing from indications
CIM indications are a representation of an event in the managed system. CIM clients can subscribe to indications by providing the indication type and the filtering expression, which selects events that are delivered to the client.
Using Snap-Ins
Snap-ins are used to show a list of all the registered PSSnapins outside of the default snap-ins that come with PowerShell. Entering the command Get-PSSnapin -Registered on a newly installed PowerShell system will return nothing, as shown in the following example:
PS C:> get-pssnapin -registered
In most cases, a setup program will accompany a PowerShell snap-in and ensure that it becomes correctly registered for use. However, if this is not the case, the .NET utility InstallUtil.exe is used to complete the registration process. In the following example, InstallUtil.exe is being used to install a third-party library file called freshtastic-automation.dll:
PS C:> & "$env:windirMicrosoft.NETFrameworkv4.0.30319InstallUtil.exe"
freshtastic-automation.dll
After the DLL library file has been registered with PowerShell, the next step is to register the DLL’s snap-in with PowerShell so that the commandlets contained in the DLL are made available to PowerShell. In the case of the freshtastic-automation library, the snap-in is registered by using the command Add-PSSnapin freshtastic, as follows:
PS C:> add-pssnapin freshtastic
Now that the freshtastic snap-in has been registered, you can enter the command Get-Help freshtastic to review the usage information for the freshtastic commandlets:
PS C:> get-help freshtastic
Now that the registration of the freshtastic library DLL is complete and the associated snap-in has been added to the console, you can enter the command Get-PSSnapin–registered again and see that the freshtastic snap-in has been added to the console:
PS C:> get-pssnapin -registered
Name : freshtastic
PSVersion : 3.0
Description : Used to automate freshness.
PS C:>
Now that you have registered the third-party library file and added its snap-in to the console, you might find that the library does not meet your needs, and you want to remove it. The removal process is basically a reversal of the installation steps listed previously. First, you remove the snap-in from the console using the command Remove-PSSnapin freshtastic, as follows:
PS C:> Remove-PSSnapin freshtastic
After the third-party snap-in has been unregistered, you will once again use InstallUtil.exe with a /U switch to unregister the DLL, as follows:
PS C:> & "$env:windirMicrosoft.NETFrameworkv4.0.30319InstallUtil.exe" /U
freshtastic-automation.dll
Once the uninstall has completed, you can verify that the library file was successfully unregistered by entering the command Get-PSSnapin -registered and verifying that no third-party libraries are listed.
Using Modules
In Windows Server 2016, a set of base modules are loaded when the operating system is installed. In addition, modules can be added or removed using the Add Features Wizard in Server Manager. Modules are also added and removed as you add and remove roles from the server. For example, when a server is promoted to a domain controller and the tools for managing Active Directory are installed, so too are all the modules required to work with AD from PowerShell.
Default Module Locations
There are two default locations for modules. The first location is for the machine, as follows:
$pshomeModules (C:Windowssystem32WindowsPowerShellv1.0Modules)
The second location is for the current user:
$homeDocumentsWindowsPowerShellModules (UserProfile%DocumentsWindowsPowerShell
Modules)
Installing New Modules
As mentioned previously, new modules can be added using the Add Features Wizard in Server Manager. In addition, other modules should come with an installation program that will install the module for you. However, if need be, you can also manually install a new module. To do this, use the following steps:
1. Create a new folder for the module that is being installed. For example:
PS C:> New-Item -type directory -path $homeDocumentsWindowsPowerShellModulesSpammer1000
2. Copy the contents of the module into the newly created folder.
Using Installed Modules
After a module has been installed on a machine, it can then be imported into a PowerShell session for usage. To find out what modules are available for use, use the Get-Module commandlet:
PS C:> Get-Module -listAvailable
Or, to list modules that have already been imported into the current PowerShell session, just use the Get-Module commandlet without the listAvailable switch parameter:
PS C:> Get-Module
Next, to import a module into a PowerShell session, use the Import-Module commandlet. For example, if the ActiveDirectory module has been installed, the following command would be used:
PS C:> Import-Module ActiveDirectory
NOTE
A complete path to the module folder must be provided for modules that are not located in one of the default modules locations or any additional module locations that have been defined for the current PowerShell session. This is required when using the Import-Module commandlet to define the module location used by the commandlet.
In addition, if you want to import all modules that are available on a machine into a PowerShell session, one of two methods can be used. The first method is to execute the following command, which lists all modules and then pipes that to the Import-Module commandlet:
PS C:> Get-Module -listAvailable | Import-Module
NOTE
By default, modules are not loaded into any PowerShell session. To load modules by default, the Import-Module commandlet should be used in conjunction with a PowerShell profile configuration script.
Removing a Module
The act of removing a module causes all the commands added by a module to be deleted from the current PowerShell session. When a module is removed, the operation only reverses the Import-Module commandlet’s actions and does not uninstall the module from a machine. To remove a module, use the Remove-Module commandlet, as shown here:
PS C:> Remove-Module ActiveDirectory
Using Remoting
When using remoting, three different modes can be used to execute commands, as follows:
![]() 1 to 1—Referred to as Interactive mode. This mode enables you to remotely manage a machine similar to using an SSH session.
1 to 1—Referred to as Interactive mode. This mode enables you to remotely manage a machine similar to using an SSH session.
![]() Many to 1—Referred to as the Fan-In mode. This mode allows multiple administrators to manage a single host using an interactive session.
Many to 1—Referred to as the Fan-In mode. This mode allows multiple administrators to manage a single host using an interactive session.
![]() 1 to Many—Referred to as the Fan-Out mode. This mode allows a command to execute across a large number of machines.
1 to Many—Referred to as the Fan-Out mode. This mode allows a command to execute across a large number of machines.
More information about each mode is provided in the following sections.
Interactive Remoting
With interactive remoting, the PowerShell session you are executing commands within looks and feels very much like an Secure Shell (SSH) session, as shown in the following example:
PS C:> enter-pssession abc-util01
[abc-util01]: PS C:Usersadministrator.COMPANYABCDocuments>
The key to achieving this mode of remoting is a PowerShell feature called a runspace. Runspaces by definition are instances of the System.Management.Automation class, which defines the PowerShell session and its host program (Windows PowerShell host, cmd.exe, and so on). In other words, a runspace is an execution environment in which PowerShell runs.
Runspaces are the method by which commands are executed on local and remote machines. When a runspace is created, it resides in the global scope and it is an environment upon itself, which includes its own properties, execution polices, and profiles. This environment persists for the lifetime of the runspace, regardless of the volatility of the host machine’s environment.
Being tied to the host program that created it, a runspace ceases to exist when the host program is closed. When this happens, all aspects of the runspace are gone, and you can no longer retrieve or use the runspace. However, when created on a remote machine, a runspace will remain until it is stopped.
To create a runspace on a machine, you can use two commandlets. The first commandlet, Enter-PSSession, is used to create an interactive PowerShell session. This is the commandlet that was shown in the previous example. When this commandlet is used against a remote machine, a new runspace (PowerShell process) is created and a connection is established from the local machine to the runspace on the remote computer. If executed against the local machine, a new runspace (PowerShell process) is created and connection is established back to the local machine. To close the interactive session, you would use the Exit-PSSession commandlet or the exit alias.
Fan-In Remoting
Fan-in remoting is named in reference to the ability for multiple administrators to open their own runspaces at the same time. In other words, many administrators can “fan in” from many machines into a single machine. When connected, each administrator is then limited to the scope of their own runspace. This partitioning of access can be achieved thanks to the PowerShell security model, which allows for the creation of restricted shells and commandlets.
However, the steps needed to fully utilize the new security model require a degree of software development using the .NET Framework. The ability of being able to provide secure partitioned remote management access on a single host to a number of different administrators is a very powerful feature. Usage could range from a web hosting company wanting to partition remote management access to each customer for each of their websites to internal IT departments wanting to consolidate their management consoles on a single server.
Fan-Out Remoting
Fan-out remoting is named in reference to the ability to issue commands to a number of remote machines at once. When using this method of remoting, commands are issued on your machine. These commands then “fan out” and are executed on each of the remote machines that have been specified. The results from each remote machine are then returned to your machine in the form of an object, which you can then review or further work with; in other words, the basic definition for how remoting was defined earlier in this chapter.
Ironically enough, PowerShell has always supported the concept of fan-out remoting. In PowerShell 1.0, fan-out remoting was achieved using WMI. For example, you could always import a list of machine names and then use WMI to remotely manage those machines:
PS C:> import-csv machineList.csv | foreach {Get-WmiObject
Win32_NetworkAdapterConfiguration -computer $_.MachineName}
Although the ability to perform fan-out remoting in PowerShell 1.0 using WMI was a powerful feature, this form of remoting suffered in usability because it was synchronous in nature. In other words, once a command had been issued, it was executed on each remote machine one at a time. While this happened, further command execution had to wait until the command issued had finished being executed on all the specified remote machines.
Attempting to synchronously manage a large number of remote machines can prove to be a challenging task. To address this challenge in PowerShell 2.0, the product team tweaked the remoting experience such that fan-out remoting could be done asynchronously. With these changes, you could still perform remote WMI management, as shown in the previous example. However, you can also asynchronously execute remote commands using the following methods:
![]() Executing the command as a background job
Executing the command as a background job
![]() Using the Invoke-Command commandlet
Using the Invoke-Command commandlet
![]() Using the Invoke-Command commandlet with a reusable runspace
Using the Invoke-Command commandlet with a reusable runspace
The first method, a background job, as its name might suggest, allows commands to be executed in the background. Although not truly asynchronous, a command that is executed as a background job enables you to continue executing additional commands while the job is being completed. For example, to run the previously shown WMI example as a background job, you can simply add the AsJob parameter for the Get-WmiObject commandlet:
PS C:> import-csv machineList.csv | foreach {Get-WmiObject
Win32_NetworkAdapterConfiguration -computer $_.MachineName -asjob}
With the AsJob parameter (introduced in PowerShell 2.0) being used, each time the Get-WmiObject cmdet is called in the foreach loop, a new background job is created to complete execution of the commandlet. Although more details about background jobs are provided later in this chapter, this example shows how background jobs can be used to achieve asynchronous remote command execution when using WMI.
The second method to asynchronously execute remote commands is by using the new commandlet called Invoke-Command. This commandlet was introduced in PowerShell 2.0, and it enabled you to execute commands both locally and remotely on machines—unlike WMI, which uses Remote Procedure Call (RPC) connections to remotely manage machines. The Invoke-Command commandlet utilizes WinRM to push the commands out to each of the specified “targets” in an asynchronous manner.
To use the commandlet, two primary parameters need to be defined. The first parameter, ScriptBlock, is used to specify a scriptblock, which contains the command to be executed. The second parameter, ComputerName (NetBIOS name or IP address), is used to specify the machine or machines to execute the command that is defined in the scriptblock. For example:
PS C:> invoke-command -scriptblock {get-process} -computer dc1,dc2
In addition, the Invoke-Command commandlet supports a set of parameters that make it an even more powerful vehicle to conduct remote automation tasks with. These parameters are described in Table 20.4.
TABLE 20.4 Important Invoke-Command Commandlet Parameters
Parameter |
Details |
AsJob |
Used to execute the command as a background job |
Credential |
Used to specify alternate credentials that are used to execute the specified commands |
ThrottleLimit |
Used to specify the maximum number of connections that can be established by the Invoke-Command commandlet |
Session |
Used to execute the command in the specified PSSessions |
As discussed previously, the AsJob parameter is used to execute the specified command as a background job. However, unlike the Get-WmiObject commandlet, when the AsJob parameter is used with the Invoke-Command commandlet, a background job is created on the client machine, which then spawns a number of child background jobs on each of the specified remote machines. Once execution of a child background job is finished, the results are returned to the parent background job on the client machine.
If a large number of remote machines are defined using the ComputerName parameter, the client machine might become overwhelmed. To help prevent the client machine or your network from drowning in an asynchronous connection storm, the Invoke-Command commandlet will, by default, limit the number of concurrent remote connections for an issued command to 32. If you want to tweak the number of concurrent connections allowed, you use the ThrottleLimit parameter.
NOTE
The ThrottleLimit parameter can also be used with the New-PSSession commandlet.
An important concept to understand when using the Invoke-Command commandlet is how it actually executes commands on a remote machine. By default, this commandlet will set up temporary runspace for each of the targeted remote machines. When execution of the specified command has finished, both the runspace and the connection resulting from that runspace are closed. This means, irrespective of how the ThrottleLimit parameter is used, if you are executing a number of different commands using the Invoke-Command commandlet at the same time, the actual number of concurrent connections to a remote machine is the total number of times you invoked the Invoke-Command commandlet.
If you want to reuse the same existing connection and runspace, you need to use the Invoke-Command commandlet’s Session parameter. However, to make use of the parameter requires an already existing runspace on the targeted remote machines. To create a persistent runspace on a remote machine, you use the New-PSSession commandlet, as shown in the following example:
PS C:> new-pssession -computer "dc1","dc2"
After executing this command, two persistent runspaces on each of the specified targets will have been created. These runspaces can then be used to complete multiple commands and even share data between those commands. To use these runspaces, you need to retrieve the resulting runspace objects using the Get-PSSession commandlet and then pass it into the Invoke-Command commandlet. For example:
PS C:> $Sessions = new-pssession -computer "dc1","dc2"
PS C:> invoke-command -scriptblock {get-service "W32Time"} -session $Sessions | ft
PSComputerName, Name, Status
PSComputerName Name Status
------------ ---- ------
Dc1 W32Time Running
Dc2 W32Time Running
First, the $Sessions variable is used to store the two resulting runspace objects that are created using the New-PSSession commandlet. Next, the $Sessions variable is then defined as the argument for the Session parameter of the Invoke-Command commandlet. By doing this, the command that is defined as the argument for the ScriptBlock parameter is executed within each of the runspaces represented by the $Sessions variable. Finally, the results from the command executed within each of the runspaces is returned and piped into the Format-Table commandlet to format the output. In this case, the output shows the current status of the W32Time service on each of the specified remote machines.
After you have finished executing commands, it’s important to understand that the runspaces that were created will remain open until you close the current PowerShell console. To free up the resources being consumed by a runspace, you need to delete it using the Remove-PSSession commandlet. For example, to remove the runspaces contained in the $Sessions variable, you would pass that variable into the Remove-PSSession commandlet:
PS C:> $Sessions | remove-pssession
New-CimSession
With the move toward CIM for managing Windows and non-Windows systems, the New-CimSession commandlet uses WSMAN to access remote computers if they are running PowerShell 3.0 with version 3.0 of the WSMAN stack. Optionally New-CimSession, like all CIM commandlets, can be forced to use DCOM.
For example:
PS C:> New-CimSession -ComputerName dc2
Id : 2
Name : CimSession2
InstanceId : 0b387ab0-1520-42c8-a4e4-c2812876adbc
ComputerName : dc2
Protocol : WSMAN
As opposed to:
PS C:> $option = New-CimSessionOption -Protocol DCOM
PS C:> $out = New-CimSession -ComputerName DC2 -SessionOption $option
PS C:> $out
Id : 3
Name : CimSession3
InstanceId : 074340ad-eae5-4c85-905b-5dc6e71325a3
ComputerName : DC2
Protocol : DCOM
Both examples make CimSession connections to a remote host, but one uses WSMAN whereas the other is forced to use DCOM.
The established session can then be used to query the remote system for information:
PS C:> get-CimInstance -CimSession $out -ClassName Win32_ComputerSystem
Name PrimaryOwner Domain TotalPhysica Model Manufacturer
Name Memory
---- ------------ ------ ------------ ----- -----------
DC2 Windows User companyab...1073270784 Virtual ... Microsof...
While similar to WMI, CIM expands Windows Server 2016’s reach into non- Windows devices.
Using the New-Object Commandlet
The New-Object commandlet is used to create both .NET and COM objects. To create an instance of a .NET object, you just provide the fully qualified name of the .NET class you want to use, as shown here:
PS C:> $Ping = new-object Net.NetworkInformation.Ping
By using the New-Object commandlet, you now have an instance of the Ping class that enables you to detect whether a remote computer can be reached via Internet Control Message Protocol (ICMP). Therefore, you have an object-based version of the Ping.exe command-line tool.
To an instance of a COM object, the comObject parameter is used. To use this parameter, define its argument as the COM object’s programmatic identifier (ProgID), as shown here:
PS C:> $IE = new-object -comObject InternetExplorer.Application
PS C:> $IE.Visible=$True
PS C:> $IE.Navigate(“www.cnn.com”)
Summary
In this chapter, you have been introduced to PowerShell, its features, concepts, and how it can be used to manage Windows. Of all the topics and items covered in this chapter, the most important concept that should be remembered is that PowerShell should not be feared—rather, it should be used. With practice, using PowerShell should become second nature.
The PowerShell team continues to produce a CLI shell that is easy and fun to use. Microsoft has fully embraced PowerShell as the de facto command-line tool for the management and configuration of the Windows family of operating systems and other Microsoft services and applications. With role-based server deployment, Server Core, virtual machines, and Nano Server, it is the only tool you can use to fully manage your client or server instances.
This trend toward all things PowerShell is even clearer when looking at all the community-based projects and third-party products being developed and released that use or enhance PowerShell. Thanks to a good feature set, which includes being built around the .NET Framework, being object and OO based, being developed with security in mind, and so on, PowerShell is a powerful tool that should be part of any administrator’s arsenal.
Best Practices
The following are best practices from this chapter:
![]() If a function needs to persist across PowerShell sessions, define that function within your profile.ps1 file.
If a function needs to persist across PowerShell sessions, define that function within your profile.ps1 file.
![]() To access block information about a base, use the BaseObject property with the PSBase standard name.
To access block information about a base, use the BaseObject property with the PSBase standard name.
![]() When naming a variable, don’t use special characters or spaces.
When naming a variable, don’t use special characters or spaces.
![]() When using aliases and variables in a script, use names that other people can undersstand.
When using aliases and variables in a script, use names that other people can undersstand.
![]() If possible, try not to use aliases in a script.
If possible, try not to use aliases in a script.
![]() In a production environment, don’t configure the PowerShell execution policy as unrestricted and always digitally sign your scripts.
In a production environment, don’t configure the PowerShell execution policy as unrestricted and always digitally sign your scripts.
![]() If built-in PowerShell commandlets don’t meet your needs, always remember that you can fall back onto existing automation interfaces (ADSI, WMI, COM, and so forth).
If built-in PowerShell commandlets don’t meet your needs, always remember that you can fall back onto existing automation interfaces (ADSI, WMI, COM, and so forth).
![]() Useful ISE add-ons are being created all the time. Just click Add-Ons, and then Open Add-On Tools Website to see what’s available.
Useful ISE add-ons are being created all the time. Just click Add-Ons, and then Open Add-On Tools Website to see what’s available.