
28. Snippets
Xcode 6 Start to Finish relies mostly on narrative to take you on a tour of using Xcode for Cocoa development. I tried to cover as much as I could in the first three parts, and I mopped up the remaining big topics in the fourth. That leaves some small topics—tricks and traps—that didn’t fit anywhere else.
Tricks
General
![]() If you’re used to Unix or Linux development in C-family languages, you’re accustomed to global macros like
If you’re used to Unix or Linux development in C-family languages, you’re accustomed to global macros like NDEBUG and DEBUG, and expect them to be set for you.
If the argument to the standard C assert() macro is zero, it halts the program. If NDEBUG is set, assert() does nothing, so you can publish code that may still exhibit the bug you put in the assertion for, but at least it won’t crash.
The NS_BLOCK_ASSERTIONS macro does the same with Cocoa’s NSAssert family of assertion macros; as do optimization levels for Swift assertions.
Many developers like to define a DEBUG macro to guard logging and assertion code. It’s not a standard macro, but it’s very common.
Xcode’s project templates define DEBUG=1 for the Debug configuration; NDEBUG and NS_BLOCK_ASSERTIONS are never set. An easy way to cut down on the size of your released code is to open the Build Settings tab in the Target editor and double-click the value for the Release version of the “Preprocessor Macros” setting. You’ll get a table to enter the definitions; click the + button to add lines. Set NDEBUG and NS_BLOCK_ASSERTIONS, and don’t set DEBUG at all. Remember to include $(inherited) to preserve definitions made at other levels.
Note
Don’t prefix the symbols you put in “Preprocessor Macros” with -D, even though that’s what would go into the clang command line; the setting does that.
A shorthand for setting NS_BLOCK_ASSERTIONS is to set “Enable Foundation Assertions” (ENABLE_NS_ASSERTIONS) in the Build Settings tab, setting Yes for debugging builds, and No for release.
![]() The Editor menu is extremely variable—it adjusts to the type of file in the active editor. If you’re sure there’s a feature for doing what you want, but you can’t find it by typing in the field at the top of the Help menu, be sure to bring up a related file, and click on it to adjust the Editor menu.
The Editor menu is extremely variable—it adjusts to the type of file in the active editor. If you’re sure there’s a feature for doing what you want, but you can’t find it by typing in the field at the top of the Help menu, be sure to bring up a related file, and click on it to adjust the Editor menu.
![]() In a complex project, an object in a XIB may take part, as provider or recipient, in dozens of outlets, actions, and bindings, each with its own context-limited editor. You don’t have to click through all of the editors; select the object, select the Connection (sixth) inspector, and all of the connections will be there in one place.
In a complex project, an object in a XIB may take part, as provider or recipient, in dozens of outlets, actions, and bindings, each with its own context-limited editor. You don’t have to click through all of the editors; select the object, select the Connection (sixth) inspector, and all of the connections will be there in one place.
![]() If you command-click on a system-provided symbol in a Swift file (including Swift itself, in
If you command-click on a system-provided symbol in a Swift file (including Swift itself, in import Swift), you will see a fully commented interface file for the class that defines the symbol, in Swift. There is no such file (at least not yet). It is an on-the-fly translation of the Objective-C @interface file.
This is ingenious, but there is one omission: API that Apple has marked as deprecated in the ObjC header doesn’t carry over into the translation. You can see the point—Apple doesn’t want to encourage the use of deprecated API, nor to maintain that API so it will be Swift-compatible.
But what happens when you use a method that was okay when you wrote it, but was then deprecated? This shouldn’t happen with API Apple has released as final—at least not for another year or two—but it does happen for preview software, and during Apple’s process of settling on the methods that should carry over to Swift. The nice thing about the .h files that have to accommodate legacy code is that the deprecations are still there, usually with comments telling you what to use instead. In the Swift interface, all you’re told is that the method you’re trying to use doesn’t exist and never has.
If Swift gaslights you like this, open an Objective-C source file, File →Open Quickly. . . (![]() O), and begin typing the symbol you’re looking for. (You can’t do this when a
O), and begin typing the symbol you’re looking for. (You can’t do this when a .swift file is showing—Xcode will force you into the Swift interfaces.) When you see the header you need, double-click it, and you’ll see the old API and (you hope) what you should use instead.
![]() You can’t subclass a Swift class in Objective-C. Ever. Not even if you declare everything
You can’t subclass a Swift class in Objective-C. Ever. Not even if you declare everything @objc and public. clang will tell you “Cannot subclass a class with objc_subclassing_restricted attribute.” Every Swift class has that attribute. If you define a class in Swift, you can extend it with an ObjC category, but its subclasses are Swift forever.
![]() You may find some user-defined items at the bottom of the Build Settings table. In general, this is how Xcode preserves settings it doesn’t recognize. What it recognizes depends on the context: If, for instance, you have a project that doesn’t have any compilable files, Xcode won’t load its list of compiler options, and those options will be shown as user-defined.
You may find some user-defined items at the bottom of the Build Settings table. In general, this is how Xcode preserves settings it doesn’t recognize. What it recognizes depends on the context: If, for instance, you have a project that doesn’t have any compilable files, Xcode won’t load its list of compiler options, and those options will be shown as user-defined.
Older projects are another source of unrecognized settings. Some options are no longer supported in Xcode 6. When you open a project, Xcode may even offer to “modernize” your project by removing them. What you do about this is up to you. Usually, it’s a good idea, but if you’re sharing the project file with others who are building for older Xcodes or OSes, in which those settings might still be relevant, you will want to preserve those settings for their benefit.
![]() One setting that I haven’t mentioned is
One setting that I haven’t mentioned is $(inherited). Targets inherit build settings from the project, which in turn inherits settings from Xcode’s defaults. Sometimes you want to add to, not replace, a setting from the next-lower level. Use $(inherited) to insert the inherited value in your setting.
![]() You’ve seen Xcode’s offer to incorporate directories as “folder references” when you add files to a project. The Project navigator shows two different kinds of folder icon: What you’ve seen throughout this book are “group” folders. Basically, these are simply organizational tools, a way to gather files you’ve decided are related. Each file in a group is itself a member of the project.
You’ve seen Xcode’s offer to incorporate directories as “folder references” when you add files to a project. The Project navigator shows two different kinds of folder icon: What you’ve seen throughout this book are “group” folders. Basically, these are simply organizational tools, a way to gather files you’ve decided are related. Each file in a group is itself a member of the project.
But sometimes adding a folder to a project means adding the folder itself. Suppose that you were building an educational program about presidents of the United States and wanted the Resources directory of the application to include a subdirectory containing a picture of each president. Your intention is that the application copy that directory in, with whatever it may contain—as new administrations or replacement portraits come in—not the particular files.
In such a case, when you add the portrait folder, you check Create folder references for any added folders in the add-files sheet. The folder you dragged in will appear in the list in the same blue color as folders in the Finder, not in the yellow of Xcode’s file-grouping folders. The folder reference can then be dragged into the Copy Bundle Resources build phase; the folder and its contents, whatever they might be at build time, will be copied into the product’s Resources directory.
![]() In Chapter 4, “Active Debugging,” I mentioned how OS X usually supersedes the default debugger-control keys (the F keys) for hardware control. You aren’t stuck with Xcode’s choices. The Key Bindings panel of the Preferences window lists all of the editor functions and application commands, and allows you to set or change the key equivalents for any of them. The default set can’t be changed, but click the + button to create a customizable copy.
In Chapter 4, “Active Debugging,” I mentioned how OS X usually supersedes the default debugger-control keys (the F keys) for hardware control. You aren’t stuck with Xcode’s choices. The Key Bindings panel of the Preferences window lists all of the editor functions and application commands, and allows you to set or change the key equivalents for any of them. The default set can’t be changed, but click the + button to create a customizable copy.
The Conflicts button in the key table’s header is particularly useful. It will show you all of the Xcode assignments that are superseded by the system or by other key assignments in Xcode.
The number of text operations available in Xcode is staggering; the list in the Key Bindings table is worth a look. You’ll find useful editing actions, like move-by-subword (underscores and internal caps) (^ Left- or Right-Arrow), you’d never have known about.
![]() I’ve made much of the fact that the Project navigator is not a directory or filesystem tool; that it reflects the way you want to structure the project, and not the placement of files in the filesystem’s directories. This isn’t quite true.
I’ve made much of the fact that the Project navigator is not a directory or filesystem tool; that it reflects the way you want to structure the project, and not the placement of files in the filesystem’s directories. This isn’t quite true.
If an Xcode project’s file references were arbitrary, they’d have to be absolute paths. That would mean that all of the files would be identified by a path that ran through your home directory. Suppose you were sharing the project with another developer. The project and its files would be in her directory, and the reference to your home directory would be wrong.
The solution would seem to be to keep the path relative to the project file—and indeed that is one of the options. It is not, however, the option Xcode uses by default. The default is Relative to Group, as shown in the Location popup in the File inspector. There are other choices, such as relative-to-build-products, relative-to-Xcode’s internal Developer and SDK directories, and, yes, the absolute path. If you have defined source trees, you can make the path relative to one of those, too.
But what does “relative to group” mean? If you click on a group folder, you’ll see in the File inspector that groups, too, have paths (which can, in turn, be absolute or relative). Groups still aren’t directories: More than one group can refer to the same file directory, and not all members of a group have to be in the same place.
Putting a filesystem location on a group has the advantage that you can have two directories in your filesystem containing files that have the same names. Maybe the one contains live classes, and the other “mocks” for testing. Switching between the two would then be a simple matter of changing the path of the corresponding group. If the group’s directory does not enclose a file in the group, that file’s path will be stored as project relative.
![]() Renaming is another file-management service the Project navigator provides. It uses the same gestures as in the Finder: To rename a file or group, click once to select it, then again a couple of seconds later. The item becomes editable. Or, select the item and press Return.
Renaming is another file-management service the Project navigator provides. It uses the same gestures as in the Finder: To rename a file or group, click once to select it, then again a couple of seconds later. The item becomes editable. Or, select the item and press Return.
If the project is under version control, Xcode will do the necessary work to ensure that the change is noted in the repository.
![]() Suppose you’ve written something like this in an Objective-C header file:
Suppose you’ve written something like this in an Objective-C header file:
extern NSString * const PRPFirstNameKey;
extern NSString * const PRPLastNameKey;
extern NSString * const PRPCurrentTeamKey;
and you want to add the corresponding declarations to an implementation file. The first thing you would naturally do is to paste the declarations from the header. Stop there. Hold down the Option key, and notice that the mouse cursor has changed to crosshairs. Drag from the first letter of the first extern to the space after the last one.
You have a column selection. Press Delete. The externs are gone.
This is an editor feature, and isn’t specific to Objective-C.
It would be nice if you could type into the column and have your text appear on each line; or copy a column, click elsewhere in the text, paste, and have the column content inserted into the insertion point and the lines below. TextMate does this. Xcode does not.
![]() By default, the Find navigator does a straightforward search across all the text files in the project. As you saw in Chapter 7, “Version Control,” global search has some simple options, readily understood. There are some deeper features:
By default, the Find navigator does a straightforward search across all the text files in the project. As you saw in Chapter 7, “Version Control,” global search has some simple options, readily understood. There are some deeper features:
![]() You don’t have to search just for text. The cascading popup menus at the top of the Find navigator offer not just text and regular expressions, but References (only the uses of the symbol you entered) and Definitions (definition of a method, function, or global variable). Doing a search for Find →Definitions → Matching stat (Ignoring Case) turns up eight matches for the
You don’t have to search just for text. The cascading popup menus at the top of the Find navigator offer not just text and regular expressions, but References (only the uses of the symbol you entered) and Definitions (definition of a method, function, or global variable). Doing a search for Find →Definitions → Matching stat (Ignoring Case) turns up eight matches for the StatView class, its statLayer let variable; the StatsLabel enum constant in GameListController.swift; and the five @IBOutlets for the StatViews in TodayViewController. No uses or other substrings, just definitions.
![]() Below the left end of the global search field is a label that says something innocuous like In Project or In Workspace. This is a button that slides in an outline of the groups in the project (and of the projects in a workspace). If you’ve been disciplined about keeping all of the files for a subsystem tucked away each in their groups, you have a great way to narrow your searches by subsystem.
Below the left end of the global search field is a label that says something innocuous like In Project or In Workspace. This is a button that slides in an outline of the groups in the project (and of the projects in a workspace). If you’ve been disciplined about keeping all of the files for a subsystem tucked away each in their groups, you have a great way to narrow your searches by subsystem.
![]() There is another category in the scope outline, “Search Scopes,” which starts out empty except for a placeholder named New Scope. . . . Clicking it triggers a popover for you to name and define a custom search scope. In Figure 28.1, a “Property Lists” scope is defined as files that are included in the workspace and have the
There is another category in the scope outline, “Search Scopes,” which starts out empty except for a placeholder named New Scope. . . . Clicking it triggers a popover for you to name and define a custom search scope. In Figure 28.1, a “Property Lists” scope is defined as files that are included in the workspace and have the plist extension. If I search for text containing wt9t in that scope, I’ll be shown only the bundle and document IDs in my Info.plist precursors.

Figure 28.1 Clicking the scope button below the global-search field opens a list of potential search scopes and an affordance for defining scopes of your own—in this case, property-list files within the workspace.
Code-Folding Ribbon
When I had you abate some Xcode features in Chapter 2, “Kicking the Tires,” you went to the Text Editing panel of the Preferences window and turned off Show: Code folding ribbon. The feature is useful, but “noisy”—with the ribbon visible, mousing into the left margin of the editor puts transient highlights in the content.
Many text editors implement folding: You click on a control, usually in the margin, or use a menu command or key equivalent, and the editor collapses the selected block of text. A possibly long stretch of code is elided to a single line, and you’re able to see the higher-level structure of a function.
The code-folding ribbon does the same thing: Turning it on adds a stripe between the gutter and the text area of the editor. The deeper the text next to the ribbon is nested, the darker the ribbon gets. When you mouse into the ribbon, Xcode highlights the text to show the extent of the code block containing that line. Clicking the ribbon collapses that block. See Figure 28.2.

Figure 28.2 When enabled in the Text Editing panel of the Preferences window, the code-folding ribbon appears as a strip at the left margin of the editor views. It shows progressively darker bands for each level of nesting in the code. Hovering the mouse pointer over the ribbon (top) highlights the lines at that level of nesting (or deeper). (middle) Moving to a deeper level dims the areas outside the highlighted scope. (bottom) Clicking the ribbon collapses the highlighted scope; its contents are replaced with an ellipsis bubble, and a disclosure triangle appears in the ribbon next to it.
The collapsed text is replaced by a yellow bubble with an ellipsis in it. Double-clicking the bubble or clicking the disclosure triangle in the ribbon expands the text. You can find menu commands for code folding, and their key equivalents, in the submenu at Editor →Code Folding.
The Assistant Editor
You’ve done a lot with the Assistant editor, but let me cover the basics all in one place: The Assistant editor is shown when you click the middle segment of the Editor control in the Workspace window’s toolbar; when you press ![]() Return, or when you navigate to a file while holding down the Option key.
Return, or when you navigate to a file while holding down the Option key.
![]() The wow feature of the Assistant editor is that it can track what file is displayed in the primary editor and show a counterpart, like the
The wow feature of the Assistant editor is that it can track what file is displayed in the primary editor and show a counterpart, like the .h file for a .c file. If there is more than one counterpart—for instance, when there is a second header file for a private interface—the Counterpart assistant will rotate among the three when you click the arrow buttons in the assistant’s jump bar or press ∧![]() Up- or Down-Arrow.
Up- or Down-Arrow.
The options for autofilling the Assistant editor go beyond counterparts: You can direct the assistant to related files in the class hierarchy, related Interface Builder files, files that include or are included by the primary editor, and processed content, like assembly and disassembly. As I mentioned in Chapter 5, “Compilation,” the assistant can display the callers or callees of a selected function; and it can show the test methods that exercise the selected function.
![]() The Option-key gesture to put a destination file into the assistant pane can be modified. The Navigation panel of the Preferences window lets you customize how Xcode responds to navigational gestures:
The Option-key gesture to put a destination file into the assistant pane can be modified. The Navigation panel of the Preferences window lets you customize how Xcode responds to navigational gestures:
![]() Simple click navigation can go to the primary editor (the big one on the left) or whatever editor you’re using at the moment.
Simple click navigation can go to the primary editor (the big one on the left) or whatever editor you’re using at the moment.
![]() Adding the Option key can send the selected file to the Assistant editor, an additional assistant pane, a new tab, or a new window.
Adding the Option key can send the selected file to the Assistant editor, an additional assistant pane, a new tab, or a new window.
![]() Double-clicking can direct the file to a new window or a new tab.
Double-clicking can direct the file to a new window or a new tab.
![]() Further, if you navigate with the Option and Shift keys, Xcode will offer you a heads-up display offering you a graphical picker for placing the file in an existing or a new view. See Figure 28.3.
Further, if you navigate with the Option and Shift keys, Xcode will offer you a heads-up display offering you a graphical picker for placing the file in an existing or a new view. See Figure 28.3.
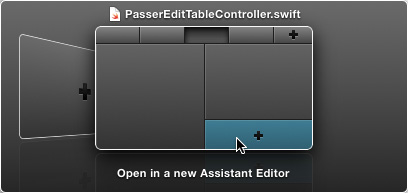
Figure 28.3 The Navigation Chooser appears when you select a file with the Option and Shift keys depressed. It is a graphical browser that lets you choose where the file is to be displayed. The menu equivalent is Navigate →Open in. . . (![]() <). A new window appears to the left in Cover Flow; placeholders for existing tabs, and a new one, run across the top of the presentation.
<). A new window appears to the left in Cover Flow; placeholders for existing tabs, and a new one, run across the top of the presentation.
![]() You can have more than one Assistant view; there’s a + button at the top-right corner of the view to add another. The x button next to it, of course, closes the pane.
You can have more than one Assistant view; there’s a + button at the top-right corner of the view to add another. The x button next to it, of course, closes the pane.
![]() You aren’t stuck with the side-by-side arrangement of the primary and Assistant editors. The View →Assistant Editor submenu offers you a choice of dividing the primary and Assistant areas vertically or horizontally, or cascading all editors in coequal rows or columns. Putting the assistant below the main editor makes dragging outlet and action connections between Interface Builder and source files much easier.
You aren’t stuck with the side-by-side arrangement of the primary and Assistant editors. The View →Assistant Editor submenu offers you a choice of dividing the primary and Assistant areas vertically or horizontally, or cascading all editors in coequal rows or columns. Putting the assistant below the main editor makes dragging outlet and action connections between Interface Builder and source files much easier.
Instruments and Debugging
![]() It bears repeating: Apple keeps two technical notes, “Mac OS X Debugging Magic (TN2124),” and “iOS Debugging Magic (TN2239),” continually updated with the latest techniques for making debugging easier. Search for Debugging Magic in the Documentation browser. It’s worth 20 IQ points.
It bears repeating: Apple keeps two technical notes, “Mac OS X Debugging Magic (TN2124),” and “iOS Debugging Magic (TN2239),” continually updated with the latest techniques for making debugging easier. Search for Debugging Magic in the Documentation browser. It’s worth 20 IQ points.
![]() The Leaks and Allocations instruments take care of most memory problems, but not all of them. Sometimes, unused objects persist in memory, but because they have residual references, they aren’t visible as leaks. Allocations has a button in its options area titled Mark Heap. Get your application started up and stable, and click Mark Heap. Then do something that will consume memory, but should return it to its original state—like opening a document, editing it, and closing it. Do it repeatedly. Mark the heap again.
The Leaks and Allocations instruments take care of most memory problems, but not all of them. Sometimes, unused objects persist in memory, but because they have residual references, they aren’t visible as leaks. Allocations has a button in its options area titled Mark Heap. Get your application started up and stable, and click Mark Heap. Then do something that will consume memory, but should return it to its original state—like opening a document, editing it, and closing it. Do it repeatedly. Mark the heap again.
The heapshot-analysis table will show you all of the objects that were created, but not deallocated, at the end of the process. Not all will be leftovers—objects can legitimately accumulate in caches—but you should satisfy yourself that they are what they should be.
Apple engineer Bill Bumgarner has an excellent tutorial on this. Search the web for his name and “heapshot.”
Building
![]() Not an Xcode tip, but something every programmer should take to heart: Compiler warnings are there for a reason.
Not an Xcode tip, but something every programmer should take to heart: Compiler warnings are there for a reason. clang and swiftc are very, very good at catching common programming errors and violations of the coding conventions on which Cocoa relies. Many of the questions raised on support forums (see Appendix B, “Resources”) arise from novices ignoring warnings. Fix every warning. Then run the analyzer (Product →Analyze, ![]() B) and fix those, too.
B) and fix those, too.
![]() Xcode assumes that products built with the Run action (or Product →Build (
Xcode assumes that products built with the Run action (or Product →Build (![]() B), which is a synonym for Build for Running) are debugging articles and not fit for release to other users; and that Archive builds, which are fit for release, are comparatively rare. Xcode therefore does not take much trouble to make build product files easy to find.
B), which is a synonym for Build for Running) are debugging articles and not fit for release to other users; and that Archive builds, which are fit for release, are comparatively rare. Xcode therefore does not take much trouble to make build product files easy to find.
For archive builds, open the Archives organizer (Window →Organizer, second tab), select the archive, and click Export. . . ; you will have several options that will save an executable. The simplest are Export as a Mac Application or Save for iOS App Store Deployment.
For run builds, do the build, find the product in the Products group in the Project navigator, and choose Show in Finder in the contextual menu.
![]() In Chapter 25, “The Xcode Build System,” I said there is no way to change the set of files in a target, so if you have debug and release versions of a file, you can’t switch between them in the Debug and Release configurations of your target. As applied to libraries, this isn’t strictly true. The trick is to take the library out of the Link Binary With Libraries file, which will keep the build system from adding it to the linker command; and instead pass the name of the desired library in the “Other Linker Flags” (
In Chapter 25, “The Xcode Build System,” I said there is no way to change the set of files in a target, so if you have debug and release versions of a file, you can’t switch between them in the Debug and Release configurations of your target. As applied to libraries, this isn’t strictly true. The trick is to take the library out of the Link Binary With Libraries file, which will keep the build system from adding it to the linker command; and instead pass the name of the desired library in the “Other Linker Flags” (OTHER_LDFLAGS) build setting.
In the Build Settings tab of the Target editor, search for other to find the setting. Open the disclosure triangle next to it, double-click the value for the Debug configuration, and click the + button to add an item to the list. Add the library (suppose it’s named libmyname_debug.a) by typing -lmyname debug into the new row. Do the same, for the release version of the library, in the Release item.
At build time, those flags will be added to the command lines for linking, with either the name of the debug version or the release version, depending on the configuration.
![]() The linker has strong opinions on what libraries it should link into an executable. In particular, for OS X builds, it will always link dynamic libraries (
The linker has strong opinions on what libraries it should link into an executable. In particular, for OS X builds, it will always link dynamic libraries (.dylib) in preference to static libraries (.a). You can override this by making sure the full path to the .a appears in the link command line. Just add the full path to the library, including the suffix and the lib prefix, to the “Other Linker Flags” (OTHER_LDFLAGS) build setting. You can reduce the dependency on the file paths on your machine by using the BUILT_PRODUCTS_DIR build variable instead of the directory path.
![]() The optimization-setting flag for
The optimization-setting flag for clang—C-family languages, including Objective-C—goes in a progression from -O0 (none at all) to -O3 (everything). The temptation, when driving for the sleekest, whizziest application, is to turn the knob up full and let the optimizer fly. And yet the standard Release setting for optimization in Xcode is -Os—optimize for size. What’s going on?
The problem is that -O3 optimization can dramatically increase the size of the generated code: llvm will autonomously convert function calls to in-line code, so that the content of those functions will be repeated throughout the application. It will turn counted for loops into n iterations of the loop body, one after the other, because it’s quicker to run straight through four copies of the same code than to keep a counter, test it against four, and conditionally branch.
All of these optimizations are ingenious, but they can be short-sighted. Modern processors are much faster than the main memory buses that serve them; waiting for loads of data or program instructions can stall a processor for a substantial portion of time. Therefore, very fast cache memory is put between the processor and RAM, to make the instruction stream available at a pace that keeps up with the CPU. But cache sizes are limited. An application that has been doubled in size by unrolling and inlining everywhere will overrun the cache and hit RAM to fetch instructions at least twice as often. In the usual case, “faster” code runs more slowly than smaller code. Keep the Release configuration at -Os.
Note
Swift’s optimization options are different, running from -Onone to -Ofast to -Ounchecked. The Swift compiler has no legacy of uncached CPUs to accommodate; -Ofast is roughly equivalent to -Os in clang, plus runtime safety checks.
![]() For Objective-C,
For Objective-C, clang is diligent about policing memory-management practices and API deprecations. Use a deprecated method, pass a @selector with retain/release semantics clang can’t guess, or use a string variable for a format string, and you will be warned.
Fine, but sometimes you know what you’re doing, and you don’t want to be harried by warnings you have soberly decided are nothing to worry about. clang selects the warnings it gives through command-line flags like -Wdeprecated for deprecated methods.
![]() You could suppress the deprecation warning for the whole target by searching for it in the build settings and turning it off. You probably don’t want to do this: You’re doing this upon sober reflection on the warnings you got, right? You’ll want to know when other deprecations arise that you do care about.
You could suppress the deprecation warning for the whole target by searching for it in the build settings and turning it off. You probably don’t want to do this: You’re doing this upon sober reflection on the warnings you got, right? You’ll want to know when other deprecations arise that you do care about.
![]() You can turn the warning off for just one file. Find it in the table in the Compile Sources build phase, and double-click on its row. You’ll get a popover in which you can enter compiler flags for just that file—in this case
You can turn the warning off for just one file. Find it in the table in the Compile Sources build phase, and double-click on its row. You’ll get a popover in which you can enter compiler flags for just that file—in this case -Wno-deprecated. This is finer-grained, but usually unwise.
![]() You can isolate the lines that concern you: Bracket it with
You can isolate the lines that concern you: Bracket it with #pragmas that save clang’s warning state, tell it to ignore deprecations, and then restore the warning after the problem line:
#pragma mark -UISearchDisplayContollerDelegate
#pragma clang diagnostic push
#pragma clang diagnostic ignored "-Wdeprecated"
// UISearchDisplayController is deprecated in iOS 8.
// Low priority; won't fix for now.
-(BOOL)searchDisplayController:
(UISearchDisplayController *)controller
shouldReloadTableForSearchString:(NSString *)searchString
{
// ...
}
#pragma diagnostic pop
Traps
Development is hard. Therefore Xcode is hard, both because it has to do a lot, and because any application that has to do a lot is subject to bugs and annoyances. Here are a few things to watch out for.
![]() In most OS X apps that edit documents, the title bar includes a “proxy icon” that stands for the document file. You can drag and drop it with the same effect as if you had dragged the document icon from the Finder. If you control- or command-click in the title, a menu of the directory chain to the document drops down. Selecting an item opens it in the Finder.
In most OS X apps that edit documents, the title bar includes a “proxy icon” that stands for the document file. You can drag and drop it with the same effect as if you had dragged the document icon from the Finder. If you control- or command-click in the title, a menu of the directory chain to the document drops down. Selecting an item opens it in the Finder.
Xcode moves its entire toolbar into the title-bar space, so there’s no room for the filename or proxy icon. When a file is displayed in one of the editor views, its item in the jump bar behaves just as the proxy and title do in regular windows.
![]() When you remove an @
When you remove an @IBOutlet from your source, clang and Swift react immediately, flagging errors and warnings on all references in your project—except for outlet connections in your XIBs and storyboards. You won’t hear of it until the NIB loader starts throwing exceptions that say the target object “is not key-value coding compliant” for the missing outlet name. As soon as you change an outlet (or an @IBAction), audit the related objects in Interface Builder. Most of these will be in File’s Owner or the view controller; select it and look in the Connection (sixth) inspector for orphaned connections.
If you’re just changing the name of an Objective-C outlet, use Edit →Refactor → Rename. . . . The refactoring mechanism will change the IB documents accurately and safely.
![]() In the name of simplicity, Xcode presents a bare search field for in-document search. There are options to be had. The magnifying-glass icon at the left end of the search field anchors a drop-down menu, and the first item is Show Find Options. . .. Selecting it gets you a popover presenting options for case sensitivity; prefix, suffix, partial, or whole-word matching for text; or regular expressions.
In the name of simplicity, Xcode presents a bare search field for in-document search. There are options to be had. The magnifying-glass icon at the left end of the search field anchors a drop-down menu, and the first item is Show Find Options. . .. Selecting it gets you a popover presenting options for case sensitivity; prefix, suffix, partial, or whole-word matching for text; or regular expressions.
Clicking anywhere else—such as to execute the search—makes the popover disappear. There is now no visible indication of what the next search will do. Your selections will persist, and you are expected either to remember them or to click on the tiny magnifying glass and select an item in a miniaturized menu. If your in-file searches yield surprising results, check the settings.
If the results are surprising, but you don’t know they are (if you knew what was in the file, you wouldn’t need to search it), and you ship a bug because of it, that’s too bad. But you got to use an uncluttered search field.
![]() Traditional regular-expression engines use & in replacement fields to stand for the full string that matched the search expression. Xcode uses $0 instead.
Traditional regular-expression engines use & in replacement fields to stand for the full string that matched the search expression. Xcode uses $0 instead.
![]() One big gap in Xcode’s version-control support is tags. When your work comes to a significant milestone, like a version release, you’ll want to mark the revision with a name that will allow you to return the project to that point. All version-control systems allow for this. Xcode won’t set, display, or revert to tags. You’ll have to go to the command line and use the
One big gap in Xcode’s version-control support is tags. When your work comes to a significant milestone, like a version release, you’ll want to mark the revision with a name that will allow you to return the project to that point. All version-control systems allow for this. Xcode won’t set, display, or revert to tags. You’ll have to go to the command line and use the git tag or svn cp subcommands.
![]() If you look in the AppleScript Editor application for the Xcode dictionary, you’ll see what purports to be an extensive scripting interface that you could use, for instance, to create and configure Xcode projects programmatically. It might disquiet you to see many references to Xcode 3. Experiment, if you’d like—some of the commands perform as promised. Most do not.
If you look in the AppleScript Editor application for the Xcode dictionary, you’ll see what purports to be an extensive scripting interface that you could use, for instance, to create and configure Xcode projects programmatically. It might disquiet you to see many references to Xcode 3. Experiment, if you’d like—some of the commands perform as promised. Most do not.
![]() However: You can script Xcode for things like text transformations—say, to generate documentation comments from a function declaration. OS X, and NeXTStep before it, features services, filters and utilities you can find in the Services submenu of an application menu, or in contextual menus. Services are sensitive to the current selection—OS X knows to offer a text-based service only when text is selected—and can replace the selection with the output of the service tool.
However: You can script Xcode for things like text transformations—say, to generate documentation comments from a function declaration. OS X, and NeXTStep before it, features services, filters and utilities you can find in the Services submenu of an application menu, or in contextual menus. Services are sensitive to the current selection—OS X knows to offer a text-based service only when text is selected—and can replace the selection with the output of the service tool.
The Automator feature of OS X produces applets from chains of scripts and services; you can use Automator to create a service. The editor is in /Applications/Utilities. Create a document, and select the Service type. Browse the Library sidebar to see the actions the system and your applications offer you.
An example: Swift, like C++, achieves its symbol-overloading and namespacing features by identifying objects internally with names derived from a full description of their scope and attributes. The compiled binaries are full of identifiers like _TFC17Mac_Passer_Rating20LeagueViewControllerm19teamArrayControllerGSQCSo17NSArrayController_.
![]() Set the context to Service receives selected (text) in (any application).
Set the context to Service receives selected (text) in (any application).
![]() Drag the “Run Shell Script” tile from the Library list.
Drag the “Run Shell Script” tile from the Library list.
![]() Set Pass input: (to stdin), so the selected text will go as an input stream into the script.
Set Pass input: (to stdin), so the selected text will go as an input stream into the script.
![]() Enter xcrun swift-demangle -compact as the script.
Enter xcrun swift-demangle -compact as the script.
![]() Drag the “Copy to Clipboard” tile under the script tile, so that the connectors mate.
Drag the “Copy to Clipboard” tile under the script tile, so that the connectors mate.
![]() Save the Service under some convenient name like Demangle Swift Symbol (there will be no file location associated with it—it goes into a directory reserved for Automator services).
Save the Service under some convenient name like Demangle Swift Symbol (there will be no file location associated with it—it goes into a directory reserved for Automator services).
![]() Quit and reopen any application (such as Xcode) you want to use the service.
Quit and reopen any application (such as Xcode) you want to use the service.
![]() Select the symbol, and Xcode →Services →Demangle Swift Symbol (or the same, from the Services submenu of the contextual menu).
Select the symbol, and Xcode →Services →Demangle Swift Symbol (or the same, from the Services submenu of the contextual menu).
![]() Paste. The result should be
Paste. The result should be Mac_Passer_Rating.LeagueViewController.teamArrayController.materializeForSet : ObjectiveC.NSArrayController!.
![]() You can give your action a system-wide hot key in the Keyboard panel of System Preferences.
You can give your action a system-wide hot key in the Keyboard panel of System Preferences.
![]() Most of the targets you’ll build with Xcode will be bundles that include an
Most of the targets you’ll build with Xcode will be bundles that include an Info.plist that the build system will process and install in the final product. By misadventure, this file might find its way into the target’s Copy Bundle Resources build phase. That conflicts with the build system. Xcode will warn you if it sees this happening in a build.
![]() In general, source files should not end up in the Copy Bundle Resources phase. This can happen if you check the box that assigns a C-family
In general, source files should not end up in the Copy Bundle Resources phase. This can happen if you check the box that assigns a C-family .h file to a target. This isn’t necessary to build the product; the compiler will find and interpret the header on its own. Xcode interprets your adding the target membership as meaning you want to treat the file as a bundle resource.
![]() You can’t have a XIB or storyboard open in more than one editor. Interface Builder products are literal archives of Cocoa objects. Concurrent access to an object network is a tremendous headache, and I don’t blame Apple for allocating its resources elsewhere.
You can’t have a XIB or storyboard open in more than one editor. Interface Builder products are literal archives of Cocoa objects. Concurrent access to an object network is a tremendous headache, and I don’t blame Apple for allocating its resources elsewhere.
![]() When you drag an
When you drag an NSTextView into a view in Interface Builder, you’re really dragging the NSTextView inside an NSScrollView and the clipping view that comes between them. (You saw the same thing in Chapter 20, “Bindings: Wiring an OS X Application” with NSTableView.) If you attempt to connect an outlet to the text view, you may end up connecting to the scroll view (or to nothing, if your outlet is typed to accept only a text view).
The problem is that the scroll view can be larger than the text view; the text view is only as tall as the text it contains. Add some “Lorem ipsum” text to the view, drag the connector to that, and you’ll connect to the text view.
![]() Being a dynamic language, the Objective-C compiler allows any object to receive any message. Implementations may be completely unrelated; all the compiler has to do is load the receiver, the selector, and the parameters onto the stack and call for the message to be dispatched.
Being a dynamic language, the Objective-C compiler allows any object to receive any message. Implementations may be completely unrelated; all the compiler has to do is load the receiver, the selector, and the parameters onto the stack and call for the message to be dispatched.
Note
Swift’s AnyObject type affords the same flexibility, but it won’t let you send the object a message until you cast it to a class or prototype that implements the method—which pins down the return type, and eliminates this problem.
This works well, but the ideal breaks down with the return value: It might be an integer, a float, a pointer, or a struct, and depending on the processor architecture, those results may be stored in completely different locations. The compiler has to generate the instructions to take the result from the correct place.
Things are still fine if all implementations of methods with a given signature return the same result type; so long as the compiler has seen some declaration of the method, it can proceed. Even if the compiler has seen declarations of different return types, it can still do the right thing if the receiving object’s class is known.
Where it breaks down is when the receiver is declared to be id or Class, and so provides no indication of what methods it implements or how they return. In the past, the compiler would silently guess what return type you expect, an abundant source of obscure bugs. clang now demands that you use a cast on the receiver of the method call to remove the ambiguity.
![]() HFS+, the recommended filesystem for OS X, is case preserving—files will get names in the same case as you provide—but case insensitive:
HFS+, the recommended filesystem for OS X, is case preserving—files will get names in the same case as you provide—but case insensitive: Xcode.txt, XCODE.TXT, and xcode.txt all refer to the same file. Most other Unix variants are case sensitive, so if you import code, be on the lookout for the assumption that the following two lines refer to different files:
#include "polishShoes.h"
#include "PolishShoes.h"
By the same token, make sure that your code uses filenames with consistent letter casing. Even if you don’t expect to port your work, HFS+ isn’t the only filesystem a Macintosh application sees, and on iOS, HFS+ is case sensitive. But: The iOS Simulator runs on the OS X filesystem. On the “iOS” that runs in the simulator, HFS+ is not case sensitive.