
Open Xcode and, from the File menu, select New → Project.... (If Xcode opens to a welcome screen, select Create a new Xcode project.)
A new workspace window will appear and a sheet will slide down from its toolbar. At the top, find the iOS section and then the Application area (Figure 1.2). You are offered several application templates to choose from. Select Single View App.
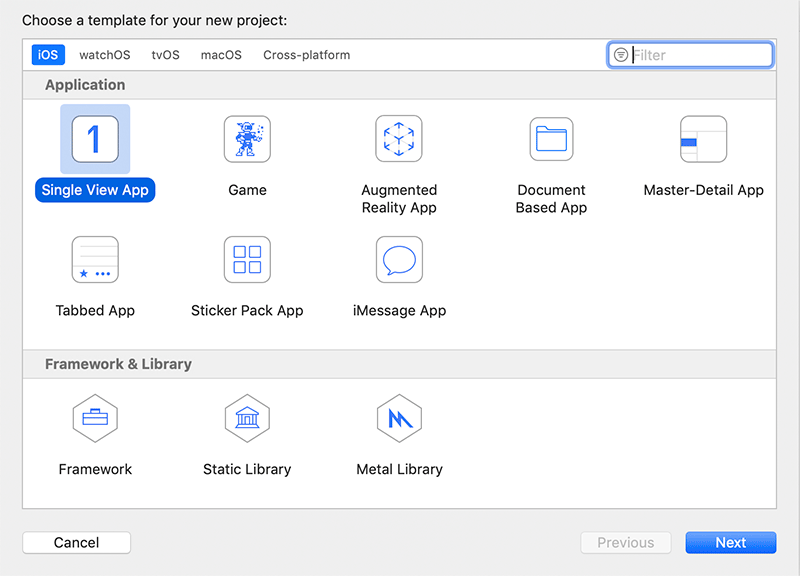
This book was created for Xcode 11.4. The names of these templates may change with new Xcode releases. If you do not see a Single View App template, use the simplest-sounding template. You can also visit the Big Nerd Ranch forum for this book at forums.bignerdranch.com for help working with newer versions of Xcode.
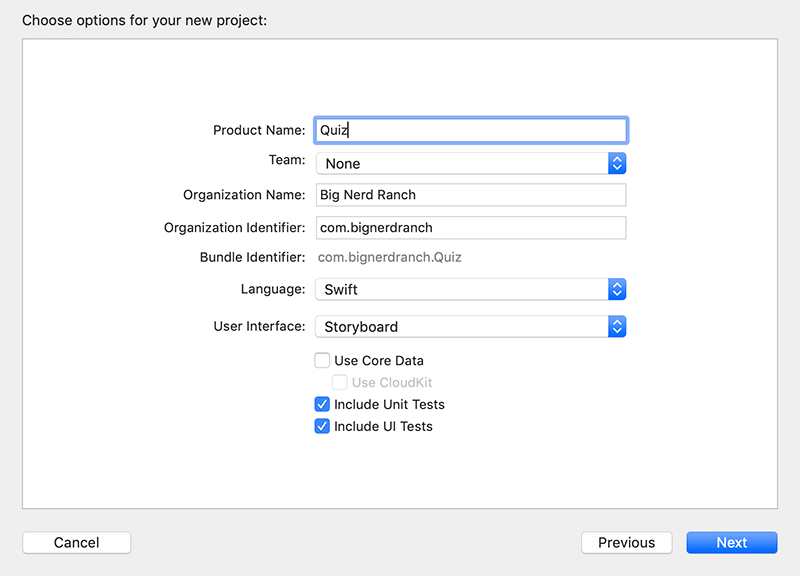
Click Next and, in the next sheet, enter Quiz for the Product Name (Figure 1.3).
The organization name and identifier are required to continue.
You can use Big Nerd Ranch or any organization name you would like.
For the organization identifier, you can use com.bignerdranch or com.yourcompany.
From the Language pop-up menu, choose Swift, and from the User Interface, choose Storyboard. Make sure that the Use Core Data checkbox is not checked.
Click Next and, in the final sheet, save the project in the directory where you plan to store the exercises in this book. Click Create to create the Quiz project.
Your new project opens in the Xcode workspace window (Figure 1.4).

The lefthand side of the workspace window is the navigator area. This area displays different navigators – tools that show you different parts of your project. You can open a navigator by selecting one of the icons in the navigator selector, which is the bar at the top of the navigator area.
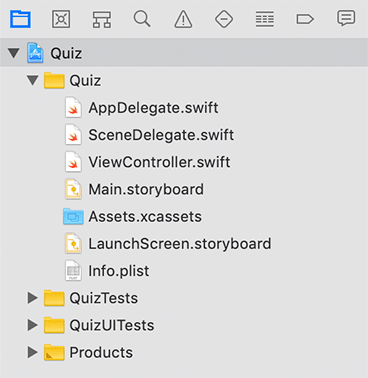
The navigator currently open is the project navigator. The project navigator shows you the files that make up a project (Figure 1.5). You can select one of these files to open and work with it in the editor area to the right of the navigator area.
The files in the project navigator can be grouped into folders to help you organize your project. A few groups have been created by the template for you. You can rename them, if you want, or add new ones.
The righthand side of the workspace window is the inspector area, which you will learn about later in this chapter.