
View controllers become more interesting when the user has a way to switch between them. Throughout this book, you will learn a number of ways to present view controllers. In this chapter, you will create a UITabBarController that will allow the user to swap between the UIViewController displaying the conversion labels and the UIViewController displaying the map.
UITabBarController keeps an array of view controllers. It also maintains a tab bar at the bottom of the screen with a tab for each view controller in its array. Tapping on a tab presents the view of the view controller associated with that tab.
Open Main.storyboard and select the map view controller. From Xcode’s Editor menu, choose Embed In → Tab Bar Controller. This will add the map view controller to the view controllers array of a new tab bar controller. You can see this represented by the relationship arrow pointing from the Tab Bar Controller on the canvas to the View Controller (Figure 4.7). Additionally, Interface Builder knows to make the tab bar controller the initial view controller for the storyboard.

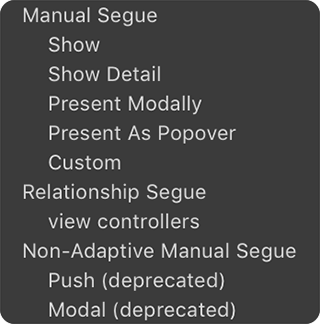
A tab bar controller is not very useful with just one view controller. Add the temperature conversion View Controller to the Tab Bar Controller’s view controllers array: Control-drag from the Tab Bar Controller to the View Controller with the temperature conversion labels. From the Relationship Segue section in the panel that appears, choose view controllers (Figure 4.8).
Build and run the application. Tap on the two tabs at the bottom to switch between the two view controllers. At the moment, the tabs just say Item, which is not very helpful. In the next section, you will update the tab bar items to make the tabs more descriptive.
UITabBarController is itself a subclass of UIViewController. A UITabBarController’s view is a UIView with two primary subviews: the tab bar and the view of the selected view controller (Figure 4.9).

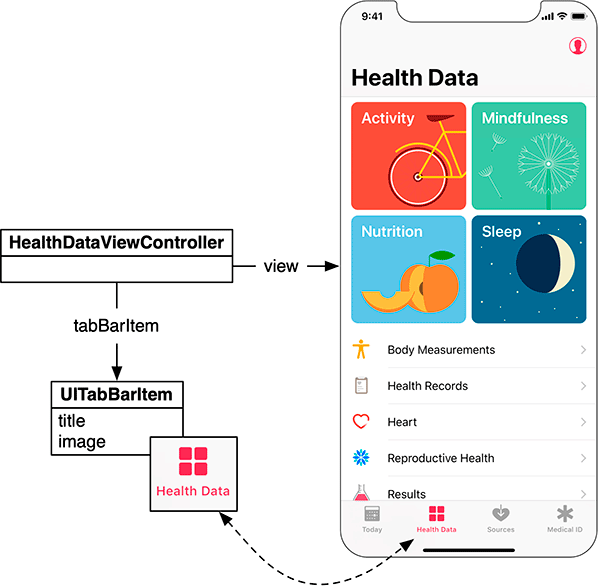
Each tab on the tab bar can display a title and an image, and each view controller maintains a tabBarItem property for this purpose. When a view controller is contained by a UITabBarController, its tab bar item appears in the tab bar. Figure 4.10 shows an example of this relationship in iPhone’s Health application.
To make WorldTrotter’s tab bar more useful, you need to add a few image files to your project for the tab bar items. In the project navigator, open the Asset Catalog by opening Assets.xcassets.
An asset is a set of files from which a single file will be selected at runtime based on the user’s device configuration (more on that at the end of this chapter). You are going to add a ConvertIcon asset and a MapIcon asset, each with images at two different resolutions.
In Finder, locate the 0 - Resources directory of the file that you downloaded earlier. (www.bignerdranch.com/solutions/iOSProgramming7ed.zip). Find [email protected], [email protected], [email protected], and [email protected]. Drag these files into the images set list on the left side of the Asset Catalog (Figure 4.11).

The tab bar item properties can be set either programmatically or in a storyboard. Because you are configuring the WorldTrotter application flow using a storyboard, that will be the easiest place to set the tab bar item properties.
In Main.storyboard, locate the map view controller (it is now labeled Item). Notice that a tab bar with the tab bar item in it has been added to the interface, because the view controller will be presented within a tab bar controller. This is very useful when laying out your interface.
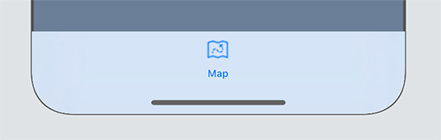
Select this tab bar item and open its attributes inspector. In the Bar Item section, change the Title to Map and choose MapIcon from the Image menu. You can also change the text of the tab bar item by double-clicking on the text on the canvas. The tab bar will be updated to reflect these values (Figure 4.12).
Now find the temperature conversion view controller and select its tab bar item. Set the Title to be Convert and the Image to be ConvertIcon.
Let’s also change the first tab to be the temperature conversion View Controller. The order of the tabs is determined by the order of the view controllers within the tab bar controller’s viewControllers array. You can change the order in a storyboard by dragging the tabs at the bottom of the Tab Bar Controller.
Find the Tab Bar Controller on the canvas. Drag the Convert tab to be in the first position.
Build and run the application. The temperature conversion view controller is now the first view controller that is displayed, and the tab bar items at the bottom are more descriptive (Figure 4.13).
