
In this section, you are going to add functionality to allow a user to navigate to and display a single photo.
Create a new Swift file named PhotoInfoViewController, declare the PhotoInfoViewController class, and add an imageView outlet.
Listing 21.16 Creating the PhotoInfoViewController class (PhotoInfoViewController.swift)
import Foundationimport UIKit class PhotoInfoViewController: UIViewController { @IBOutlet var imageView: UIImageView! }
Now set up the interface for this view controller. Open Main.storyboard and drag a new View Controller onto the canvas from the library. With this view controller selected, open its identity inspector and change the Class to PhotoInfoViewController.
Add an image view to the Photo Info View Controller’s view. Set up its Auto Layout constraints to pin the image view to all four sides of the safe area. Open the attributes inspector for the image view and confirm that its Content Mode is set to Aspect Fit. Finally, connect the image view to the imageView outlet in the PhotoInfoViewController.
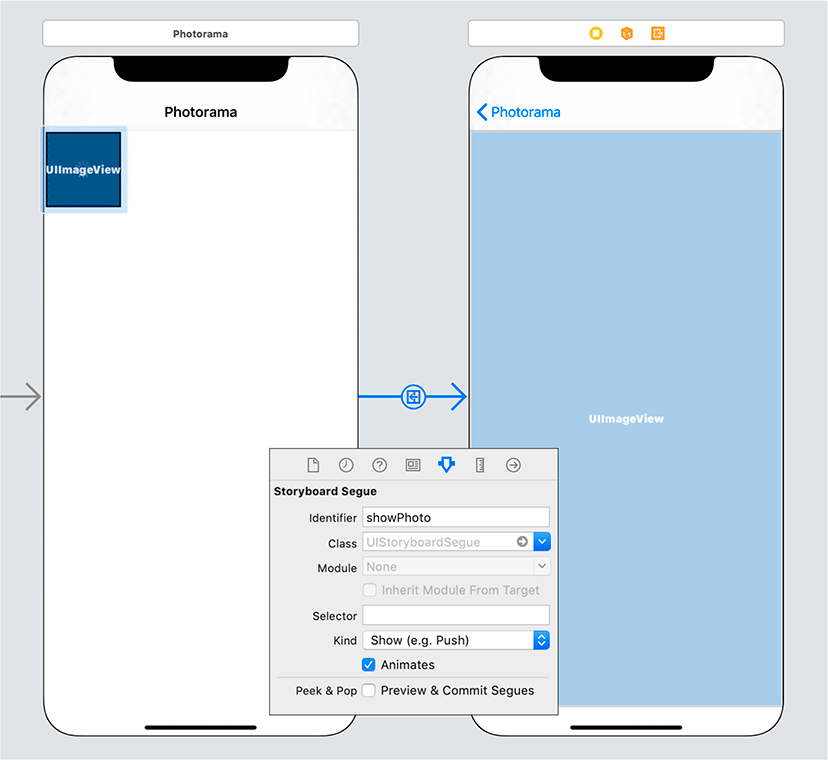
When the user taps on one of the collection view cells, the application will navigate to this new view controller. Control-drag from the PhotoCollectionViewCell to the Photo Info View Controller and select the Show segue. With the new segue selected, open its attributes inspector and give the segue an Identifier of showPhoto (Figure 21.13).
When the user taps a cell, the showPhoto segue will be triggered. At this point, the PhotosViewController will need to pass both the Photo and the PhotoStore to the PhotoInfoViewController.
Open PhotoInfoViewController.swift and add two properties.
Listing 21.17 Adding a Photo property (PhotoInfoViewController.swift)
class PhotoInfoViewController: UIViewController {

    @IBOutlet var imageView: UIImageView!

    var photo: Photo! {
        didSet {
            navigationItem.title = photo.title
        }
    }
    var store: PhotoStore!
}
When photo is set on this view controller, the navigation item will be updated to display the name of the photo.
Now override viewDidLoad() to set the image on the imageView when the view is loaded.
Listing 21.18 Updating the interface with the photo (PhotoInfoViewController.swift)
override func viewDidLoad() {
    super.viewDidLoad()

    store.fetchImage(for: photo) { (result) -> Void in
        switch result {
        case let .success(image):
            self.imageView.image = image
        case let .failure(error):
            print("Error fetching image for photo: (error)")
        }
    }
}
In PhotosViewController.swift, implement prepare(for:sender:) to pass along the photo and the store.
Listing 21.19 Injecting the photo and store (PhotosViewController.swift)
override func prepare(for segue: UIStoryboardSegue, sender: Any?) {
    switch segue.identifier {
    case "showPhoto":
        if let selectedIndexPath =
                collectionView.indexPathsForSelectedItems?.first {

            let photo = photoDataSource.photos[selectedIndexPath.row]

            let destinationVC = segue.destination as! PhotoInfoViewController
            destinationVC.photo = photo
            destinationVC.store = store
        }
    default:
        preconditionFailure("Unexpected segue identifier.")
    }
}
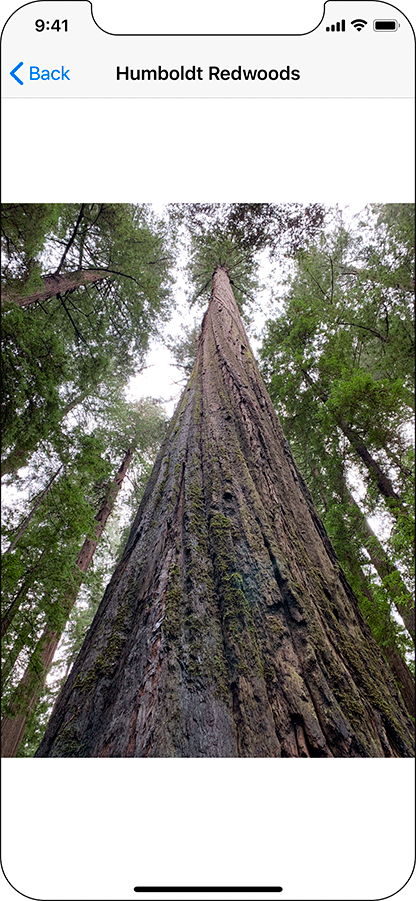
Build and run the application. After the web service request has finished, tap one of the photos to see it in the new view controller (Figure 21.14).
Collection views are a powerful way to display data using a flexible layout. You have just barely tapped into the power of collection views in this chapter. See Apple’s guide on Customizing Collection View Layouts to learn more.