5. Selections
In This Chapter
Because so much of what we do in Photo- shop starts with a selection, using the Selection tools is a fundamental Photoshop skill. A selection isolates one or more parts of your image for manipulation while leaving the unselected areas untouched. Making a selection is a means to an end and not the end itself. Once you’ve made a selection, it exists as potential for how you can alter the image.
There are several ways to make selections, using tools and menus. Every selection method has its pros and cons. None will work in every instance. The key is knowing when to choose one tool, or combination of tools, over another.
Marquee Tools
These tools let you select rectangular and elliptical shapes. You can also select 1-pixel-wide rows and columns.
To make a rectangular or elliptical selection:
Click the layer you want to target.
Click and hold the current Marquee tool (M) (FIGURE 5.1), then choose Rectangular Marquee Tool to make rectangular selections, or Elliptical Marquee Tool to make elliptical selections.
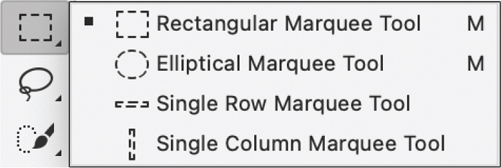
FIGURE 5.1 The Marquee tools
(Optional) On the Options bar, adjust the Feather and Anti-alias settings (see Chapter 3).
For the Style setting, choose Normal (FIGURE 5.2). You will control the marquee size and proportions by dragging.

FIGURE 5.2 Options for the Elliptical Marquee tool
Drag diagonally over the area you want to select. For a square or circle, hold Shift while you drag (FIGURE 5.3).
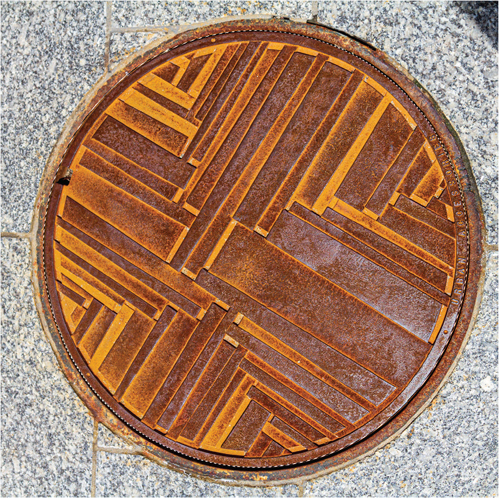
FIGURE 5.3 Use the Elliptical Marquee tool (holding Alt/Option to draw from the center) to make selections of circular or oval subjects.
Tip
Hold Alt/Option to draw a rectangular or elliptical selection from the center.
Tip
For more precision than dragging, set Style to Fixed Ratio and specify a height-to-width Fixed Ratio or Fixed Size and specify the marquee’s height and width. Then, click and drag over the canvas area you want to select.
Tip
When using Fixed Ratio or Fixed Size, click the arrows icon (![]() ) to swap the width and height values.
) to swap the width and height values.
 Video 5.1
Making Marquee Selections
To select a single row or column of pixels:
Practical uses of the single row or single column marquee tools are few and far between, and you may have a long and illustrious Photoshop career without ever using them, but here’s a fun case study that can result in a pleasing abstract image.
Click the layer you want to target.
Choose either the Single Row or Single Column Marquee tool.
Click anywhere on the canvas to make the selection.
Copy the selection to a new layer (Ctrl/Command+J).
Choose Edit > Free Transform, and stretch the pixels across the whole canvas (FIGURE 5.4).

FIGURE 5.4 In this example, a single column of pixels is selected (from the center of the image), and then transformed to create an abstract image.
Lasso Tools
The Lasso comes in three flavors: “regular,” Polygonal, and Magnetic (FIGURE 5.5).
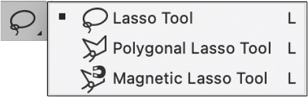
FIGURE 5.5 The Lasso tools
Use the Lasso tool to make loose selections or to refine selections made with other tools, such as the Magic Wand or Quick Selection tool. Use the Polygonal Lasso tool to select a straight-sided subject. Working with a pressure sensitive tablet, it’s possible to make accurate freeform selections with the Lasso tool; working with a mouse or trackpad, it’s best to restrict the tool to making loose selections or to clean up rough selections (Figure 5.6). As for the Magnetic Lasso, which snaps to a selection edge, we never use it — everything it does can be done more easily with other selection tools.
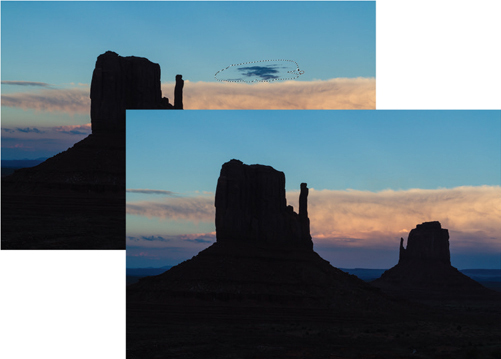
FIGURE 5.6 Use the Lasso tool to make rough selections, such as this free-form lasso selection around the dark clouds in preparation for removing them with Content-Aware Fill (see Chapter 13).
To make freeform selections:
Select the layer on which you want to make the selection.
Select the Lasso tool (L or Shift+L).
(Optional) Set values for Feather and Anti-alias on the Options bar.
Drag around an area on the layer. When you release the drag, the open ends of the selection join automatically.
(Optional) To add to the selection, Shift-drag around the area to be added.
(Optional) To subtract from the selection, Alt/Option-drag around the area to be removed.
Video 5.2
Making Lasso Selections
To make straight-sided selections:
Select the Polygonal Lasso tool (L or Shift+L).
Click to create straight-sided segments.
To close the selection, position the cursor over the starting point and click when a closed circle appears beside the cursor (FIGURE 5.7). Alternatively, you can simply release the mouse.
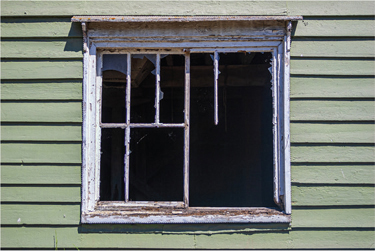
FIGURE 5.7 The Polygonal Lasso tool is a good choice for selecting straight-sided subjects.
Tip
Toggle between the Lasso tool and the Polygonal Lasso by holding Alt/Option.
Tip
To constrain the selection to multiples of 45°, hold Shift while clicking.
Tip
To delete the last segment while using the Polygonal Lasso tool, press Backspace/Delete.
Automated Selection Tools
The automated selection tools—Magic Wand, Quick Selection, and Object Selection—share the same tool space and single-key shortcut (W). Before making a manual selection, it’s worth trying these tools first. Even if they don’t make a perfect selection, they usually give you a starting point.
Magic Wand
The Magic Wand has been a part of Photoshop from the very beginning, and since that time it has been responsible for the selection of more than a gazillion pixels. With the Magic Wand tool, you can click on an area of the image to select all adjacent pixels of the same (or a similar) shade or color.
It’s intuitive, and it really does feel like magic—when it works. The thing is, it won’t always work. Don’t let your Magic Wand become a Tragic Wand. If it ain’t working, try another tool. There may be easier, faster, ways that result in better quality selections.
Video 5.3
Making a Magic Wand Selection
To make a selection with the Magic Wand tool:
Select the Magic Wand tool (W or Shift+W).
Set the Sample Size (the number of pixels the Magic Wand should evaluate) in the Options bar. To avoid sampling an errant, non-representative pixel color, rather than use Point Sample, choose 3 By 3 Average or 5 By 5 Average (FIGURE 5.8).
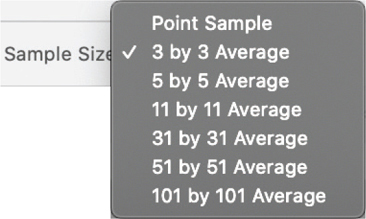
FIGURE 5.8 The Sample Size options
On the Options bar, set the Tolerance, which determines how similar in tone or color the other pixels need to be in order to be selected. A higher number results in a bigger selection; the default value is 32 (FIGURE 5.9).

FIGURE 5.9 The results of clicking on the poppy with the Magic Wand with Tolerance set to 32 (left) and 64 (right).
Still on the Options bar, turn on the Anti-alias option, which creates a smoother-edged selection—and is nearly always a good idea.
(Optional) Turn on the Contiguous option on the Options bar. With Contiguous checked, the Magic Wand selects only adjacent pixels of the same brightness. When not checked, all pixels in the image with the same brightness values are selected (FIGURE 5.10).
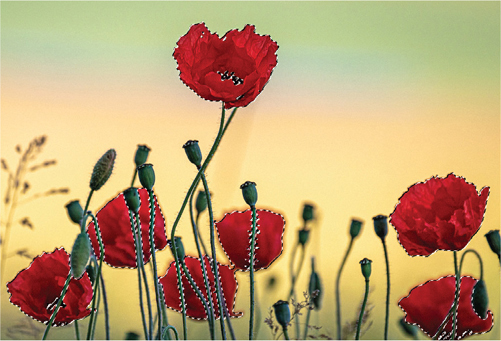
FIGURE 5.10 Using the Magic Wand with Contiguous not selected, results in all similar colors in the image being selected.
Click on a representative area of the image to make a selection with the Magic Wand.
Tip
To select similar colors on all visible layers, turn on the Sample All Layers option on the Options bar. To select colors on just the current layer, make sure this option is off.
Video 5.4
Making a Quick Selection
Quick Selection tool
The Quick Selection tool lets you “paint” a selection using an adjustable elliptical brush. As you drag, the selection expands outward, automatically finding the defined edges in the image.
To make a selection with the Quick Selection tool:
Select the Quick Selection tool (W or Shift+W).
On the Options bar, choose New to make an initial selection, Add To to add to an existing selection, or Subtract From to remove areas from an existing selection.
(Optional) To change the brush options for the Quick Selection tool, click the Brush Options on the Options bar (FIGURE 5.11).
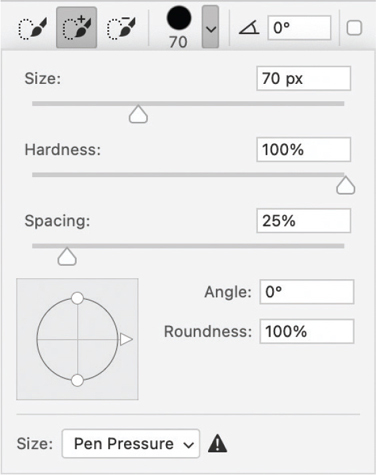
FIGURE 5.11 The Brush options for the Quick Selection tool
Turn on the Enhance Edge option to create a smoother selection edge (FIGURE 5.12). We’ve never found a reason not to use this.

FIGURE 5.12 Quick Selection tools
Drag over the part of the image you want to select (FIGURE 5.13).
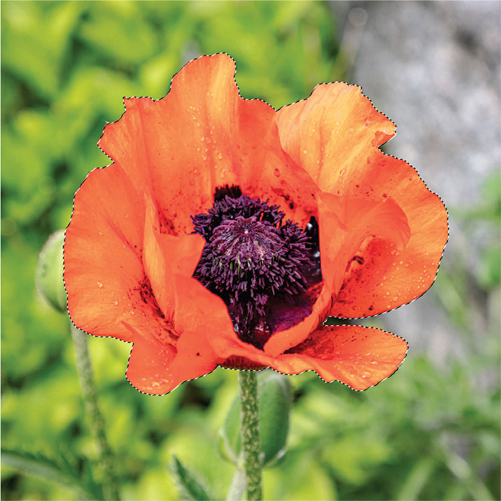
FIGURE 5.13 The Quick Selection tool makes easy work of this kind of selection because the edges are well defined against the background.
Tip
To subtract from a selection, toggle to Subtract mode by holding Alt/Option, then drag over the existing selection.
Tip
Both the Add and Subtract modes help “teach” the Quick Selection tool what to pay attention to when finding edges. In some cases edge detection can improve by not just dragging within the subject in Add mode, but also by dragging outside the subject in Subtract mode.
Tip
To quickly change the brush size or hardness, press the Right Bracket (]) key to increase the brush size or the Left Bracket ([) key to decrease the brush size. Press Shift+] to increase the hardness or Shift+[ to decrease hardness.
Tip
To factor in the pixels on all layers, rather than just the currently selected layer, turn on Sample All Layers before painting your selection.
Object Selection tool
The Object Selection tool, the newest of the automated selection tools, makes selecting one or more objects in an image easier and is an efficient way to create a starting point for a more accurate selection.
To make a selection with the Object Selection tool using the Object Finder:
Turn on the Object Finder option on the Options bar; the Object Selection tool automatically finds objects in your image (FIGURE 5.14).

FIGURE 5.14 Turn on Object Finder to automatically identify objects in the image.
Highlight an object by hovering your cursor over it. A color overlay (blue by default) will indicate the found objects (FIGURE 5.15).
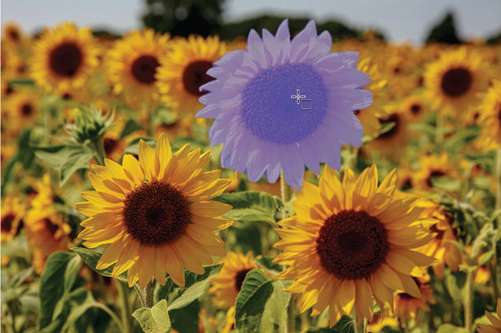
FIGURE 5.15 Using artificial intelligence, Object Finder detects the objects in the image. When the cursor hovers over the sunflower, it shows a colored overlay.
Click the object to instantly select it.
Tip
To add to the selection, hold Shift and click on another object.
Tip
To subtract a currently selected object, hold Alt/Option and click on the object.
As great as the Object Finder is, there will be times when it doesn’t know exactly what you want. For example, using the same image, to select just the center of the sunflowers, we need to be more specific. You can make the selections yourself in either Rectangle or Lasso mode. Drag to draw a rectangle or freeform area to select the object inside the defined region. Once the selection has been made, as well as marching ants, a color overlay appears when you move inside the selected area(s).
To make a selection with the Object Selection tool without Object Finder:
Select the Object Selection tool.
Choose the mode (Rectangular or Marquee).
For a sharper edge, choose the Hard Edge option.
To include pixels from all layers in the selection, choose Sample All Layers.
Draw a marquee over the object you want to select (FIGURE 5.16).
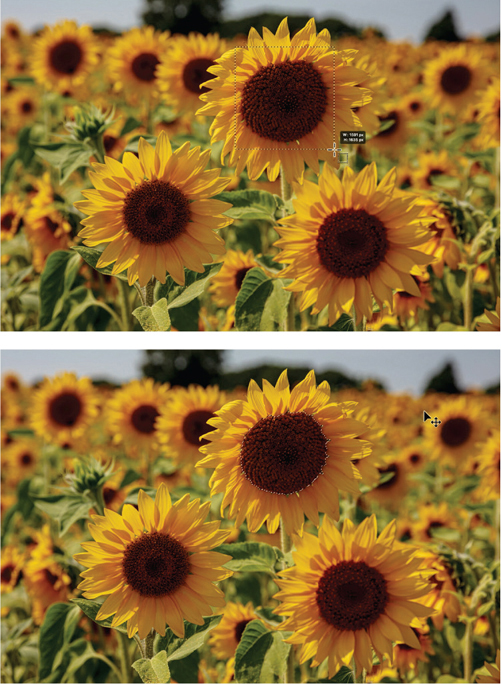
FIGURE 5.16 Using the Object Selection tool in Rectangular mode, a selection is dragged over the center of the flower. The Object Selection tool finds the object within the selection area.
If you need to refine your first selection, you can switch modes (between Rectangular and Lasso) and use the Object Selection tool in Add, Subtract, or Intersect mode. See “Working with Selections.”
Video 5.5
Making an Object Selection
Deselecting and Reselecting Selections
What goes up must come down and what gets selected must also be deselected. If you plan on using the selection again, you can save it, so that you don’t need to repeat steps—but we’ll get to that in Chapter 8.
To deselect selections:
Do one of the following:
Choose Select > Deselect (Ctrl /Command+D).
Right-click and choose Deselect.
Or, if you’re using the Rectangle Marquee tool, the Elliptical Marquee tool, or the Lasso tool, click anywhere in the image outside the selected area.
Tip
Perhaps the number one reason for Photoshop not behaving the way you expect is that you have a forgotten or hidden selection—even a tiny one. This can flummox even advanced users. As a first troubleshooting step, choose Select > Deselect (Ctrl/Command+D) to see if that fixes the problem.
Offering more than just a simple undo, Photoshop will remember your last selection, and you can recall this selection even after you’ve done other things to the image.
To reselect the most recent selection:
Do one of the following:
Choose Select > Reselect (Ctrl+Shift+D/Command+Shift+D).
Click the selection step in the History panel.
Working with Selections
Having looked at some basic ways of making selections, let’s turn our attention to some ways in which you can modify those selections. You can transform selections, move them, hide their edges, add to or subtract from them in various ways, copy them to another document, and more.
If you need to make minor tweaks to the shape of a selection, then Transform Selection is a useful tool. Note that this changes the selection outline only, not the contents of the selection.
To transform a selection:
With a selection active, choose Select > Transform Selection.
Pull on any other transform handles to reshape the selection (FIGURE 5.18).
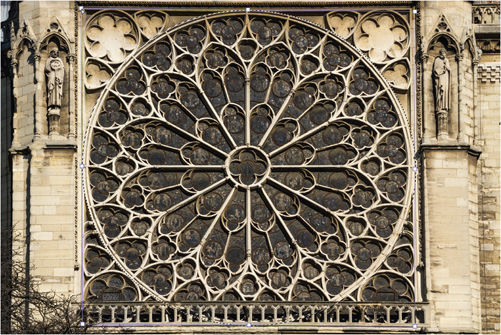
FIGURE 5.18 Distorting an elliptical selection using Transform Selection.
Tip
To distort a selection, hold Ctrl/Command while dragging a transform handle.
Tip
To transform a selection from the center, hold Alt/Option while dragging a transform handle.
Tip
To change the contents of a selection, choose a command from the Edit > Transform submenu instead of choosing Select > Transform Selection.
To move a selection edge:
Select any selection tool (except Quick Selection or Object Selection).
Position the cursor inside the selection and drag.
Tip
To move a selection while drawing it, keep the mouse button down, then hold the spacebar.
Tip
To constrain the move direction to multiples of 45°, begin dragging, and then hold Shift as you continue to drag.
Tip
To move the selection in 1-pixel increments, press an arrow key.
Tip
To move the selection in 10-pixel increments, hold Shift, and use an arrow key.
Tip
To move the pixels of the selection, rather than the selection edge, use the Move tool.
Sometimes selection edges can be visually distracting, and you’ll want to hide them.
To hide selection edges (aka marching ants):
Do one of the following:
Choose View > Extras to show or hide selection edges, grids, guides, target paths, slices, annotations, layer borders, count, and Smart Guides all at once (FIGURE 5.19). (You can specify what constitutes an “extra” by choosing View > Show > Show Extras Options.)
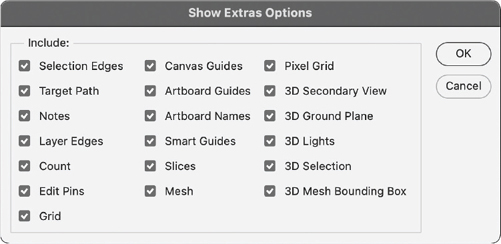
FIGURE 5.19 The Show Extras menu and Show Extras Options
Choose View > Show > Selection Edges to toggle the view of the selection edges of the current selection only. The selection edges reappear when you make a different selection.
You can refine your initial rough selections by adding to them or subtracting areas from them. With the Quick Selection tool, doing so is as easy as choosing Add mode (its default behavior) or Subtract mode, and then painting over the areas you want to add to or remove from the initial selection. For other selection tools it takes an additional step.
To add to a selection:
While using any selection tool (except Quick Selection), select Add To Selection on the Options bar or hold Shift. A plus sign appears beside the cursor when you’re adding to a selection.
Drag the tool to select the area you want to add to the selection (FIGURE 5.20).
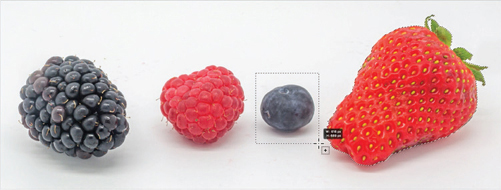
FIGURE 5.20 Adding to a selection
To subtract from a selection:
Select Subtract From Selection on the Options bar or hold Alt/Option. A minus sign appears beside the cursor when you’re subtracting from a selection.
Drag the tool to select the area you want to remove from the selection (FIGURE 5.21).
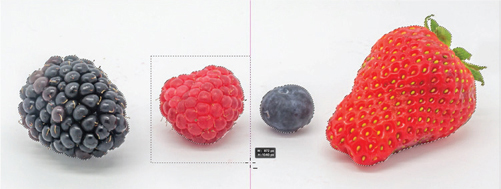
FIGURE 5.21 Draw a rectangular marquee over the raspberry while holding down Alt/Option to subtract it from the original selection.
Intersect is more useful when you’re making selections based on luminance or color values (see Chapter 8) than selecting objects. But here’s a simple example.
To intersect with a selection:
Select Intersect With Selection on the Options bar or hold Shift+Alt/Option. An X appears beside the cursor when you’re selecting an intersected area (FIGURE 5.22).
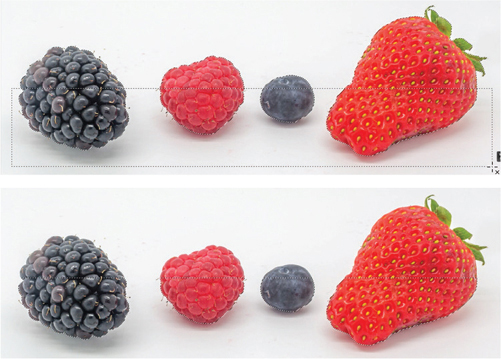
FIGURE 5.22 Start out with all berries selected. Then, to intersect the selection, leaving just the bottom halves of each selected, draw a rectangular marquee while holding Alt/Option+Shift.
Before manually adding to or subtracting from a selection in any way, set the Feather and Anti-aliasing values on the Options bar to the same settings used in the original selection (FIGURE 5.23).
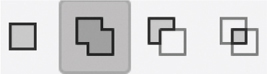
FIGURE 5.23 The Selection options from left to right: New, Add to Selection, Subtract from Selection, Intersect with Selection
Sometimes selecting the opposite parts of an image from those you want is easier than selecting the parts you do want. In those cases, you can use the Inverse option. Suppose you had an object on a solid-colored background. You could easily select the background with the Magic Wand tool, and then invert the selection to become the object (FIGURE 5.24).
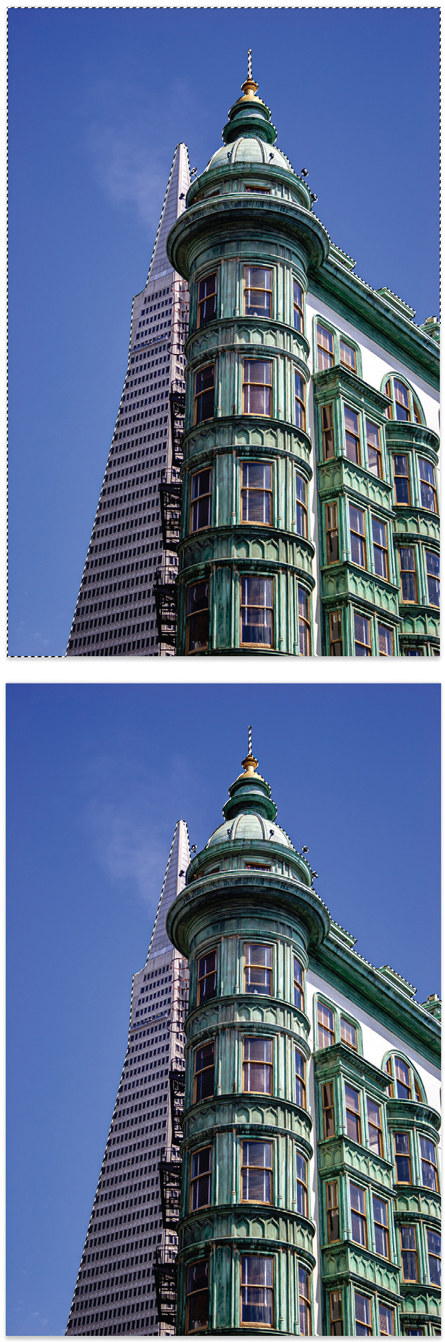
FIGURE 5.24 It’s often easier to start with the opposite of what you want. In this example, because the sky is almost flat, it is easy to select with the Magic Wand or by choosing Select > Sky. Then, choose Inverse to select the buildings.
To inverse a selection:
Make a selection using any selection method.
Choose Select > Inverse (Ctrl+Shift+I/Command+Shift+I).
To move selected pixels:
Switch to the Move tool (V).
Drag from within an active selection to a new position. If you selected multiple areas, all areas will move as you drag.
To copy selected pixels:
Switch to the Move tool (V).
Hold Alt/Option as you drag from within an active selection to a new position.
To copy a selection to another document:
Switch to the Move tool (V).
Drag from within the selection to the other document’s tab or document window, pause, and then drop it.
To delete a selection:
Make sure the selection is active and that you have the right layer selected.
Press Backspace/Delete to delete the selection and replace it with transparency (FIGURE 5.25)—just so long as the layer is not a Background layer.
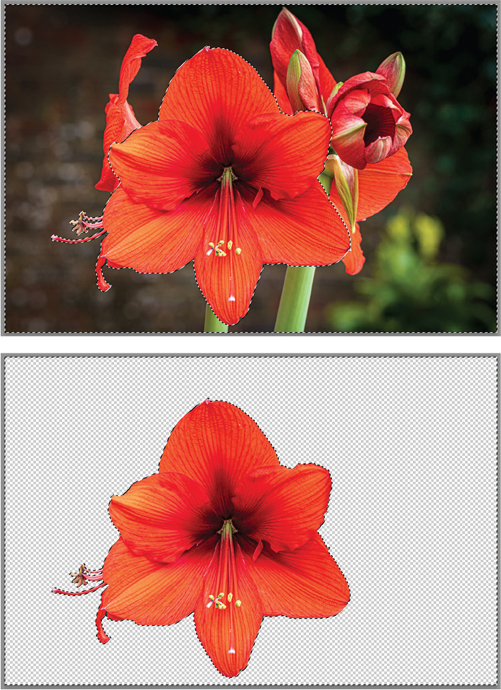
FIGURE 5.25 Deleting a selection: before and after
To fill a selection:
Make sure the selection is active and that you have the right layer selected.
Choose Edit > Fill (Shift+F5) to open the Fill dialog.
Choose the type of fill you want from the Contents menu (FIGURE 5.26).
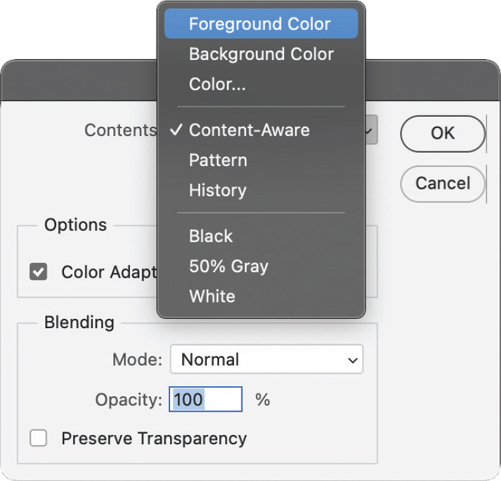
FIGURE 5.26 Choose a fill option.
Click OK.
Tip
To quickly fill a selection with the Foreground color, press Alt+Backspace/Option+Delete.
Tip
To quickly fill a selection with the Background color, press Ctrl+Backspace/Command+Delete.
Modifying Selections
With the evolution of the Select and Mask dialog (see Chapter 8) and its more interactive interface, the options on the Modify menu—Border, Smooth, Expand, Contract, and Feather—are not as essential as they once were. Nevertheless, the old-school methods are still useful.
Border lets you select a width of pixels inside and outside an existing selection edge.
To modify the border of a selection:
Make a selection with one of the selection tools.
Choose Select > Modify > Border.
Enter a value between 1 and 200 pixels in the Width field, and click OK (FIGURE 5.27).
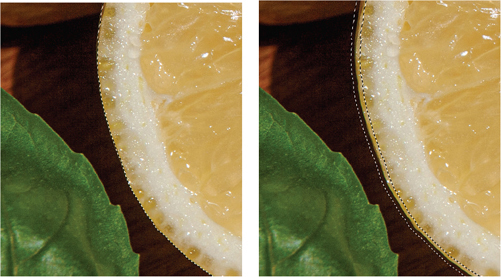
FIGURE 5.27 The result of creating a border selection (in this case, of 30 pixels)
Smooth can reduce the bumpiness of a rough selection.
To smooth a rough selection:
Make a selection with one of the selections tools.
Choose Select > Modify > Smooth.
Enter a value for the Sample Radius (FIGURE 5.28).
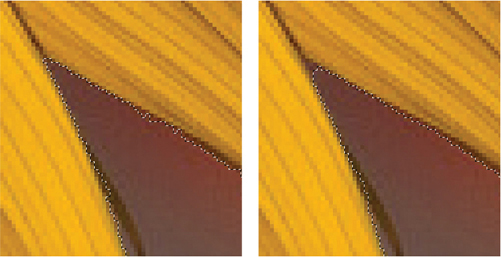
FIGURE 5.28 Close-up of the result of smoothing a rough selection by 3 pixels
To expand or contract a selection:
Make a selection with one of the selections tools.
Choose Select > Modify > Expand or Select > Modify > Contract.
In the Expand By or Contract By field, enter a specified number of pixels by which to expand (push out from its current edge) or contract (pull in from its current edge) the selection (FIGURE 5.29).

FIGURE 5.29 From left to right: close-up of a selected red object, the selection expanded, the same selection contracted, a selection border.
To feather a selection:
Make a selection with one of the selections tools.
Choose Select > Modify > Feather.
In the Feather Radius field, enter a value by which to soften the selection edges. The effect of the feathering becomes visible only after you move, cut, copy, or fill the selection (FIGURES 5.30).
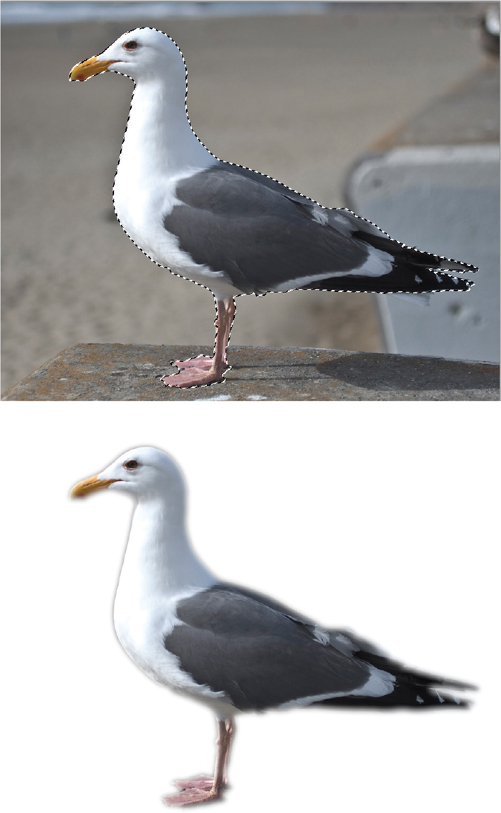
FIGURE 5.30 The result of copying a feathered selection to a new layer and then hiding the original layer
Tip
While you can add feathering when using the Marquee tools and the Lasso tools, it’s preferable to start with a neutral (unfeathered) selection and add feathering as needed. Once a selection edge has been feathered, it can’t be unfeathered.
Tip
Small selections with a large feather radius may be so faint that their edges are invisible and you see this warning message: “No pixels are more than 50% selected.” You can either decrease the feather radius or increase the size of the selection. Or live with the selection knowing that you won’t be able to accurately see the selection edges.
Growing Selections
Both Grow and Similar select a range of pixels up to the current Tolerance setting of the Magic Wand tool.
To grow a selection:
Make an active selection.
Choose Select > Grow to include all adjacent (contiguous) pixels.
Alternatively, choose Select > Similar to extend a selection to include similar (contiguous and noncontiguous) pixels (FIGURE 5.31).
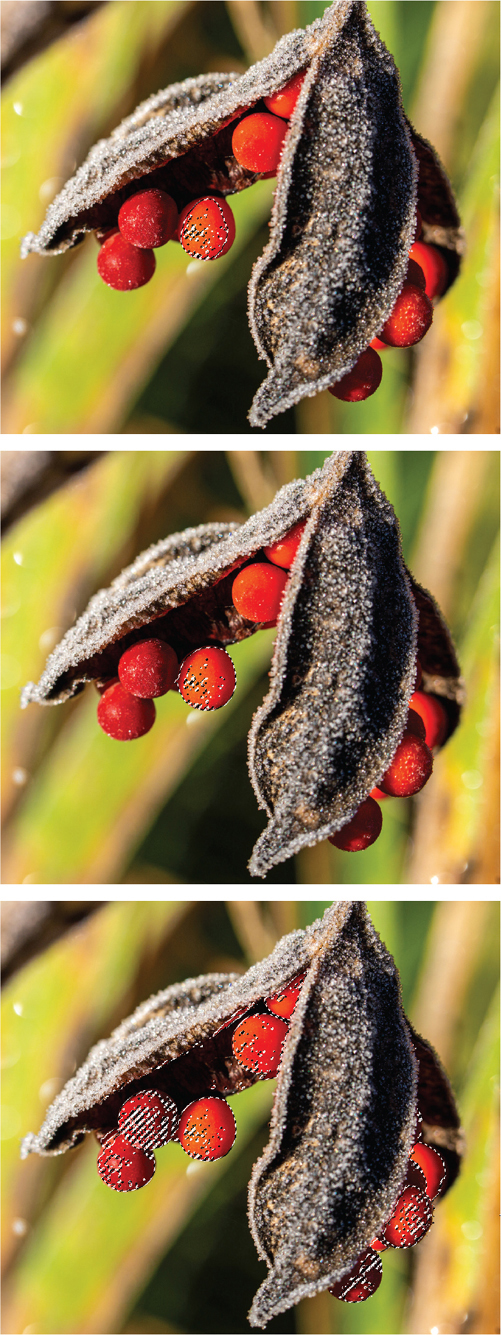
FIGURE 5.31 The original selection is on the left. Choosing Grow extends the selection to adjacent pixels; choosing Similar includes noncontiguous pixels.
Tip
To increase a selection in increments, choose either the Grow or Similar command more than once.