
14
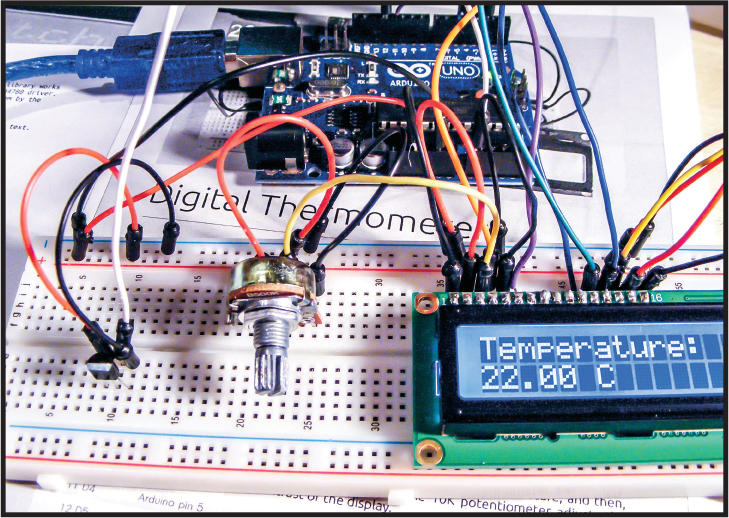
Digital Thermometer
This project will add an LM35 temperature sensor to an LCD screen and Arduino to give you a digital thermometer.
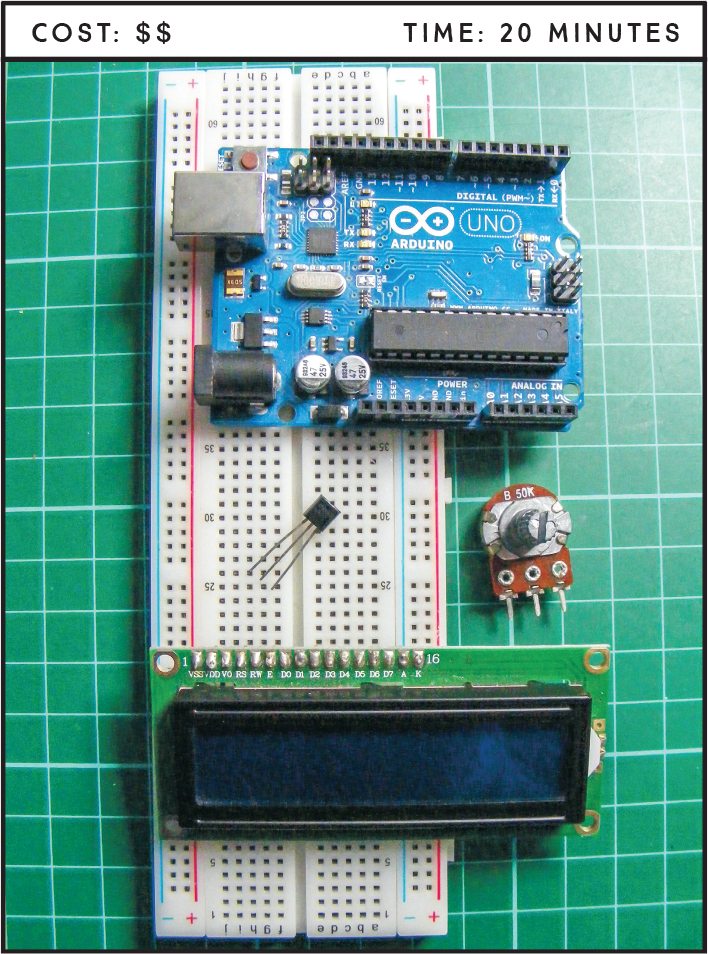
PARTS REQUIRED
Arduino board
Breadboard
Jumper wires
HD44780 16×2 LCD screen
LM35 temperature sensor
50k-ohm potentiometer
LIBRARY REQUIRED
LiquidCrystal
HOW IT WORKS
The Arduino takes the voltage reading from the same LM35 temperature sensor we used in Project 12 and converts that value to temperature in degrees Celsius. The sketch then changes this value to Fahrenheit by multiplying the value by 9, dividing the result by 5, and adding 32. The LiquidCrystal library does all the hard work in displaying the temperature on the LCD screen using the lcd.print command. This project can easily be adapted with more sensors for an all-around weather center.
THE BUILD
First, prepare the LCD screen according to “Preparing the LCD Screen” on page 109. Then follow these steps:
Insert your LCD screen and potentiometer into the breadboard; then use your breadboard and jumper wires to make the connections for the LCD screen as shown in the following table.
LCD SCREEN
ARDUINO
1 VSS
GND
2 VDD
+5V
3 VO contrast
Potentiometer center pin
4 RS
Pin 12
5 R/W
GND
6 Enable
Pin 11
7 D0
No connection
8 D1
No connection
9 D2
No connection
10 D3
No connection
11 D4
Pin 5
12 D5
Pin 4
13 D6
Pin 3
14 D7
Pin 2
15 A BcL+
+5V
16 K BcL–
GND
Connect the GND and +5V rails to Arduino GND and +5V.
You should have already connected the center pin of the 50k-ohm potentiometer to LCD pin 3 (VO). Now connect one of the outer pins to GND and the other to +5V.
Connect the center pin of the LM35 temperature sensor to Arduino A0, the left pin to the +5V rail, and the right pin to the GND rail, as shown in the following table.
LM35 SENSOR
ARDUINO
Left
+5V
Center
A0
Right
GND
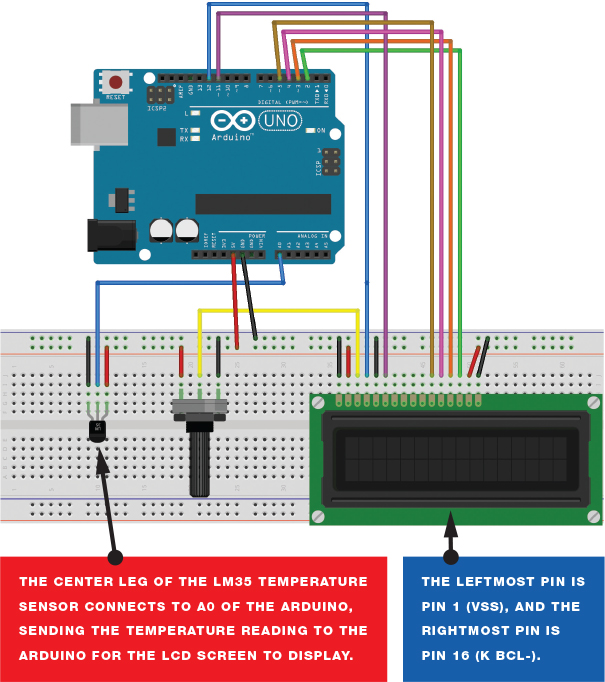
Make sure your setup matches the circuit diagram shown in Figure 14-2, and upload the code in “The Sketch” on page 118.
FIGURE 14-1: The circuit diagram for the digital thermometer
THE SKETCH
The sketch uses the LiquidCrystal library to display a value on the screen according to what the LM35 sensor detects. The LM35 sensor sends a reading to Arduino pin A0, which is read as voltage. The sketch converts the voltage reading to a temperature value in Celsius, and then it uses a couple of calculations to show the final reading in Fahrenheit. The sketch updates and displays the reading every second.
#include <LiquidCrystal.h> // Call the LCD library
#define sensor A0 // Pin connected to LM35 sensor (A0)
int Vin; // Reads the value from the Arduino pin
float Temperature; // Receives the voltage value converted to temp
float TF; // Receives the converted value in °F
LiquidCrystal lcd(12, 11, 5, 4, 3, 2); // Pins connected the LCD
void setup() {
lcd.begin(16, 2); // The display is 16x2
lcd.print("Temperature: "); // Sends text to the LCD
}
void loop() {
// Reads the A0 pin and stores the value in Vin
Vin = analogRead (sensor);
// Converts voltage value to temperature and
// stores value in Temperature (in °C)
Temperature = (500 * Vin) / 1023;
TF = ((9 * Temperature) / 5) + 32; // Changes °C to °F
lcd.setCursor(0, 1); // Move cursor of LCD to next line
lcd.print(TF); // Display the temperature on the LCD screen
lcd.print(" F"); // Write F for the Fahrenheit scale
delay(1000); // Wait for a second before reading the pin again
}
TROUBLESHOOTING
Q. Nothing is displayed on the LCD screen.
• Make sure you’ve connected power to the breadboard rails and that the connections match the tables given earlier.
• Turn the potentiometer to change the contrast of the screen until you see text.
• If the screen has garbled messages on it, you probably haven’t wired it up correctly; recheck your wiring against Figure 14-2.
• If the value shown seems too high, make sure the LM35 sensor is firmly inserted in the breadboard and allow a moment for the reading to stabilize.