
This time, the connections are very simple since they are just done using several USB cables.
In the previous chapters, we have seen how to set up a webcam (see Chapter 3, Aquarium Monitor, for instance); but this time, we have a different configuration due to the fact that we're using two webcams at the same time.
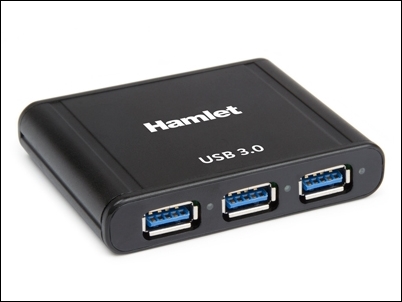
As the reader might know, the BeagleBone Black board has only one USB host port, so to connect two webcams, we need a USB hub. These devices (used to connect more than one device to a USB host port) are very common, and the reader can find them anywhere on the Internet.
A little schematic of the system using a USB HUB with three ports is shown in the following diagram:

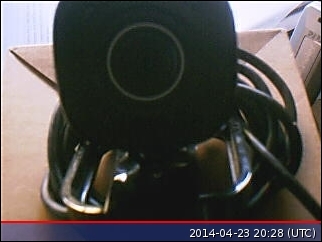
For my prototype, I used two generic webcams supported by the Video4Linux driver class, as already explained in Chapter 3, Aquarium Monitor, connected to the USB HUB as shown in the following image. However, you can use your preferred device since it's a very common device.
Note
The curious reader can get more information about the USB hub's drivers at https://en.wikipedia.org/wiki/USB_hub.
To verify if everything is well connected and supported, you have to connect the webcams as shown in the diagram in the previous section. Then, you should get something similar to the output of my system, as follows:
root@beaglebone:~# ls -l /dev/video*
crw-rw---T 1 root video 81, 0 Jan  1  2000 /dev/video0
crw-rw---T 1 root video 81, 1 Jan  1  2000 /dev/video1
Okay, now we can verify if the webcams are correctly managed using the fswebcam program in the same manner as in the previous chapter. However, this time we must specify which webcam must be used to take a simple picture to the fswebcam program. The trick can be done using the -d option argument, as shown in the following command line:
root@beaglebone:~# fswebcam -d /dev/video0 video0-shot.jpg
--- Opening /dev/video0...
Trying source module v4l2...
/dev/video0 opened.
No input was specified, using the first.
Adjusting resolution from 384x288 to 352x288.
--- Capturing frame...
Captured frame in 0.00 seconds.
--- Processing captured image...
Writing JPEG image to 'video0-shot.jpg'.
Tip
As already stated in Chapter 3, Aquarium Monitor, if you get a completely blank image with a message as follows, you can resolve the issue by adding the -S option argument to the command line:
root@beaglebone:~# fswebcam -d /dev/video0 -S 10 webcam-shot.jpg
Then, to take a picture from the other webcam, we can use the following command line:
root@beaglebone:~# fswebcam -d /dev/video1 video1-shot.jpg
--- Opening /dev/video1...
Trying source module v4l2...
/dev/video1 opened.
No input was specified, using the first.
Adjusting resolution from 384x288 to 320x240.
--- Capturing frame...
Captured frame in 0.00 seconds.
--- Processing captured image...
Writing JPEG image to 'video1-shot.jpg'.
The following two screenshots show the two pictures from the two webcams, which are set face to face, that is, the first webcam gets a picture of the second one and vice versa.

The following screenshot shows all the devices that I used to implement this project and to test the software:

Nothing special to highlight here; all the connections are just very simple USB connections. However, let me highlight the fact that I used an external power supply for both the BeagleBone Black board and for the USB hub in order to avoid power loss due to the high power consumption from the webcams.