
You are about to dive into the arcane, but necessary world of remote debugging/cross-compiling. In this chapter, we will specifically take a look at a recipe for setting up remote debugging using the GDB server.
We will set up a specific kind of environment on your client desktop, another kind of environment on your BBB, and use an IDE as a way to ease the potential collision between these two worlds.
Wait a minute! Didn't we just do a debug recipe directly on BeagleBone Black using GDB? And can't we just develop and compile right on BeagleBone Black? Yes and yes.
But your BeagleBone Black is not quite powerful enough to serve as a serious development box. Ideally, what we want to do is hand off that work to a fancier, faster, desktop box. Otherwise, you will spend many unnecessary hours testing, compiling, debugging, and watching reruns of Doctor Who while waiting for the BBB to complete its tasks.
Why don't we just make something on one box and move it over to another box? Hmm. Not so fast. If you want to create or debug an application on a nonBBB board and output a binary or chunk of code to run it on an ARM Linux board like the BBB's, then you have to have the right toolset. This toolset will juggle between differing board architectures and operating system requirements.
Unfortunately, getting this toolset set up properly can be quite unpleasant. Not only does it take a fair bit of time, the process is also fraught with many opportunities for error. So, be patient and persistent in following this recipe.
Before going into the minutiae, here are the high-level steps to get remote debugging going on BeagleBone Black:
- Install and set up a virtual machine; you can skip this if your client development box is Linux.
- Install and set up a cross-compile and debug toolchain.
- Install and set up the GDB server on your BeagleBone Black.
- Install and set up Eclipse, our IDE of choice.
Nothing to it, right? Not quite...
Part I: Set up Virtual Machine—Mac OSX
On your client box, we will set up a virtual machine (VM) with a Linux distribution on board. There are a number of sources for this, but we will use Oracle's free virtual box (once again, if you are already using this book and its recipes with a Linux box as your client machine, installing a VM is not necessary).
Download and install the VM from https://www.virtualbox.org/. When finished, open the application. Perform the following steps
- Download a Linux distribution that you will load to Virtual Box's virtual machine environment. We used an i386 net install of Debian Wheezy available from debian.org at https://www.debian.org/releases/wheezy/debian-installer/ (download is available at http://cdimage.debian.org/debian-cd/7.6.0/i386/iso-cd/debian-7.6.0-i386-netinst.iso).
- Next, install and set up a Linux environment on the VM. In the open Virtual Box window, click on New (VM).
- Give the VM a name, something clever like Debian Wheezy.
- From the drop-down options:
- Choose Linux
- Then choose, Debian (32-bit) according to the type of
.isoyou downloaded
- Then, click on Continue.
- Allocate 1024 MB of memory instead of the default 512 MB. Then, click on the Next button.
- For the hard drive, unless you have another virtual hard disk set up and want to use it, leave it with the default setting: Create a virtual hard drive now. Then, click on Create.
- For the hard drive file type, leave the default VDI setting. Then, click on Continue.
- For the storage on the physical hard drive, check whether you prefer the VM to have a fixed drive space allocation (which can be faster once built) or a dynamic storage capacity (which will only expand as needed). I kept mine at dynamically allocated. Click on Continue.
- For the file location and size, click on Create. This closes the setup window and returns you to the main dashboard.
- At the dashboard, you should now see the VM we just created: Debian Wheezy. Before running the VM, we need to configure it some more. So, click on Settings.
Follow these settings:
- General | Advanced | Shared Clipboard. Choose bidirectional because you will want to share the clipboard data in both the directions between the client box (in our case, Mac OS X) and the Debian VM. You will still need to follow additional steps to get this function working. Navigate to the following:
System | Storage | Controller IDE—Click on the (+) sign (Add CD/DVD device) to open a browse directory window. Click on Choose Disk.
Navigate to the folder where you downloaded the
.isofile of your preferred Linux distro. The filename will be something similar todebian-x.y.z-i386-netinst.isoor some variant on the architecture that you chose. Then, click on Open.
- General | Advanced | Shared Clipboard. Choose bidirectional because you will want to share the clipboard data in both the directions between the client box (in our case, Mac OS X) and the Debian VM. You will still need to follow additional steps to get this function working. Navigate to the following:
Your OS should now be loaded. But now, we need to have the OS actually installed in its normal fashion on the virtual drive that you set up. Perform the following steps:
- On the dashboard, while making sure that your new Debian VM is selected, click on the Start button.
- On your first bootup, you will be presented with a Debian setup window. Choose INSTALL.
You will then be taken through quite a few setup windows, including choosing language, region and keyboard preferences, network options, password and user setup, and other configuration options that I will not elaborate here. Configure as you see fit, while clicking on the Continue button until you end up with the hard disk partitioning sequence. Make your choices there according to your preference. In most cases, choosing the default option should be fine.
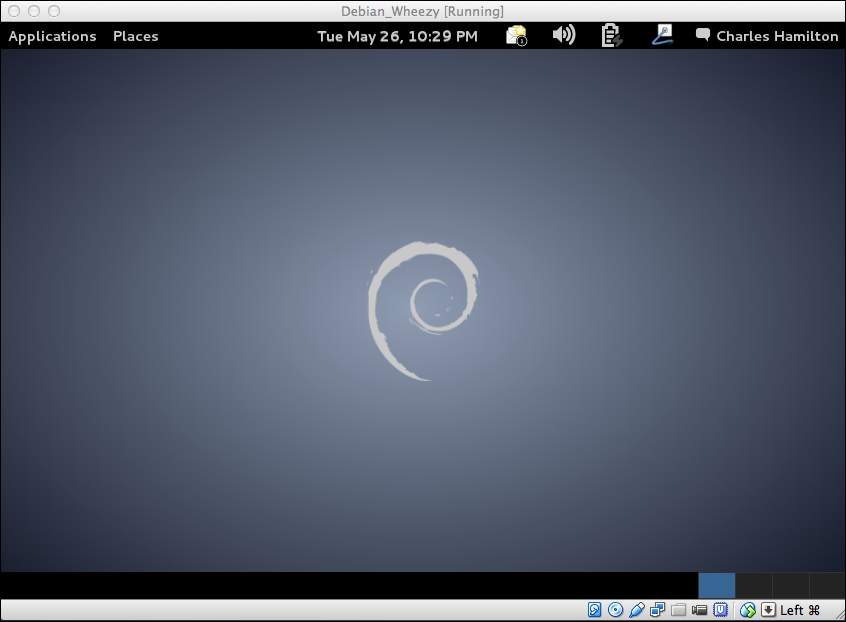
- Once the Debian installation and setup is completed, you will end up at the Debian GUI login screen. Log in and you will finally arrive at the desktop.
- Let's open the terminal window in our new Debian environment and perform a basic ping test on BeagleBone Black. We want to make sure that we can communicate with it via our VM as follows:
$ ping 192.168.7.2
You should get consistent pings.
Adding cut and paste to VM
We now need to implement an additional functionality to the virtual box that will drive you mad if you do not add it: the cut-and-paste function. When you use Mac OS X as your client machine, Virtual Box, like most virtual machine software, does not include cut-and-paste by default. Instead, they have given us a series of 15 steps (yes, 15!). Oracle/Virtual Box refers to this function as Guest Additions. Here we go:
- Let's begin by installing some external kernel modules on your VM. So, with a terminal window open in the Debian virtual machine on your client desktop, run the following command as a root user:
$ sudo -i
~#  apt-get install dkms
- Next, back on your client desktop (Mac OS X), we have to locate a very buried
.isofile that contains the code to add the guest additions with its cut and paste feature. In Finder, navigate to Applications | Virtualbox.app | Show Package Contents.This will open all the hidden directories in the package, including our target directory and file.
Then, navigate to Contents | MacOS | VBoxGuestAdditions.iso.
- Find and copy the
VBoxGuestAdditions.isofile to a place where you can find it on your machine. - Back in your open Virtual Box, in Debian Wheezy | Settings | Storage, click on the small CD icon at the bottom of the screen and select Choose a Virtual CD/DVD disk file.
Another way to perform the same thing is from the drop-down menus at the top of the screen (not in the VM/Debian window, but the virtual machine menu options at the very top of your desktop machine. There, you can choose Devices | CD/DVD devices | IDE (IDE Primary Master) | Choose a Virtual/CD/DVD disk file.
- Browse to where you put the
VBoxGuestAdditions.isofile and select it. The.isofile should now appear in the CD/DVD drive options. Click on OK and restart the VM. - With the terminal window open in your Debian VM, run the following two commands:
~# apt-get update
~# apt-get upgrade
- Now, confirm that you have the
makeand GNU C compiler installed, which should already be on the distribution that you installed. Check it with the following code:~# gcc --version - If you don't get an output that shows the version, but a
command not founderror, you will need to install it as follows:~# apt-get install make gcc - Reboot your Virtual Box machine.
- Determine the exact version of your kernel with the following code:
~# uname -a - Install the correct version of the
linux-headerspackage. Replace the following version numbers with the version number shown in the prior step:~# apt-get install linux-headers-2.6.26-2-68This may take some time; just wait for the installation to finish and return to your terminal prompt.
- Restart your VM with the following code:
# reboot - From the screen options, select Machine | options | General and then click on the Advanced tab. In the Shared Clipboard dropdown, select the Bidirectional option.
The cut-and-paste functionality between your client host box (in our case, Mac OS X) and your virtual machine environment should now be enabled.
- Before moving one though, we need to verify that the cut-and-paste function is working. From your Debian Wheezy virtual machine window, navigate to Applications | Accessories | gedit Text Editor and open a new file, as shown in the following screenshot:

- From the open file window, enter
Ground Controland then select Edit | Copy. Then, navigate to your client desktop (Mac/Windows machine, and so on), open a simple text editor, and select Paste. Hopefully,Ground Controlwill be pasted to the window. - We want to check the bidirectional functionality, so now enter
Major Tomin (Mac/Windows) text editor on the desktop and press Ctrl + c (copy). Now, switch back to the VM editor window and then select Edit | Paste.Major Tomshould be pasted successfully to thegeditwindow. - Reboot the VM and then log back in as the root user with the following code:
# sudo -i - Add your username to the
sudogroup as follows:# adduser username sudo - Then, use the
fdiskcommand to check whethersudois working properly. The-voption will check the version offdiskinstalled on your VM. You should get a prompt for a user password, as shown in the following code:# sudo fdisk -vThe screen output should show the version of
fdiskthat is installed, and there should be no errors about permissions. - Install
ssh. We already use it on the BBB. Now, we need to add it to our VM. SSH gives Eclipse the ability to connect and transfer files to BeagleBone Black usingscp, a secure network protocol. Install it with the following code:# sudo apt-get install ssh
Part II: Installing gdbserver on BeagleBone Black
We need this package on board the BBB so that we can run gdb from afar or from another box. Perform the following steps:
- First, download the Debian installation package of
gdbserverforarmhf(the BBB-native architecture) on your VM as follows:# wget http://http.us.debian.org/debian/pool/main/g/gdb/gdbserver_7.4.1+dfsg-0.1_armhf.deb - Now, use
scpto transfer the package to the BBB, as shown in the following code:# scp gdbserver_7.4.1+dfsg-0.1_armhf.deb [email protected]:~ - You should get a password prompt for the root user on BeagleBone. Log in and install the package as follows:
# ssh [email protected]
root@arm# dpkg -i gdbserver_7.4.1+dfsg-0.1_armhf.deb
- When finished, log out by exiting the SSH session, as shown in the following code:
root@arm# exit
Part III: Installing and setting up the toolchain
This part and the next one are the hairiest bits of the process; many online tutorials on this subject purport to deliver a working toolchain lashed to an IDE, though few of them actually deliver.
Fortunately for us, engineer and blogger Aaron Clarke's very clear steps at http://bit.ly/1x7TGUY provide superb guidelines for a successful toolchain and the Eclipse IDE setup. The vast majority of the credit for the next two parts of the recipe go to Mr. Clarke.
Note
We chose not to include screenshots of the process because doing so would have made the recipe considerably longer. However, you can find a more graphical version of this recipe online at Aaron Clarke's blog, which includes a version for Debian Jessie at http://blog.embeddedcoding.com/2015/05/beaglebone-black-development-part-6.html.
Here we go.
Perform the following steps:
- At the terminal prompt on your Debian VM, if you are not already logged in as root, do so now with the following command:
$ sudo -i - Create a new directory where you will download the toolchain and then navigate to that directory, as shown in the following code:
root@debian:/home/user# mkdir bbb-tools
root@debian:/home/user# cd bbb-tools
- Using
wget, download the toolchain from the following link to the directory that we just created:# wget -c https://launchpad.net/linaro-toolchain-binaries/trunk/2013.10/+download/gcc-linaro-arm-linux-gnueabihf-4.8-2013.10_linux.tar.xz - Then, untar the file with the following code:
# tar xf gcc-linaro-arm-linux-gnueabihf-4.8-2013.10_linux.tar.xz - Now, run the
echocommand to create thebbb-varsfile; this will be used to test that our environment is set up properly, as shown in the following code:# echo "export CC=`pwd`/gcc-linaro-arm-linux-gnueabihf-4.8-2013.10_linux/bin/arm-linux-gnueabihf-" > bbb-vars - Verify that the command worked. The
bbb-varsfile should appear in the directory as follows:root@debian:/home/user/bbb-tools# ls bbb-vars
- Set up the environment for a remote test by sourcing the
bbb-varsfile. Take a look at the command preceding the (.) is the file location:root@debian:~# ./home/user/bbb-tools/bbb-vars - Now, verify that the toolchain version we installed is correct using the following code:
root@debian:~# ${CC}gcc –-version

arm-linux-gnueabihf-gcc (crosstool-NG linaro-1.13.1-4.8-2013.10 - Linaro GCC 2013.10) 4.8.2 20131014 (prerelease)Copyright (C) 2013 Free Software Foundation, Inc.This is free software; see the source for copying conditions.  There is NOwarranty; not even for MERCHANTABILITY or FITNESS FOR A PARTICULAR PURPOSE
Part IV: Installing and setting up the Eclipse IDE
Perform the following steps:
- We will first install Eclipse on our VM with the following code:
root@debian:~# sudo apt-get install eclipse eclipse-cdtThen, open Eclipse and set up a workspace by closing the welcome screen and navigating to Window | Show view | C/C++ Projects.
- Create a new C project by navigating to File | New | C Project.
- Give the project a name:
bbb_ground_control. - Select Project type | Hello World ANSI C Project.
- Then, select Toolchain Cross GCC and click on Next.
- Enter the basic settings, such as the author name, in the next window.
- Click on Next to bring up the Select Configurations window.
- Now, click on the Advanced settings to bring up a Properties window.
- From the left-hand side, navigate to C/C++ Build | Settings to bring up Tool Settings for the Debug configuration.
- Choose the Tool Settings tab, then fill the Prefix and Path fields in the following manner:
Prefix:
arm-linux-gnueabihf-Path:
/home/user/bbb-tools/gcc-linaro-arm-linux-gnueabihf-4.8-2013.10_linux/bin - Then, click on OK.
- This brings up another C Project window, which annoyingly asks you to repeat what you just did in the prior step. This may be a bug, but do it anyway:
Prefix:
arm-linux-gnueabihf-Path:
/home/cah/bbb-tools/gcc-linaro-arm-linux-gnueabihf-4.8-2013.10_linux/bin - Then, click on Finish.
- The sample code runs and you get an error:
Symbol 'EXIT_SUCCESS' could not be resolved. Aaargh!The error says that some C code symbols cannot be resolved by the compiler. Not to worry though. This error can be ignored because according to the Eclipse documentation, it is inaccurate and does not affect the successful operation of the application.
- Now, we will build the project. On the Eclipse main menu, select Project | Build All. Then, open the Console window to see the build output messages. You should see the compiler prefix being used for the
gcccompiler as follows:00:24:52 **** Build of configuration Debug for project bbb_ground_control ****make all Building file: ../src/bbb_ground_control.cInvoking: Cross GCC Compilerarm-linux-gnueabihf-gcc -O0 -g3 -Wall -c -fmessage-length=0 -MMD -MP -MF"src/ bbb_ground_control.d" -MT"src/ bbb_ground_control.d" -o "src/ bbb_ground_control.o" "../src/ bbb_ground_control.c"Finished building: ../src/ bbb_ground_control.c Building target: bbb_ground_control Invoking: Cross GCC Linkerarm-linux-gnueabihf-gcc -o " bbb_ground_control " ./src/ bbb_ground_control.o Finished building target: bbb_ground_control 00:24:52 Build Finished (took 172ms) - For the Eclipse remote connection setup, on the main menu, click on Run | Run Configurations.
- Select C/C++ Remote Application. Click twice on this to open another dialog window.
- A drop-down option should show bbb_Hello_World Debug. Click on the New button in the middle of the window to create a project debug run configuration. Click on the New button next to Connection in the Main tab.
- This brings up the New Connection window.
- Select Linux and click on Next.
- This brings up a window with the connection information. Enter BeagleBone Black IP address for Host name and name the Connection name and Description both as
BeagleBone Black:- Host name:
192.168.2.7 - Connection name:
Beaglebone Black - Description:
Beaglebone Black
- Host name:
- Click on Next.
- In the New Connection/Files window, select the
select.sshfiles and then click on Next. - In the New Connection/Processes window, select
processes.shel.linux. Then, click on Next. - In the New Connection/Shells window, select
ssh.shells. Then, click on Next. - In the New Connection/Ssh Terminals window, select
ssh.terminalsand click on Finish. - You will end up back at the Run Configurations window. For Connection, choose BeagleBone Black, not Local.
- Click on Properties next to Connection. A window will come up, so select Remote workspace location.
- Enter a path to your project on BeagleBone Black. For the sake of simplicity, you should probably follow what we did and input
/root. - Click on OK. This takes you back to the Run Configurations window.
In the following steps, we will perform two key things: configure our remote paths on the BBB and give our application permission to execute.
- At the bottom of the Run Configurations screen are two fields. Input the following:
remote absolute file path for C/C++ application:
/root/test_project/bbb_ground_controlcommands to execute before application:
chmod +x /root/test_project/bbb_ground_controlNote
Choose a path on BeagleBone Black where the
bbb_ground_controlexecutable file will be placed. In our example, it is/root/test_project/bbb_ground_control, wherebbb_ground_controlis the name of the binary file that we will compile. The purpose of thechmod +xcommand is to give our program permission to execute. - Click on Apply. We are almost there. Be patient and hang on tight.
- From the terminal window on the VM, we have a couple more things to perform on the BBB itself, which is to mirror what we just input in the two fields in Eclipse. First, log in with the following code:
# sudo ssh 192.168.7.2 - Answer
yeswhen promptedare you sure. - Enter the root password for the BBB:
root. You should now be logged in to the BBB. - Run the commands to duplicate what we just did in Eclipse, which means that we need to create a new directory, navigate to it and then run the following command to give the application permission to execute:
root@beaglebone:~# mkdir test_project
root@beaglebone:~# cd test_project
root@beaglebone:~# chmod a+w .
- Now, exit the SSH session on BeagleBone Black with the following code:
root@beaglebone:~# exit - Back in the VM Eclipse window, click on Run.
- Another pop-up window will appear. Enter the user and password as
root. Click on them and agree to the next few prompts from the BBB.The last few steps are focused on how to set up a remote debug session.
- In your terminal window, navigate to the project
Debugpath with the following code:# cd ~/bbb-eclipse-workspace/bbb_ground_control/Debug - Now, we will perform a little obscure but necessary step when you run GDB: create an invisible file called
.gdbinit. This is an initialization file that resides in the debug directory and automatically loads and parses when you run GDB.Typically, you would populate this file with any required commands. However, for our current recipe, the file remains empty, although it needs to remain present for GDB's proper operation.
- We could use
nanoto create the file because we used this editor in the earlier chapters. However, there is another command that actually generates the file on the fly, saves it, and places it in whatever directory you have entered, as shown in the following code:# touch .gdbinit - Make sure that the file was created with the following code:
# lsHmm. It isn't there!
To figure out what is happening, this is a case where using different options with a command is vital. With the
lscommand, we want to append the command with the-aoption. So, try again using the following code:# ls -aThe
gdbinitfile should now appear in the directory's lineup. - Back in the Eclipse window, select Window | Open Perspective | Other. Then, select Debug. This will shift the window views to a debug-centric UI.
- From the top menu, select Run | Debug Configurations. In the window that opens, select C/C++ Remote Application | bbb_ground_control Debug.
Hold on tight. Almost done.
- Select the Debugger tab. This shows us more tabs because we haven't had our fill of tabs or options yet.
- Now, select the Main tab. Here, we need to populate the two fields: GDB Debugger (the executable in the toolchain directory) and the GDB command file (the directory where we created the .gdbinit file). To facilitate this step, you should be able to browse the relevant directories and grab the right paths as follows:
GDB Debugger:
/home/user/bbb-tools/gcc-linaro-arm-linux-gnueabihf-4.8-2013.10_linux/bin/arm-linux-gnueabihf-gdbGDB command file:
/home/user/bbb-eclipse-workspace/bbb_ground_control/Debug/.gdbinit - Then, click on Apply. I like this part.
- Now, we finally get to test the whole shebang with Debug run. Let me repeat and this time with bugles and proper fanfare: we will test everything we just did and start a Debug session.
So, at the bottom of the still open window, click on Debug. Hold your breath! This will start the remote session with the BBB and finish the cycle just after the
main()line in your.cfile.If all went as planned and the gremlins stay home, you should see the following output on your Eclipse console screen:
Last login: DAY MO DATE TIME YEAR from 192.168.7.1
echo $PWD'>'
chmod +x /root/test_project/bbb_ground_control;gdbserver :2345 /root/test_project/bbb_ground_control;exit
root@beaglebone:~# echo $PWD'>'
/root>
root@beaglebone:~# chmod +x /root/test_project/bbb_ground_control;gdbserver :2345  /root/test_project/bbb_ground_control;exit
Process /root/test_project/bbb_ground_control created; pid = 2910
Listening on port 2345
Remote debugging from host 192.168.7.1
- Since the ultimate goal of all this effort was to actually perform some debugging on a program, now you can really get to work. Make sure your
bbb_ground_control.cwindow is selected. Then, at the top, choose Run. - From the drop-down list, you will see the basket of debug commands now ready for your able, debug-twitchy fingers.
- If you made it to this point, this recipe has one last set of command ingredients:
# Go to actual cabinet on actual shelf
# Take out bottle of single malt scotch
# Pour dram, perhaps two
# Lean back head and drink
# Congratulate Major Tom on a good test flight
A thorough review of how to debug is beyond the scope of this book. Fortunately, there are ample resources to learn more. Here are a few:
- RMS's gdb debugger tutorial is available at http://www.unknownroad.com/rtfm/gdbtut/gdbtoc.html
- For a deeper understanding of GDB and the
.gdbinitfile, refer to http://www.dirac.org/linux/gdb/03-Initialization,_Listing,_And_Running.php