
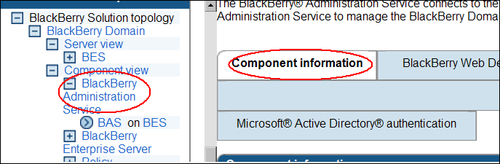
- Under Servers and components, expand BlackBerry Solution topology; expand BlackBerry Domain and then Component view.
- Click on BlackBerry Administration Service and on the right hand pane we can see the settings for our main admin interface.
- With the Component information tab, select scroll down and click on edit component.
- Under Security settings, we can change the minimum password length; for the BAS login accounts default is set to 4.
- We can also set the expiry time of the password by specifying the number of days; default is set to 365. These can be changed to keep in line with your organization's security policies.

If required, we can add the company logo and change fonts using the other tabs.
If we are going to create a role that suits our company needs we are looking to create two roles: a junior helpdesk role and a senior helpdesk role. You might recall from the table under the PIN-to-PIN messages section that the two roles mentioned are pre-configured roles within the BES environment, so why would we need to re-create these two roles?
The reason is that if we are going to use groups in our BlackBerry organization to make admin tasks and management easier, we need to be aware that when we use the two default roles, they by nature have the ability to add themselves to groups, which could have higher, more elevated permissions than you would expect.
For example, if we create a group called Senior Helpdesk, which has the default senior role assigned to it, then add the following administrative user accounts to it: Tim and Jo.
We then create a Junior Helpdesk group, which has the default junior role assigned to it and add our two junior administrative accounts to the group: Tom and Harry.
When Tom or Harry log on to the BlackBerry Administration Service they could add themselves to the Senior Helpdesk group, because by nature the Junior Helpdesk role has the ability to grant access to groups!
So I would prefer to create my own groups, roles, and administrative users from scratch as shown next.
We have the option of creating the role from fresh or we can copy an existing role and change the permissions we need for our organization. For our Junior Admin role, we are going to copy the Junior Helpdesk Administrator role and modify it, so members of it cannot elevate themselves to higher levels of permissions (when we use groups in our organization to carry out administrative tasks).
- Under BlackBerry solution management, expand Role and click on Manage roles.
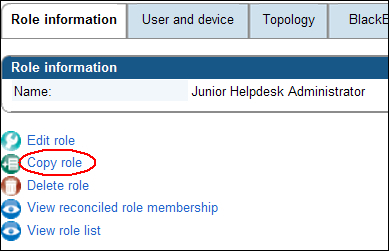
- Click on the Junior Helpdesk Administrator role.

- Select Copy role.
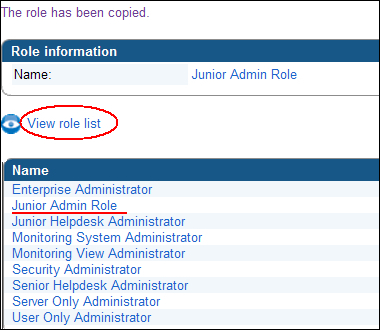
- Enter the name Junior Admin Role and a description and select Copy role.

- Click on View role list and select Junior Admin Role.
- Click on Edit role.
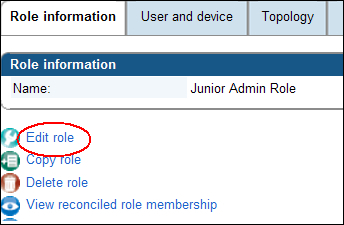
- Click on User and device tab.
- Change the drop-down for Edit a group to No Access.
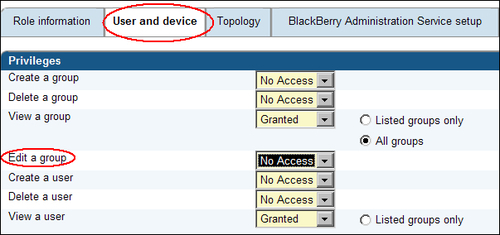
- Check to see if the other permissions are within your organizational policy and then select Save all.
Next, we are going to create a group called Junior Admins and assign it the role we have just created. We envisage in our network that there will be several Junior Admins; therefore having a group will make our management easier.
- Under BlackBerry solution management, expand Group and click on Create a group.
- Enter the group name —
Junior Adminsand a description and click on Save.
- Click on Manage groups.
- Select Junior Admins group.

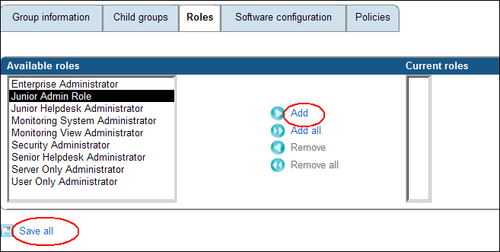
- Click on the Roles tab, and then click on Edit group.
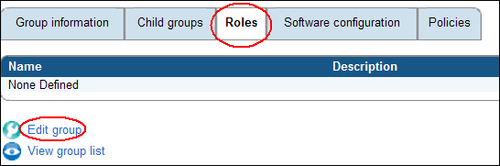
- Then add the Junior Admin Role and select Save all.
Next, we are going to create our administrative users — who have just joined our company as junior admins.
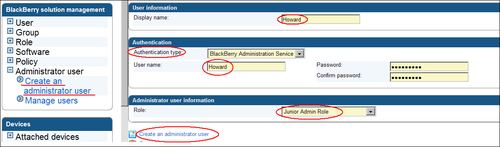
- Under BlackBerry solution management, expand Administrative user and click on Create an administrative user.
- In the Display name, enter a friendly name for the user —
Howard. - Select the Authentication type for the user to log in — Active Directory or BlackBerry Administration Service.
- Enter the appropriate details. If using BAS, the username is not linked to any accounts and therefore can be anything with a strong password (remember we set the minimum length for this password earlier in the lab). If using Active Directory, you will need to specify the Active Directory account username and the domain name.
- Select the Role, which we just created for this user — Junior Admin Role.
- Click on Create an administrator user.
- Finally, we are going to add our newly created user to the group Junior Admins.
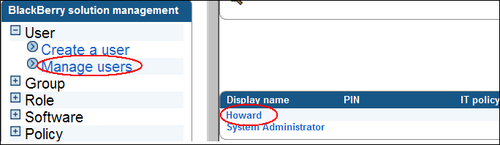
- Under BlackBerry solution management expand Administrative user and click on Manage users.
- Click on Howard (or the user you have created).
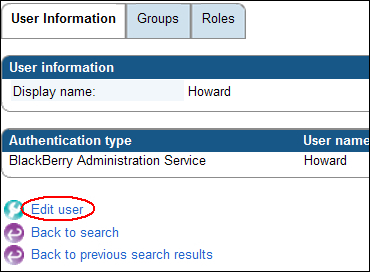
- Then click Edit user.
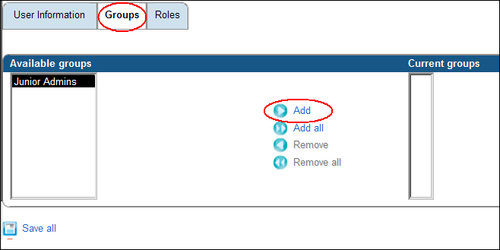
- Select the Groups tab.
- Add the Junior Admins group.
- Select Save all.
So to recap on the above, when you create an administrative user you need to assign the user a role to start with. It is always advisable to assign the user the role with the least permissions to start with. The user can then be placed in appropriate groups, bearing in mind that a user can belong to more than one group. If this happens then the user is given the least restrictive role.
There are two more aspects we would like to set from the off on our BES, one is the Enterprise policy as discussed earlier in the chapter and also the ability to limit BlackBerry Messaging to our corporate network. We will look at activating the Enterprise policy first, remembering that it is a whitelist of devices that are allowed to join our BlackBerry infrastructure.