As mentioned earlier, we can install a fresh copy of BES 5 on a new server. This can be done using the guide from Chapter 1, Introduction to BES 5. Once the new server is installed with its new SRP ID and keys, use the following procedure to transport users to the new BlackBerry domain.
In preparation for the migration, we need to gather the following information to simplify terminology. In the following example, the source server is the old BES currently running on the network and the destination server is the new BES 5 that we have just installed on a fresh server install.
- Database location of the source server
- Database location of the destination server
- Login details of the BESAdmin account (bear in mind that you can use the same existing BESAdmin account when installing the new BES 5 version).
- Download and install the Transporter tool on each server — the tool is found in the Resource Kit.
Once we have downloaded the Transporter tool, which is available from the BlackBerry Resource Kit, install it on the new BES server.
- Double-click on the MSI to install the software.
- Select the appropriate language, accept the license agreement and default installation location and click on Finish once installed.
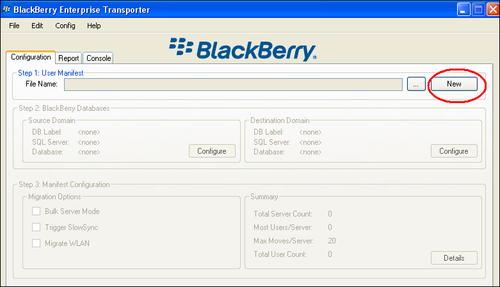
- Launch the Transporter tool.
- Under Step 1: User Manifest, select New.
- Enter a name for the XML file that we are going to create —
BES50 moveand select Save.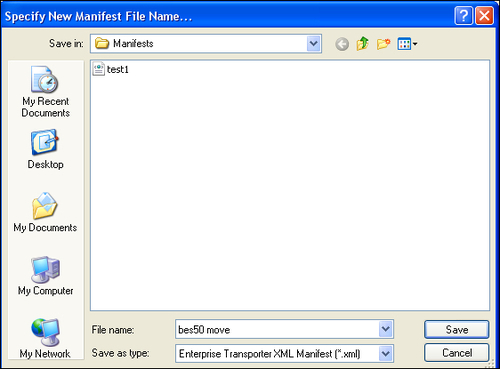
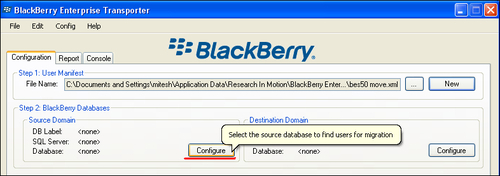
- Under Step 2: BlackBerry Databases, click the Configure button for the source domain.
- In the new box that opens up, use the drop-down to change the Label to <new> as shown in the following screenshot:
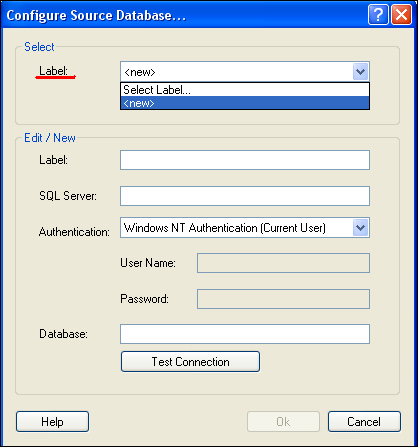
- Enter name for the label —
Conn_Old_BES. - Enter the name of the Microsoft SQL server that houses the old BES database. If you are using instances, make sure you give the full instance name by using
servernameinstancename. - Select the Authentication type that is set up on the old BES database.
- Click on Test Connection and then click on Ok.
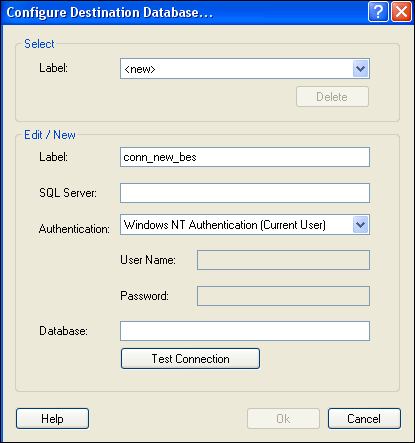
- Click on Configure Destination Database.
- Select new label and enter name as
conn_new_bes. - Enter the name of the SQL server.
- Select the Authentication type and click on Test Connection and select Ok, as shown in the following screenshot:
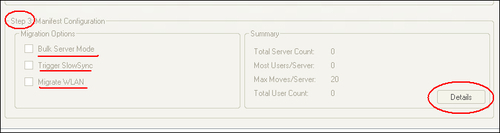
- Under Step 3: Manifest Configuration, we have three options:
- Bulk Server Move: This will allow us to move users in Bulk format from the source database to the destination database (advisable to use when moving a large amount of users — say, 500 plus)
- Trigger SlowSync: This will initiate a slow synch of the user's device to the new BES, once they have been moved to the new BES server
- Migrate WLAN: This option is selected if the setup is done using a WLAN
- For the purpose of this label, we are going to leave all three unticked. Click on Details, as shown in the following screenshot:
- After clicking on Details, a User Manifest Configuration window opens up, as shown in the following screenshot. Click on Find Users.

- Select a user to move from the old BES to the new BES, as shown in the following screenshot. Ensure that the radio button is selected to show users from the whole Blackberry domain. If there are a vast number of users we can move the radio button to other options to granulize the search. Once the users are found for migration, click on Add and then the Done button. RIM recommendations based on a typical server is not to migrate more than 10 users at a time.

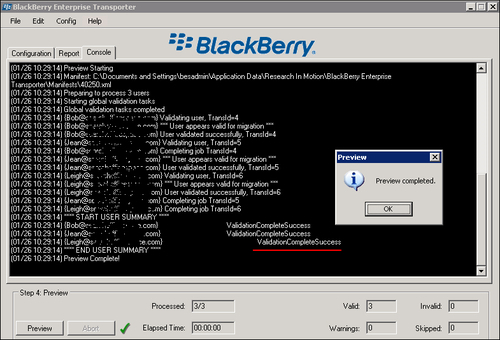
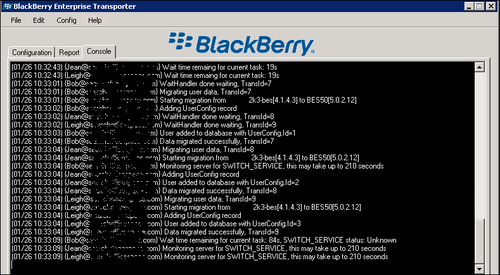
- In Step 4: Preview, we are going to select Preview, so we can see any errors that might crop up during the move of the user.

- While the preview is taking place, select the Console tab so we can take a look at what the move is testing. As we can see from the following screenshot, it will make sure the user is available for the move and has the correct permissions. In our case, the validation has been successful, which means we can move on to Step 5. If any errors are indicated, we need to sort these out before moving on to Step 5, (see the Transport Errors section of this chapter). If there is any warning indicated, we can still move on to Step 5, but would have to tick the Ignore Warnings box; most warnings resolve around data not being moved, or a noncompliant IT policy.
- Once the preview is complete and we have sorted out any errors, we can begin Step 5: Migration, the Migrate option. Depending on the errors seen during the preview, we may want to continue migrating a user with the errors, which means that we would need to place a tick in the Ignore Warnings box.

- We can keep an eye on the migration by selecting the Console tab. A user usually takes 15 minutes to migrate, depending on network traffic and size of the user's database settings.
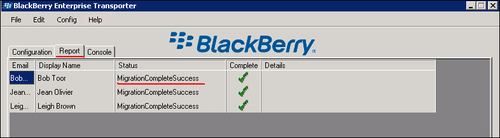
- We can view the report once the migration has finished by selecting the Report tab and as we can see from the following screenshot the user has been transferred successfully along with the IT policy.
- As a final check we can log on to the new BES and see if the user has appeared there and ensure that messages are being delivered to the device.
- The user should also have been deleted from the old BES server.
- The user should have the new IT policy successfully sent to the device along with the correct service books. All this can be checked using the following steps:
- Check that user is on the new BES and messages have been delivered. Click on Manage Users and search for the user we have just migrated across
- Click on the user and ensure under Associated Device Properties the times and dates are current
- Click on the user's PIN number, click on the Messaging tab and ensure message history is current, and shows no errors.
- Click on the Service Books tab and ensure that the user has the right service books and that they are pointing to the SRP of the new BES, not the old one.
Common transport errors are related to BlackBerry Administration Login failed. We need to ensure that we have stated the correct details. A common cause is that a proxy setting is not letting the connection through. If this is the case, then you can follow the procedure so that the Transporter tool bypasses any proxy settings.
In the EnterpriseTransporter.exe.config file, add the following section inside the <configuration> tags:
<system.net>
<defaultProxy>
<proxy usesystemdefault = "false" />
</defaultProxy>
</system.net>
If the users preview reports that the IT policy may not be applied successfully, log on to the current BES and see if the user has any IT policies pending and re-send the user an IT policy from the current BES prior to migrating the user.
To ensure a smooth migration make sure that the user has 50 percent or more battery life on the Smartphone and is in good GRPS coverage.