The installation process itself is pretty much straight forward; we need to log on to the target BES server using the besadmin service account. Make sure that you have at hand the license key and SRP information provided when you bought the software and follow these steps:
- Copy or insert the BlackBerry media on to the target BES server. Extract the software to a folder and run the
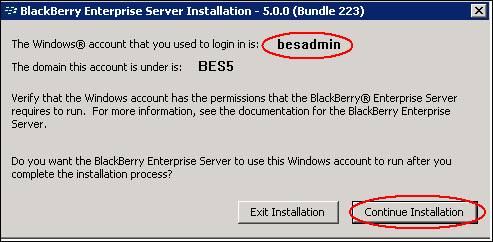
setup.exeicon. - Select the appropriate language. A message will be displayed. Ensure that the account shown is the BES Service account (besadmin) and click on Continue Installation.
- Enter details in the EULA and click Next.
- We now have the option to create a new BlackBerry database or choose an existing one. For this lab we are going to create a new BlackBerry configuration database, as shown in the following screenshot. If you created one already using the
BesMgmt.cfgfile then the following steps will differ.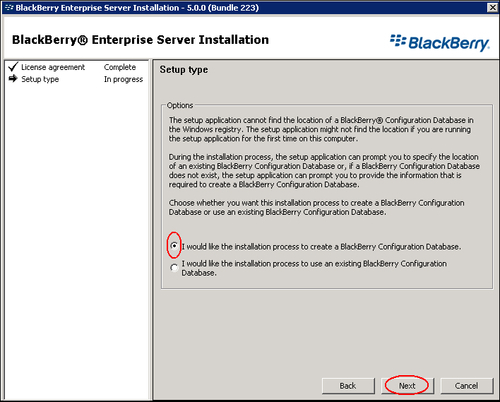
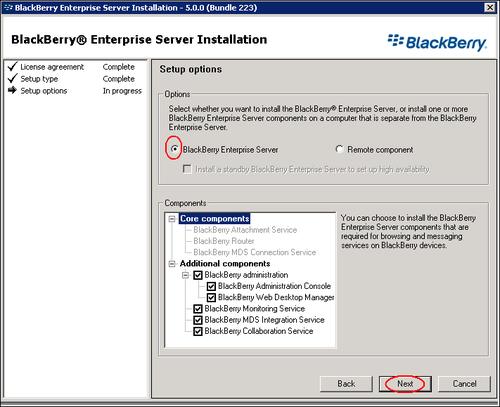
- Then select to install a BlackBerry Enterprise Server with all the components selected, as shown in the following screenshot:
- The next screen will bring up the EULA for the Apache Service. Accept the license and click Next. BlackBerry Enterprise Server does not use Microsoft Internet Information (IIS) to house the BlackBerry Administration websites, it uses the Apache platform.
- You will also need to agree to the CPL license and click Next to continue.
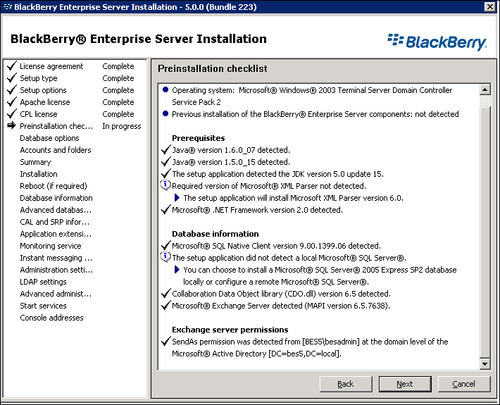
- The setup will run through a Preinstallation checklist so that any software components that the BES needs will be updated. If it's not the latest version or if the software is missing, it will be installed during the setup process.
- Also ensure that the Exchange server permissions have been applied and there are no errors. The setup will prompt to say that the Send As permission for the service account is not set at the domain level. If you have set it at an OU level, such as the users container then it is fine to carry on with the installation, but bear in mind that only users in that OU will be able to send and receive messages via the BlackBerry Enterprise Server. You can follow the same procedure as specified in the Assigning Microsoft Exchange permissions to the Service account section of this chapter for changing the OU to the Domain — if you have users in multiple OU within the domain.
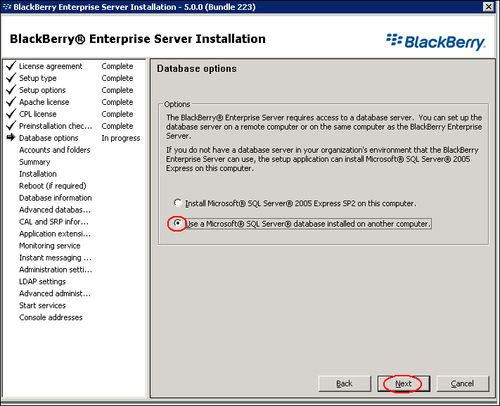
- Next, we have to select our database option. We can install a lightweight MSDE on to the same server or we can point to an SQL server to house the BlackBerry database. We will — for the purpose of this lab — choose to house the BlackBerry database on a remote SQL Server, as shown in the following screenshot:
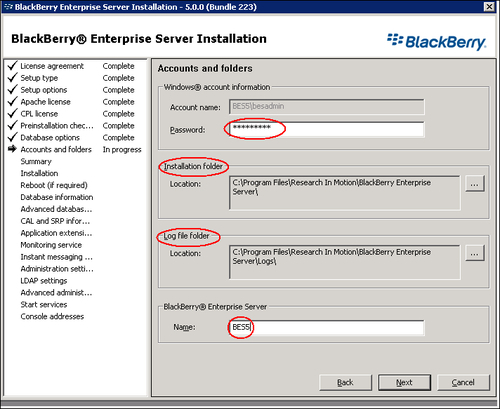
- In the following screenshot, we need to enter the password for the service account. Select the path for the BlackBerry Server installation and the installation log files. We also have to enter the name for the BlackBerry Enterprise Server:
- You will be presented with an installation summary. View to make sure the settings are correct and click on Install. Once the software has carried out the first install part, it will prompt you to reboot the server. Log back in with the besadmin service account.
- Select Local if the SQL Server is housed on the same server as the BES install or select Remote if the SQL server is on a different machine.
- Enter the SQL Server name and the name of the BES configuration database. In our case,
BESMgmt, the default name is fine and select Windows authentication, as shown in the following screenshot: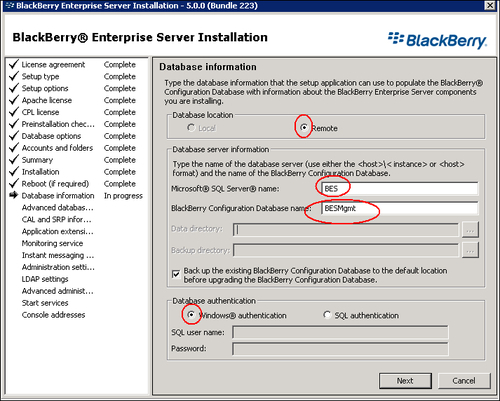
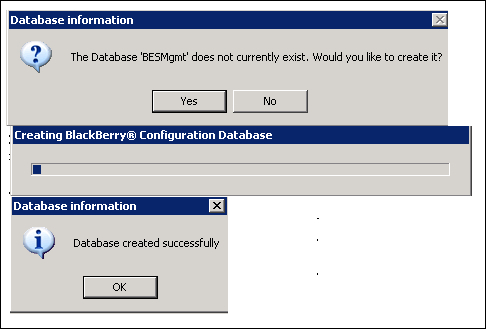
- It will prompt you to create the database and as long as all the permissions and roles are set up correctly — as shown earlier in this chapter — the installation will go ahead and create the database for us, as shown in the following screenshot:
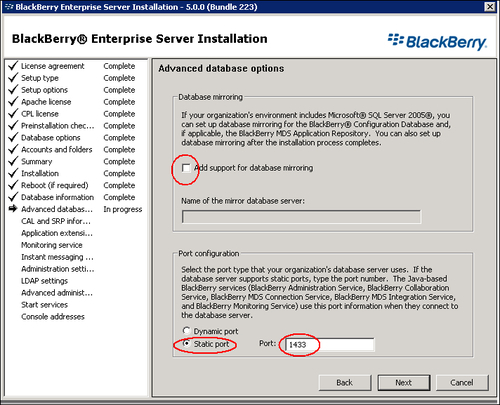
- It will prompt for a mirror database for the purpose of this lab. We will be coming back to this in Chapter 8, Upgrades, so we will leave it unchecked, as shown in the following screenshot. It will also ask you to select the port type the SQL database uses in your organization; the type can either be a Dynamic port or in most cases a Static port running on 1433. Please amend these settings according to your organization's SQL setup.
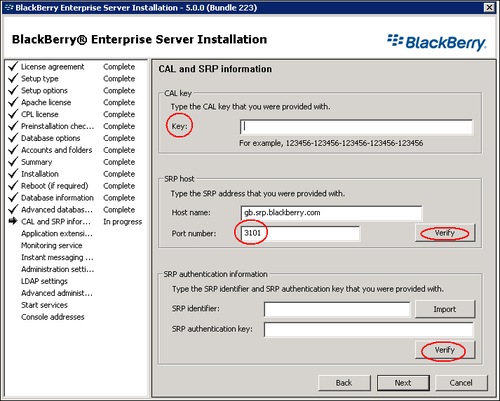
- It will then prompt you to enter the licensing information for the BES server. Enter the
CAL, followed by your SRP host details where the port number should be3101. You can click on the Verify button to make sure the host details are correct. - Type in the SRP authentication information provided when you purchased the BES and click the Verify button to test the connectivity to the BlackBerry infrastructure.
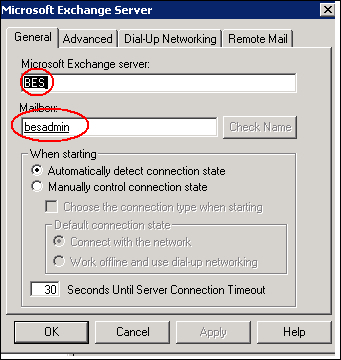
- Once you click on Next, it will prompt you to check the Exchange Server name and the service account. Enter the name of your Exchange Server and the besadmin account.
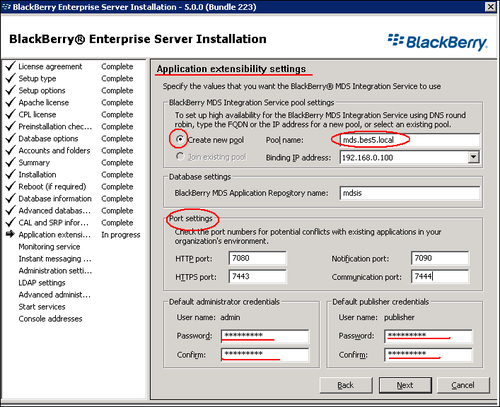
- Once we have clicked OK, it will go back to the Application extensibility settings screen. For MDS Integration Service Pool enter a Fully Qualified Domain name in the Pool name. This is important so that we can utilize DNS and ensure high availability when we do set up a fail over structure. The binding IP address will be of the BES server.
- We need to set up the MDS Integration Service database, which will use Windows authentication. Enter a name for the MDS database or you can accept the default one.
- Verify the port numbers and ensure they don't conflict with any pre-existing port numbers in your infrastructure.
- We have to set passwords for two accounts that are used with the MDS integration service — the administrator credentials and the publisher credentials; both accounts are created during installation. Once the passwords are entered, click on Next. It will then prompt you to create the MDS database, select yes.
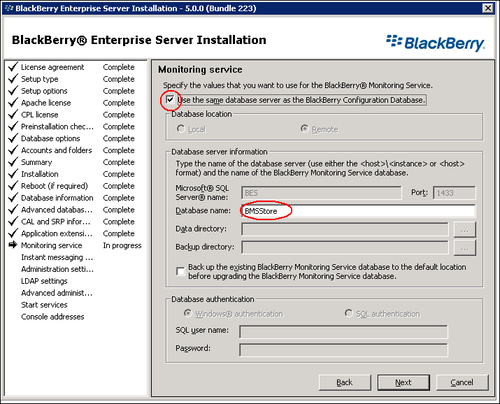
- We now have to enter information regarding our Monitoring service. We can choose to have the monitoring database on the same SQL server as the BlackBerry configuration database or select a different SQL server. We are going to leave the database server on the same SQL server by placing the tick in the first box, as shown in the following screenshot. We have to give the database a name and by clicking Next it will go ahead and create the database for us:
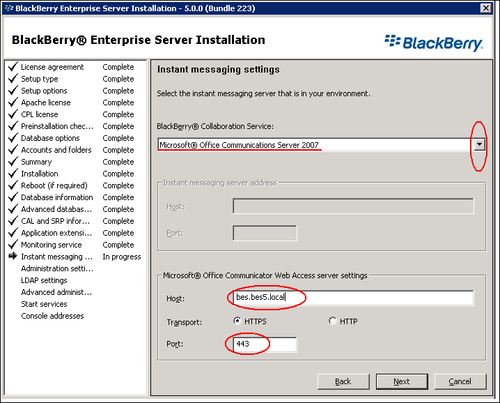
- The Instant messaging settings now appears, from the Blackberry Collaboration Service drop-down. Select Microsoft Office Communication Server 2007 and in the host name type the name of the instant messaging server followed by the port number it uses, as shown in the following screenshot:
- We are then presented with the Administration settings page. This is the new system that we will be using to administer the BES server (it has replaced the old BlackBerry Manager). We need to type a FQDN that the BlackBerry Administration Service can use to host the site.
- Ensure that the default port numbers don't conflict with any existing applications on your network and then type a password that will be used for the SSL certificate to authenticate with the browsers.
- In the Active Directory screen, as shown in the following screenshot, type in the name of the service account,
besadmin, followed by the domain name and the password and verify the settings: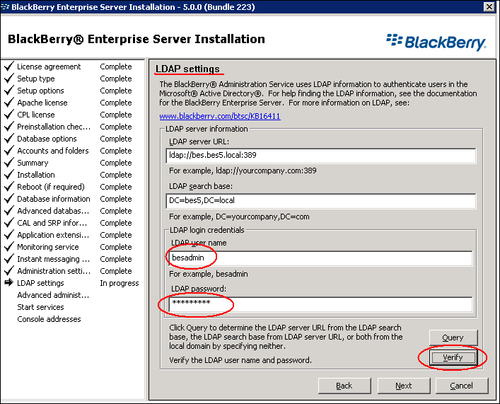
- In the Advanced administration settings we need to decide how we are going to log into the BlackBerry administration site. We have two options: Windows authentication or to use the BlackBerry Administration Service authentication — which has a default User name of admin. We are going to choose the option of using the BlackBerry Administration Service authentication.
- Enter and confirm the password for the BlackBerry Administration Service authentication, as shown in the following screenshot:

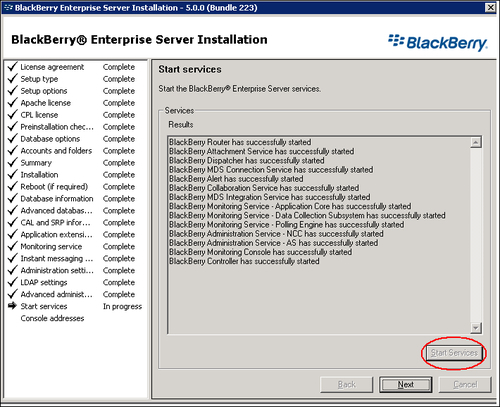
- It will now prompt us to start the BlackBerry services, click on Start services. Once all the services have started successfully click on Next.
- We will then be presented with a list of web addresses to access various sites that we have created during our installation. Please make a note of these sites:
- BlackBerry Administration Service
- BlackBerry Monitoring Service
- BlackBerry MDS Integration Service
- BlackBerry Web Desktop Manager
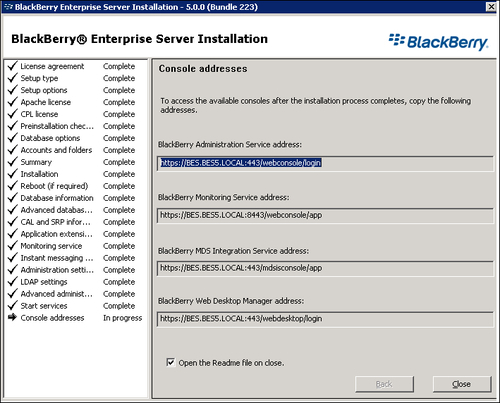
- Click on Close. We have now successfully installed our BES 5!
..................Content has been hidden....................
You can't read the all page of ebook, please click here login for view all page.