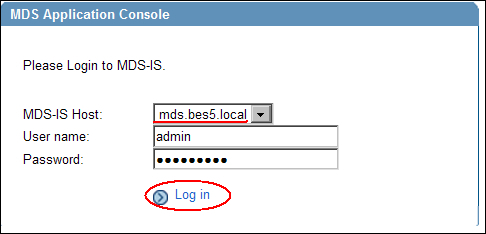
The console was created during the installation of the MDS Integration Service. We can log in to it using the details we specified during installation in Chapter 1, Introduction to BES 5.
- Open up an Internet Browser.
- Type the FQDN of the server that hosts the BlackBerry Administration Service followed by the subdirectories listed next. For example,
https://bes.bes5.local/mdsisconsole/app. - In the MDS-IS Host drop-down list, select our MDS-IS instance, and type in the user name and password created during the installation process.
Now that we have logged into our MDS console, we can add the MDS application to the MDS application repository.
Note
If you get an error while logging in stating "unable to connect to MDS services", ensure that your internal DNS has an A host record pointing to the MDS-IS service. In our example, we would need an A record created in internal DNS that points mds to the ip address of our BES server. Then restart the MDS-IS service.
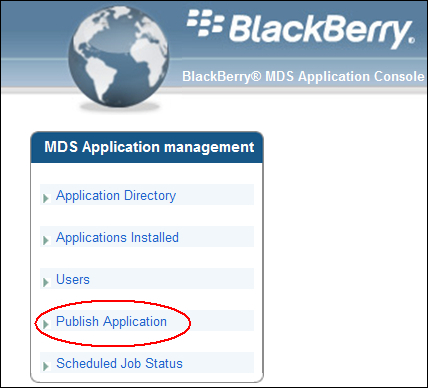
- Within the MDS console under the MDS Application management menu, click on Publish Application.
- In the Upload application bundle section, browse to the Expense Tracker ZIP file (the one downloaded from the link in the introduction of this chapter).
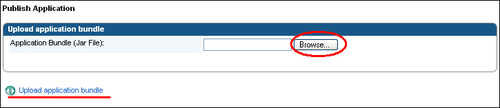
- Click on Upload application bundle and then click on the Update application bundle link again.
We have now added the Expense Tracker to the MDS application repository using the MDS console. Please note that the MDS sample application that we downloaded was already primed for publication. If you are developing your own MDS application, please make sure that you have taken the appropriate steps to make the application publishable.
We now need to look at sending this MDS application to our users' devices.
We can send the MDS application to BlackBerry devices over the air. Users will then use the BlackBerry MDS control centre on their BlackBerry device to search the MDS application repository and find the Expense Tracker application. This will enable them to then go ahead and install the application. The MDS control centre is available on the BlackBerry device once the MDS runtime platform has been installed and activated on the device.
- Log into the MDS console.
- On the MDS Application management menu, click Application Directory.
- Browse for the Expense Tracker application.
- Click on the install icon. We now have the following options:
- We can install the application based on groups, and using the drop-down we can select an existing group that we want to install the MDS application to.
- We can install the application based on BlackBerry PIN numbers. Select the PINs option and we can import a list of PINs from the BlackBerry Administration Service or we can type the PINs in separating each PIN by a semi colon (;).
- We can install the application on BlackBerry devices based on usernames. Select the users option, and as mentioned earlier we can either export the users or type them individually.
- We are going to use the group option and select the Sales Group.
- We can then choose some scheduling options:
- We can specify the date and time we want the application to be installed.
- We can specify how many devices at one time the application install request will be sent to the default setting; the default setting is 10 at a time and is configured under the group setting.
- The push interval allows us to set the interval at which the MDS Integration Service tries to send the application to devices; the default value is 5 minutes.
- Click Install to proceed.
We can check to see if the process was completed successfully by viewing the scheduled job status in the MDS console under the MDS Application management.
So using the MDS console, we have successfully deployed the MDS Expense Tracker application to all the devices within the Sales Group.
You should now be able to go to a device that belongs to the Sales Group and see the MDS Expense Tracker application functioning on their device.
We have settings available in our IT policy with regards to MDS applications; these can be configured to provide tighter control of the applications.
As with Java-based software, we can apply application control policies to our MDS applications. This feature is outside the scope of this book but further information can be found at http://www.blackberry.com/developers/.