
Working with Auto Layout can be very frustrating. If it does not work correctly, I recommend that you clear all the constraints and start over.
Let's begin by adding Auto Layout to our Label subtitle, which is where we should show the currently selected location:
- Select the View, that we are using as a container and then the Pin icon. Enter the following value:

- Click Add 4 Constraints.
- Select the Label subtitle and then the Pin icon. Enter the following values:

- Click Add 4 Constraints. Your constraints should look like the following:
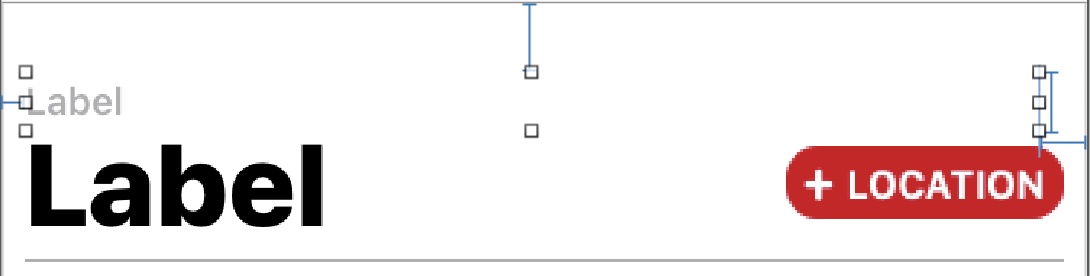
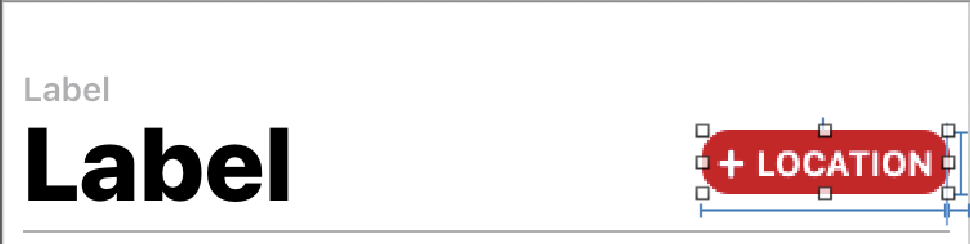
- Next, select the Location button and then the Pin icon. Enter the following values:
-
- Top: 5
- Right: 8
- Constrain to margins: Unchecked
- Width: 96 (should be checked)
- Height: 25 (should be checked)
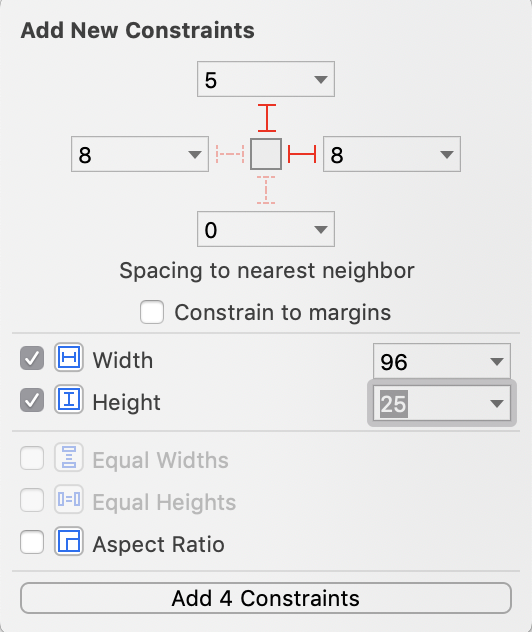
- Click Add 4 Constraints. You should now see the following:
- Now, select the grey line (it might be easier to use the outline to select the view) and then the Pin icon. Enter the following values:
- Right: 8
- Bottom: 0
- Left: 8
- Constrain to margins: Unchecked
- Height: 1 (should be checked)
- Click Add 4 Constraints. Your constraints should look like the following:

- Select the Label (title) and then the Pin icon. Enter the following values:
-
- Top: 0
- Right: 8
- Left: 8
- Height: 37 (should be checked)
- Constrain to margins: Unchecked
- Click Add 4 Constraints. You should see the following when you are done:

We have completed adding Auto Layout to the Explore tab header. If you want to check every constraint, feel free to look at Chapter 11, Getting Started with the Grid, starter project. Let's look at designing the Explore Cell next.