Now that you have your phone and account connected, you can quickly get your phone set up to run wirelessly. With your device already connected via USB, go to Window | Devices, and then Simulators. Click on the checkbox marked Connect via network:
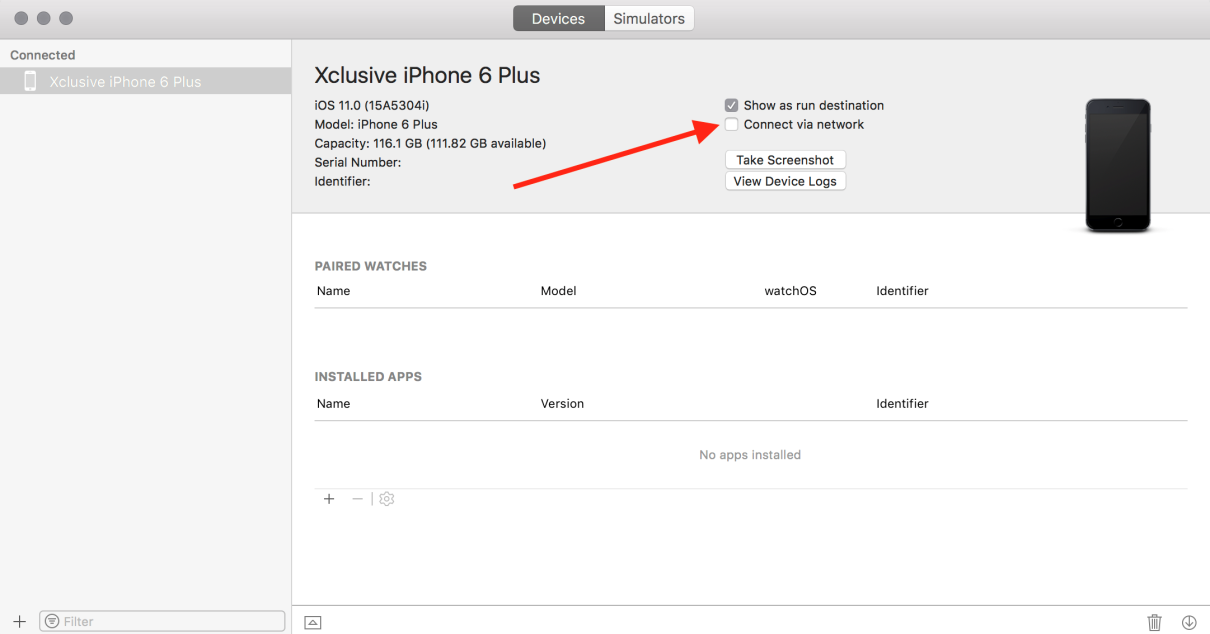
Make sure that your phone and your computer are connected to the same Wi-Fi network.
When I first connected to my device, I saw a globe icon in Xcode that lets you know that your device is connected via the network, as demonstrated in the following screenshot:

After a short time, the globe went away. Even if you do not see the icon, you can disconnect the USB, and your device should still be connected to Xcode (as long as it is connected to the same Wi-Fi network).
You will not need to use a device for this book, but it is always good to run your app in an actual device before you submit it to the store.
Before we get to the right-hand side of the toolbar, select the Main.storyboard file in your navigator panel. This file is used to display all of your visual setup for your entire app. We will this in detail later in this book. After you select the file, you should see the following: