Photoshop, Illustrator, and InDesign allow you to create type within bounding boxes. In Photoshop, you can create multiple paragraphs within a bounding box and choose justification options, but you have no ability to link multiple blocks of text (known as text threading). When you set type in a bounding box in Illustrator, the box is called area type; in InDesign, it is referred to as a text frame. To make our discussion easier in this chapter, type bounding boxes in both InDesign and Illustrator are referred to as text frames.
Both Illustrator and InDesign offer advanced options for handling text blocks, including the ability to thread text, apply attributes to text frames, and wrap text around objects. Text frames can assume many different shapes and can appear as graphic objects or flow around objects and images. In both Illustrator and InDesign, text frames give you great flexibility when working with type.
Text frames are created in the same manner in both Illustrator and InDesign. Simply click the Type tool, and drag to create a rectangle. A blinking cursor tells you the program is ready to accept type within the frame you created.
To resize a text frame, click and drag any one of the handles on the bounding box and reshape as desired. Any text within the frame conforms to the new size. If you start typing in a text frame and you want to quickly reshape the frame, press the
Tip
InDesign CS4 and Illustrator CS4 have a new pop-up measurement readout that shows you the width and height of a frame as you draw text frames and objects.
You can add text to a frame either by typing it in directly from the keyboard or by importing it from another document. If the text oversets the frame (that is, the bounding box is not large enough to hold all the text), you will see a tiny red plus sign (+) in a box at the bottom-right corner of the text frame. If you don't want the text to carry over to a new text frame, you need to make the type size smaller or the text frame larger, until the plus sign disappears. However, if you want to create a text thread (that is, carry the text over to a new frame), click the plus sign with the Selection tool. This action "loads" the cursor with all the overset text. Click and drag open a new text frame, and the overset text automatically flows into the new frame.
Tip
You can resize text frames to fit the content in InDesign by double-clicking on the control handles.
In Illustrator, when you select threaded text frames, you see a visible link between them, as shown in Figure 17.1. You can hide the text threads by choosing View

InDesign's default setting hides the text threads. There is no visible indication that the text blocks are linked. If you want to view the text threads, choose View

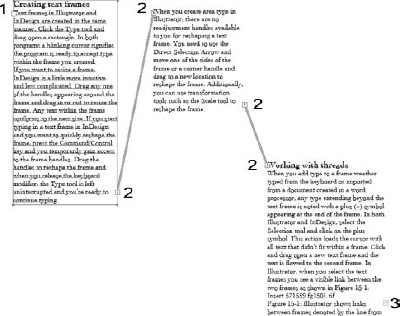
Text frames in both Illustrator and InDesign have in ports and out ports that enable linking to other text frames for continuation of a thread. The in port is a small square located in the top-left area of the text frame, and the out port is located at the bottom-right. An empty port indicates that no text precedes or follows the text frame. A port containing a right arrow indicates that text is threaded from one frame to another. An out port with a plus (+) symbol indicates that more text is contained within the frame but has not yet been threaded and remains hidden. In Figure 17.3, you can see a thread where the symbols are placed.
To flow overset text to a new text frame, simply click the plus sign on the out port with the Selection tool. Click a blank area of the document, or drag open a rectangle, and the overset text flows to the new frame.
If you need to add a new text frame between frames in an existing thread, use the Selection tool to click the out port preceding the frame where you want to add the new frame. Clicking the out port loads the cursor with text following the selected frame. Click and drag open a new text frame, and the text is then threaded through it. Note that you can also click the in port and thread the text backwards.
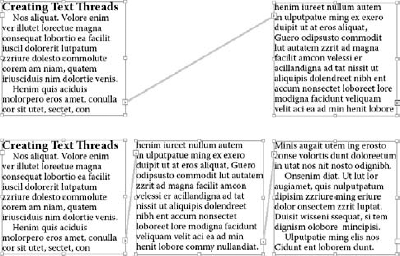
To make this process a little clearer, look at Figure 17.4. At the top, you see two linked text frames with overset text as indicated by the plus sign (+) in the out port of the second text frame. To eliminate this overset, we want to create a new text frame in the second column and thread the text through it. To do this, we click the out port at the bottom-right of the text frame in column one. The cursor changes to indicate that it is loaded with all the text following that frame. Then we click and drag to create a new text frame in column two. As you can see in the bottom example in Figure 17.4, the text thread now runs through the newly created text frame and is no longer overset in the third frame.
Illustrator and InDesign differ a little when unthreading frames. In Illustrator, you can break a thread between two objects, release an object from a text thread, or cut the threads without changing the placement of the text. In InDesign, you have only two options: You can unthread frames that result in breaking the thread to all subsequent frames, or you can cut a frame from a thread. The methods for handling each of the three options in Illustrator and the two options in InDesign include the following:
Breaking a thread in Illustrator: Using the Selection tool, double-click an out port to break the thread to the next frame; double-click an in port to break the thread to a previous frame; or single-click an in or out port, move the cursor to another in or out port, and click the cursor.
Releasing an object from a text thread in Illustrator: Click the object you want to release from the thread with the Selection tool. Choose Type

Cutting threads in Illustrator: Select a linked text object with the Selection tool, and choose Type
Breaking frames in InDesign: To unthread or break frames in InDesign, start by clicking an in or out port with the selection tool. The cursor loads with text. Move the cursor over an in or out port in another frame, and double-click the mouse button. Note that when the cursor is loaded and positioned over an in or out port, the cursor shape changes to a broken-chain-link symbol informing you that the thread will be broken. Likewise you can just double-click an in/out port to break the thread.
Cutting frames in InDesign: To cut a frame in InDesign, start by selecting one or more frames in a thread with the Selection tool. For multiple frame selection where you want to cut several frames, use Shift+click. Choose Edit
Note
You have some sample scripts installed in the InDesign folder on your hard drive that handle splitting frames and stories. Open the Window
Text frame attributes include options for creating columns, creating offsets, setting type, adjusting baselines, and so on. The ability to change text frame attributes is a timesaver because it allows you to make text formatting and/or layout changes quickly and easily. For example, if you need to change the type style and column width of multiple text frames, you can make these changes simply by selecting the text frames and applying the desired attributes. In both Illustrator and InDesign, dialog boxes offer options for setting attributes of text frames. In InDesign, using Object Styles makes this much more powerful.
Note
For information about Object Styles in InDesign, see Chapter 16.
When you create layouts in InDesign, you can specify the number of columns applied to pages. You can create threaded text frames within individual columns and flow the text through multi-columned pages. Likewise, in Illustrator, you can create several text frames and link the frames to create a single thread. As an alternative to creating multiple frames, you can create single text frames and divide the single frames into multiple columns. You can create multi-column text frames in either Illustrator or InDesign.
In Illustrator, create an area type frame by selecting the Type tool and dragging open a rectangle. From the Type menu, select Area Type Options, and the Area Type Options dialog box opens, shown in Figure 17.5.
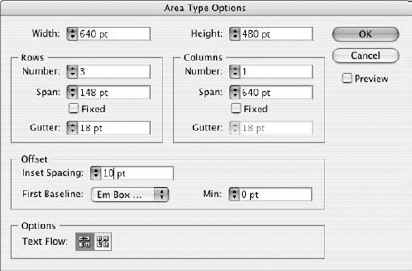
In Illustrator's Area Type Options dialog box, you can specify overall width and height, define rows, columns, and offset values, and select a text flow method. When experimenting with different attributes, place a check mark in the Preview box to dynamically preview the results.
InDesign has a similar dialog box for setting text frame attributes. In InDesign, choose Object
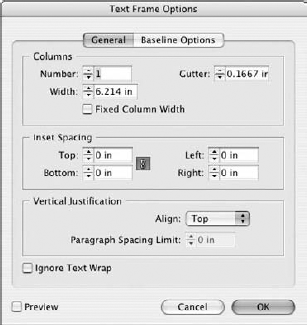
The Text Frame Options dialog box offers you a Preview check box. This InDesign feature enables you to preview settings made in the Text Frame Options dialog box dynamically in the page layout as you make settings adjustments.
InDesign CS4 provides you additional settings for baseline adjustments. You can set up baselines for frames instead of the entire document. Click the Baseline Options tab in the Text Frame Options dialog box, and the options choices for baseline settings appear, as shown in Figure 17.7. The choices for using a custom baseline include defining a start point (offsetting from the layout grid); setting the baseline relative to the page, page margin, frame or inset; increment values (normally this setting is equal to the body text leading); and displaying a user-defined color for the grid lines. Custom baseline grids are particularly helpful when using rotated text layouts.
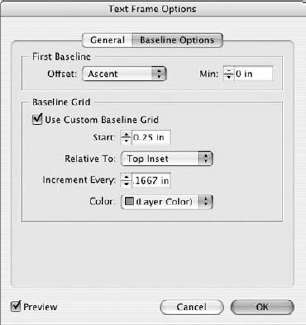
Figure 17.7. To apply baseline settings on a frame, select the Use Custom Baseline Grid check box and make settings choices for the offset, relative to, and a gridline color.
The following steps show how you might apply options for text frame attributes using the Text Frame Options dialog box in InDesign.
STEPS: Setting Text Frame Options in InDesign
Create a new document. Open InDesign, and choose File
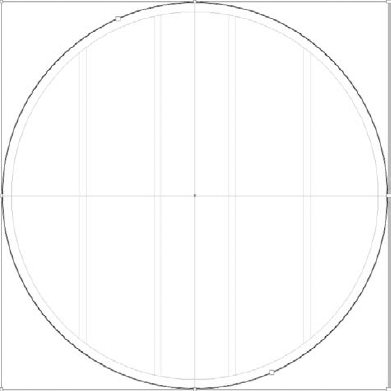
Create a frame object. Drag guidelines from the ruler wells to the 3-inch vertical and horizontal ruler marks. The guidelines intersect at the center point of the document. Select the Ellipse Frame tool, and position the cursor at the center point. Hold the Option/Alt key, and press Shift to drag from center and constrain the angle to create a perfect circle. Click and drag from the center out toward the outside guidelines to create a circle. The default margin guides appear at 0.5 inches around the inside of the document page, as shown in Figure 17.8.
Convert the object to a text frame. Select the object, and choose Object
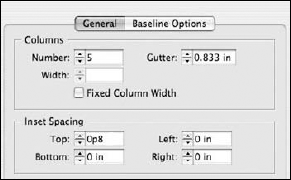
Set the text frame options. Select the text frame, and choose Object
View the text frame edges. By default, you may not be able to see the column and inset spacing guidelines. If the guidelines are not shown, choose View
Set the text attributes. Click the Type tool and from the Control palette, select the font and point size for your type. In Figure 17.11, Kabel Book was selected from the Font drop-down list and the type size was set to 8 points.
Fill with placeholder text. If you created a keyboard shortcut for filling with placeholder text as discussed in Chapter 16, press Shift+F12. If you didn't create a keyboard shortcut, choose Type

You can set text attributes via the Control palette for options such as typeface, font size, leading, kerning, and tracking. In addition, you have a couple of text formatting options in the Text Frame Options dialog box. They include First Baseline positioning and Vertical Justification options.
In the Text Frame Options dialog box (refer to Figure 17.7), the First Baseline pane allows you to choose a first baseline offset method from a pull-down menu and also lets you specify a minimum value for first baseline offset. The following explains these items in more detail:
Ascent: With this setting, the first baseline is calculated so that the top edges of characters with ascenders (such as d and b) fall just below the top inset of the text frame.
Cap Height: With this option, the top edges of uppercase letters touch the top inset of the text frame.
Leading: This setting uses the text's leading value as the distance between the baseline of the first line of text and the top inset of the frame.
x Height: This option calculates the first baseline whereby the top of the x character falls just below the top inset of the text frame.
Fixed: This option allows you to specify the distance between the baseline of the first line of text and the top inset of the frame.
Minimum: The field box to the right of the Offset pull-down menu is where you can specify a minimum value for the first baseline offset.
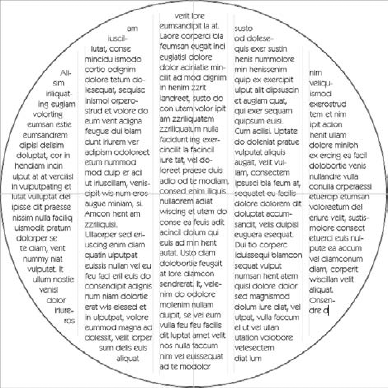
Vertical Justification in the General pane allows you to specify how text is aligned vertically within a text frame. When you choose Top, Center, or Bottom from the Align menu, the text retains its specified paragraph leading and paragraph spacing values. When you choose Justify as the vertical alignment option, the lines are spaced evenly to fill the frame, regardless of the specified leading and paragraph spacing values. Figure 17.12 shows examples of the four vertical justification options available in InDesign.

One big advantage of using layout programs is the ability to use master pages. Elements placed on the master page automatically appear on all subsequent pages where the master page is applied. The use of master pages eliminates repetitive keystrokes, ensures greater design consistency, speeds up the editing process, and conserves memory because objects are applied on a single page and referenced on all other pages. Master pages are available only in InDesign.
Illustrator CS4 now offers multiple artboards where you can create multi-page documents. For more information on creating multiple pages in Illustrator, see Chapter 24.
You can add a text frame on a master page and define the type attributes for the frame. On all subsequent pages where a given master page is applied, the text frame is positioned and ready for use. When you create a new document check the Master Text Frame checkbox in the New Document dialog box to add master frames to new documents. You can either type text in a master frame or import text from another document. The text automatically picks up the attributes you established on the master page.
Note
For a more comprehensive view on creating master pages, see Chapter 24.
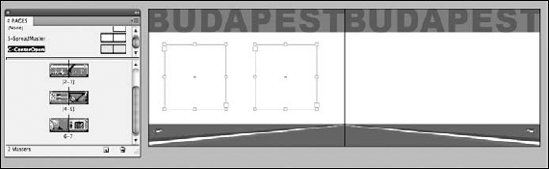
You create text frames on master pages in the same way you create them on regular pages. Use either the Type tool or convert objects to text frames. To set text attributes, styles, and other options, click the cursor inside the frame or select the frame with the Selection Tool. While selected, set the attributes using the various palettes and menu options used for type, such as the Control palette, the Character palette, and the Paragraph palette. In Figure 17.13, you can see a master page containing two separate text frames, and several objects. You set text attributes for the separate frames by clicking in each frame and then setting options.
When you have one or more frames created on a master page and you apply the master page to document pages, you can type in the frames or import text. Selecting the Type tool and clicking on a frame, however, does not access the frame. Neither the Type tool nor the Selection tools alone can activate a text frame from a master page. You need to use
Tip
If you want to place a file in a frame, choose File
All the options you have for creating text threads, autoflowing text, and assigning attributes are available to you when creating frames on master pages. If you create frame threads on master pages, you can flow text through the frames, as shown in Figure 17.15. The frames in Figure 17.15 were drawn on the master page, and text was placed on a document page based on the master page. Notice that the frame threads show the direction of the text flow.
When you want to flow text through a document using InDesign's text autoflow feature, you can use autoflow features with or without frames on master pages. InDesign permits you to add Master Text Frames at the time you create a new document by checking the Master Text Frame check box in the New Document dialog box. If, after creating a layout you want to add a master frame, you can do so on a master page. If you created a Master Text Frame in a new document, when using the master page you can change attributes of text frames easily by adjusting the single master page items and the text flows on all documents according to the adjustments made on the master pages. To understand quite simply how to work with master text frames, follow these steps where we begin by creating a master text frame on a master page.
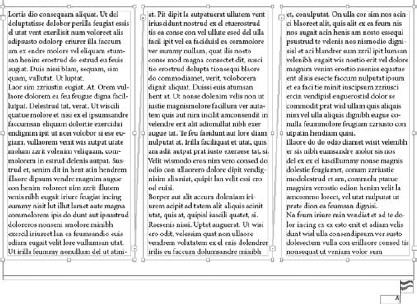
Figure 17.15. Frame threads on master pages can be applied to document pages keeping the thread order.
STEPS: Autoflowing Text in Master Frames
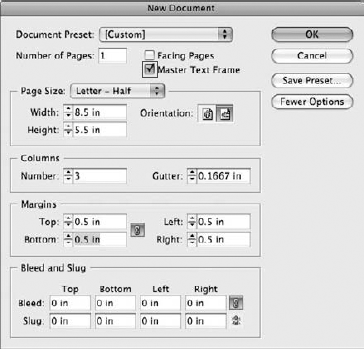
Create a new document. Open InDesign, and choose File
Note
If you don't see the Bleed and Slug area in the New Document dialog box, click More Options.
Import text. Choose File
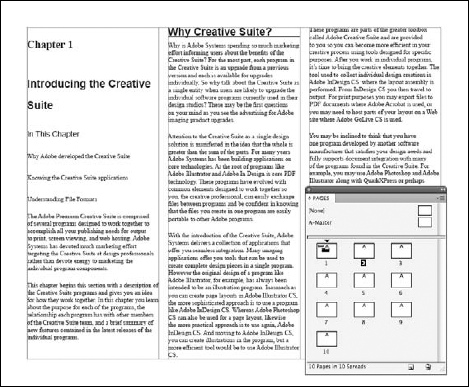
Autoflow the text. When you double-click a filename or select a file in the Place dialog box and click Open, the cursor is loaded with text from the selected file. To place the text, you simply click the cursor to place text in an existing frame or click and drag the cursor to place text within a new frame. However, when placing text within a master frame, where you want to flow the text through many pages in your document, press the Shift key, and you see the cursor change shape. Click the mouse button with the Shift key depressed, and the text flows through the master text frame. If more text is placed than can fit within the current frame, InDesign adds new pages with new master frames and threads the text. More new pages are created with frames until the end of the passage of text is reached. In Figure 17.17, we added text to a master frame in a one-page document, and InDesign created an additional nine pages to accommodate the text file.
When you create a master text frame, you can return to it and modify its attributes. Changes made on the master frame are reflected on all pages where the frame is used.
To modify a master frame, double-click the master page in the Pages palette where the frame is positioned. Select the frame with a Selection tool, and either open a context menu and select Text Frame Options or select the Object menu and select Text Frame Options. The Text Frame Options dialog box opens. You can make changes to the number of columns, gutter spacing, inset spacing, baseline shifts, and vertical justification the same as when you make changes to frames drawn manually on individual pages. Likewise, you also can apply attribute choices for text styles and transformations to the master frames and Object Styles.
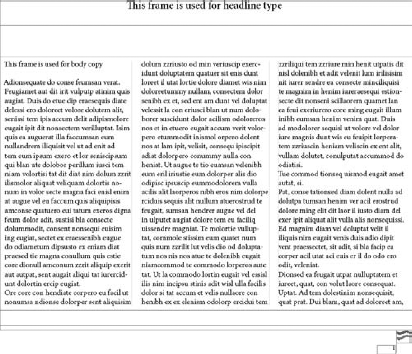
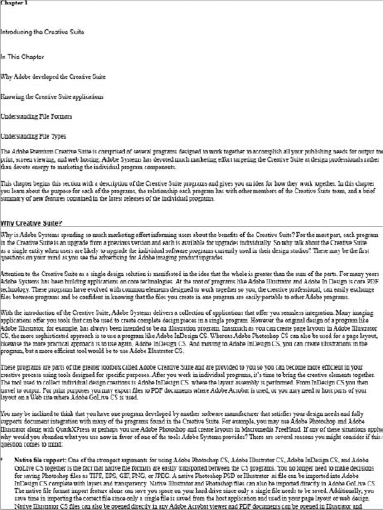
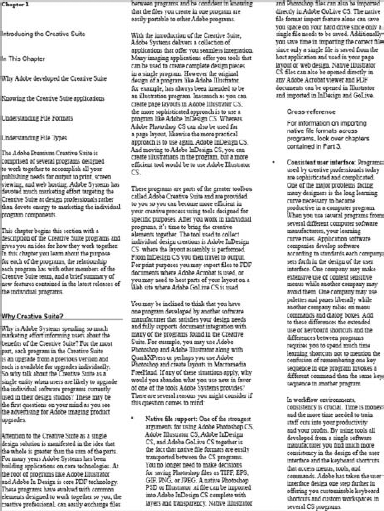
After making adjustments on the master frame, all text within a master frame thread is readjusted to the changes made to the frame on the master page. In Figure 17.18, text was placed on a page in a single column. The text was placed within a frame created from a master frame on the master page. By adjusting the Text Frame Options and changing the frame from one column to three columns, all the text in the document using the master frame adjusts automatically, as shown in Figure 17.19.
Wrapping text around graphic elements in your design layouts can add greater visual appeal to your document. If you must manually set type around objects to create a text wrap, your job could become tedious and time-consuming. Fortunately, both Illustrator and InDesign offer you many different options for wrapping text around objects and images.
You can wrap text around any placed object, type objects, imported images, and objects you draw in Illustrator. If you save files as bitmaps from Photoshop with transparency, Illustrator can wrap text while ignoring transparent pixels. In Figure 17.20, you can see a text wrap around a Photoshop bitmap image with transparency.
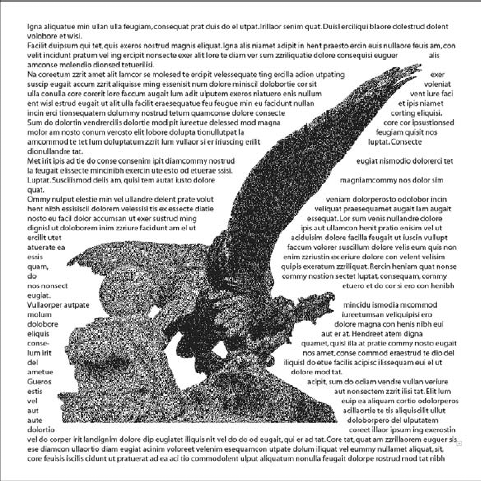
Figure 17.20. Illustrator can wrap type around objects as well as images with transparency, clipping paths, and transparent layers.
To understand how to wrap text around graphic objects, look over the following steps.
STEPS: Applying Text Wraps to Objects in Illustrator
Create area type on a new document page. Create a text block by selecting the Type tool and dragging open a rectangle where you want the text to appear. You can import text or type text in the text block.
Tip
If you want to use Greek text in Illustrator, open InDesign and use the Fill with Placeholder Text command to add Greek text to a text frame. Click the cursor inside the frame and choose Edit
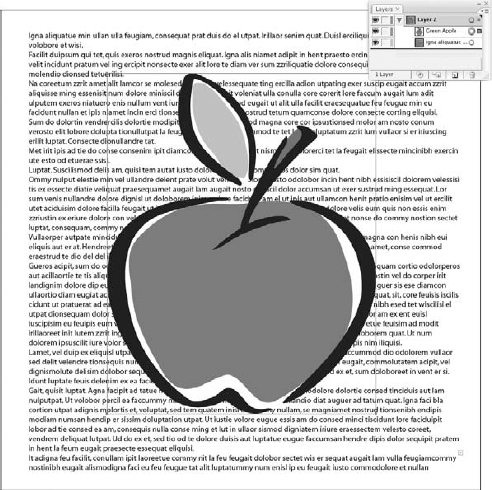
Place a graphic you want to use for the text wrap. You can place an object created in another program or use objects created in Illustrator. If you don't have an object handy, use the Symbols palette and drag an object to the document window. Use the transformation tools to size the object as desired. In Figure 17.21, an object from the Symbols palette was sized and placed on top of the text. Be certain that the object to be wrapped is on the same layer as the text and that it appears in front of the text.
Assign a text wrap to the object. Objects are assigned attributes for a text wrap. Select the object with one of the selection tools, and choose Object
Open the Text Wrap Options dialog box. Choose Object
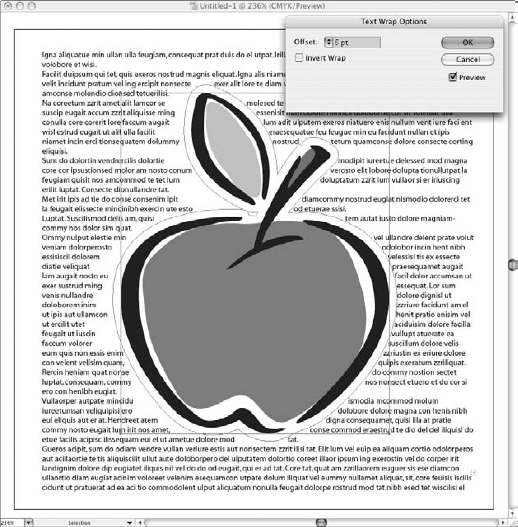
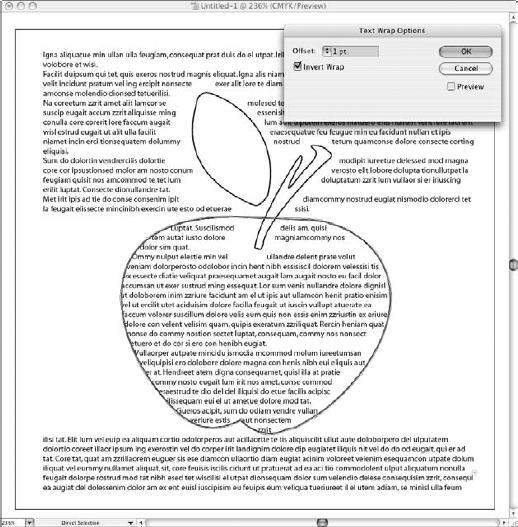
In the Text Wrap Options dialog box, an option appears for inversing a wrap. Check the box, and click Preview to see the results of an inverse wrap. This option is used for containing text within objects, as shown in Figure 17.23.
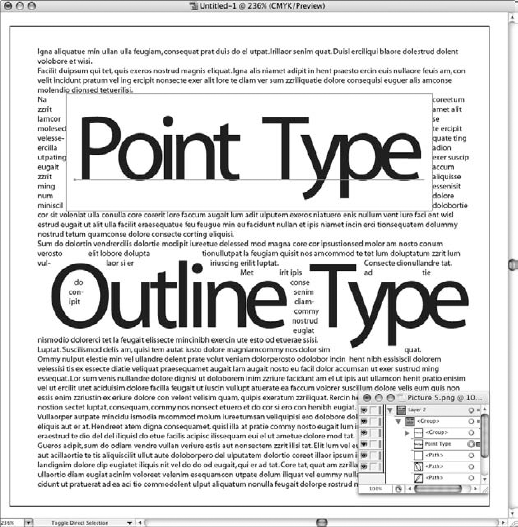
You also can wrap text around type objects. You can use the text frame as the object, or you can create outlines and wrap text around the outlined type. Follow the same procedures for applying text wraps to graphic objects. In Figure 17.24, you can see the effects of wrapping text around a text frame (top) and text converted to outlines (bottom).
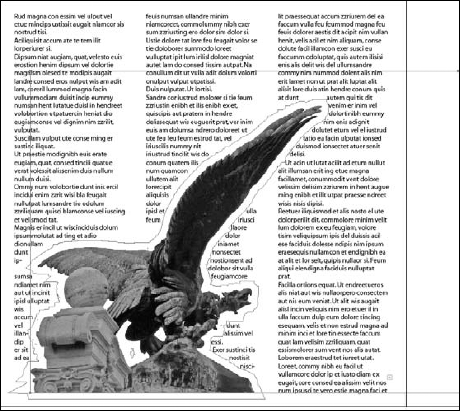
Images from Photoshop can be assigned text wraps. Follow the same steps as mentioned previously for applying text wraps to graphic objects. Be certain that the placed Photoshop file is contained in the same group as the text that wraps the object. If a Photoshop file contains a mask or transparency, be certain to create a clipping path and save the file with the path in either Photoshop native format or EPS. In Figure 17.25, a clipping path is added to the image. Notice that the transparency is not enough to create the wrap around the object in Illustrator to properly designate the path. The clipping path is needed to mask the object so the text wrap falls around the image.

Figure 17.25. Create and save a clipping path in a Photoshop file when you want to mask an image. Save the document in Photoshop native format (PSD) or as an EPS.
Notice that the text neatly wraps the image, as shown in Figure 17.26, at the offset distance defined in the Text Wrap Options dialog box.
InDesign offers significantly better options for wrapping text that you find in Illustrator that include additional options for setting the text-wrap and path attributes. You can adjust clipping paths and path tolerances in InDesign, as well as set the same options found in Illustrator's Text Wrap Options dialog box.
If you have an Illustrator document that needs to be imported into InDesign, you can create text wraps and complete the layout in Illustrator. When the file is imported into InDesign, the text wraps and layout appearance are preserved in InDesign when you place the file. In Figure 17.27, you can see the results of importing a native Illustrator document with a text wrap into InDesign.
InDesign offers you options for adjusting the clipping path on placed objects and also on objects placed in Illustrator and imported into InDesign. The path defined in Photoshop is the default path used in Illustrator and ultimately appears in the InDesign view.
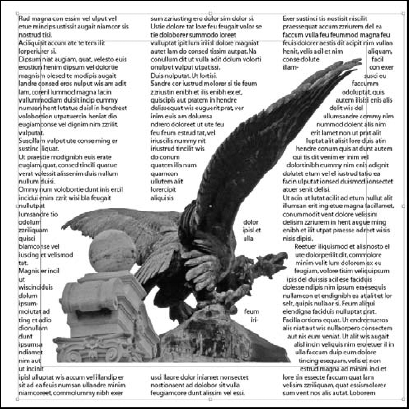
Figure 17.27. Text wraps created in Illustrator are preserved when placed in InDesign. Save the Illustrator files in native Illustrator Document (AI) format and import directly by choosing File
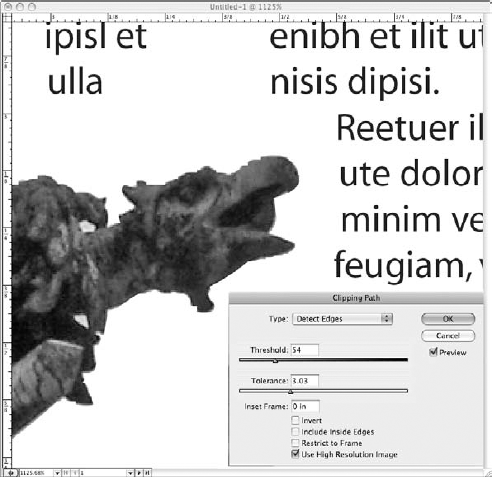
You may have situations where artifacts appear around the edges of an image to which you have assigned a clipping path. If you need to adjust the tolerance so more of the path edge is cut off or the edge is pushed out to show more image and less mask, you can make the adjustments in InDesign. With the placed object selected, choose Object
From the Type drop-down list, select Detect Edges. The Threshold and Tolerance sliders enable you to adjust the path. In Figure 17.28, you can see the results of changing the Tolerance and Threshold on the same image used in Figure 17.26.
InDesign offers you a more elaborate set of options for wrapping text than you find in Illustrator. InDesign's Text Wrap palette lets you specify wrap options for a selected object in the foreground, as well as specify how the text behind the object is wrapped. Shown in Figure 17.29, the Text Wrap panel is opened by choosing Window
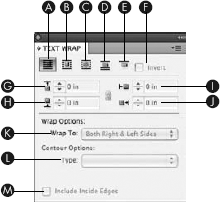
In the Text Wrap palette, you see five icons across the top of the palette, some field boxes, and drop-down lists, all used to adjust text-wrap options. The items include the following:
No Text Wrap icon: The first icon in the top row turns off text wrap.
Wrap Around Bounding Box icon: The second icon sets the text wrap around the bounding box of all objects. The bounding box represents the periphery of the farthest elements to the edge of the object.
Wrap Around Object Shape icon: This icon wraps the shape of objects and can include images with clipping paths. When this icon is selected, the drop-down lists for the Contour Options become active.
Jump Object icon: Selecting this icon stops the wrap at the top of the image and starts it again at the bottom of the image. In essence, the wrap jumps over the object/image.
Jump to Next Column icon: When you want the text to stop at the top of the image and not continue below the image, select this icon and text jumps to the next column. In essence, the wrap offset is used for the top of the image only, without regard to the sides or bottom of the image.
Invert check box: This option is the same as you find in Illustrator. It is used to invert the text wrap and wrap text inside objects.
Top Offset field: This option controls the offset distance on the top edge of the object/image. Edit the field box or click the up/down arrows to adjust the offset distance. Note: When contour options are selected (see below), Top Offset is the only available field and applies to the entire contour, not just the top of the object.
Bottom Offset field: This option acts the same as Top Offset but controls the bottom offset distance.
Left Offset field: This choice offers the same offset options controlling the left side of the object/image.
Right Offset field: This option controls the offset for the right side of the object/image.
Wrap to drop-down menu: This choice includes options for the sides of the object to wrap to.
Contour Options drop-down list: From the Contour Options Type drop-down list, you have options that are used when you select the Wrap Around Object Shape icon. The options in the menu include the following:
Bounding Box: Choose this option when you want to place the wrap around the frame where the outside edges appear.
Detect Edges: InDesign can automatically detect edges in objects and images with paths. To enable auto-detection of edges, use this option.
Alpha Channel: Use this option when a Photoshop image contains an Alpha Channel or transparency and you want the image masked. InDesign interprets layered Photoshop files with transparency the same as when creating a clipping path. All the transparency is masked when you select this option.
Photoshop Path: This option is the same as Alpha Channel, except you need a path created in the image. InDesign clips the image to the path saved in Photoshop.
Graphic Frame: The frame holding an object or image can be larger or smaller than the imported item. When you select this option, the wrap forms around the frame, ignoring the frame contents.
Same As Clipping: This option is the same as Photoshop Path when a clipping path has been saved. You can import native PSD files as well as EPS files saved with clipping paths.
Include Inside Edges check box: If you have an object with a cutout inside the object and want text to wrap around the outside and fill the inside cutout, select this option.
As is the case with Illustrator, you can adjust the text-frame options and change frames from single to multiple columns. In multiple-column frames, text wraps apply to all columns interacting with the object, as shown in Figure 17.30. If you create multiple frames on a page and either link the frames or keep them isolated as independent frames, the text wraps likewise occur for all text interacting with the object/image.

Text is typed or imported into text frames in Illustrator and InDesign.
When text is extended from one frame to another, the text follows a thread. Text frames in threads can be linked, unthreaded, or cut from frames. New frames can be added between existing threaded frames.
Text frames in Illustrator and InDesign can be assigned different properties. You can specify number of columns, inset spacing, column gutter widths, and font attributes as well as paragraph and object styles.
Text can be wrapped around graphic objects, text objects, and images in both Illustrator and InDesign.
Text wraps can be applied to paths, transparencies, and clipping paths of Photoshop images placed in InDesign.