
Force.com Migration Tool is Java ANT based command line tool to deploy metadata components from one Salesforce org to another org or deploy same metadata components to multiple Salesforce org's like Developer org -> UAT org -> Pre-Production org -> Production org. It allows you to deploy metadata components likes Objects, Communities, Apex classes, Apex triggers, Lightning Components and Visualforce Pages, and so on. The advantage of using Force.com Migration Tool is, it allows you to schedule a deployment over the weekend or non-business hours. This use Metadata API to deploy the components. It is very useful and time-saving to use Force.com Migration Tool in following scenarios
- Migrate components from development org to a test org with large amounts of metadata quickly.
- In the case of multistage release processes using this tool deployment of components can make this activity much more efficient.
- When IT does deploy from staging org to production org.
- Deploying metadata components from a local repository to Salesforce org.
Before installing Force.com Migration Tool you need the following to be available and installed on your machine:
- Java SE Runtime Environment (v1.7 or higher): To verify that you have properly installed Java, run the following command on Mac Terminal or Windows command line:
Java –version
Make sure that the output should look something like the preceding screenshot.
- Apache ANT installation (v1.6 or higher): Open the following URL in your browser, then installed ANT version 1.6 or higher http://ant.apache.org/bindownload.cgi. Once you have installed the ANT, the next step is to set the environment variables
ANT_HOMEandJAVA_HOME. Set ANT_HOMEenvironment variable value to pointing to the directory where you have installed ANT. SetJAVA_HOMEenvironment variable value to pointing to the location of your JDK. On a Mac, it should look like the following screenshot:
To verify that you have properly installed and setup environment variables for Ant, run the following command on Mac Terminal or Windows command line:
ant –version
Make sure that the output should look something like the preceding screenshot.
Perform the following steps to install Force.com Migration Tool
- Open the following URL in your browser, then installed Force.com Migration Tool in your local machine https://gs0.salesforce.com/dwnld/SfdcAnt/salesforce_ant_39.0.zip
- Save the ZIP file on your local machine and extract the contents to the directory where you want to store it. It should look something like the following screenshot
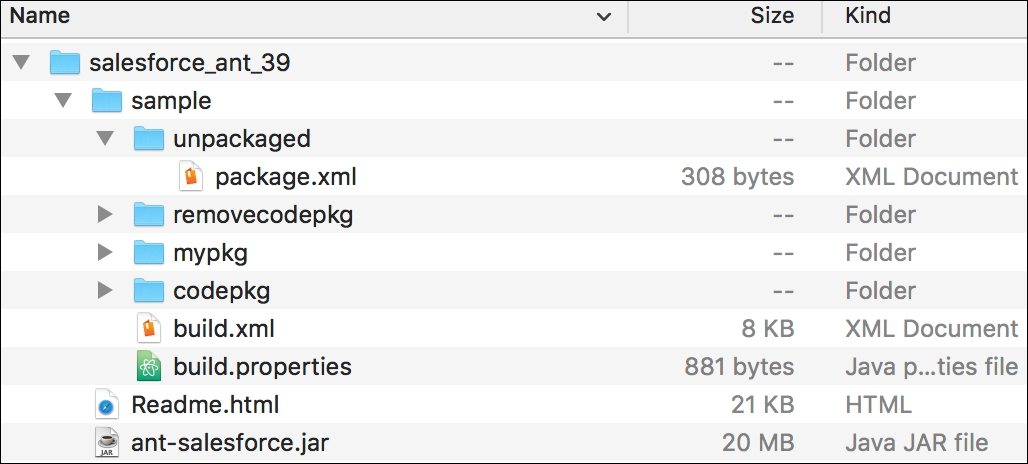
- Following are the details of folders and files extracted by Force.com Migration Tool
Readme.htmlcontains the instructions how to use Force.com Migration Tool.Ant-salesforce.jaris a JAR file containing the ANT task.- Sample folder contains the following items:
- A
codepkgfolder contains sample Apex class and Apex trigger. - A
mypkgfolder contains sample custom object. - A
removecodepkgfolder that contains XML files for removing the preceding metadata components from your org if deployed. - A sample
build.propertiesfile is used to store your Salesforce credentials, to run the task. - A sample
build.xmlfile, that used to deploy and retrieve API calls.
- A
- You are now all set to use Force.com Migration Tool.
Force.com Migration Tool allows you to manage version control and keep a backup of your work on your local machine. It also allows you to create folders based on your project or deployment strategy.
A business scenario: David Guzman is working as System Administrator at Universal Containers. In Chapter 7, Optimizing Business Processes with Visual Workflow and Approval Processes he has created a custom field on Account object called as Status__c. Now he wants to migrate this field to his personal developer org using Force.com Migration Tool.
Perform the following steps to deploy metadata components using Force.com Migration Tool
- Create few folders in your ANT directory that is
UAT-MetadataandVersion 1insideUAT-Metadata. Then copybuild.propertiesandbuild.xmlfiles insideUAT-Metadatafolder, as shown in the following screenshot: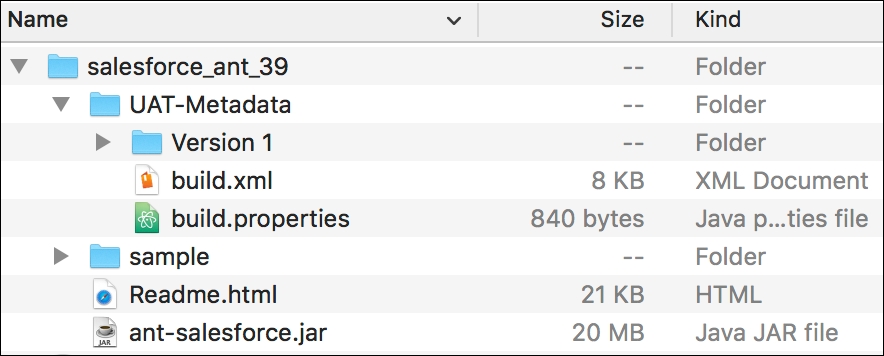
- The next step is to edit
build.propertiesfile and enterSalesforce credentialsfor source org to retrieve the metadata components based on the schema defined inside thepackage.xml(we will createpackage.xmlin next step):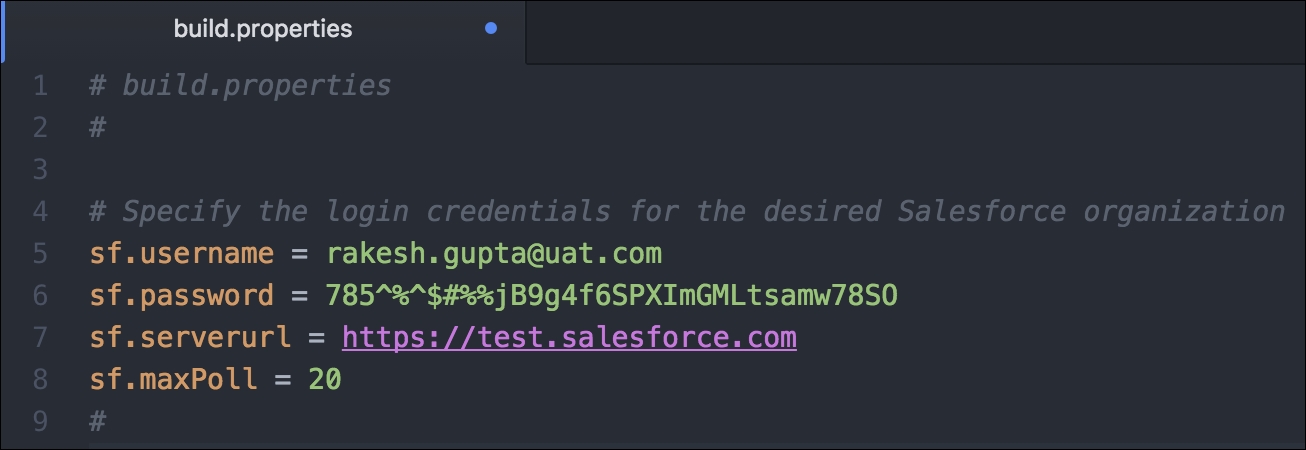
- The next step is to build a
package.xmlfile that contains account's custom fieldStatus__c. Either you can create it manually with the help of Metadata API developers guide or use Force.com IDE to do so. Once you have thepackage.xmlfile moves it to inside theVersion 1folder. Then it should look something like the following screenshot:
Your
package.xmlshould look like the following screenshot:
- Then edit the
build.xmlfile and set thepackage.xmllocation, inside targetretrieveUnpackagedtag, as shown in the following screenshot:
- Open the Terminal on Mac and navigate to the directory of the UAT-metadata for the current scenario. Then run the following command on Mac Terminal or Windows command line to retrieve the metadata components from source org for schema defined inside
package.xml:ant “retrieveUnpackaged”
If the retrieval or build is successful, then you will get success message on the screen. It should look like something the preceding screenshot. The next step is to navigate to
UAT-Metadatafolder on your local machine. After successful retrieval of metadata components from source org, it should contain a folderobjectinsideretrieveUnpackagedfolder, as shown in the following screenshot:
Inside
objectfolder, you can find the documentAccount.Objectthat contains complete schema of account's custom fieldStatus__c:
- To deploy metadata components to target org, navigate to
UAT-Metadatafolder on your local machine and edit thebuild.propertiesfile to change the Salesforce credentials pointing to target org. - Open the Terminal on Mac and make sure that you are still inside
UAT-Metadatafolder. Then run the following command on Mac Terminal or Windows command line to deploy metadata components to target Salesforce organt “deployUnpackaged”: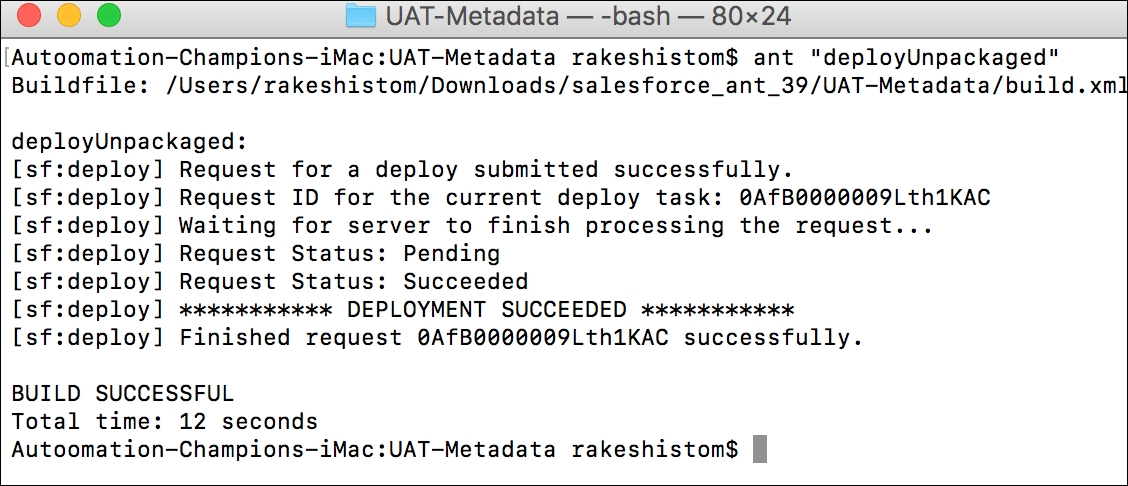
If the deployment is successful, then you will get success message on the screen. It should look like something the preceding screenshot.
- The final step is to login into your target org and verifies the deployment.
Design the folder structure as your want. Make sure to update the folder structure in build.xml file.