
You can use Enterprise Territory Management to manage and maintain your sales territories in Salesforce. First, create territory types, build a model, and then finally add and test your account assignment rules. When you're done with your model, activate it, and then assign users and accounts.
Following the Winter '15 release, Enterprise Territory Management is ready to be enabled by Salesforce administrators in new organizations. Organizations that were created before the Winter '15 release need to call Salesforce support to enable the feature. It is not possible to enable Enterprise Territory Management in existing organizations that have customizable forecasting enabled.
Enterprise Territory Management is available in Salesforce Classic only. To enable Enterprise Territory Management, follow the steps given as follows:
- In the Salesforce Classic view, click on Setup | Administer | Manage Territories | Settings, and then click on the Enable Enterprise Territory Management button, as shown in the following screenshot:

- The next step is to define the default user access for records associated with the sales territories you set up. Select the default access levels you want for accounts, opportunities, and cases. Depending on your organization-wide default settings, you may have to select the access level for contacts as well:

- The final step is to enable and configure the filter-based assignments of territories to opportunities. Select Enable Filter-Based Opportunity Territory Assignment, if you are planning to use the Apex code Salesforce provides the create Apex class first and enter the class name
OppTerrAssignDefaultLogicFilter. Select Run filter-based opportunity territory assignment job when opportunities are created, if you want to run the opportunity territory assignment rule when opportunities are created:
- Once done, click on Save.
Tip
You can find the Apex code provided by Salesforce at the following URL: https://developer.salesforce.com/docs/atlas.en-us.apexcode.meta/apexcode/apex_interface_TerritoryMgmt_OpportunityTerritory2AssignmentFilter.htm
A territory model organizes all the elements of your organization's Territory Management in one place, including a territory hierarchy, account assignments, and user assignments. Keep your model in the Planning state until you build your hierarchy, define assignment rules for territories, add users to territories, and run your rules to see the resulting account assignments.
Territory types help you categorize and define different territories. Creating territory types is the first step in building your territory model in Salesforce. To create the territory types, follow the steps given as follows:
- Click on Setup | Administer | Manage Territories | Territory Types.
- Click on the New Territory Type button; it will redirect you to the new territory type page.
- Enter the Label as
Direct Accounts; you can also add a Description. Make sure that you specify a territory type priority:
- Once done, click on Save.
The first step in building your territory model is creating the record that connects the elements, such as territories, user assignments, and account assignments. When you create a territory model record, Salesforce generates a territory hierarchy for it. To create the territory model record, follow the steps given as follows:
- Click on Setup | Administer | Manage Territories | Territory Models.
- Click on the New Territory Model button; it will redirect you to the new territory type page.
- Enter the Label as
Worldwide Sales; you can also add a Description: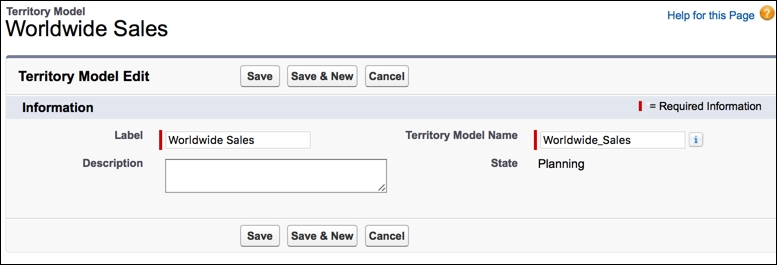
- Once done, click on Save.
You should create a territory hierarchy as you build your organization's territory model. When you create a territory, it appears on the model's territory hierarchy. To create the territory hierarchy, follow the steps given as follows:
- Click on Setup | Administer | Manage Territories | Territory Models.
- Open the territory model Worldwide Sales and then click on the View Hierarchy button to create or edit an existing territory hierarchy:

- To create a top-level territory, hover over the territory model Worldwide Sales and click Create Territory:
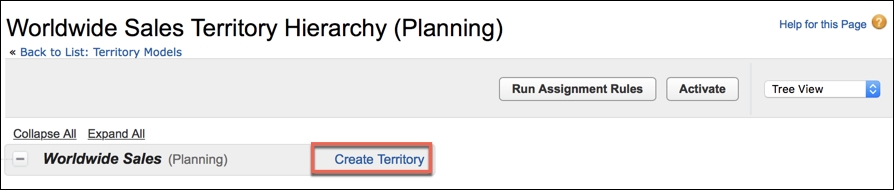
To create a child territory from an existing territory, hover over the territory name and click Create Territory.
- On the New Territory page, enter the Label as
EMEA, and choose a Territory Type asDirect Accounts; you can also add Description. Finally, define the territory users' access level for accounts, opportunities, and cases as the default user access for those records:
- Once done, click on Save.
Likewise, define the complete territory hierarchy in a way similar to the following screenshot:

You can select the Tree View from the dropdown to show the model's territory hierarchy.
You can assign accounts to territories either by using assignment rules that assign them automatically, or by adding them manually. Rules can be configured to apply to both parent territories and their descendants. Manual assignments apply only to the territory where they are made. Before you activate your territories' account assignments rule, make sure that you preview them by running assignment rules and related reports while the model is in a Planning state. When you are fully satisfied with your planned account assignments, change it to an Active state. Then, run the assignment rules again so that your territories include affected accounts that were created or updated during the activation process.
An assignment rule allows you to automatically assign new or edited accounts to territories. The rule identifies one or more criteria used to define that territory, and assigns accounts with those criteria to a specified territory automatically. If your territory is in a Planning state, running rules lets you preview account assignments. If your territory is in an Active state when you run the rules, accounts are assigned to territories according to your rules.
Consider a business scenario wherein, David Guzman is working as system administrator at Universal Containers. His manager Brigette Hyacinth wants to auto-assign an account to West Coast territory for the account's where billing state is California.
Perform the following steps to solve the preceding business requirement:
- Click on Setup | Administer | Manage Territories | Territory Models.
- Open the territory model Worldwide Sales and then click on the West Coast territory hierarchy.
- Navigate to the Assignment Rules Assigned to This Territory related list and click on New.
- Enter the Rule Name as
Billing State California.For the criteria, select Account: Billing State/Province containsCalifornia. - If you want the rule to also apply to the current territory's descendants, select the Apply to child territories checkbox. For the current business scenario, don't select this checkbox. If you also want the rule to run automatically whenever a user creates or edits an account, select the Active checkbox:
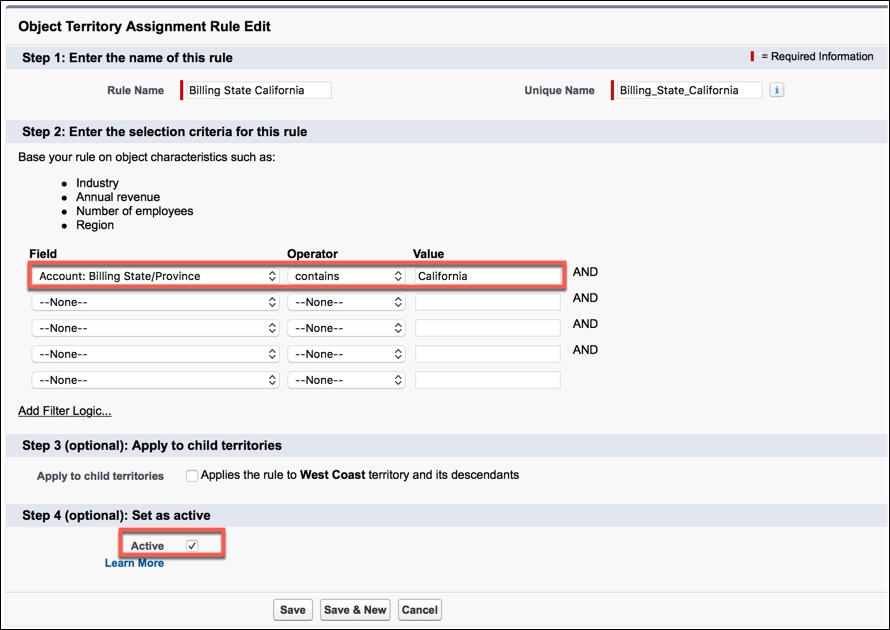
- Once done, click on Save.
- If you want to test the territory assignment rule for existing accounts, then click on Run Rules:

You'll receive an e-mail when the process is complete. Now, open an existing account where the billing state is California and check the Assigned Territories related list, as shown in the following screenshot:

Make sure to add the Assigned Territories related list to the account page layouts.
Accounts that are not assigned to territories by assignment rules can be assigned manually to one or more than one territory at a time. Manual assignment is useful for accounts that have unique characteristics, and which, therefore, can't be assigned by rules. To manually assign accounts to a territory, follow the steps given as follows:
- Click on Setup | Administer | Manage Territories | Territory Models.
- Open the territory model Worldwide Sales, click on the View Hierarchy button, and then open West Coast territory hierarchy.
- Navigate to the Manually Assigned Accounts related list and click on Add Accounts to see a list of your organization's accounts:

- In the Available related list, select the checkbox for each account you want to assign. Each selected account appears in the Selected related list:

- Once done, click on Assign. Now check the Manually Assigned Accounts related list and it will display the account you have assigned to the West Coast territory:

Likewise, you can create assignment rules for other territories and manually assign account records to them.
This feature allows us to assign an account to one or more territories directly from the account record. Only territories that are in a Planning or an Active state can be assigned to accounts. To manually assign accounts to one or more territories, follow the steps given as follows:
- Open the account you want to assign territories to.
- From the account detail page, navigate to the Assigned Territories related list and then click on the Assign Territories button:

- It will display a list of your organization's territories. Now select the territories that you want to assign to the account. In the Available related list, select the checkbox for each territory you want to assign. Each selected territory appears in the Selected related list:

- Once done, click on Assign. Now go back to the account detail page and check the Assigned Territories related list:

Make sure to verify your selection.
Make sure to assign users to the territories. This way, they will gain the accounts' access to sell products and services. You can assign users to territories that belong to models in an Active or a Planning state. To assign users to territories, follow the steps given as follows:
- Click on Setup | Administer | Manage Territories | Territory Models.
- Open the territory model Worldwide Sales, click on the View Hierarchy button, and then open the West Coast territory hierarchy.
- Navigate to the Assigned Users related list and click on Manage Users to see a list of your organization's users. Select or search for the users you want to add:
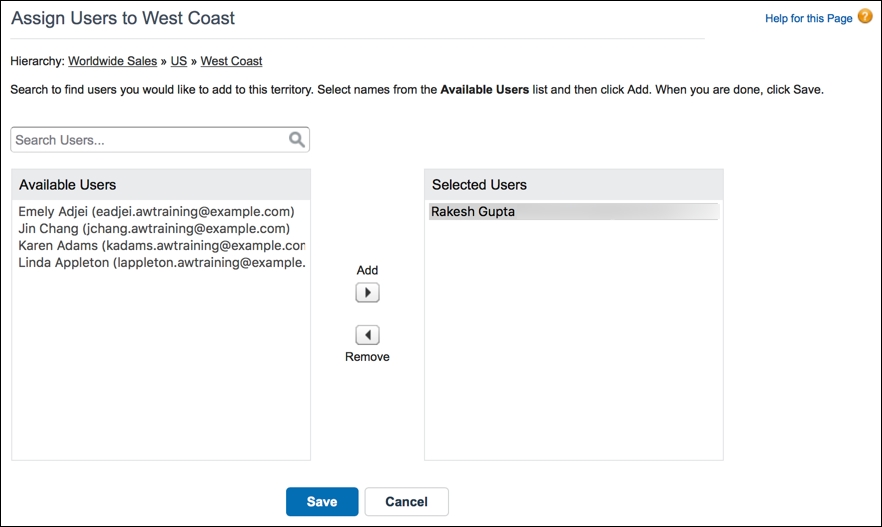
- Once done, click on Save.
Salesforce allows you to enable Chatter on the Territory Model object to collaborate on model development directly within model records. Your team can collaborate and get notifications when any changes happen to the territory model. To enable Chatter on Territory Model object, follow the steps given as follows:
- Click on Setup | Build | Customize | Chatter | Feed Tracking.
- Select the Territory Model object and enable Feed Tracking option for it. Then select the territory model fields you want to track.
- Once you are done, click on Save:
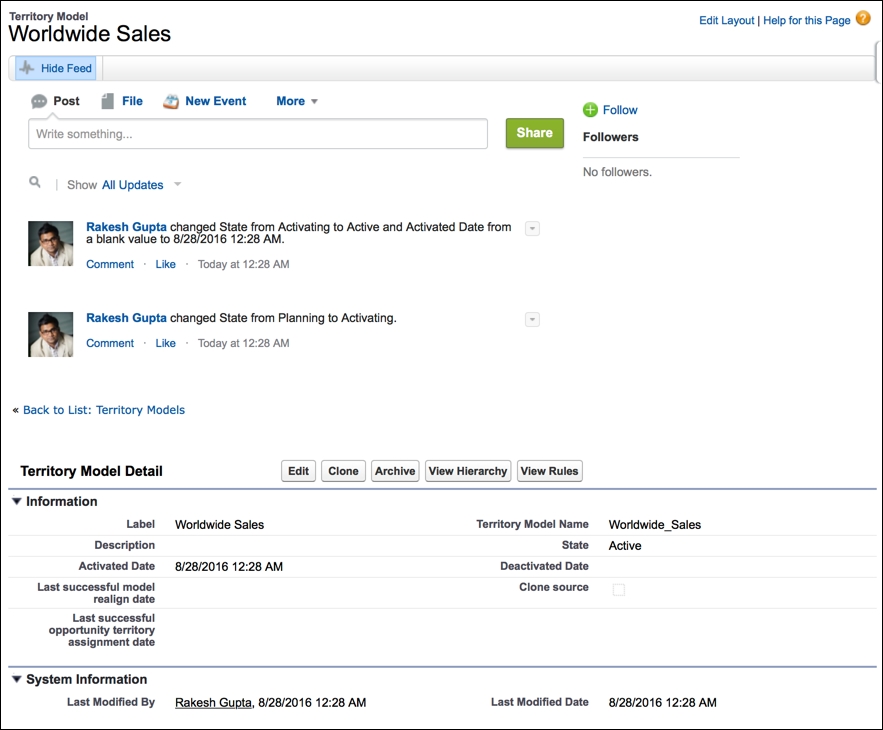
To verify the changes, navigate to Setup | Administer | Manage Territories | Territory Models and open the Worldwide Sales territory model.
When you are done with your testing, and are satisfied with the structure of the territory model and its territory account assignments, then the next step is to activate it. To activate a territory model, follow the steps given as follows:
- Click on Setup | Administer | Manage Territories | Territory Models.
- Open the territory model Worldwide Sales:

- Once done, click on Activate.
The Opportunity Territory Assignment filter automatically assigns territories to opportunities based on the filter logic in the Apex class. To run it, follow the steps given as follows:
- Click on Setup | Administer | Manage Territories | Territory Models.
- Open the View Hierarchy for the Worldwide Sales territory model.
- Click on Run Opportunity Filter to initiate the job that applies the filter:

- The next step is to select the options for which you want to run the opportunity territory filter.

- Once done, click on Save. You'll receive an e-mail when the job is complete.
To verify this, open an opportunity and check the Territory field. Make sure to add Territory and Exclude from the territory assignment filter logic fields on the opportunity page layouts:

It is possible to exclude an opportunity from filter-based territory assignment via the API or manually. To do this, open the opportunity record that you want to exclude, and then select the Exclude from the territory assignment filter logic. Once you are done, click on Save.