Contact is a way to maintain the information about key decision makers, buyers, and key influential people for an account in Salesforce. The sales and marketing people often need it as they should visit the customer site and give a demo to them about products or services to finalize the deal. You can store contact information, such as first name, last name, account name, billing address or shipping address, contact number, and e-mail address.
You can create a contact in Salesforce by using the user interface, or you can import it from another organization by using the import wizard and data loader.
One account may have more than one contact and one contact may be associated with multiple accounts. For example, say, your company is currently selling a product to two sites of Automation Champion, USA and India. You have two accounts for Automation Champion in your Salesforce. For the USA account, Cathal Murtagh is the decision maker, and for the India account, she is the executive sponsor. To associate one contact with multiple accounts, we can use the contact to multiple accounts feature.

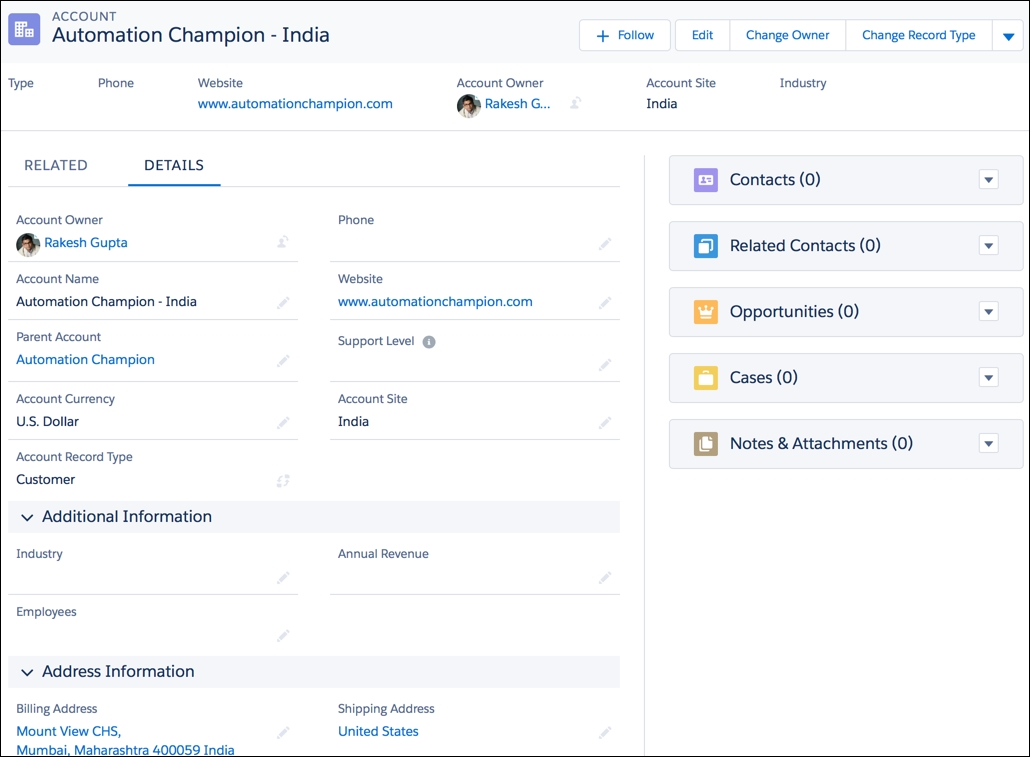
Before proceeding ahead, create a new account for Automation Champion - India, as shown in the following screenshot:

Make sure to set the correct name for the account and site, as shown in the preceding screenshot, to eliminate any confusion.
A business scenario: currently, Cathal Murtagh is the decision maker for Automation Champion - USA account. As Universal Containers has set up a new account for Automation Champion, the India business wants to list Cathal Murtagh as executive sponsor for the India account, without creating a duplicate contact.
Perform the following instructions to set up a contact to multiple accounts:
- Click on Setup (gear icon) | Setup | PLATFORM TOOLS | Feature Settings | Sales | Account Settings.
- Click on the Edit button and then navigate to Contacts to Multiple Accounts Settings and select the Allow users to relate a contact to multiple accounts checkbox, as shown in the following screenshot:

- Once you are done, click on the Save button.
- The next steps are to add the Related Contacts related list to the account page layouts:
- Click on Setup (gear icon) | Setup | PLATFORM TOOLS | Objects and Fields | Object Manager | Account | Page Layout, then select the appropriate page layouts.
- Then, select Related Lists section.
- Drag Related Contacts onto the page layout, as the related contacts related list automatically includes all the direct contacts.
- Once you are done, click on the Save button.
- Like what you just did in step 4, take it as a reference; now, add the Related Accounts related list to the contact page layouts.
- Now, open the Automation Champion - India account, navigate to Related Contacts related list, and then select Add Relationship from the drop-down menu, as shown in the following screenshot:

- The next step is to create an account contact relationship for Cathal Murtagh as Executive Sponsor for the Automation Champion - India account, as shown in the following screenshot:

- Once you are done, click on the Save button.
This is how you can associate one contact with multiple accounts without creating duplicate contact records in the database.
