In this recipe, we will explore the steps to create an ASP.NET web forms IP-STS using the SecureTokenProviderBase abstract class created in the previous recipe. We will look at the details of defining a token handler and provide a generic implementation of the token serialization process.
To design a custom IP-STS, follow these steps:
- In the
IdentityManagementsolution created in the previous recipe, add a Visual Studio 2010 C# ASP.NET Web Application project and name itWebSTS. - Add reference to the
System.IdentityModel, Microsoft.IdentityModel, System.ServiceModelassemblies. - Add reference to the
Commonassembly from theCommonproject (select from the Projects tab under the Add Reference dialog box):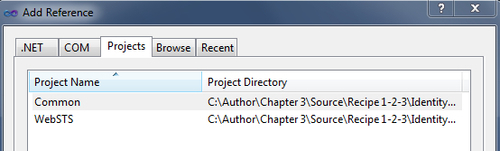
- Create a new class in the
WebSTSproject and name itSaml11SecureTokenProvider. Implement theSecureTokenProviderBaseabstract class (IdentityService.Common). - Create a public constructor to accept a collection of claim key/value pairs:
Dictionary<string, string> _claims; public Saml11SecureTokenProvider(Dictionary<string, string> claims) { _claims = claims; } - Create
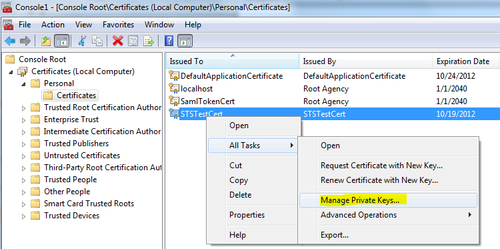
SigningCredentialsto sign the token by implementing theGetSigningCredentialsabstract method:protected override SigningCredentials GetSigningCredentials() { X509Certificate2 signingCert = CertificateUtil.GetCertificate( StoreName.My, StoreLocation.LocalMachine, ConfigurationManager.AppSettings["SigningCertificate"]); return new X509SigningCredentials(signingCert); }The certificate subject name is stored in the
Web.configfile. - Implement the
GetEncryptingCredentialsmethod to retrieve the token encryption attributes:protected override EncryptingCredentials GetEncryptingCredentials() { X509Certificate2 encryptCert = CertificateUtil.GetCertificate( StoreName.My, StoreLocation.LocalMachine, ConfigurationManager.AppSettings["EncryptingCertificate"]); return new EncryptedKeyEncryptingCredentials(encryptCert); }You need to implement this method only if you intend to encrypt the token. It is optionally specified by implementing the
IsEncryptedmethod.protected override bool IsEncrypted() { return !string.IsNullOrEmpty(ConfigurationManager.AppSettings["EncryptingCertificate"]); } - Create a
Saml11SecurityTokenHandler (Microsoft.IdentityModel.Tokens.Saml11)instance to generate a SAML 1.1 token in theGetTokenHandlermethod.protected override SecurityTokenHandler GetTokenHandler() { SecurityTokenHandlerCollection handlers = SecurityTokenHandlerCollection.CreateDefaultSecurityTokenHandlerCollection(); return handlers[typeof(SamlSecurityToken)]; } - Serialize the token.
protected override string SerializeToken(SecurityToken token)
{
XmlWriterSettings settings = new XmlWriterSettings
{
Encoding = Encoding.UTF8,
Indent = true
};
StringBuilder sb = new StringBuilder();
XmlWriter innerWriter = XmlWriter.Create(sb, settings);
innerWriter.WriteProcessingInstruction("xml", "version="1.0" encoding="UTF-8" standalone="yes"");

SecurityTokenHandlerCollectionManager mgr = SecurityTokenHandlerCollectionManager.CreateDefaultSecurityTokenHandlerCollectionManager();
SecurityTokenHandlerCollection sthc = mgr.SecurityTokenHandlerCollections.First();
SecurityTokenSerializer ser = new SecurityTokenSerializerAdapter(sthc);
ser.WriteToken(innerWriter, token);
innerWriter.Close();
return sb.ToString();
}
Note
The serializer doesn't automatically include the XML identifier in the generated token XML string. The
WriteProcessingInstructionmethod of theXmlWriterobject is used to include the identifier. - Open the
Default.aspxpage and include the following code in the body form.<div> <table class="style1"> <tr> <td> Name</td> <td> <asp:TextBox ID="txtName" runat="server" Width="200px" Text="John Doe"></asp:TextBox> </td> </tr> <tr> <td> UserID</td> <td> <asp:TextBox ID="txtUserId" runat="server" Width="200px" Text="johndoe"></asp:TextBox> </td> </tr> <tr> <td> Language ID</td> <td> <asp:TextBox ID="txtLanguageId" runat="server" Width="200px" Text="en-US"></asp:TextBox> </td> </tr> </table> <br /> <asp:Button ID="Button1" runat="server" onclick="Button1_Click" Text="Button" /> </div>
There are three text boxes representing the claims (name, userid and language) that will be included in the token and a button to submit the request and generate the token.
- In the
Button1_Clickevent handler, create the claim type/value pairs and pass it to an instance ofSaml11SecureTokenProviderclass. Call theIssuemethod to generate the token.protected void Button1_Click(object sender, EventArgs e) { Dictionary<string, string> claims = new Dictionary<string, string>(); claims.Add(WSIdentityConstants.ClaimTypes.Name, txtName.Text); claims.Add(WSIdentityConstants.ClaimTypes.PrivatePersonalIdentifier, txtUserId.Text); claims.Add(WSIdentityConstants.ClaimTypes.Locality, txtLanguageId.Text); Saml11SecureTokenProvider provider = new Saml11SecureTokenProvider(claims); string token = provider.Issue(); if (token != null) { HttpContext.Current.Items.Add("EncSamlToken", token); HttpContext.Current.Items.Add("TargetRp", ConfigurationManager.AppSettings["AppliesToAddress"]); Server.Transfer("~/StsProcessing.aspx"); } }The retrieved token string is assigned to a form variable to be posted to the RP-STS.
- Add an ASPX page to the
WebSTSproject and name itStsProcessing.aspx. Include aHtmlTextAreacontrol in the page body to display the encrypted token:<body> <form id="form1" runat="server"> <div> <input type="hidden" ID="wresult" runat="server" /> <input type="hidden" ID="wctx" runat="server" /> <textarea id="txtToken" cols="120" rows="40" runat="server"></textarea> <button type="submit">POST</button> </div> </form> </body>
Notice that there are a couple of hidden variables,
wresultandwctx. The variables will be used to allow the token to get posted to an RP, as discussed in the next recipe. - Open the
StsProcessing.aspx.csfile and in thePage_Loadmethod, assign the retrieved token to thewresulthidden variable and set it as theInnerTextproperty of theHtmlTextAreacontrol. Also, set the page post action to the target RP URL:protected void Page_Load(object sender, EventArgs e) { string encToken = HttpContext.Current.Items["EncSamlToken"] as string; string targetRp = HttpContext.Current.Items["TargetRp"] as string; if (string.IsNullOrEmpty(encToken)) Response.Write("error"); else { txtToken.InnerText = Server.HtmlEncode(encToken); Page.Form.Action = targetRp; Page.Form.Method = "POST"; wctx.Value = "http://localhost:8002"; wresult.Value = encToken; } } - Update the
Web.configfile to include the values for the signing credentials, encrypting credentials, token expiration, issuer name, and RP address.<appSettings> <add key="SigningCertificate" value="CN=STSTestCert"/> <add key="EncryptingCertificate" value="CN=STSTestCert"/> <add key="HoursToExpiration" value="1"/> <add key="IssuerName" value="http://localhost:8001"/> <add key="AppliesToAddress" value="http://localhost:8002/Default.aspx"/> </appSettings>
In our example, the same certificate is being used for signing and encryption for illustration. Ideally, a different set of certificates should be used in real time.
- Compile the solution. Run the
WebSTSproject and click on Create Token in theDefault.aspxpage (make sure it is set as the startup page). If the token generates successfully, you should get redirected to theStsProcessing.aspxpage and the encrypted token string should get displayed in the text area, otherwise an error message will be displayed: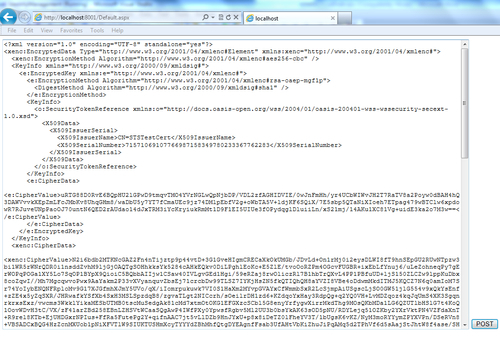
There are a couple key methods in the token generation process using the SecureTokenProviderBase contract that needs to be elaborated. The rest of the methods in the abstract class are pretty self-explanatory. The GetTokenHandler method allows us to specify a token handler. In our implementation, in the Saml11SecureTokenProvider class, a default SecurityTokenHandlerCollection is created first. Then, the Saml11SecurityTokenHandler instance is returned from the collection using the type of SecurityToken (a type of SamlSecurityToken specifies a SAML 1.1 token that can be generated using the Saml11SecurityTokenHandler).
The generated token is serialized into an XML string using the SerializeToken method. Notice that this method accepts a SecurityToken as a parameter, allowing the implementation to serialize either a simple SecurityToken or a EncryptedSecurityToken. The SecurityTokenHandlerCollectionManager class is used to return the first named SecurityTokenHandlerCollection object, and then the SecurityTokenSerializerAdapter instance to serialize the token into an XML string: