
We have already used Windows Live as the default identity provider in the previous recipe. In this recipe, you will learn how to configure Google and Facebook as the identity providers in ACS. We will be building on what we created in the previous recipe. Essentially, we will use the same relying party application and change the configurations wherever needed.
To configure Google as an identity provider, perform the following steps:
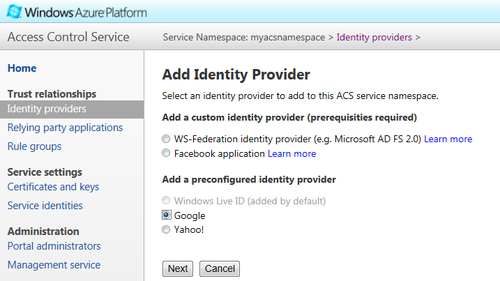
- Go to ACS Management Portal and click on the Identity providers link under the Trust relationships section and click on Add. Select the Google radio button and click on Next, as shown in the following screenshot:
- In the next screen, verify that the relying party application (
AspNetRelyingPartyApp) created in the previous recipe is selected and click on Save, as shown in the following screenshot: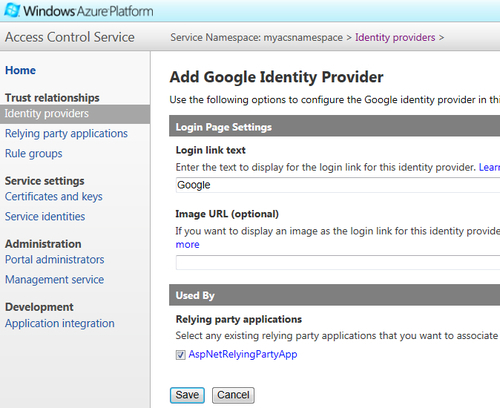
- Once you click on Save, you should be able to see Google in the list of Identity Providers, as shown in the following screenshot:

So far, you have successfully configured Google as an identity provider in ACS. Now, you need to configure how claims are sent by ACS to the relying party application. By default, Google doesn't send the e-mails to the users. You need to configure the identity provider to supply the desired claims to your application and transform them. Perform the following steps to add a rule to pass through an e-mail address in the token so that your application can use it:
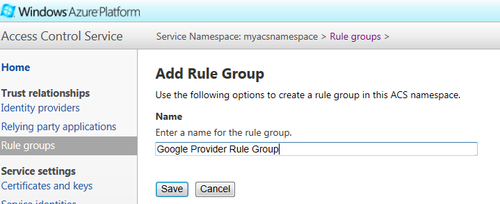
- Go to ACS Management Portal, select Rule groups, and click on Add. On the Add Rule Group page, provide the name as Google Provider Rule Group and click on Save, as shown in the following screenshot:
- The previous step should add your rule group to the list of the rule groups. Select Google Provider Rule Group that we created just now and you will be navigated to the Edit Rule Group page. Click on the Add link over the Rules section to navigate to the Add Claim Rule page.
- On the Add Claim Rule page, perform the following steps:
- a. Under the Claim issuer section, select the Identity Provider radio button and select Google as the identity provider.
- b. Under the Input claim type section, select the Select type radio button and enter http://schemas.xmlsoap.org/ws/2005/05/identity/claims/emailaddress in front of it.
- c. Under the Input claim value section, select Any.
- d. Under the Output claim type section, select Pass through input claim type.
- e. Under the Output claim value section, select Pass through input claim value.
- f. Optionally, you can add a description of the rule in the Description (optional) section.
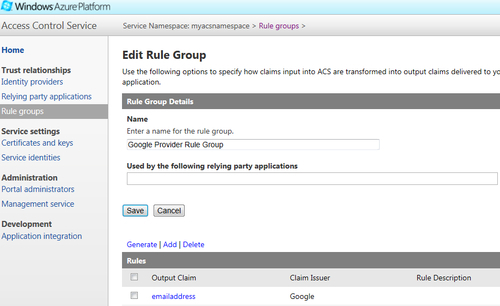
- Click on Save. This should take you to the Edit Rule Group page where you should see the emailaddress rule in the Rules list, as shown in the following screenshot:
The configuration of Google as an identity provider is complete. You still need to configure your relying party application to use the claim rule created previously. To do this, perform the following steps:
- Click on the Relying party applications link in ACS Management Portal and click on your application (AspNetRelyingPartyApp) created in the previous recipe. This should take you to the Edit Relying Party Application page.
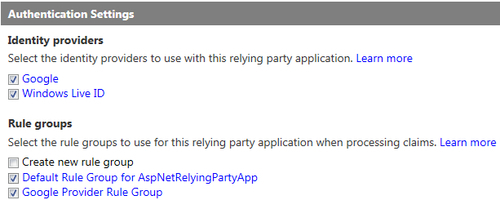
- Go to the Authentication Settings section and make sure that Google is selected under the Identity providers section. Next, select the Google Provider Rule Group under Rule Groups. Click on Save:
You are all done configuring Google as an identity provider. To test your work, perform the following steps:
- Run your relying party application (
AspNetRelyingPartyApp website) created in the previous recipe. On running the application, you should be redirected to a page where you can see both Windows Live ID and Google as the options, as shown in the following screenshot: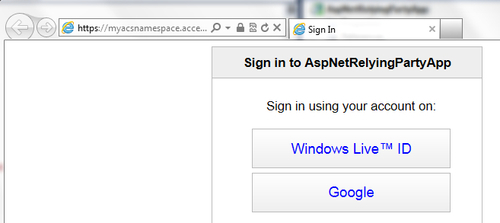
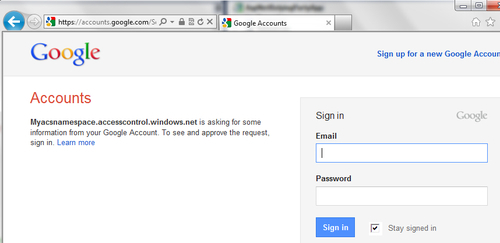
- Click on Google and supply your Google account credentials on the next page:
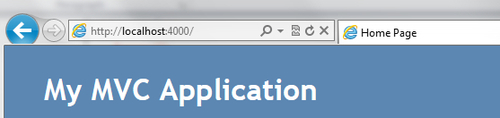
- If it is successful, you will be redirected to the home page of your website:

Congratulations! You have successfully configured Google as an identity provider. Next, we will explore the steps to configure Facebook as an identity provider:
- To obtain a Facebook application ID and a Facebook application secret, create a Facebook account or use an existing account at http://www.facebook.com.
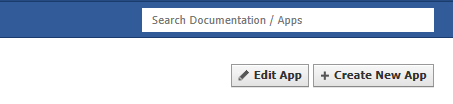
- Navigate to http://www.facebook.com/developers/.
- On the facebook DEVELOPERS page, click on the + Create New App button, and then follow the instructions:
- Once the application is created successfully, you will be redirected to the application summary page. Make a note of the App ID and App Secret. You will need them later. Then click on the Website link in the Select how your app integrates with Facebook section and specify your fully qualified domain name URL to your namespace in the Site URL field, for example, https://myacsnamespace.accesscontrol.windows.net/, as shown in the following screenshot:
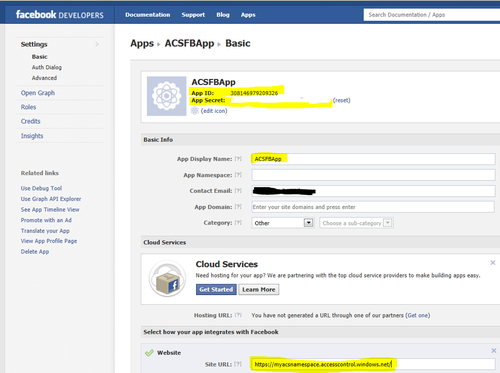
- Your namespace may be different.
- Click on Save Changes.
So far, you have created a new Facebook application and obtained an application ID and an application secret. Now, you need to configure Facebook as an identity provider. It can be done by performing the following steps:
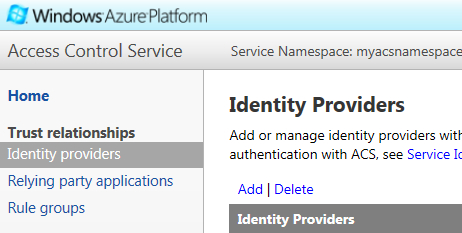
- Go to your ACS Management Portal. Note that we are using the same namespace created in the previous recipe.
- Click on Identity providers and then click on Add, as shown in the following screenshot:
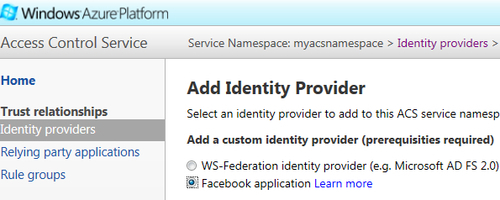
- On the Add Identity Provider page, select the Facebook application radio button and click on Next:
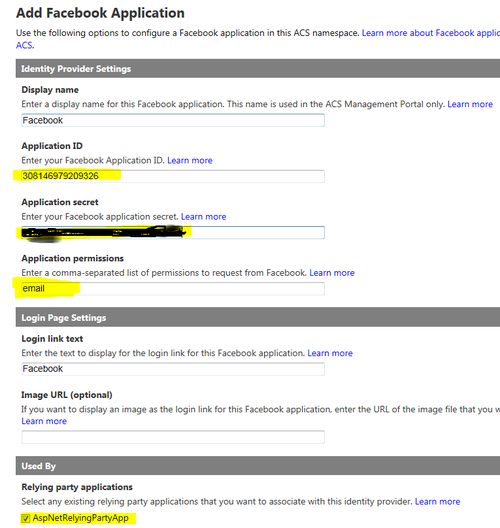
- On the Add Facebook Application page, enter the application ID and the application secret obtained while creating your Facebook application previously in step 4 in the Application ID and Application secret fields respectively, and select ASPNetRelyingPartyApp under Relying party applications. Keep Application permissions as email, although you may supply other values by reviewing additional permissions at http://developers.facebook.com/docs/authentication/permissions:
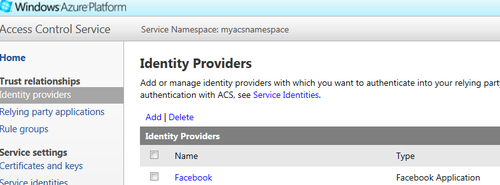
- Click on Save. You should be able to see Facebook in the list of Identity Providers, as shown in the following screenshot:
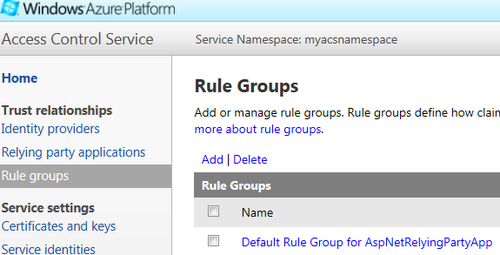
- Now, you need to configure the rules for the Facebook identity provider that we created just now. To do this, click on Rule Groups and Select the Default Rule Group for AspNetRelyingPartyApp that we created in the previous recipe, as shown in the following screenshot:
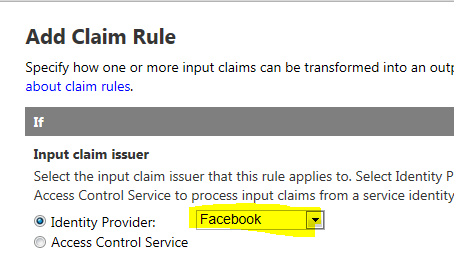
- On the Edit Rule Group page, click on Add over the Rules section to add a new rule for the Facebook identity provider. This takes you to the Add Claim Rule page. Make sure that Facebook is selected as Identity Provider in the Input claim issuer section and click on Save:
- Verify that a new rule for Facebook is added to the Rules section on the Edit Rule Group page.
You are all done configuring Facebook as an identity provider. To test your work, perform the following steps:
- Run your relying party application (
AspNetRelyingPartyApp website) created in the previous recipe. On running the application, you should be redirected to a page where you can see Windows Live, Google, and Facebook as the options; the first two because you configured those for your relying party application before: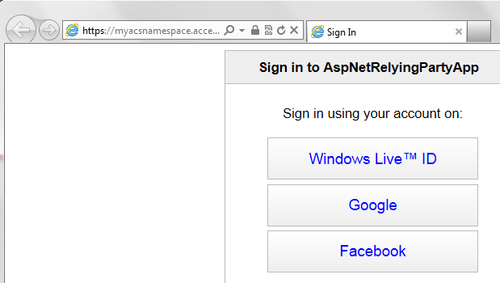
- Click on Facebook and supply your Facebook credentials (the same as the ones used to create the Facebook application) on the Facebook login page.
- If successful, you will be redirected to the home page of your website:
You have successfully configured Facebook as an identity provider.
The working mechanism remains the same as described in the previous recipe. In this recipe, we have additionally demonstrated the use of Google and Facebook as the identity providers.