
So far, you have learned how to secure the web applications using ACS. In this recipe, we will look at how to secure a WCF REpresentational State Transfer (REST) service with ACS and OAuth.
If you are not familiar with OAuth, you can learn more on this at http://oauth.net/.
To create the REST WCF service, we will use the WCF REST service project template installed with the WCF REST Multi-Project Template Visual Studio extension. To install this extension, go to Tools | Extension Manager in Visual Studio 2010 and search for WCF REST in the online gallery:
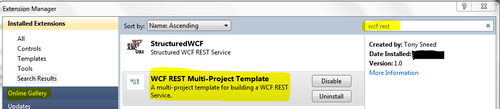
You can also go to the online Visual Studio gallery and install the extension from http://visualstudiogallery.msdn.microsoft.com/9272629c-74e2-423b-9841-f20b57f855fe.
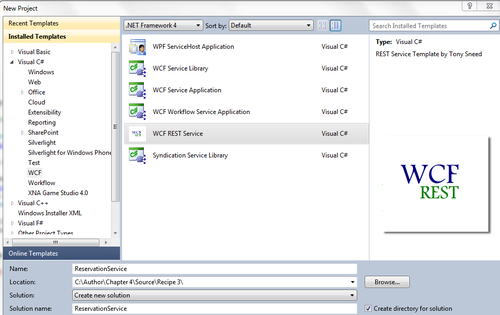
If the extension is successfully installed, you will see a WCF REST Service template in Visual Studio. To create the service, perform the following steps:
- Create a new WCF REST service project and name the service by entering ReservationService in the Solution name section, as shown in the following screenshot:
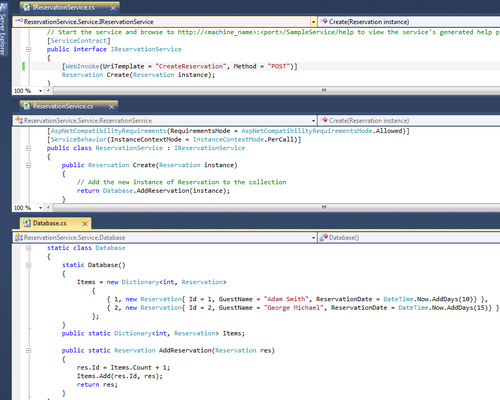
- You will see the four projects created by default. You may tweak them as necessary, but for this sample we will replace all the instances of
SampleServicewithReservationServiceand theSampleItementity in theEntitiesproject by theReservationentity. Once done, go toGlobal.ascxof the service host web application and update theRegisterRoutesmethod, as shown in the following code snippet:private void RegisterRoutes() { RouteTable.Routes.Add(new ServiceRoute("ReservationService", new WebServiceHostFactory(), typeof(ReservationService.Service.ReservationService))); }The final changes should look like the following screenshot:
- We will now test our service by calling the
CreateReservationmethod from the client. For this, go toProgramclass in theReservationService.Clientproject and replace all the code with the following code snippet:class Program { static void Main(string[] args) { // First start the web project, then the client WebClient client = new WebClient(); client.Headers["Content-type"] = "text/xml"; var url = new Uri("http://localhost:2795 /ReservationService/CreateReservation"); var newReservation = new Reservation { GuestName = "Jack Sparrow", ReservationDate = DateTime.Now.AddDays(20) }; var resString = EntitySerializer.GetString <Reservation>(newReservation); var result = client.UploadString (url, "POST", resString); var createdReservation = EntitySerializer. GetObject<Reservation>(result); } }
Note the use of the EntitySerializer helper class in the preceding code snippet. The class is used to serialize/de-serialize the objects to/from the XML string and the implementation for this class can be found in the source code under the Helpers folder in the client project. Run the client and verify that the calls to the service are successful to ensure that you have set up the service correctly.
Next, we will create a relying party application for our WCF REST service that we created previously. Perform the following steps:
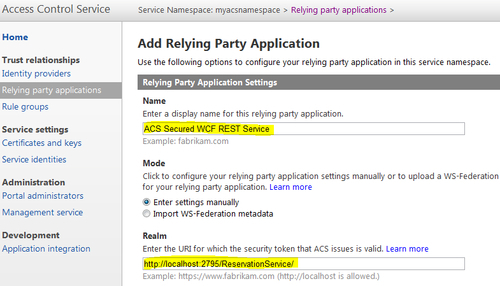
- Go to ACS Management Portal and click on Relying party applications (remember to use the same
MyACSNamespacenamespace that you created in the Configuring Access Control Service for an ASP.NET MVC 3 relying party recipe).Click on Add to add a new relying party application and enter the application name and the realm URL in the Name and Realm fields respectively, as shown in the following screenshot:
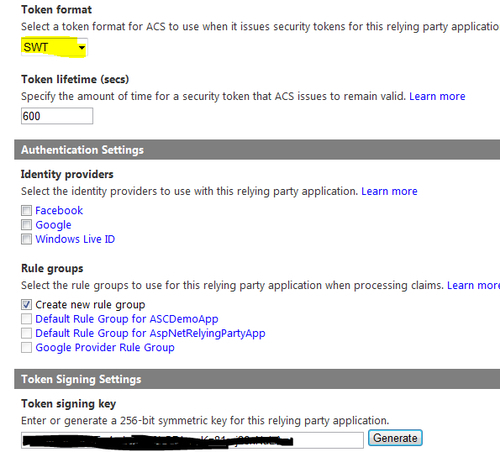
- Select Token format as SWT, uncheck any selected identity providers under the Identity providers section, and ensure that Create new rule group is selected under the Rule groups section. Finally, click on Generate under the Token Signing Settings section to generate a new key and click on Save. Verify that your application is in the Relying Party Applications list:
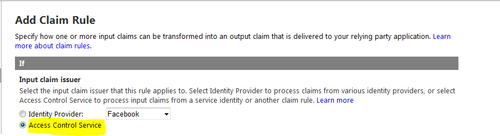
- Click on the Rule groups link in the left-hand side menu and click on newly created Default Rule Group for ACS Secured WCF REST Service. Add a new rule by clicking on the Add link over the Rules section. On the Add Claim Rule page, select the Input claim issuer as Access Control Service and leave the rest of the fields to their default values and then click on Save:
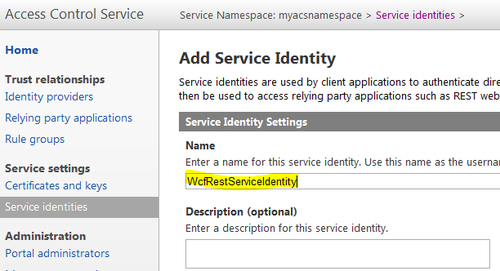
- Click on the Service identities link in the left-hand side menu and add a service identity. Service identity can be used by a client to directly authenticate with ACS and obtain a token, which then can be passed to the WCF REST service:
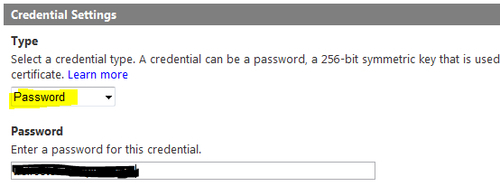
- Under the Type section in the Credential Settings section, select credential type as Password, supply a password, and click on Save:
So far, you have configured the REST service in ACS and you need to configure the service to handle the incoming tokens from the client for authentication. Perform the following steps:
- Open
Web.configof the service host and add the following settings. TheIssuerSigningKeyis the token signing key generated while adding your service as a relying party:<appSettings> <add key="ACSHostName" value="accesscontrol.windows.net"/> <add key="ACSNamespace" value="your namespace"/> <add key="IssuerSigningKey" value="your key"/> </appSettings>
- Now, you need to create a custom authorization manager to authenticate each call to your service. For that purpose, you need to create a custom class and inherit from
SecurityAuthorizationManager. The source code for this recipe includes one such implementation in theACSAuthorizationManagerclass. The class overrides theCheckAccessCoremethod ofSecurityAuthorizationManagerand checks the access token of the incoming message in the header. If it is valid, the appropriate service method is called else theUnauthorizederror message is sent in the response:public class ACSAuthorizationManager : ServiceAuthorizationManager { string serviceNamespace = ConfigurationManager.AppSettings.Get("ACSNamespace"); string acsHostName = ConfigurationManager.AppSettings.Get("ACSHostName"); string trustedTokenPolicyKey = ConfigurationManager.AppSettings.Get ("IssuerSigningKey"); string trustedAudience = "http://localhost:2795/ReservationService/"; protected override bool CheckAccessCore(OperationContext operationContext) { string headerValue = WebOperationContext.Current.IncomingRequest. Headers[HttpRequestHeader.Authorization]; // check that a value is there if (string.IsNullOrEmpty(headerValue)) { CreateUnauthorizedResponse(); return false; } // check that it starts with 'WRAP' if (!headerValue.StartsWith("WRAP ")) { CreateUnauthorizedResponse(); return false; } string[] nameValuePair = headerValue.Substring("WRAP ".Length).Split(new char[] { '=' }, 2); if (nameValuePair.Length != 2 || nameValuePair[0] != "access_token" || !nameValuePair[1].StartsWith(""") || !nameValuePair[1].EndsWith(""")) { CreateUnauthorizedResponse(); return false; } // trim off the leading and trailing double-quotes string token = nameValuePair[1].Substring(1, nameValuePair[1].Length - 2); // create a token validator TokenValidator validator = new TokenValidator( this.acsHostName, this.serviceNamespace, this.trustedAudience, this.trustedTokenPolicyKey); // validate the token if (!validator.Validate(token)) { CreateUnauthorizedResponse(); return false; } return true; } - Finally, you need to modify the
Global.asaxfile to enable the use of the previously created authorization manager in the WCF pipeline. For this, first create a new class calledSecureWebServiceHostFactoryinherited fromWebServiceHostFactoryand override theCreateServiceHostmethod to setServiceAuthorizationManagerof the host to the instance of the custom authorization manager that you created in step 2:public class SecureWebServiceHostFactory : WebServiceHostFactory { protected override ServiceHost CreateServiceHost(Type serviceType, Uri[] baseAddresses) { ServiceHost host = base.CreateServiceHost(serviceType, baseAddresses); host.Authorization.ServiceAuthorizationManager = new ACSAuthorizationManager(); return host; } public override ServiceHostBase CreateServiceHost(string constructorString, Uri[] baseAddresses) { ServiceHostBase host = base.CreateServiceHost(constructorString, baseAddresses); host.Authorization.ServiceAuthorizationManager = new ACSAuthorizationManager(); return host; } }Update the
RegisterRoutesmethod in theGlobal.asaxfile to use the new service host factory:public class Global : HttpApplication { void Application_Start(object sender, EventArgs e) { RegisterRoutes(); } private void RegisterRoutes() { RouteTable.Routes.Add(new ServiceRoute("ReservationService", new SecureWebServiceHostFactory(), typeof(ReservationService.Service.ReservationService))); } }So far, we are done with the server side. Let's see how we can call the service passing in the required security token so that the call doesn't fail. Perform the following steps:
- Add an
App.configfile to the client project (your console application) and add the following application settings:<appSettings> <add key="ACSHostName" value="accesscontrol.windows.net"/> <add key="ACSNamespace" value="--your namespace--"/> <add key="ServiceIdentityUserName" value="--your user name- -"/> <add key="ServiceIdentityCredentialPassword" value="--your password--"/> </appSettings>
You can find
ServiceIdentityUserNameandServiceIdentityCredentialPasswordon the Service identities page of ACS Management Portal. You will need to click on Password under the Credentials section to view your password: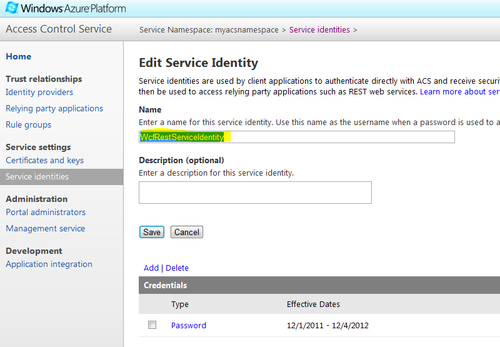
- Update the
Programclass of your console application (client) with the following code snippet and run the application:class Program { static void Main(string[] args) { try { // First start the web project, then the client WebClient client = new WebClient(); var token = RetrieveACSToken(); client.Headers.Add("Authorization", token); client.Headers.Add("Content-type", "text/xml"); var url = new Uri("http://localhost:2795/ReservationService /CreateReservation"); var newReservation = new Reservation { GuestName = "Jack Sparrow", ReservationDate = DateTime.Now.AddDays(20) }; var resString = EntitySerializer.GetString <Reservation>(newReservation); var result = client.UploadString(url, "POST", resString); var createdReservation = EntitySerializer.GetObject <Reservation>(result); } catch (Exception ex) { throw ex; } } private static string RetrieveACSToken() { var acsHostName = ConfigurationManager.AppSettings. Get("ACSHostName"); var acsNamespace = ConfigurationManager.AppSettings. Get("ACSNamespace"); var username = ConfigurationManager.AppSettings. Get("ServiceIdentityUserName"); var password = ConfigurationManager.AppSettings. Get("ServiceIdentityCredentialPassword"); var scope = "http://localhost:2795/ReservationService/"; // request a token from ACS WebClient client = new WebClient(); client.BaseAddress = string.Format("https://{0}.{1}", acsNamespace, acsHostName); NameValueCollection values = new NameValueCollection(); values.Add("wrap_name", username); values.Add("wrap_password", password); values.Add("wrap_scope", scope); byte[] responseBytes = client.UploadValues("WRAPv0.9", "POST", values); string response = Encoding.UTF8.GetString(responseBytes); string token = response .Split('&') .Single(value => value.StartsWith("wrap_access_token=", StringComparison.OrdinalIgnoreCase)) .Split('=')[1]; var decodedToken = string.Format("WRAP access_token="{0}"", HttpUtility.UrlDecode(token)); return decodedToken; } }
Note that in the Main method in the preceding code snippet, the token is retrieved from ACS and is put in the header of the message prior to making the call to the REST service. This is because the authorization implementation is set up at the service to look for the token in the header as described in the previous section. If everything is set up correctly, you will see a successful response from the service. To validate whether the authorization is really working at the service, try changing one of your username/password settings in App.config to invalid values and run the application. You should get a 404 Unauthorized error from the service.
The client application first sends a web request to ACS to retrieve the ACS token using the service identity configured with ACS, which it can pass to the WCF REST service. Finally, a REST call is made to the service passing on the authorization token retrieved from ACS. The token is validated at the service using the custom authorization manager implementation and, if it is successful, the call is made to the service method else an unauthorized exception is thrown:
