
Salesforce is a widely used CRM platform and supports federated authentication. In this recipe, we will briefly explore the steps to enable claims-based authentication in Salesforce.
You will need access to a Salesforce account to execute the steps in this recipe. We will be using the federation server that we configured as an identity provider in the previous chapter.
To implement Single Sign-On with Salesforce, perform the following steps:
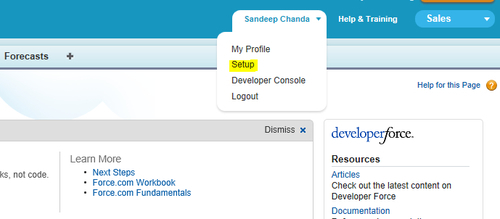
- Log in to your Salesforce account and click on Setup under your account settings menu, as shown in the following screenshot:
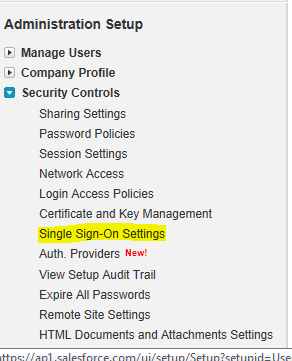
- In the Setup page, expand the Security Controls node under Administration Setup and click on the Single Sign-On Settings link, as shown in the following screenshot:
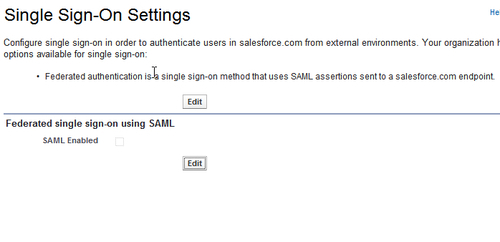
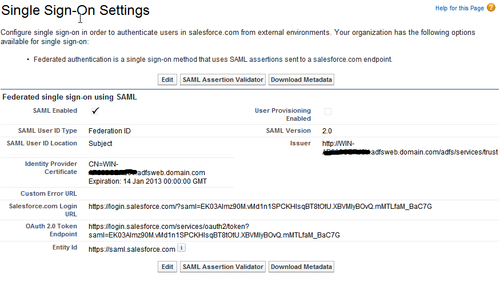
- In the Single Sign-On Settings page, click on Edit under the Federated single sign-on using SAML section, as shown in the following screenshot:
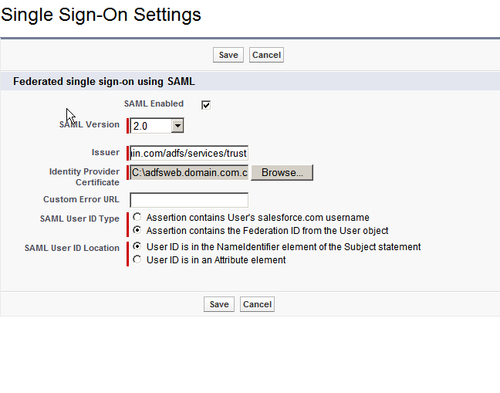
- In the Single Sign-On Settings page, select the SAML Enabled checkbox and enter the following details:
- SAML Version: Select 2.0 from the dropdown list.
- Issuer: Enter the Entity ID (refer to the
FederationMetadata.xmlfile in your Active Directory instance). - Identity Provider Certificate: Select the domain certificate.
- SAML User ID Type: Select Assertion contains the Federation ID from the User object.
- SAML User ID Location: Select User ID is in the NamesIdentifier element of the Subject statement, as shown in the following screenshot:
- Review Single Sign-On Settings and click on the Download Metadata button to download the federation metadata configuration file:
- Register your Salesforce account as a relying party with the identity provider (AD FS 2.0 in our recipe) using the federation metadata document that you downloaded in the previous step. Create a claims transformation rule to map a LDAP UPN claim to NameID.
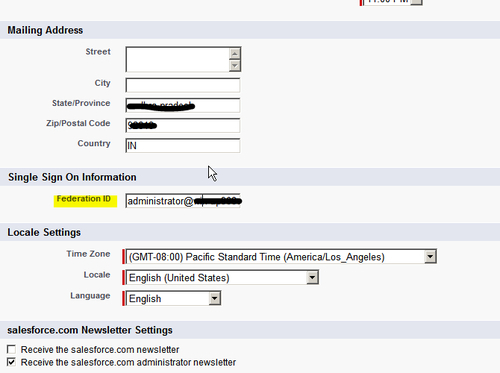
- Update the user profile in your Salesforce account to include the UPN as Federation ID, as shown in the following screenshot:
Your Salesforce account is now successfully configured for Single Sign-On using AD FS 2.0.
For an identity provider (for example, AD FS 2.0) initiated sign-on, you can click on a link that redirects to the https://<your domain url>/adfs/ls/idpinitiatedsignon.aspx?loginToRp=https://saml.salesforce.com URL from your intranet. This will initiate an SAML sign-on with Salesforce and, after a successful authentication, you will be signed-in.