
Now that we have successfully configured a federation server, we will explore a federation scenario where the claims issued by Federation Service are used by a claims-enabled (using the WIF runtime and the SDK) ASP.NET Web Application. Web Server (IIS) where ASP.NET Web Application is hosted will establish a trust relationship with the federation server and will allow access to the users who present the claims issued by Federation Service.
In this recipe, we will use a claims-enabled ASP.NET Web Application to verify the claims issued by Federation Service. You should have the WIF SDK installed along with Microsoft Visual Studio 2010 to create a claims-enabled ASP.NET Web Application.
To implement the federation scenario, perform the following steps:
- First, we will create a claims-enabled ASP.NET Web Application. To do this, create a new ASP.NET Web Application project from the Visual Studio 2010 C# templates. Right-click on the project and open the properties page. Under the Web tab, select Use Local IIS Web server and enter the
http://adfsweb.domain.com/ClaimsEnabledAppURL in the Project Url textbox. Click on the Create Virtual Directory button to create theClaimsEnabledAppvirtual directory if it doesn't exist under Default Web Site:
- In the IIS Manager console, under Application Pools, create a new application pool named
ClaimsEnabledAppand associate with theClaimsEnabledAppweb application. Under the Process Model section in Advance Settings, set Load User Profile property to True, as shown in the following screenshot: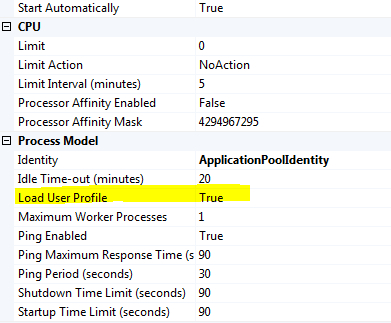
- Right-click on the project and click on Add STS reference….
- In the Federation Utility Wizard, under Application URI, enter https://adfsweb.domain.com/ClaimsEnabledApp and click on Next.
- Select Use an existing STS option in the Security Token Service step and enter adfsweb.domain.com in the textbox. Click on Next.
- Select Disable certificate chain validation in the STS signing certificate chain validation error step and click on Next. Select No encryption in the Security token encryption step of the wizard and click on Next. Review the settings and run the Federation Utility.
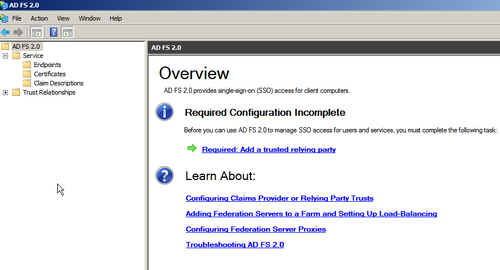
- Next, we will configure AD FS 2.0 to send claims to the ASP.NET Web Application. To do this, click on the Required: Add a trusted relying party link in the AD FS 2.0 management console, as shown in the following screenshot:
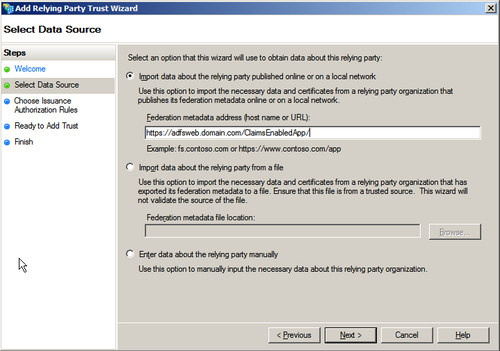
- Click on Start in the Add Relying Party Trust Wizard window and in the Select Data Source step, select the Import data about the relying party published online or on a local network option and enter the https://adfsweb.domain.com/ClaimsEnabledApp URL in the textbox. Click on Next, as shown in the following screenshot:
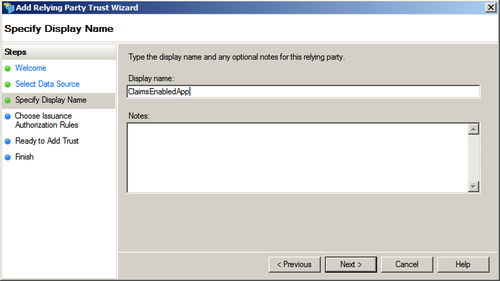
- In the Specify Display Name step, enter ClaimsEnabledApp as the name of the relying party and click on Next, as shown in the following screenshot:
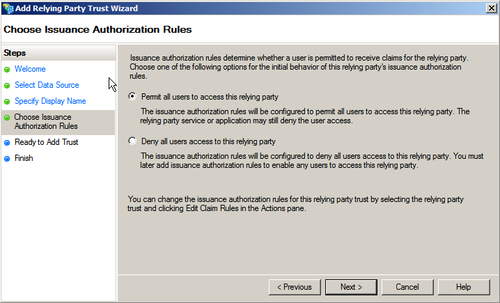
- In the Choose Issuance Authorization Rules step, select Permit all users to access this relying party and click on Next, as shown in the following screenshot:
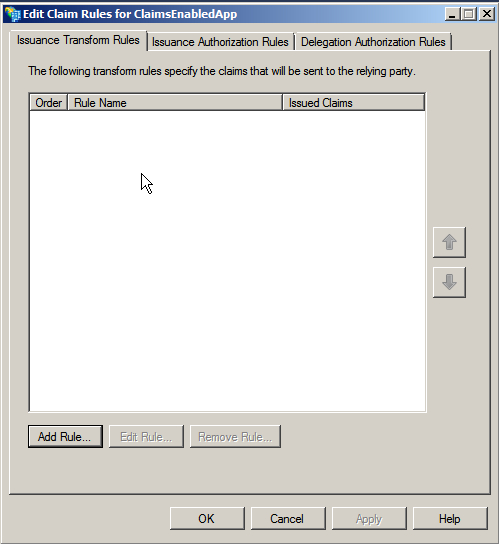
- Review and complete the wizard to finish adding the relying party. Closing the wizard launches the Edit Claim Rules for ClaimsEnabledApp window, as shown in the following screenshot:
- Click on Add Rule… to launch the Add Transform Claim Rule Wizard window and select the Pass Through or Filter an Incoming Claim option from the Claim rule template drop-down menu. Click on Next, as shown in the following screenshot:
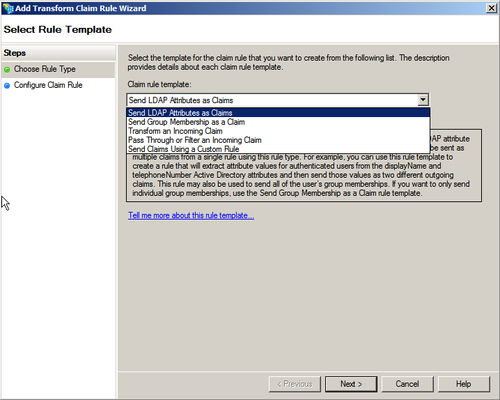
- There are multiple templates available to transform the incoming claims. The pass through option allows you to pass through all the incoming claims with a selected claim type. It also allows filtering of incoming claims with the selected claim type. You can select the different templates and to learn more about them, click on the Tell me more about this rule template… link.
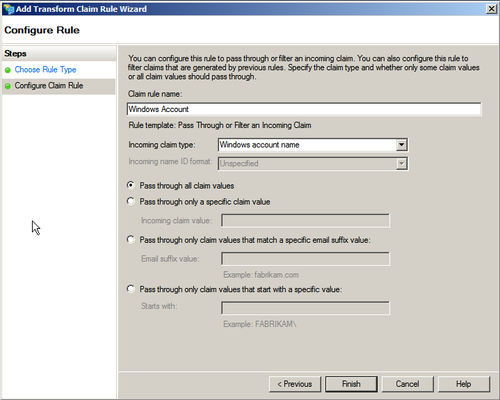
- In the Configure Claim Rule step, specify Claim rule name as Windows Account and select Windows account name from the Incoming claim type drop-down menu. Click on Finish to complete the wizard and then click on OK in the Edit Claim Rules dialog box to save the changes:
This step completes the configuration on the AD FS 2.0 management console and a trust relationship has been established between the federation server and the ClaimsEnabledApp ASP.NET Web Application. Browsing the https://adfsweb.domain.com/ClaimsEnabledApp URL will redirect you to Federation Service for verifying the incoming claims and redirect back to the web application URL with the authenticated user logged in.
Note
You must implement a request validator in the ClaimsEnabledApp web application (explained in Chapter 2, Overview of Claims-based Identity) to prevent a request validation error once the user is redirected from Federation Service to the application after a successful verification of the incoming claims.
The way this works is similar to the multiple scenarios elaborated in the previous chapters. The intent of this recipe was to demonstrate how easy it is to configure a federation server that can leverage the existing Active Directory infrastructure to implement a claims-based SSO.
You can create custom rules using Claim rule language. To view a sample of what the Claim rule language section looks like, click on View Rule Language… in the Edit Rule — Windows Account dialog box, as shown in the following screenshot:
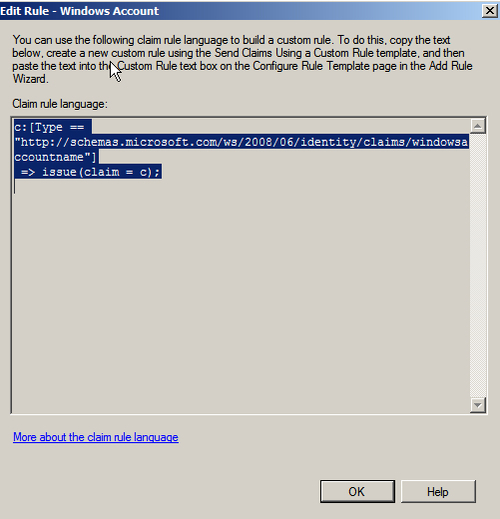
You can copy the expression in the preceding screenshot and use it to create the new rules using the Send Claims Using a Custom Rule template.