
In Chapter 1, Process Modeling, you defined roles and organization units. Roles authorize the people with a set of responsibilities (task) to perform. Later, you divide the tasks based on these roles by creating swimlane in the process. And each horizontal swimlane is associated with a role.
The method you adopted in Chapter 1, Process Modeling, for role assignment was static. However, there could be situations where a user is on vacation or leaves the organization, and in these cases you need to have new users to be assigned to roles in a dynamic fashion. You can assign users dynamically to roles using Oracle BPM workspace.
You have a user BusinessAnalystManager which will be assigned a Business Analyst role, as the user businessanalyst will be on vacation.
- Log in to Oracle BPM workspace (
http://localhost:8001/bpm/workspace/) as WebLogic user. - Click on the administration link.
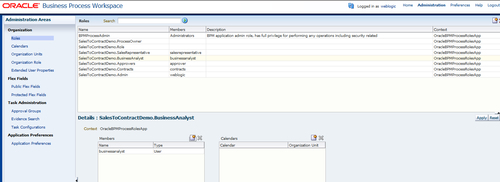
- Click on Roles, in the Administration Areas panel on the left, to list all the different roles across all the deployed processes.
- Select SalesToContractDemo.BusinessAnalyst role and this will list the user assigned to the role. You can find that only businessanalyst user is assigned to SalesToContractDemo.BusinessAnalyst role.
- Click on the add icon on the lower panel, to add a user to this role.
- Select users from the drop-down list and search for users. Select businessanalystmanager and click OK.
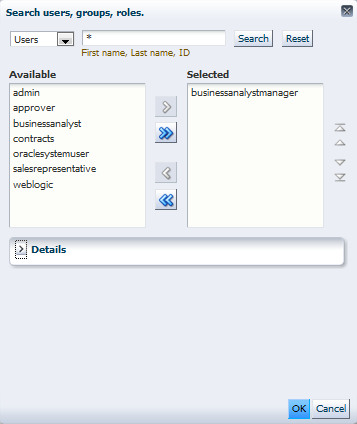
- You will be back to the Roles page. Click on Apply.
II. Manage organization units
You can define organization units in Oracle BPM workspace and can define hierarchy of organization units too.
- Log in to Oracle BPM workspace (
http://localhost:8001/bpm/workspace/) as WebLogic user. - Click on Organization | Organization Units.
- Click on add button and from the list, select Root Organization Unit.

- Enter Name of organization unit as APJ Sales Unit.
- Click on the add button and select Child Organization Unit to add a child organization to APJ Sales Unit.
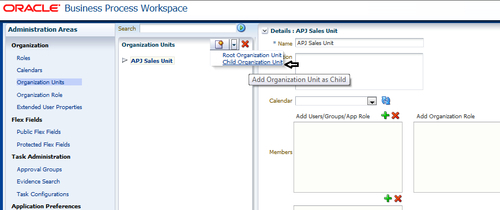
- Enter India Sales Unit for Name of the Child Organization .
- Click on Apply.
- Open JDeveloper in the default role.
- Go to the BPM project navigator and click on Organization in the SalesToContractDemo project, as shown in the following screenshot:
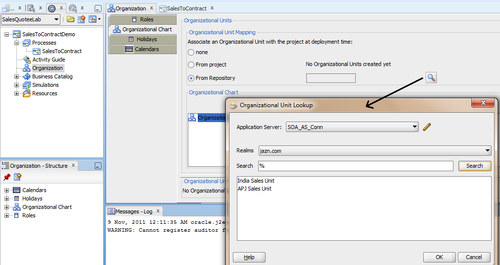
- Check From Repository and click the browse button to open Organization Unit Lookup.
- Select the Application Server and search for all.
- You can find the Organization Units you have created.
- Select the one required and click OK.
This way you can associate an organization unit with the project at deployment time from repository.
III. Creating Approval Groups
- Log in to the Oracle BPM workspace application as the WebLogic user.
- Click on the administration link at the top of the page.
- Click Approval Groups in Task Administration.
- Click on the green plus (+) icon next to Groups, and select Create Static.

- In the Details section, enter Name of the group as SalesGroup and click on the green plus (+) icon to add members to the group.
- Search/browse for Members. This will open the Identity Browser.
- Select zonalmanager from the list. Let's have only one user belonging to this group at the moment.
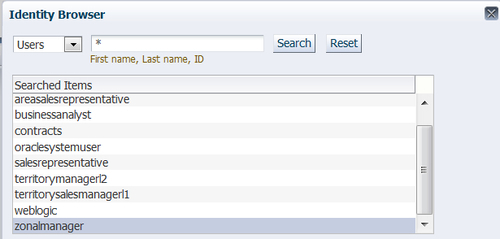
- Click OK.
- Click OK on the Add to Group box too.
- Click on the Apply button, and zonalmanager will now be a member of SalesGroup.
Note
Go to http://acharyavivek.wordpress.com to learn about Dynamic Approval Group.
IV. Managing organization roles
Organization roles are logical roles that define the members of an organization unit. They are groups of users specified by using a query. For example: all Members of SalesGroup belong to a logical Organization Role named SalesAgents.
- Go to Oracle BPM workspace and log in as the WebLogic user.
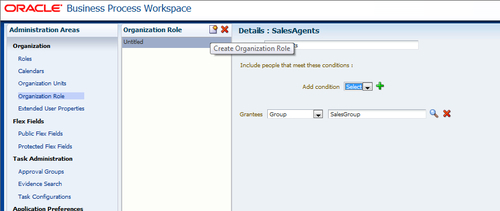
- Click on Organization Role as shown in the following screenshot.
- Click on the add icon to add an organization role.
- Enter Name as SalesAgents and select SalesGroup in the Grantees Group list.
- Click on Apply.
There's more...
The following section will guide you through the necessary steps to revoke a role.
- From the Business Process Workspace toolbar, select Administration. The Administration Areas panel appears.
- In the Organization panel, select Roles.
- Select a role. The Details panel displays the details for the selected role.
- Choose the member in the Members section and click on Revoke the role from user, group, or role.
- Click on OK.