Adding Shadow and 3D Effects
You can add shadow and 3D effects to objects, including AutoShapes, WordArt, and clip art.
→ To learn more about adding an AutoShape object to a slide, see “Adding AutoShapes” in this chapter.
→ For details on how to effectively use WordArt to enhance your presentation, see “Understanding WordArt” in this chapter.
→ To learn what clip art images are available and how to use them, see “Inserting Clip Art” in Chapter 13.
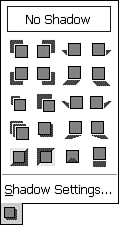
![]() Select an object and click the Shadow Style button on the Drawing toolbar to display the Shadow palette, shown in Figure 14.25.
Select an object and click the Shadow Style button on the Drawing toolbar to display the Shadow palette, shown in Figure 14.25.
Figure 14.25. Shadows can add a dramatic effect to a presentation.

Choose the shadow style you want to apply from the available palette options.
Tip from
To remove a shadow immediately, click the Undo button. To remove a shadow later, select the shadowed object, click the Shadow button on the Drawing toolbar, and choose No Shadow.
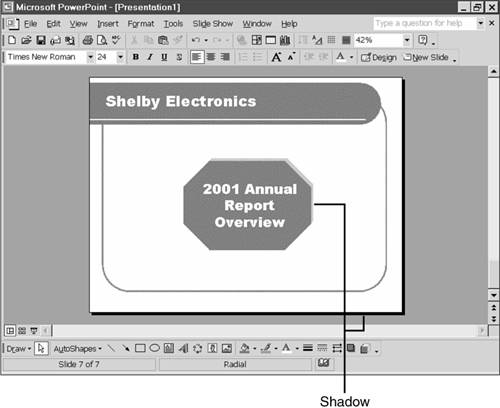
You can also customize the shadow by specifying its exact position and color. To do this, select Shadow Settings from the Shadow palette. The Shadow Settings toolbar displays, as described in Table 14.2. Figure 14.26 shows an object with a shadow.
→ To learn how to nudge an object to move it slightly, see “Nudging Objects” in this chapter.
→ For details on the effects of this dialog box, see “Using the Colors Dialog Box” in this chapter.
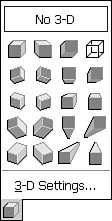
To add 3D effects, select the object you want to modify and click the 3-D button on the Drawing toolbar. The 3-D palette displays, illustrated in Figure 14.27.
Figure 14.26. Get dramatic with shadows.

Figure 14.27. Get creative with 3D, but be sure your object doesn't become too distorted.

Choose the 3D style you want to apply from the available palette options.
Can't apply 3D effects? See the “Troubleshooting” section near the end of the chapter.
Tip from
To immediately remove a 3D effect, click the Undo button. To remove 3D later, select the object, click the 3-D button on the Drawing toolbar, and choose No 3-D.
You can also customize the 3D effect by specifying its tilt, depth, direction, lighting, surface, and color. To do this, select 3-D Settings from the 3-D palette. The 3-D Settings toolbar displays, described in Table 14.3.
→ To learn more about the options available in this dialog box, see “Using the Colors Dialog Box” in this chapter.
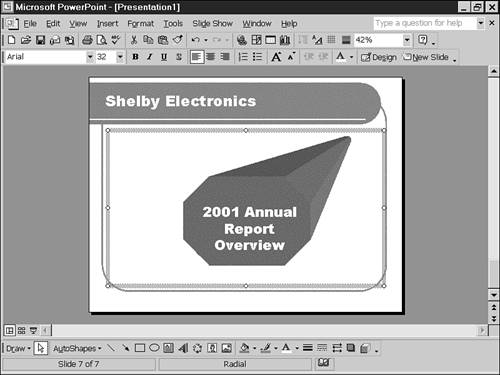
Figure 14.28 shows an object with 3D effects.
Figure 14.28. Properly used, 3D effects can enhance a presentation.

