

Try It
459
TABLE 402
PROPERTY VALUE
Height
Auto
Orientation
Horizontal
Width
Auto
Add five
Image controls to the StackPanel.
Use the Properties window or the XAML code editor to give the
Image controls the property
values shown in Table 40-3:
TABLE 403
PROPERTY VALUE
HorizontalAlignment Center
Margin
4
Source
An appropriate picture
Stretch Uniform
VerticalAlignment Center
Width
100
Resize the
Window so it fits the images nicely.
Hints
Sometimes it’s easier to edit XAML code directly instead of using the designer to modify the
user interface. In this example, you can simply replace the Grid control with a StackPanel
in the XAML code if you like.
If you like, you can make a style to hold common properties.
Step-by-Step
The steps required for this Try It are all fairly straightforward exercises in using Visual Studio. If you
have trouble figuring out how to perform a step, skim this lesson again or watch the lesson’s screencast.
The basic steps are:
1. Create the new program.
2. Remove the initially created Grid control and replace it with a StackPanel. Set the
StackPanel’s properties. (In particular, set Orientation to Horizontal.)
596906c40.indd 459 4/7/10 12:35:21 PM
460
LESSON 40 Making WPF aPPlications
3. Add five Image controls. Set their properties. (In particular, set Stretch to Uniform and set
their
Source properties.)
4. If you like, move common Image properties into a style.
Please select Lesson 40 on the DVD to view the video that accompanies this lesson.
EXERCISES
1. Copy the program you built for this lesson’s Try It and replace the StackPanel with a
WrapPanel. (Hint: Instead of removing the StackPanel and all the controls that it con-
tains and then rebuilding everything inside a
WrapPanel, edit the XAML code and replace
the
StackPanel element with a WrapPanel element. Be sure to also change the closing
</StackPanel> tag.) Run the program and see what happens if you make the program’s
window taller and narrower.
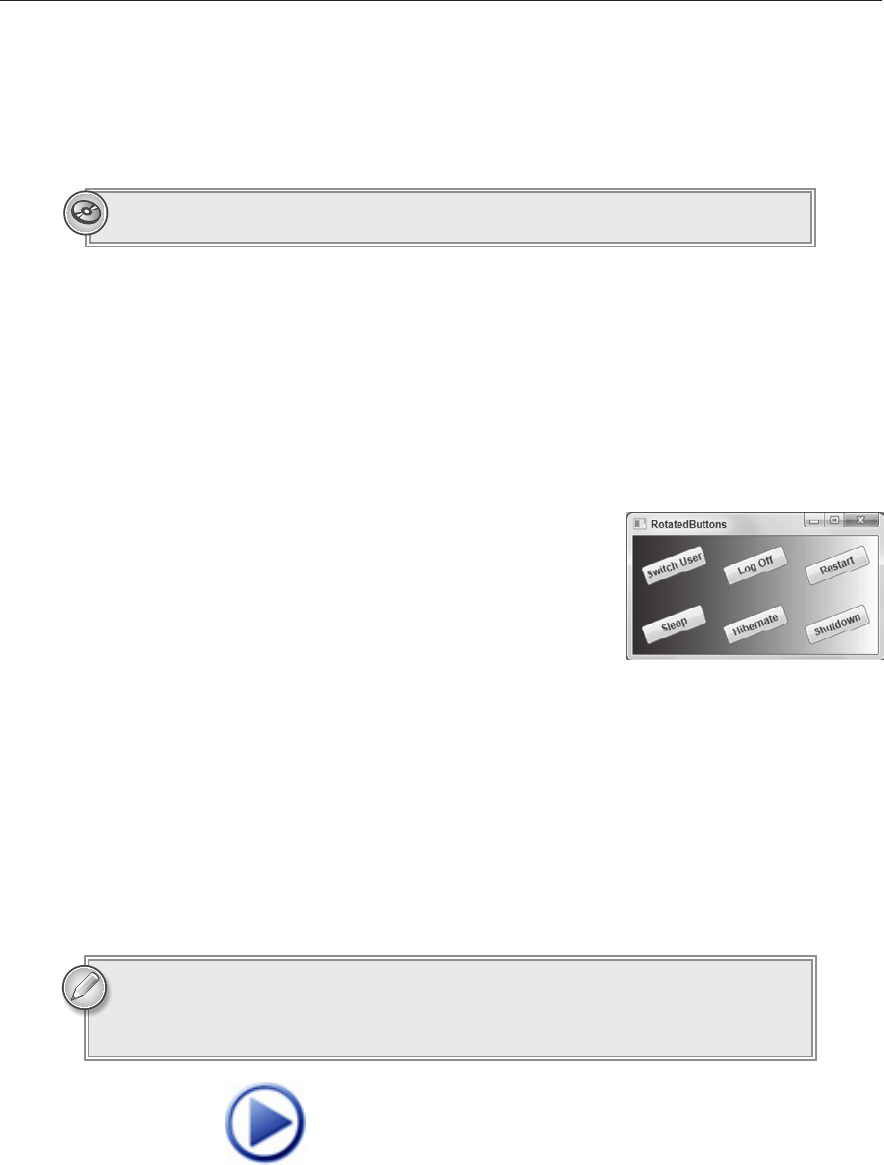
2. Make the program shown in Figure 40-5. Replace the
initially created
Grid with a UniformGrid. Set the new
control’s
Rows property to 2 and its Columns property
to 3.
Add a button to the UniformGrid. Then add a
LayoutTransform property to it as shown in the
following code:
<Button Content=”Switch User” Height=”23” Width=”75”>
<Button.LayoutTransform>
<RotateTransform Angle=”-20”/>
</Button.LayoutTransform>
</Button>
Copy and paste this button several times and edit each button’s Content property to deter-
mine the text it displays.
If you like, experiment with the
UniformGrid’s background brush and move common prop-
erties into a style.
You can download the solutions to these exercises from the book’s web page at
www.wrox.com or www.CSharpHelper.com/24hour.html. You can find them in
the Lesson40 folder of the download.
FIGURE 405
596906c40.indd 460 4/7/10 12:35:22 PM
Click here to Play
..................Content has been hidden....................
You can't read the all page of ebook, please click here login for view all page.