
Uploading the Icon and Background for Your Android Application
By now, you should have decided what type of icon you want, as well as the background for your application. These are important elements of your style, which I discussed in Chapter 3.
You will notice that the drawable folder in the res folder of Package Explorer has three folders: hdpi, mdpi, and ldpi. You will also notice that each of them has a file of the same name, icon.png. icon.png is set up for different types of bitmap images. These are the required measurements for the icon and background, in pixels:
- hdpi is for high-density DPI screen images. The icon must be 72×72 pixels, and the background must be 800×480 pixels.
- mdpi is for medium-density DPI screen images. The icon must be 48×48 pixels, and the background must be 320×480 pixels.
- ldpi is for low-density DPI screen images. The icon must be 32×32 pixels, and the background 320×420 pixels.
It is important that your icon and background conform to these dimensions, as Android is set up for them for very specific instances. For example, shifting your application from portrait to landscape mode will look much better if your background is presented correctly.
How to Replace the Default icon.png File
Note that each of the drawable folders in Figure 12-4 has a specific image file known as icon.png, which is the bitmap for the icon. What you want to do is replace that default icon, which is nothing more than the Android logo in its default state, as shown in Figure 12-5.

Figure 12-5. The default Android icon, which automatically appears when you create an Android application
Here are some steps you can follow to change the default icon to one that you have designed:
- You should get the graphics that you want for your icon, and save it in PNG format if it is not already. You can easily convert your image from its current file type by opening up Microsoft Windows’ default Paint program and saving the image in PNG format.
- You will need to crop the PNG image so that it’s square—preferably 200×200 pixels (it can be larger, provided the length equals the width). This can be accomplished in Microsoft Office Picture Manager by selecting the image, selecting Picture from the top menu, and then selecting Crop. The Crop tool can make your image square; you can see the exact numbers of pixels in your image on the right, in the “Picture dimensions” section (see Figure 12-6).
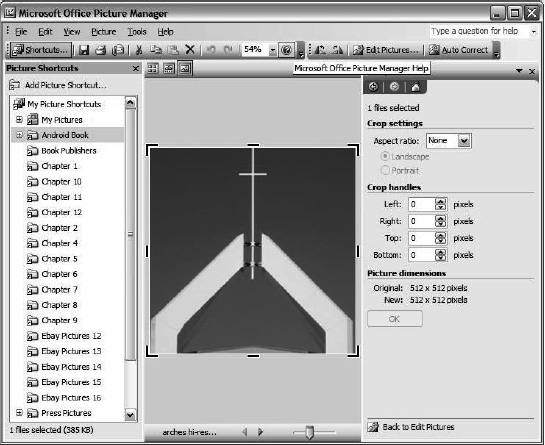
Figure 12-6. Using Microsoft Office Picture Manager is one way of turning your graphic for your icon into a perfect square.
- You can use the Resize tool (also a selectable from the picture menu bar) to bring your image to the appropriate size (see Figure 12-7). Keep in mind that Picture Manager’s resizing tool can distort things, so you might want to try Photoshop or other tools that can resize an image.
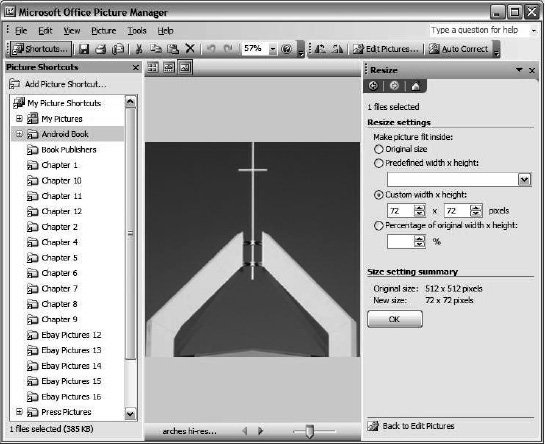
Figure 12-7. The Resize tool can reduce your icon to its proper size.
- Resize your icon to 72×72 for the
hdpiversion and click OK. Click Save As from the top menu. Go to the directory where you saved your workspace, and click theresfolder and thendrawable-hdpi. Save the file asicon.png. It will ask you if you want to overwrite, so click Yes. See Figure 12-8.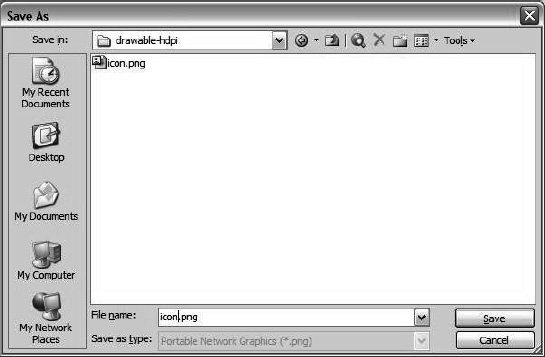
Figure 12-8. Saving your icon as an icon.png file (in the proper format) will ensure that it will show up in your application.
- Go back to your original image (preferably 200×200), resize it to 48×48 for the
mdpifile, and Click OK. Click Save As from the top menu.- Go to the directory where you saved your workspace, and click the
resfolder and thendrawable-mdpi. Save the file asicon.png. It will ask you if you want to overwrite, so click Yes.- Repeat Steps 5 and 6 for your icon, this time for
ldpi; the dimensions need to be 32×32.
You now have your icon for all three different screen resolutions.
How to Set a Background
If you do not set a background for your application, it will appear as a black, blank screen, as shown in Figure 12-9. Since that is a little boring, you should make one of your own, one that is consistent with your style.
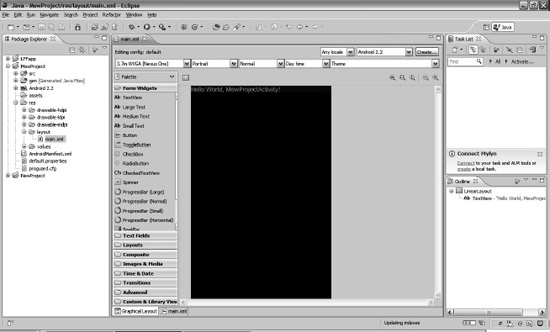
Figure 12-9. What your application will look like in Graphical Layout mode, sans background
Similar to the steps for the icon, you will need to create a background.png file for the hdpi, mdpi, and ldpi files. The one for hdpi has to be 800×480 pixels, the one for mdpi has to be 320×480 pixels, and the one for ldpi must be 320×420 pixels. Save them under the same name (background.png) in the same manner that you saved the icon.png file.
Sadly, Android does not automatically set the background, but you can use a simple line of code to do it yourself in main.xml:
android:background="@drawable/background
Perfect. It has gone from ugly black to customized! If you want to see what it looks like, feel free to jump ahead and check out Figure 12-17.