
How to Update Your Android Application
In this section, I am going to assume that you have discovered a way to improve your application, and you have gone into your application and altered the code significantly enough that you can justify an official update of your application. You may have also discovered a bug in the application that you have finally figured out how to fix. This section will describe how you can update your application using Eclipse and the Android Market publisher site.
After you have made all the updates to your application, make certain that it runs without errors. I recommend regression testing to uncover new errors that appear after you change it, not to mention a barrage of tests to ensure error-free running. You should also run it on an emulator or Android device to make certain that your new features run exactly as planned.
Open up your application on Eclipse. Before you put your update on the Android Market, you have to update your AndroidManifest.xml file in your Android program. When you upload your APK to the Android Market, it automatically defaults to this underneath the package prompt in the first few lines of the AndroidManifest:
android: versionCode = "1"

android: versionName = "1.0"
You will want to change the android: versionCode to 2, and you can change the android: versionName to whatever you want. You probably shouldn’t change the version name to 2.0 unless this is a major update of some type. I will leave you to decide what that is. To put it in perspective, I made a few updates on my first application after it was out on the market for a few days. I figured that a version name of 1.1 was appropriate (see Figure 11-2).

Figure 11-2. The typical Android manifest for a program on Eclipse. Note the version code and version name, which will need to be changed for an update.
With Eclipse already open, you will need to digitally sign your application again, like you did before when you first submitted to the Android Market.
Right-click the top of the application in Package Explorer, and select Android Tools and Export Signed Application Package. You should see a window like in Figure 11-3.

Figure 11-3. The Export Android Application window
Go ahead and select your project. If it’s not there by default, select the proper project and click Next. You should see a window like in Figure 11-4.
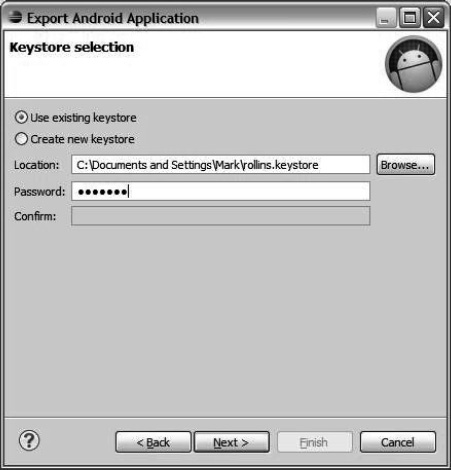
Figure 11-4. The “Keystore selection” screen of the Export Android Application dialog
From here, it will default to “Use existing keystore,” and it should default to where you put your keystore the first time. If it doesn’t, click the Browse button and find the directory where you put the keystore that you wish to use. Enter the password and confirm it, and then click Next. You will then see a window like in Figure 11-5.

Figure 11-5. The Key Alias selection of the Export Android Application dialog
If you input your password correctly, you will get a screen like in Figure 11-6, with your alias appearing by default. If you didn’t input it correctly, you’ll get a message that says, “Keystore was tampered with or password was incorrect.” If you run into this problem, just click Back, and try entering your password again.

Figure 11-6. Destination and key/certificate checks
According to the official Android Market publishing site, at http://developer.android.com/guide/publishing/publishing.html, “The package name must be the same as the existing version and the .apk file must be signed with the same private key. If the package name and signing certificate do not match those of the existing version, Market will consider it a new application, publish it as such, and will not offer it to existing users as an update.” Consider this package name your unique ID on the market.
This means that you want to make your APK file and your file name the same, so you should go into your file manager and save your old APK file with a different name, such as file name Vers 1, just so you have the original version, in case you need it again. In fact, I usually copy the entire directory, and I recommend zipping it as an archive. Just go to your file manager, right-click the folder, and click Send To ![]() “Compressed (zipped) folder.”
“Compressed (zipped) folder.”
Once you have the new destination APK file, go ahead and click the Finish button.
Now you will need to go to the Android Market and officially put out the new version of your application. Open your browser to the Android Market at http://market.android.com/publish. Log in with the username and password that you set up when you originally published your application, as shown in Figure 11-7.

Figure 11-7. The opening page of the Android Market publishing site
After you have finished logging in, you will see an “All Android Market listings” page, like one shown in Figure 11-8.
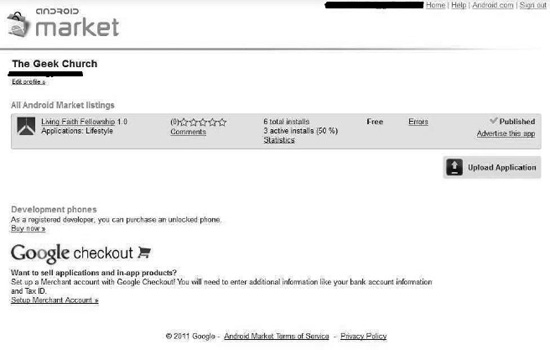
Figure 11-8. The “All Android Market listings” page will have a list of all of the applications you have on the Android Market.
Select the app to be updated. Click “APK files” and you will see a screen like in Figure 11-9.
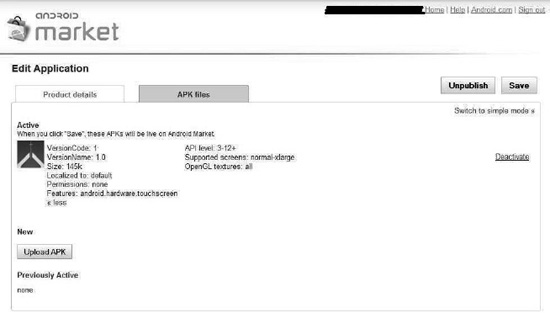
Figure 11-9. The screen for editing your application
Click Unpublish. This will take your application off the market until you put it back on again. The Unpublish button will change to read “Publish,” as shown in Figure 11-10.
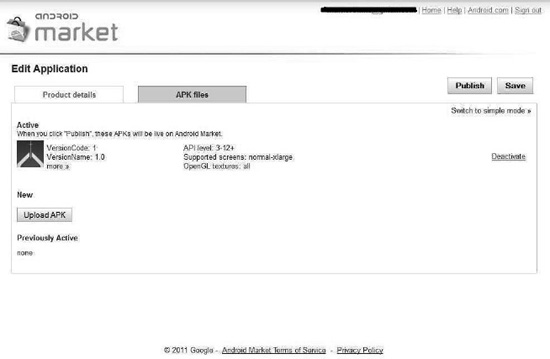
Figure 11-10. Unpublishing your application on the Android Market publishing site
You will need to upload the new APK, so click Upload APK. You should see a window like Figure 11-11.
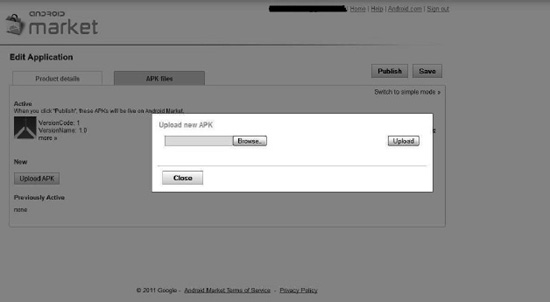
Figure 11-11. Uploading the new APK
Browse to wherever you saved your new APK, and click Upload. You will see a screen like the one shown in Figure 11-12.

Figure 11-12. What you will see after you upload the new version of your APK. Note that the VersionName and VersionCode have changed.
If your application has changed as far as user permissions go, you will get a warning, as shown in Figure 11-12. Click Save, and you will see a screen like Figure 11-13.

Figure 11-13. What you will see after you update your APK
Your application cannot handle two versions of the same APK, so it will ask you to deactivate one of them. Go ahead and deactivate the old version, and activate the new. Click Save and then Publish.
If you’ve made any significant changes, you should probably open the program to the editing screen and make a note of whatever changes you’ve made. These will show up in the official Android Market entry. To do this, click the “Product details” tab, and enter a description of your changes in the Recent Changes text box, as shown in Figure 11-14.

Figure 11-14. Noting the recent changes to your updated application
Okay, now that you have completed your first Android update, do not let it be your last. You are going to have to keep doing more and more updates to keep up with consumers’ needs. If you do an update that is a complete renovation of your application, this should be considered a new version.
![]() Tip For some reason, new versions that end in zero get a lot of attention. Mozilla recently took advantage of this, moving Firefox rapidly to 5.0 and then 6.0. *). You should consider doing the same with your application.
Tip For some reason, new versions that end in zero get a lot of attention. Mozilla recently took advantage of this, moving Firefox rapidly to 5.0 and then 6.0. *). You should consider doing the same with your application.
When you put version 2.0 on the market, be certain that all your media contacts and social networks are informed of this. It is a big deal! The same goes for your 3.0, 4.0, and so on.
Now that you are an application developer, it is necessary to do maintenance of more than just your applications to keep your career alive and fruitful. You are also going to need to change your marketing practices from time to time, and make new announcements for each improvement (possibly even press releases).
At some point in the life of your application, maintenance begins to take precedence over creation. This is not to say that you should stop being creative when you have a moneymaking application. If anything, you should always be looking to improve on what you have made.
One way of finding out how you can improve is by looking at your feedback via e-mail or social networking sites. You will find out real fast, often through negative criticism, what your application needs or does not need.