In this section, we will describe the specific steps required to launch an EC2 instance into our public subnet. For general steps, refer to the General steps for launching an EC2 instance and doing SSH section of this recipe. Follow these steps:
- Go to the EC2 dashboard and click on Instances from the left sidebar.
- Click on the Launch Instance button at the top of the page, select Amazon Linux 2 AMI, set Type to t2.micro, and click Next: Configure Instance Details.
- Within the Configure Instance Details page, for the Network, select our custom VPC. For Subnet, select our public subnet. Leave the option for Auto-assign Public IP to Use subnet setting, which has a value of Enable for our public subnet. Click Next: Add Storage:

- We will use the default configuration on the Add Storage page. Click Next: Add Tags.
- On the Add Tags page, add a tag with Key set to Name and Value set to MyPublicInstance. Click on Next: Configure Security Group.
- On the Configure Security Group page, select Create a new security group and provide values for Security group name and Description:

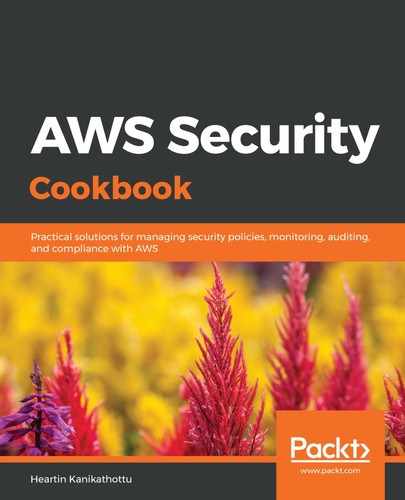
- Add a rule for SSH (if not already present) and set Source to My IP. Our local machine IP should be automatically populated. Click on Review and Launch:
We only provided SSH access to our local IP. In the real world, you may give access to a range of IPs or to another dedicated machine referred to as a jump host or a bastion host.
- Follow the instructions displayed on the screen to complete the EC2 launch and take note of its public IP or public DNS:

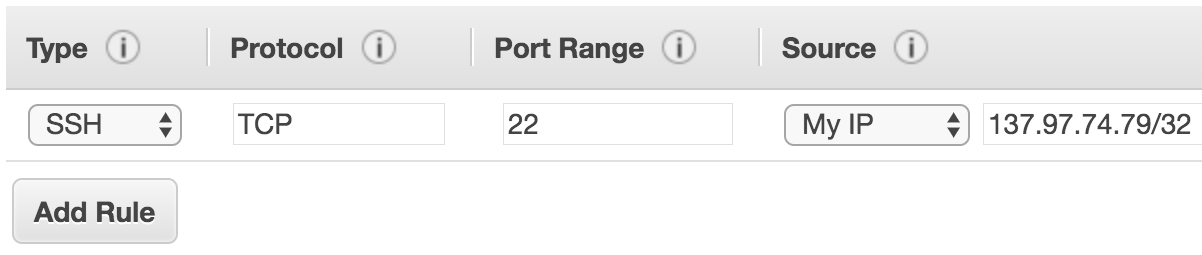
- SSH into the EC2 instance:
We should be able to successfully log in to the EC2 server.
In the next section, we will launch an instance into our private subnet.