
Having some facility to hook up sensors is almost de rigueur when you talk about the Internet of Things. Furthermore, learning how to get your arms around the large datasets that typically pour out of these sensors has become a crucial piece of the IoT puzzle. In the next section, we will take a look at a recipe that introduces one method for managing this data.
We will be piggybacking on a recipe from Chapter 3, Physical Computing Recipes Using JavaScript, the BoneScript Library, and Python, and will use the TMP36 temperature sensor in particular. However, this time, you will learn how to use the data coming out of the sensor and display it in a more accessible IoT-style manner.
The following materials will be needed:
- BBB powered via 5V supply.
- Ethernet or Wi-Fi connectivity.
- Breadboard.
- 3x jumper wires.
- The TMP36 temperature sensor—this is the same sensor as the one we used in Chapter 3, Physical Computing Recipes Using JavaScript, the BoneScript Library, and Python. As a reminder, this low-cost sensor is readily available from numerous sources, including suppliers such as Sparkfun (https://www.sparkfun.com/products/10988).
Perform the following steps to use sensors and data with ThingSpeak:
- If BBB is not already off, turn it off.
- Using the following fritzing diagram, wire your powered down BBB:
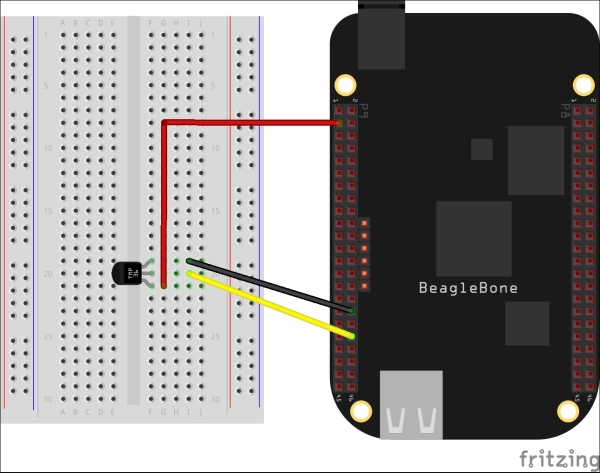
You may remember this configuration from Chapter 3, Physical Computing Recipes Using JavaScript, the BoneScript Library, and Python as the wiring is exactly the same: GND uses the analog ground P9_34 (GNDA_ADC), 3V PWR at P9_3, and the sensor pin at P9_38.
- Power your BBB and log in via SSH.
- Sign up for a new account at ThingSpeak (https://thingspeak.com/), a free cloud service for data publishing and creating IoT-style products.
- Follow the prompts on the ThingSpeak site on how to set up a channel for your account. Just for fun, let's name the channel as
Ground Control Temperature.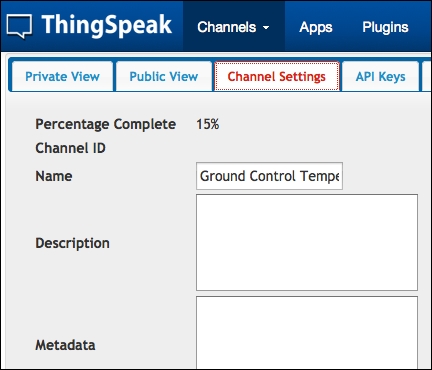
- At the bottom of the same Channel Settings screen, create a second field called
Field Label 2, as shown in the following screenshot: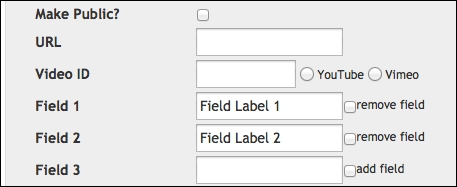
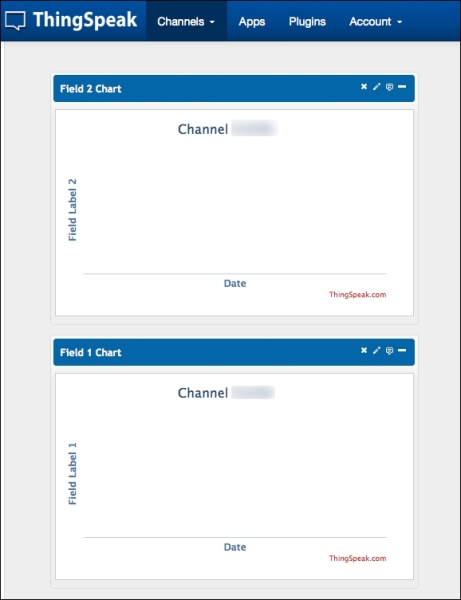
- You can now see the blank slate charts that have been created for the channel that will receive data from the BBB's sensor:
- From your GitHub repo, download the BoneScript (Node.js) code for this recipe to your BBB with the following command:
$ git clone https://github.com/HudsonWerks/tmp36-sensor-thingspeak.git - Navigate to the new directory that we just created and open the Node.js file with the following command:
$ cd tmp36-sensor-thingspeak
$ sudo nano tmp36-thingspeak.js
- In a browser on your client desktop, open the Cloud9 IDE and create a new JavaScript file. Then, copy and paste the code from the open
nanowindow on your BBB to the Cloud9 file. - Before trying to send data to ThingSpeak, we should first verify that our sensor, wiring, and basic code are functioning properly. Now, in your Cloud9 window, click on the RUN button. If all goes well, the console output in the IDE should show readings similar to the following code:
debugger listening on port 15454
Sensor reading started.
Output at 10-sec intervals.
Temperature at Ground Control for Tue, 11 Aug 2015 19:20:21 GMT
Fahrenheit: 64.4
Celsius: 18
_____________
Temperature at Ground Control for Tue, 11 Aug 2015 19:20:31 GMT
Fahrenheit: 63.86
Celsius: 17.7
If you are not getting readings from the sensor, go back and check your wiring.
- Next, we will hook up our code to the ThingSpeak channel that we set up in the first part of this recipe using the generated API. Back on the ThingSpeak Channels tab, drill down to the new channel you created and search for the API Keys tab option. Select this tab and then copy (Ctrl + C) the Write API Key generated, as shown in the following screenshot:
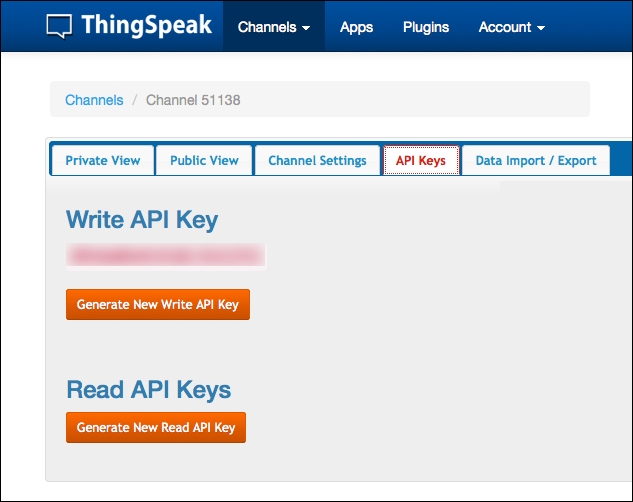
- Back in the Cloud9 window, on line 30 of the
tmp36code window, paste your ThingSpeak Write API key to the designated part of the code as follows://Post temperature data to ThingSpeak request.post('http://api.thingspeak.com:80/update',{form:{api_key: 'THINGSPEAK_WRITE_API_KEY_HERE', field1: temp_f, field2: temp_c}});
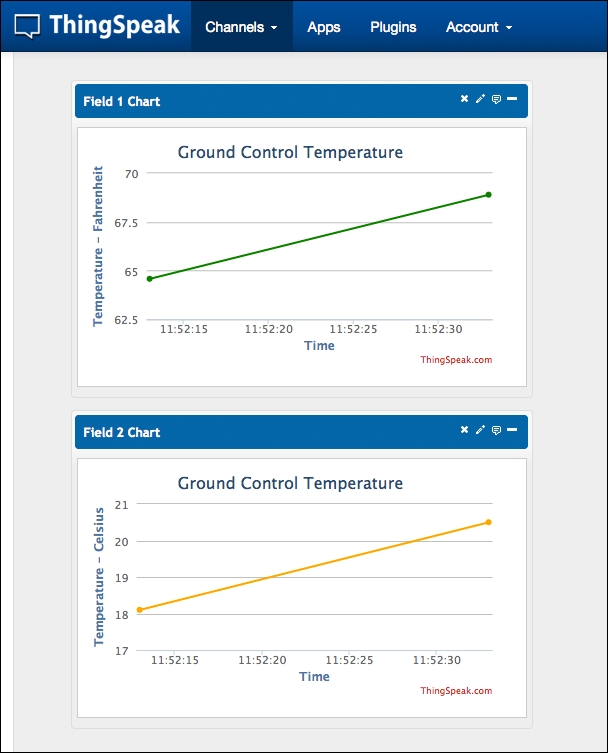
- Now, it's time to see your temperature readings that is displayed on the ThingSpeak cloud service. So, as you again click on RUN in the IDE, your Cloud9 console should be outputting temperature readings as before. Within a few moments, back on the ThingSpeak channel, data points should be appearing at 10-second intervals on the screen, plotting the fluctuations of Ground Control Temperature of your room, as shown in the following screenshot:
- Last but not least, we want to make the sensor data visible through yet another method, this time using Twitter. As Twitter is free and readily available on your smartphone, it serves as a useful channel to funnel IoT data. ThingSpeak simplifies the process considerably by having a web hook that lets you plug into a Twitter account.
If you do not have a Twitter account, set one up now. And even if you do have one, create a new development account that is separate from your primary feed. Otherwise, your followers may not appreciate getting your temperature sensor tweets.
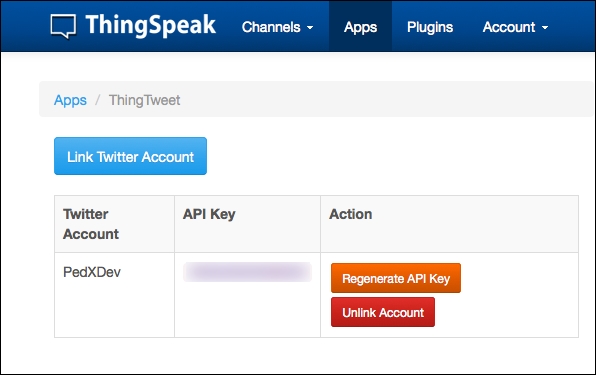
- On the ThingSpeak site, select Apps from the menu and then ThingTweet.
- Under the ThingTweet App, select Link Twitter Account. This will redirect you to Twitter so you can authorize ThingSpeak access to your account. If you want to proceed with the rest of this recipe, you will need to give permission for authorization.
Once you have confirmed the right Twitter account, Twitter will send you back to ThingSpeak.
- After the authorization process, the ThingSpeak app generates a ThingTweet API Key that we will need to use in our code, as shown in the following screenshot:
- Copy and paste this new API Key to line 33 of the code in the Cloud9 window, where it says
THINGTWEET_TWITTER_API_KEY_HEREand the two CHANNEL-IDs to the designated spots in the code:request.post('https://api.thingspeak.com/apps/thingtweet/1/statuses/update', {form:{api_key: 'THINGTWEET_TWITTER_API_KEY_HERE', status: "The current Ground Control temperature is %%channel_CHANNEL-ID_field_1%% F, %%channel_CHANNEL-ID_field_2%% C"}}); }
Note
All the parameters from the Twitter API statuses/update are possible, including geolocation. You can learn more about the ThingSpeak API and its Twitter app on their site at https://thingspeak.com/docs/thingtweet/.
- Last but not least, click on RUN in the IDE. Let's keep our fingers crossed because your BBB's Ground Control Temperature will begin to send temperature updates to your Twitter account.
Three cheers for Ground Control Temperature!
You will soon learn that there is a vast array of new ventures playing in the IoT cloud services sandbox. As most of them are nascent businesses in a newly emerging industry, it is difficult to predict who will emerge as go-to platforms in the future. However, a handful of players are worth mentioning for their ease of use or their strong positioning on the marketplace:
- Cloud deployment: Deploying software updates to multiple remote devices will become an increasing challenge as the IoT continues to grow. Two players, Resin.io (https://www.resin.io/) and Docker (https://www.docker.com/), are leading the charge in creating a platform for containerizing your applications, making it easy to deploy packages to all your devices over the cloud.
- Data display and hosting: Many businesses in the IoT space are trying to make it easier for you to manage and display your IoT data in a slicker package and simultaneously host with them. Here are a couple of them:
- Initial state (https://www.initialstate.com/)
- Ubidots (http://ubidots.com/)
- Messaging and alerts: Dweet.io/Freeboard (http://dweet.io/)
- Connecting to web services through open APIs: Ship.iot (https://shipiot.net)
- Toolsets to hook up IoT devices including the following sample:
- IBM's Nodered.js (http://nodered.org/)
- Adafruit I/O (https://www.adafruit.com/io)