
In the previous recipe, we compiled and installed the part that actually tracks the satellite. Now, we need to add the piece of the system that allows us to manage the potential flood of data, share it with others, and have them share their data back with us.
Note that this has been tested successfully on Debian Wheezy (3.8) and Debian Jessie (13.4).
The materials needed are as follows:
- An RTL-SDR dongle.
- An antenna—for the recommended low-cost antenna that we are using, refer to the Diamond Antenna in the prior recipe on plane tracking (http://www.aesham.com/glass/magnet/diamond-antenna-mr-75s/).
- An antenna adapter—if you use an antenna other than the small one that often comes with the dongle, such as the one mentioned before, you will need to buy a separate adapter. Don't worry! They're cheap too, and ours was only about USD $6.00 (http://amzn.to/1WoB7Lq). Attach the antenna to the RTL-SDR dongle via the uSML adapter.
- Powered USB.
- Ethernet or Wi-Fi connectivity.
Here are the steps you need to perform:
- Check that
pipis installed and the package management system used to install and manage packages is written in Python through the following command:$ pip listAs Python 2.7.9 and later versions (on the Python2 series) and Python 3.4 and later versions include
pipby default, you may have pip already. If not, you can install it this way: - Download
get-pip.pyat https://bootstrap.pypa.io/get-pip.py. - Then, run the following:
$ sudo python get-pip.py - Install package dependencies via the following command:
$ sudo pip install virtualenvwrapperNote
virtualenv is a tool designated to address the problem of dealing with packages' dependencies while maintaining different versions for different projects. For example, if you work on two Python Django websites, one that uses Django 1.2 and another 0.96, there is no way to keep both versions if you install them into the standard
/usr/lib/python2/site-packages. virtualenv creates two isolated environments.vitualenvwrappertakes virtualenv a step further by providing commands that can be invoked from the terminal window. - So that your program knows where to find
virtualenvwrapper, modify your bash profile with the following command:$ sudo nano ~/.bashrc - At the end of the open file, append it with the following:
export WORKON_HOME=$HOME/.virtualenvs
source /usr/local/bin/virtualenvwrapper.sh
- Reload the bash script with the following command:
$ sudo source ~/.bashrc - Time to install the dependencies. Use the following commands:
$ sudo apt-get install libxml2-dev libxslt1-dev python-dev
$ sudo pip install django
$ sudo pip install django-dotenv
- Now, it's time to get the custom package created by the SatNogs team. First, we will clone the source code from the repository as follows:
$ git clone https://github.com/satnogs/satnogs-network.git - Set up the virtual environment. On the first run, you should create it and link it to your project path. The following commands will do this:
$ cd satnogs-network
$ mkvirtualenv satnogs-network -a .
(Note the
.symbol at the end of the command, and don't usesudo.) - Set your environmental variables as follows:
(satnogs-network)debian@beaglebone:~/satnogs-network$ cp .env-dist .env - Activate your python virtual environment with the following command:
$ workon satnogs-network - Install the local development requirements as follows:
$ pip install -r requirements/dev.txtThis step may take a while and consume most of your BBB's resources as it downloads, compiles, and installs the development platform to share your SatNog tracking data.
- Create and set up the database with the following command:
$ sudo ./manage.py migrate - We are nearly there now. Create a superuser using this command:
$ ./manage.py createsuperuserFollow the prompts to input a username, e-mail address, and password.
- Next, we will add some demo data into the database so that there is something to look at the end of the road as follows:
$ ./manage.py initialize - Whew! Time to run the server. Use the following command:
$ sudo ./manage.py runserver your_ip_address_here:8000If you experience problems getting the browser to resolve an address, shut down the server (by pressing Ctrl + C), and rerun the command with the following network address:
$ sudo ./manage.py runserver 0.0.0.0:8000The address,
0.0.0.0, allows you to reach the server from any machine in your network. - And now the last stop: open up a browser on your desktop machine to the IP address and the port you used in the previous step. The SatNogs Network web-based GUI should open with a variety of functions for starting a satellite tracking project.
You can sign up as a Ground Station operator by first confirming your user credentials. Look in the terminal window for the following output, which contains a verification link:
User <NAME> at example.com has given this as an email address.
To confirm this is correct, go to http://your_ip_address_here:8000/accounts/confirm-email/generated_string_here/
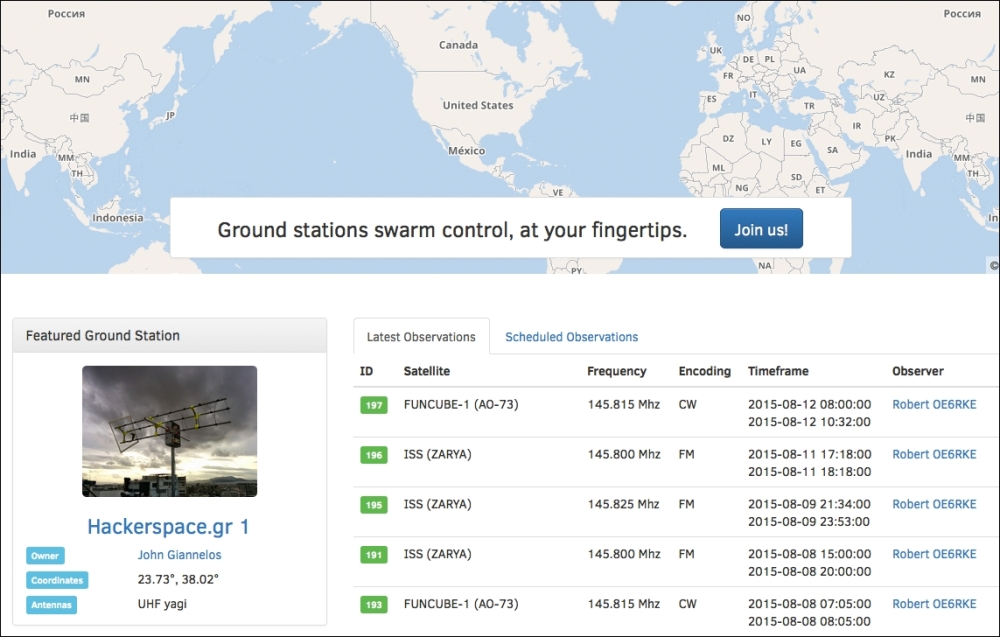
- Once you've validated your email address, you can add a Ground station on the SatNog Network (https://network-dev.satnogs.org/) similar to the ones in the following screenshot:
Now, the next time you reboot or shut down the server and the
virtualenvenvironment and want to run SatNogs again, just jump right to the following three main steps, and you will be off to the races:$ cd satnogs-network $ workon satnogs-network $ sudo ./manage.py runserver your_ip_address:8000