Materials are what give an object its outward appearance. In Blender, materials are extremely versatile and because of that rather complex. Almost any aspect of the way light behaves when reflecting from an object may be controlled and that not only by simple parameters, but by image maps and node networks as well.
Up to 16 materials can be associated with an object and, within an object, individual parts can refer to one of these 16 materials. In Text3d objects, each individual character may refer to a different material and in curves this is true for each control point.
From a developer's point of view, assigning materials to objects is a two-step process. First, we have to define a new material, and then we have to assign a material or materials to an object. The first step may be omitted if we can refer to already existing materials.
If an object like a mesh already has faces defined we then still have to assign a material to each face. Newly created faces will have the active material assigned if the active material is defined.
A small code snippet illustrates how we can assign materials to a Mesh object. Here we assign a material with a white diffuse color to all even numbered faces and one with a black diffuse color to all odd numbered faces in a Mesh object referred to as ob.
me=ob.getData(mesh=1)
mats=[ Blender.Material.New(), Blender.Material.New()]
mats[0].rgbCol=[1.0,1.0,1.0]
mats[1].rgbCol=[0.0,0.0,0.0]
ob.setMaterials(mats)
ob.colbits=3
for f in me.faces:
if f.index%2 == 0 :
f.mat=0
else:
f.mat=1
The highlighted line makes sure that the material indices used in each face refer to the materials assigned to the object. (It is also possible to associate materials with the mesh data as we will see in the next section.)
In Blender, both a Mesh object and the top-level Blender object containing the Mesh object may have their own list of 16 materials. This is convenient if we would want to instance many copies of the same mesh but with different materials applied. However, in some situations we might want to apply some or all of the materials to the Mesh instead of to the object. This is controlled by the colbits attribute of the object. This attribute consists of 16 bits, each bit indicating whether to use the material from the Object or that from the Mesh. We saw an example of that already in the previous section.
A Curve object may also have its own set of materials, and selecting the actual material obeys the same rules as for a Mesh object. Metaballs do have their own set of materials as well and switching between the sets of materials is effected in the same way, but unlike many types of objects that consist of parts (see next section) there is no way to associate different materials with different elements within a Metaball (this is true in the GUI as well: the buttons in the Links and Materials of the Edit context exist to assign material indices to individual metaball elements but they have no effect). Just the first slot of the list of materials is used.
Note that objects that are not rendered themselves, such as armatures and lattices, have no associated materials (that is, any materials associated with the top-level Object containing the armature or lattice is ignored). Some objects that do not have associated materials may have textures associated to them. The World and Lamp objects for example may have associated textures to control their colors.
Within a mesh each face may have its own associated material. This material is identified by its index into the list of materials and stored in the mat attribute. Within a Text3d object, each character may have its own material, again identified by its index into the list of materials. This time, this index is not stored directly in an attribute but may be set or retrieved by accessor methods that take the index of the character in the text as argument.
Sections within a Curve (CurNurb objects) may be assigned a material index by their setMatIndex() method. The index might be retrieved from it by the corresponding getMatIndex() method. Note that associating materials with curves that consist of a single line without an extrusion width set or a bevel object associated will have no visible effects as these curves are not rendered.
The following snippet shows how to assign different materials to different characters within a Text3d object. The code itself is straightforward but as you may notice we define a list of three materials but use only one. This is wasteful but necessary to work around a peculiarity in setMaterial(). Its material index argument should be offset by one, for example, index 2 refers to the second material in the list, however, the largest index may pass is not offset by one. So if we would like to use two materials, we would have to use indices 1 and 2 to access materials 0 and 1, but the actual list of materials should contain three materials, otherwise we can't pass 2 as an argument to setMaterial().
mats=[Material.New(),Material.New(),Material.New()]
mats[0].rgbCol=[1.0,1.0,1.0]
mats[1].rgbCol=[0.0,0.0,0.0]
mats[2].rgbCol=[1.0,0.0,0.0]
ob.setMaterials(mats)
ob.colbits=3
txt=ob.getData()
for i in range(len(txt.getText())):
txt.setMaterial(i,1+i%2)
The highlighted code shows the correction by 1. The full code is provided as TextColors.py.
One important aspect of dealing with materials that we have not dealt with so far is vertex colors. In meshes, each vertex may have its own vertex color. A vertex color is distinct from a material, but whether vertex colors have any visible effect is controlled by a material's mode flags. For a material to use any vertex colors its VColPaint bit should be set by calling its setMode() method. When used this way, vertex colors determine the diffuse color of a material while all the materials' regular attributes control the way this diffuse color is rendered. A common use for vertex colors is to bake computationally expensive effects such as ambient occlusion. Since vertex colors can be rendered very quickly, ambient occlusion might be approximated this way even in real-time setups such as in the game engine. (Approximated because it will not respond in the same way to changes in lighting.)
Vertex colors are stored as Mesh, MCol objects (basically RGBA tuples) in the col attribute of a face. The col attribute is a list containing a reference to an MCol object for each vertex in the face. This arrangement makes sense when you consider the fact that materials are associated with faces, not with vertices. When the vertex colors of vertices are different they are linearly interpolated across the face.
It is only possible to assign to the col attribute of a face if the mesh has its vertexColors attribute set to True.
The following example snippet shows how we might set the vertex colors of a mesh. We choose shades of gray depending on the z-coordinate of the vertices (highlighted).
import Blender
ob=Blender.Scene.getCurrent().objects.active
me=ob.getData(mesh=1)
me.vertexColors=True
for f in me.faces:
for i,v in enumerate(f.verts):
g = int(max(0.0,min(1.0,v.co.z))*255)
f.col[i].r=g
f.col[i].g=g
f.col[i].b=g
mats=[Blender.Material.New()]
mats[0].setMode(Blender.Material.Modes['VCOL_PAINT'])
ob.setMaterials(mats)
ob.colbits=1
ob.makeDisplayList()
Blender.Window.RedrawAll()
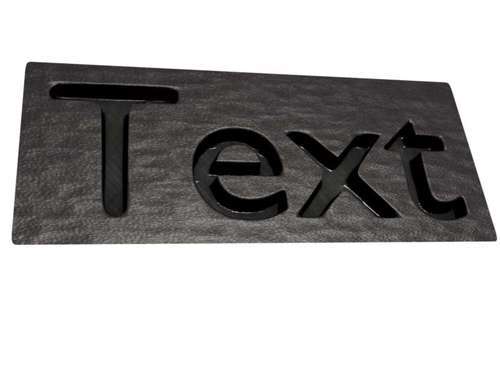
As a finishing touch to our engraving activities we will add two materials. One material index is assigned to the vertices on the surface and another one to the vertices in the chiseled grooves. This way we can, for instance, create the appearance of newly created lettering in a slab of weathered stone.
As we have earlier defined some convenient vertex groups, assigning material indices is a matter of iterating over all faces and assigning to each vertex of a face the appropriate material index depending on which vertex group a vertex is a member of. The function shown below takes a slightly more general approach as it takes a mesh and a list of regular expressions and assigns a material index to each face depending on whether it belongs to a vertex group that has a name that matches one of the regular expressions.
This functions makes it very easy to assign the same material index to all vertex groups that have similar names, for example all tail and thorax segments of the mesh created by creepycrawlies.py (these all have names such as tail.0, tail.1, …, and so on).
The function is available in Tools.py. It depends on Python's re.search() function that will match a regular expression against a string. The highlighted line shows that we embed the regular string in so-called anchors (^ and $). This way a regular expression such as aaaa will match only a vertex group with the name aaaa and not one with the name aaaa.0 so we can distinguish between them if we want. If we want to match all vertex group names that start with tail, we could pass the regular expression tail.* for example.
Note
Regular expressions are an extremely powerful way to match strings. If you are unfamiliar with them you should consult the documentation of the Python module (http://docs.python.org/library/re.html). Start with a gentler tutorial, for example, http://docs.python.org/howto/regex.html.
Another thing to note in this function is the way we use set operations. These speed up things quite a bit as the Python set operations are extremely fast. We use them here to check efficiently whether the set of vertices (or rather their indices) that comprises a face are all in the set of vertex indices that are in some vertex group. We compute, in advance, both the sets of vertex indices that belong to a vertex group and the sets of vertex indices of each face and store them in dictionaries for easy access. In this way, we create those sets only once for each vertex group and each face respectively instead of recreating each set every time we match against a regular expression. For large meshes, this saves potentially a lot of time (at the expense of storage).
import re
def matindex2vertgroups(me,matgroups):
if len(matgroups)>16 :
raise ArgumentError("number of groups larger than number of materials possible (16)")
groupnames = me.getVertGroupNames()
vertexgroupset={}
for name in groupnames:
vertexgroupset[name]=set(me.getVertsFromGroup(name))
print name,len(vertexgroupset[name])
faceset={}
for f in me.faces:
faceset[f.index]=set([v.index for v in f.verts])
for i,matgroup in enumerate(matgroups):
for name in groupnames:
if re.search('^'+matgroup+'$',name):
for f,vset in faceset.items():
if vset.issubset(vertexgroupset[name]) :
me.faces[f].mat = i
break

