
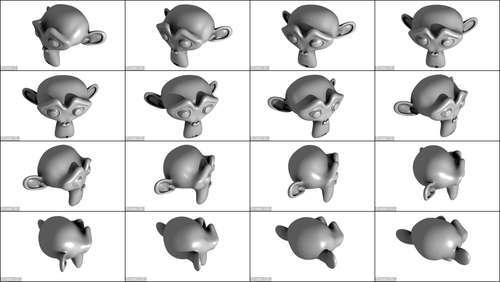
Fitting multiple camera views to a single image is just one example where multiple images might be effectively combined to a single image. Another example is when we would like to show frames from an animation where we don't have access to facilities to replay the animation. In such situations we would like to show something resembling a film strip where we combine a small rendition of, for example, every tenth frame to a single sheet of images. An example is shown in the following illustration.
Although there are more images to combine than in the multiple camera view, the code to create such a film strip is fairly similar.
The first function that we develop is strip() that takes a list of filenames of images to combine and an optional name that will be given to the combined image. A third optional argument is cols, which is the number of columns in the combined image. The default is four, but for long sequences it might be more natural to print on landscape paper and use a higher value here. The function will return a Blender Image object containing the combined image.
We again use the pim module, which is either an alias for the PIL module if it's available or will refer to our bare bones implementation if PIL is not available. The important difference with our previous image combination code is highlighted. The first highlighted part shows how to calculate the dimensions of the combined image based on the number of rows and columns plus the amount of pixels needed for the colored edges around images. The second highlighted line shows where we paste an image in the destination image:
def strip(files,name='Strip',cols=4):
rows = int(len(files)/cols)
if len(files)%int(cols) : rows += 1
im = pim.open(files.pop(0))
w,h= im.size
edge=2
edgecolor=(0.0,0.0,0.0)
comp = pim.new(im.mode, (w*cols+(cols+1)*edge,h*rows+(rows+1)*edge), edgecolor)
for y in range(rows):
for x in range(cols):
comp.paste(im,(edge+x*(w+edge),edge+y*(h+edge)))

if len(files)>0:
im = pim.open(files.pop(0))
else:
comp.save(name,format='png')
return Image.Load(name)
The render() function that we define here will take the number of frames to skip as an argument and will render any number of frames between the start and end frames. These start and end frames may be set by the user in the render buttons. The render buttons also contain a step value, but this value is not provided to the Python API. This means that our function is a little bit more verbose than we like as we have to create a loop that renders each frame ourselves (highlighted in the next code) instead of just calling renderAnim(). We therefore have to manipulate the startFrame and endFrame attributes of the render context (as before) but we take care to restore those attributes before returning a list of filenames of the rendered images. If we did not need any programmatic control of setting the skip value, we could have simply replaced a call to render() by a call to renderAnim():
def render(skip=10):
context = Scene.GetCurrent().getRenderingContext()
filenames = []
e = context.endFrame()
s = context.startFrame()
context.displayMode=0
for frame in range(s,e+1,skip):

context.currentFrame(frame)
context.startFrame(frame)
context.endFrame(frame)
context.renderAnim()
filenames.append(context.getFrameFilename())
context.startFrame(s)
context.endFrame(e)
return filenames
With these functions defined the script itself now simply calls render() to create the images and strip() to combine them. The resulting Blender image is reloaded to force an update if an image with the same name was already present and all windows are prompted to redraw themselves (highlighted):
def run():
files = render()
im=strip(files)
bpy.data.images.active = im
im.reload()
Window.RedrawAll()
if __name__ == "__main__":
run()
The full code is available as strip.py in combine.blend.