Many cartoon characters seem to have difficulties trying to swallow their food, and even if they did enjoy a relaxing lunch, chances are they will be forced through a rain pipe too small to fit comfortably for no apparent reason.
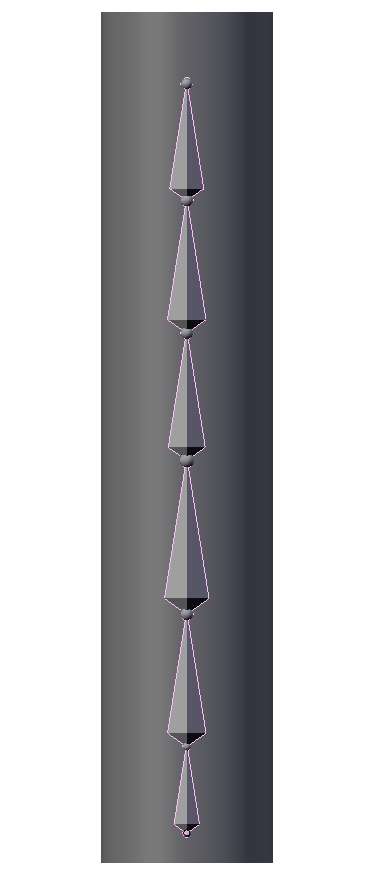
It is difficult to animate swallowing or any other peristaltic movement by using shape keys as it is not the shape of the overall mesh that changes in a uniform way: we want to move along a localized deformation. One way of doing that is to associate an armature consisting of a linear chain of bones with the mesh that we want to deform (shown in the illustration) and animate the scale of each individual bone in time. This way, we can control the movement of the 'lump' inside to a great extent. It is, for example, possible to make the movement a little bit halting as it moves from bone to bone to simulate something that is hard to swallow.
In order to synchronize the scaling of the individual bones in a way that follows the chain from parent to child, we have to sort our bones because the bones attribute of the Pose object that we get when calling getPose() on an armature is a dictionary. Iterating over the keys or values of this dictionary will return those values in random order.
Therefore, we define a function sort_by_parent() that will take a list of Pose bones pbones and will return a list of strings, each the name of a Pose bone. The list is sorted with the parent as the first item followed by its children. Obviously, this will not return a meaningful list for armatures that have bones with more than one child, but for our linear chain of bones it works fine.
In the following code, we maintain a list of names called bones that hold the names of the Pose bones in the correct order. We pop the list of Pose bones and add the name of the Pose bone as long as it is not already added (highlighted). We compare names instead of Pose bone objects because the current implementation of Pose bones does not reliably implement the in operator:
def sort_by_parent(pbones):
bones=[]
if len(pbones)<1 : return bones
bone = pbones.pop(0)

while(not bone.name in bones):

bones.append(bone.name)
We then get the parent of the bone that we just added to our list, and as long as we can traverse the chain of parents, we insert this parent (or rather its name) in our list in front of the current item (highlighted below). If the chain cannot be followed anymore we pop a new Pose bone. When there are no bones left, an IndexError exception is raised by the pop() method and we will exit our while-loop:
parent = bone.parent
while(parent):
if not parent.name in bones:

bones.insert(bones.index(bone.name),parent.name)

parent = parent.parent
bone = parent
try:
bone = pbones.pop(0)
except IndexError:
break
return bones
The next step is to define the script itself. First, we get the active object in the current scene and verify if it is indeed an armature. If not, we alert the user with a pop up (highlighted part of the following code), otherwise we proceed and get the associated armature data with the getData() method:
scn = Blender.Scene.GetCurrent()
arm = scn.objects.active
if arm.getType()!='Armature':

Blender.Draw.PupMenu("Selected object is not an Armature%t|Ok")

else:
adata = arm.getData()
Then, we make the armature editable and make sure that each bone has the HINGE option set (highlighted). The business with the conversion of the list of options to a set and back again to a list once we added the HINGE option is a way to ensure that the option appears only once in the list.
adata.makeEditable()
for ebone in adata.bones.values():

ebone.options = list(set(ebone.options)|set([Blender.Armature.HINGE]))

adata.update()
A pose is associated with an armature object, not with its data, so we get it from arm by using the getPose() method. Bone poses are very much like ordinary IPOs but they have to be associated with an action that groups those poses. When working interactively with the Blender an action gets created automatically once we insert a key frame on a pose, but in a script we have to create an action explicitly if it is not present already (highlighted):
pose = arm.getPose()
action = arm.getAction()

if not action:

action = Blender.Armature.NLA.NewAction()
action.setActive(arm)
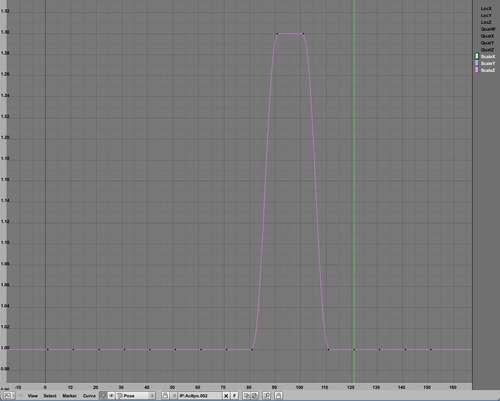
The next step is to sort the Pose bones as a chain of parenthood by using our previously defined function. What is left is to step along the frames in steps of ten at a time and set keys on the scale of each bone at each step, scaling up if the sequence number of the bone matches our step and resetting it if it doesn't. One of the resulting IPOs is shown in the screenshot. Note that by our setting the HINGE attribute on each bone previously, we prevent the scaling to propagate to the children of the bone:
bones = sort_by_parent(pose.bones.values())
for frame in range(1,161,10):
index = int(frame/21)-1
n = len(bones)
for i,bone in enumerate(bones):
if i == index :
size = 1.3
else :
size = 1.0
pose.bones[bone].size=Vector(size,size,size)
pose.bones[bone].insertKey(arm,frame, Blender.Object.Pose.SIZE)
The full code is available as peristaltic.py in peristaltic.blend.
To use this script you will have to run it with an armature object selected. One recipe to show its application would be the following:
- Add an armature to a scene.
- Go to edit mode and extrude any number of bones from the tip of the first bone.
- Go to object mode and add a mesh centered on the position of the armature. Any mesh will do but for our illustration we use a cylinder with plenty of subdivisions.
- Select the mesh and then shift select the armature. Both armature and
Meshobject are now selected while the armature is the active object. - Press Ctrl + P and select armature. In next pop up, select Create from bone heat. That will create a vertex group on the mesh for each bone in the armature. These vertex groups will be used to deform the mesh when we associate the armature as a modifier with the mesh.
- Select the mesh and add an armature modifier. Type the name of the armature in the Ob: field and make sure that the Vert.Group toggle is selected and Envelopes is not.
- Select the armature and run the
peristaltic.py.
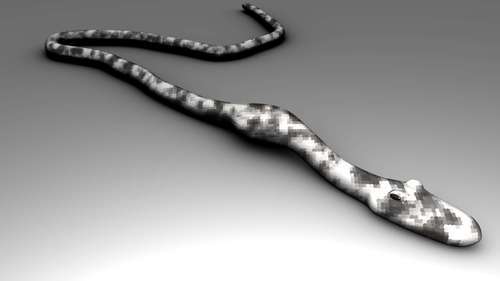
The result will be an animated Mesh object resembling a lump passing through a narrow flexible pipe. A few frames are shown in the illustration:

Rain pipes are of course not the only hollow objects fit for animating this way as shown in the following illustration: