4. Crop and Straighten Images
In This Chapter
A good crop is often one of the most important—and simplest—things you can do to improve an image. The edges of an image make up its frame, and your choice of framing strengthens what you think is important. If you’re the one capturing the image, you can crop in camera, but even with the best forethought in the world, you may change your mind when you see the image on screen. You may need to crop to remove distracting elements, to emphasize what’s important, or to repurpose an image for a specific page or screen size and shape.
The Crop tool provides real-time feedback to help you visualize the cropped result. You can make permanent changes that delete the cropped pixels or nondestructive changes that retain the cropped pixels in case you need to revert to them. You can also straighten crooked images and optionally plug any gaps with Content-Aware Fill, which samples pixels from adjacent areas. The related Perspective Crop tool can be used to fix perspective distortions.
Cropping a Photo
Cropping is one of the most basic types of image manipulation and potentially one of the most impactful. It can remove unwanted objects or distractions from the edge of the frame, change the image’s aspect ratio, and improve its overall composition.
Select the Crop tool (C) (
 ) from the toolbar. Crop handles display on the edges of the photo.
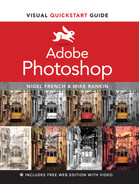
Draw a crop area or drag the corner and edge handles to define the crop boundaries of the photo (FIGURE 4.1).
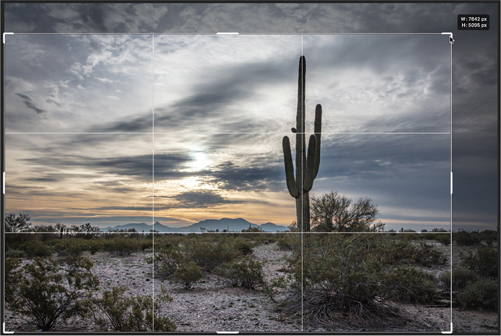
FIGURE 4.1 A crop in progress with the Rule of Thirds overlay shown
(Optional) On the Options bar, choose a ratio or physical size for the crop. You can enter values in the Width and Height fields, choose a preset, or define your own preset values for later use (FIGURE 4.2).
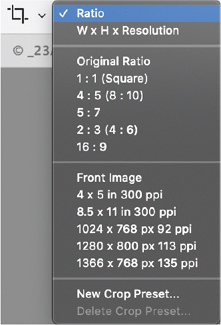
FIGURE 4.2 Crop options: Ratio and size presets
(Optional) Choose to display overlay guides, such as Rule Of Thirds, Grid, and Golden Ratio, while cropping. To cycle through all the options, press O (FIGURES 4.3 and 4.4).
FIGURE 4.3 Overlay options

FIGURE 4.4 Use the crop overlays to help compose the final image. While you can’t go wrong with Rule of Thirds, different types of images lend themselves to different overlays. Press O to cycle through overlays.
Click the gear menu on the Options bar to specify additional crop options as desired (see the sidebar “Additional Crop Options”).
Press Enter/Return or click the checkmark on the Options bar to crop the photo (FIGURE 4.5).

FIGURE 4.5 Use the Options bar to Reset, Cancel, or Commit to the crop.
Tip
Make sure to provide enough “breathing space” around your subject when composing photos. Its always easier to take extra stuff away than it is to add something you don’t have.
Tip
If you have an active selection, you can also crop an image using the Crop command. Use a Selection tool to select the part of the image you want to keep, then choose Image > Crop.
Cropping with Content-Aware Fill
Cropping implies making the image smaller, but you can also “crop” to extend an image. Using Content-Aware technology, Photoshop will intelligently fill the new areas. This works on a single-layer image only, however.
On the Options bar, select Content-Aware. The default Crop rectangle expands to include the whole image.
Straighten or rotate the image or expand the canvas beyond its original size (FIGURE 4.6).
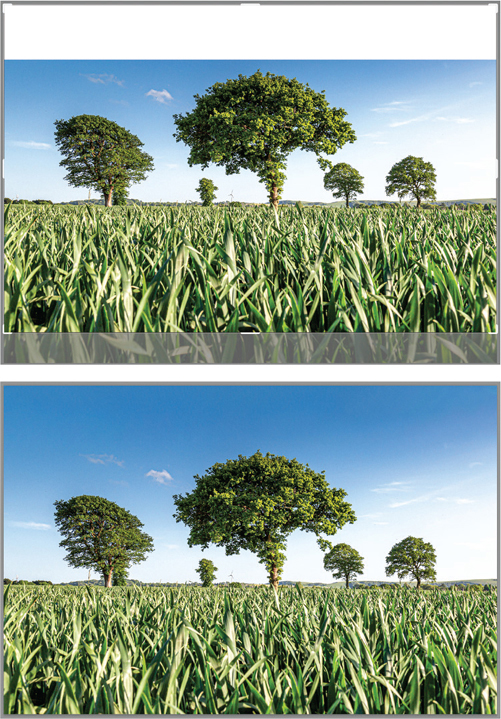
FIGURE 4.6 Using Content-Aware Fill to add more sky to the top of the image
Press Enter/Return, or click on the checkmark in the Options bar to commit to the crop.
 Video 4.1
Cropping and Straightening an Image
Straightening Images
We’re often surprised by how photos we thought were straight when we took them look slightly crooked on screen. Whether this is down to user error or the optics of our lenses, thankfully it’s easy to fix and can really improve an image. And when you straighten a photo while cropping, Photoshop resizes the canvas automatically to accommodate the rotated pixels.
To straighten an image while cropping:
Select the Crop tool (C). Crop handles display on the edges of the photo.
Start dragging from one of the corner handles. Hover your cursor outside the crop boundary until it changes to a curved double-ended arrow.
Move the cursor just outside the image and drag to rotate the image. A grid displays inside the crop box, which you can use for reference while you rotate the image behind it (FIGURE 4.9).
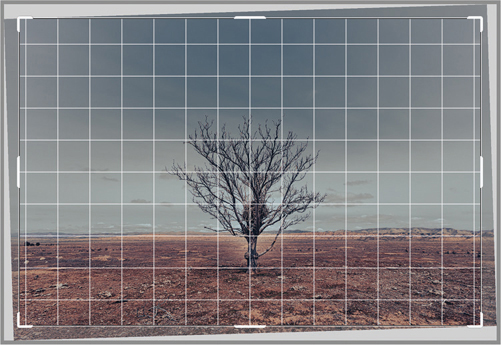
FIGURE 4.9 Cropping and straightening using the grid.
Press Enter/Return or click the checkmark on the Options bar to confirm the crop.
To straighten an image with the Straighten tool:
Select the Crop tool.
Click Straighten on the Options bar.
Draw a reference line with the Straighten tool along the horizon or an edge to straighten the image along it (FIGURE 4.10).
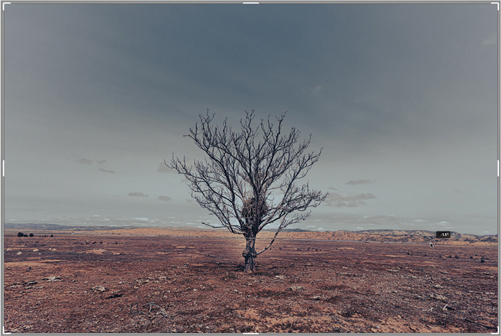
FIGURE 4.10 Draw a line along the horizon with the Straighten tool.
To straighten an image with the Ruler tool:
Select the Ruler tool (FIGURE 4.11). (If necessary, click and hold the Eyedropper tool to reveal the Ruler.)
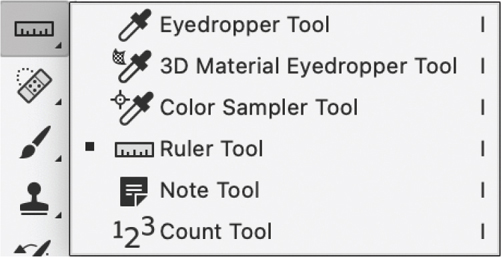
FIGURE 4.11 The Ruler tool
In the image, drag across an element that should be horizontal or vertical.
On the Options bar, click Straighten Layer. Photoshop straightens the image.
Use the Crop tool or Content-Aware Fill to eliminate any transparent areas along the edges.
Crop and straighten scanned photos
You can place several photos on a scan bed and scan them in one pass to create a single image file. The Crop and Straighten Photos feature will then create separate files from the multiple-image scan.
Tip
For best results, have a solid white background behind the photos to make it easier for Photoshop to isolate each photo. Work with images that have clearly defined edges, and leave about 1/8 inch (3 mm) between the images.
To crop and straighten scanned photos:
Open the scanned file of the images you want to separate.
Choose File > Automate > Crop And Straighten Photos. Photoshop does its magic and each image opens in its own window (FIGURE 4.12).
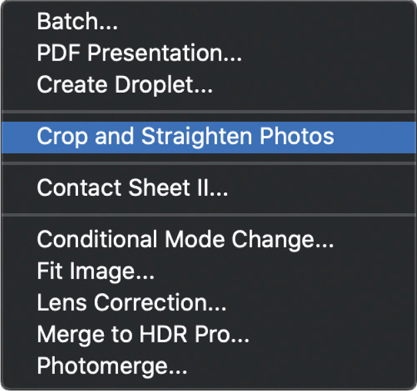
FIGURE 4.12 For a quick-and-dirty batch scan and crop, use File > Automate > Crop and Straighten Photos.
Perspective Cropping
Use the Perspective Crop tool to fix images with keystoning (distortion that can happen when a building is shot from below) or other distortions that can happen with a wide-angle lens. This tool is also great for straightening the edges of photographed artwork. (A related tool, Perspective Warp, is discussed in Chapter 15.)
Select the Perspective Crop tool.
Draw a marquee around the distorted image.
When you release the marquee, Photoshop converts it to a bounding box with handles. Drag the handles to match the edges to the object you want to correct (FIGURE 4.13).
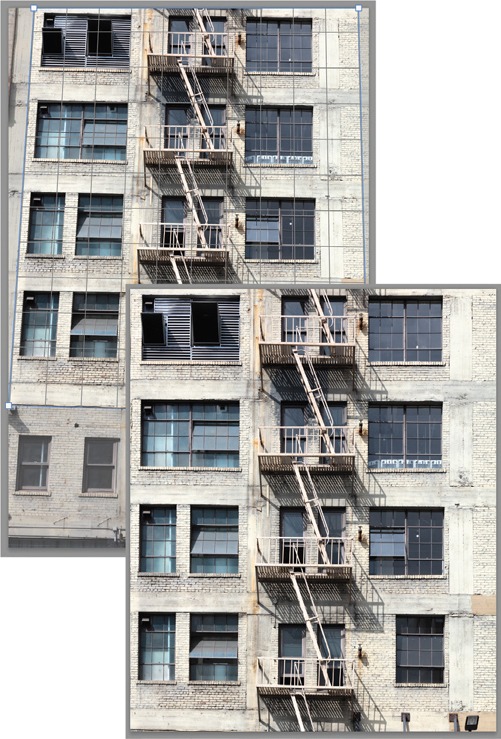
FIGURE 4.13 Cropping with the Perspective Crop tool
Press Enter/Return.
Cropping with the Trim Command
By now you may be getting the impression that there are multiple ways to do things in Photoshop, and cropping is no exception. The Trim command provides another option. It trims surrounding transparent pixels or background pixels of a color you specify.
Choose Image > Trim, and in the Trim dialog, select an option (FIGURE 4.14):
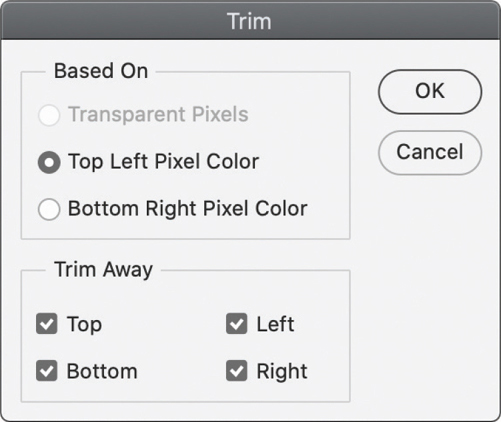
FIGURE 4.14 The Trim command is useful for trimming away a border of transparent pixels.
Transparent Pixels to trim away transparency at the edges of the image
Top Left Pixel Color to remove an area defined by the color of the top-left pixel
Bottom Right Pixel Color to remove an area defined by the color of the lower-right pixel
Top, Bottom, Left, or Right to remove one or more areas of the image to trim away.
Tip
If trimming away the transparent pixels still leaves a transparent space around the image, it’s because the pixels aren’t fully transparent; this is common with drop shadows.
Rotating or Flipping an Entire Image
The Image Rotation command rotates or flips an entire image (FIGURE 4.15). The equivalent commands on the Edit > Transform submenu transform only the selected layer (see Chapter 15).
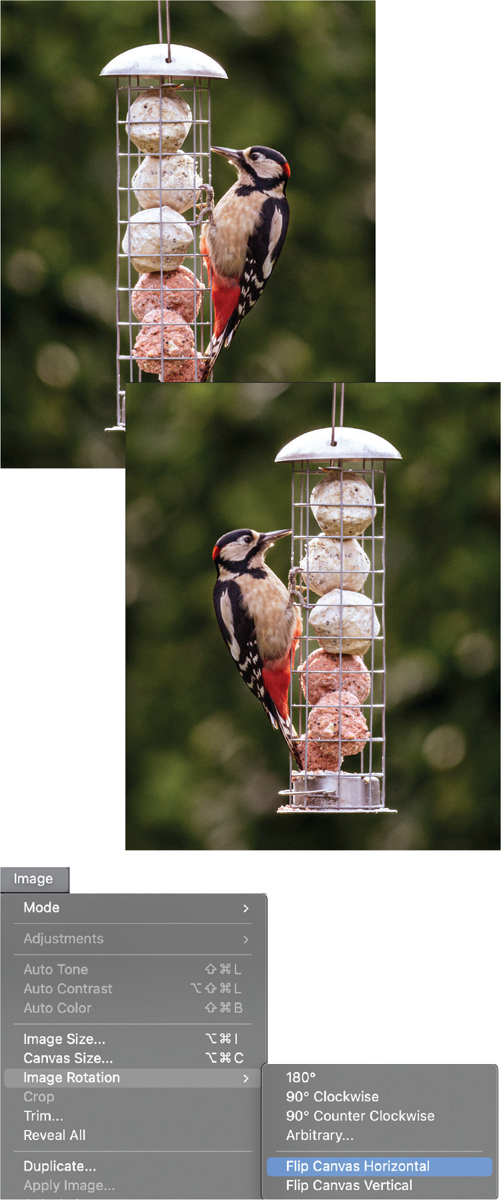
FIGURE 4.15 The result of flipping the canvas horizontally
To rotate an image, choose Image > Image Rotation and one of the following commands from the submenu:
180° rotates the image by a half-turn.
90° Clockwise rotates the image clockwise by a quarter-turn.
90° Counter Clockwise rotates the image counterclockwise by a quarter-turn.
Arbitrary rotates the image by the angle you specify.
Flip Canvas Horizontal or Flip Canvas Vertical flips the image along the corresponding axis.
Tip
While we’re on the topic of rotation, let’s clarify the difference between rotating the image and rotating the view of an image. Image Rotation modifies the file information, whereas Rotate View nondestructively rotates the image for viewing.
Changing the Canvas Size
The canvas is the editable area of an image. You can make it bigger or smaller using the Canvas Size command. Canvas size is distinct from image size, and it can be bigger or smaller than the image itself. Increasing the canvas adds space around an image. If the image has a transparent background, the added canvas will be transparent. If it doesn’t, the added canvas is a solid color. Decreasing an image’s canvas size crops into the image—yet another way to crop! If your layer is a Normal (as opposed to Background) layer, you can use the Move tool to adjust the crop of the image within the canvas.
To change the canvas size:
Choose Image > Canvas Size.
In the Canvas Size dialog that opens, do one of the following (FIGURE 4.16):
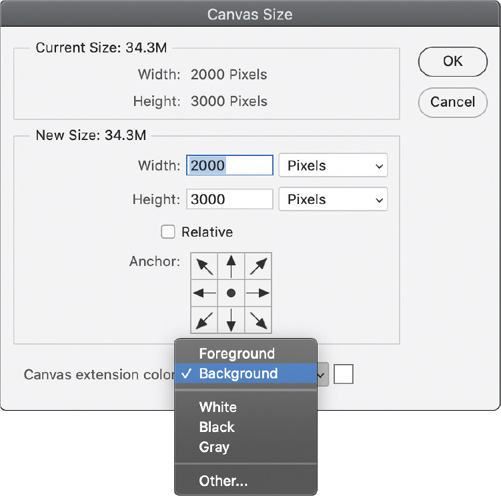
FIGURE 4.16 The Canvas Size dialog and Canvas Extension color options. Note that the Canvas Extension Color options are applicable for only images with a Background layer.
 Enter the canvas dimensions in the Width and Height fields. As well as entering the dimensions in inches, centimeters, or pixels, you can also express this as a percentage of the current canvas size.
- Select Relative, and enter the amount you want to add or subtract from the current canvas size.
Click a square to anchor the image to the new canvas. The size change will happens on the side(s) opposite the selected square or from the center if the center square is selected.
Choose an option from the Canvas Extension Color menu. If the layer is unlocked, the canvas extension will be transparent.
You can also use the Crop tool to resize the image canvas, too.
To resize the canvas using the Crop tool:
Drag the crop handles outwards to enlarge the canvas. Hold Alt/Option to enlarge from all sides.
Press Enter/Return to confirm.
Erasing Parts of an Image
As well as cropping out unwanted parts of an image at the edges of a frame, you can also delete parts of the image within the area that you retain. Photoshop has several erasing tools that share the same tool space: the Eraser, the Background Eraser, and the Magic Eraser.
The Eraser erases to the background color if you’re on a background or locked layer; otherwise, the pixels are erased to transparency. There’s also an option to erase to a state on the History panel.
To erase to a history state:
Make a change to the image. In this example, we chose Image > Adjustments > Black And White.
Undo the change by pressing Ctrl/Command+Z.
Select the Eraser tool (E) (
 ), and on the Options bar, check Erase To History.
On the History panel, click in the left column of the dimmed history state (Black & White) (FIGURE 4.17) so that the History Eraser icon appears in that column.
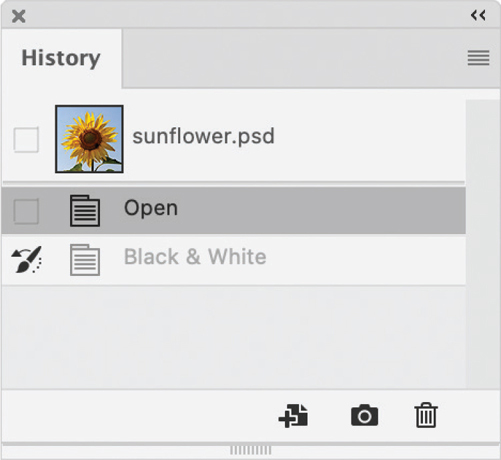
FIGURE 4.17 Choose the history state that you want to erase to and then paint on the image.
Paint on the image to restore areas to the specified history state. Adjust the size and settings of the Eraser as necessary (FIGURES 4.18 and 4.19).
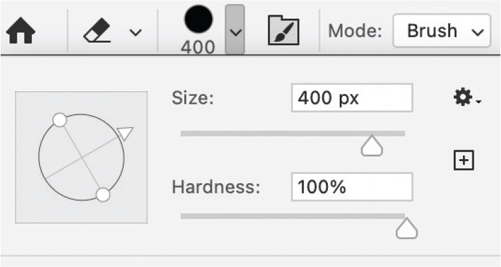
FIGURE 4.18 The Eraser settings on the Options bar
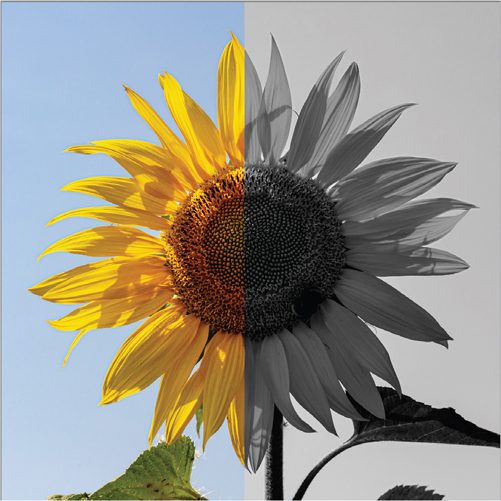
FIGURE 4.19 Erasing to a history state. Interesting as this may be, there are easier ways—see Chapter 7.
Erasing with the Background Eraser
The Background Eraser erases similar pixels to transparency as you drag, overriding any lock transparency settings. It samples the color in the center, or hotspot, of the brush, and deletes that color wherever it appears inside the brush.
Select the Background Eraser (
 ) (E).
- Optionally, add a Color Fill layer beneath the image layer.
- Adjust size and settings of the brush.
- Choose a sampling option. If the background is the same color, choose Sampling Once. (FIGURE 4.20)
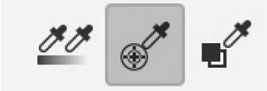
FIGURE 4.20 Choosing a sampling option
- Choose the Sampling Limits: Discontiguous lets you paint between strands of hair or branches (FIGURE 4.21).
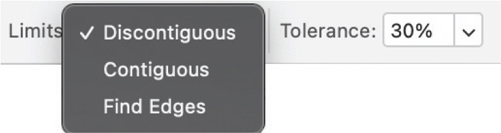
FIGURE 4.21 Setting the sampling limits
- Choose a tolerance setting: a higher number removes more colors.
Paint around the edge to remove the background color, revealing transparency or the color fill layer beneath. Vary the brush size as go. (FIGURE 4.22)
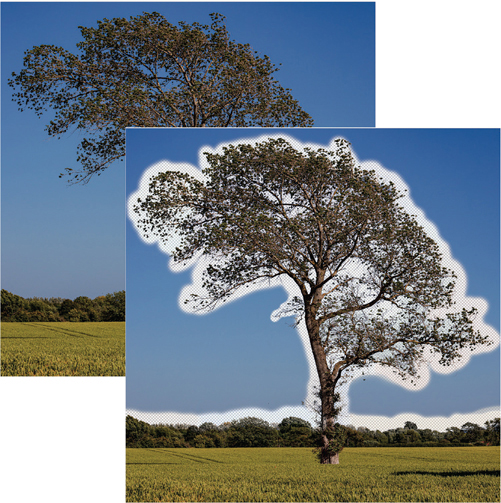
FIGURE 4.22 Paint around the edges of the subject. Vary the brush size (press [ for a smaller brush, or ] for a larger brush), sampling limits, and tolerance as necessary.
Switch to regular Eraser to clean up any areas away from the edges. (FIGURE 4.23)

FIGURE 4.23 Switch to the regular Eraser to paint out areas away from the edges.
Erasing with the Magic Eraser
The Magic Eraser changes similar pixels to transparent. If the transparency is locked, the pixels change to the background color. If you’re working on a Background layer, it is converted to a normal layer and all similar pixels change to transparent.
The Background Eraser and Magic Eraser are older tools and better, faster, and nondestructive results can be achieved using the Select and Mask workspace. (See Chapters 6–8 and 16 on layers, layer masks, and retouching.)