
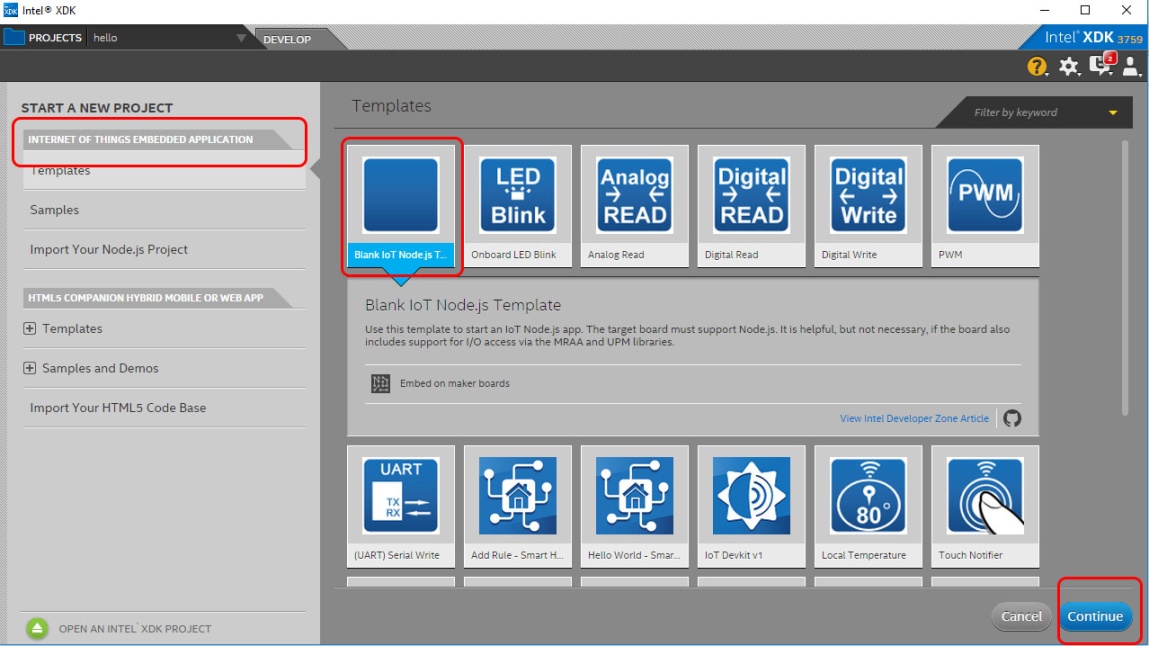
Another IDE we will be covering is the powerful cross-platform development tool by Intel: Intel XDK. This will be used to run our Node.js scripts. Ideally we run our Node.js scripts from the XDK, but there is always an option to do the same by just transferring the .js file to your device using an FTP client such as FileZilla and use node FileName.js to run your script. From the list of downloaded software provided at the beginning of this chapter, download and install the XDK and open it. You may be required to sign in to the Intel developer zone. Once done, open your XDK. Then, under IoT embedded applications, select a Blank IoT Node.js Template:
Once opened, replace all the existing code with the following code:
var m = require('mraa'), //require mraa
console.log('MRAA Version: ' + m.getVersion()); //write the mraa version to the console

varmyLed = new m.Gpio(13); //LED hooked up to digital pin 13 (or built in pin on Galileo Gen1 & Gen2 or Edison)
myLed.dir(m.DIR_OUT); //set the gpio direction to output
varledState = true; //Boolean to hold the state of Led

functionperiodicActivity()
  {
    myLed.write(ledState?1:0);
    ledState = !ledState;
    setTimeout(periodicActivity,1000);
  }
periodicActivity(); //call the periodicActivity function
If you have a close look at the code, then you may notice that the structure of the code remains more or less similar as that of the other two platforms. We initially import the MRAA library:
var m = require('mraa'),
console.log('MRAA Version: ' + m.getVersion());
We also display the version of MRAA installed (you can skip this step). The next task is to initialize and configure the pin to be in output or input mode:
varmyLed = new m.Gpio(13);
myLed.dir(m.DIR_OUT);
varledState = true;
We use ledState to get the present state of the LED. Next, we define the logic in a separate function for blinking:
functionperiodicActivity()
  {
    myLed.write(ledState?1:0);
    ledState = !ledState;
    setTimeout(periodicActivity,1000);
  }
periodicActivity();
Finally, we call the function. On close inspection of the code, it's evident that the we have used only one delay in milliseconds as we are checking the present state using the tertiary operator. In order to execute the code on the device, we need to connect our device first.
To connect your device to the XDK, go to the IoT Device section, and click on the dropdown. You may see your device in the dropdown. If you see it, then click on Connect:

If the device is not listed, then we need to add a manual connection. Click on Add Manual Connection, then add the credentials:

In the address, put in the IP which was used in FileZilla. In the Username, insert root, and the password is the password that was set before. Click on Connect and your device should be connected. Click on Upload to upload the program and Run to run the program:
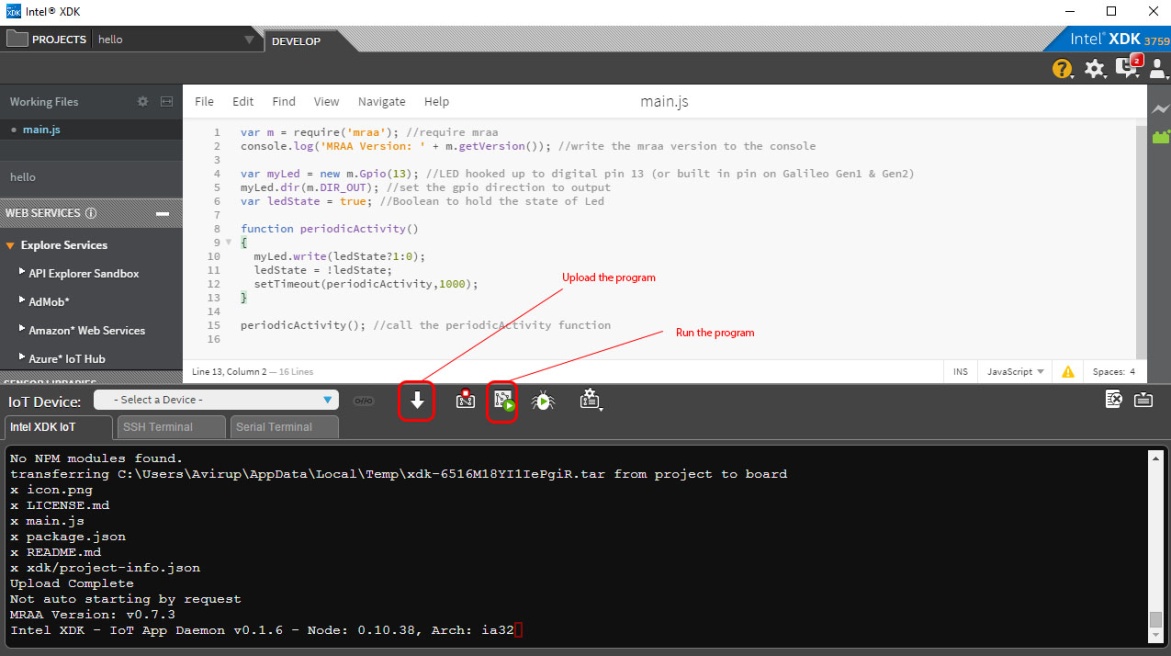
After uploading, the LED that is attached to pin 13 should blink. Normally, when dealing with complex projects, we go for blank templates so that it's easy to customize and do the stuff we need.