
As previously mentioned, this short section will show users how to push data from Edison to an Android device using the MQTT protocol. The following screenshot depicts the workflow:

From the preceding illustration, it is clear that we first obtain readings from the temperature sensor and then use the MQTT broker to push the readings to the Android application.
Firstly, we are going to connect the temperature sensor to Edison. Make a reference of the circuit from Chapter 2, Weather Station (IoT). After it is connected, fire up your editor to write the following Node.js code:
var mraa = require('mraa'), var mqtt = require('mqtt'), var B=4275;

var R0=100000;

var client = mqtt.connect('mqtt://iot.eclipse.org'),
function sendData()

{

  var tempPin=new mraa.Aio(0);

//Processing of temperature var a=tempPin.read();

  var R=1023/a-1; R=100000*R;

  var temperature=1/(Math.log(R/100000)/B+1/298.15)-273.15; temperature
  = +temperature.toFixed(2);

//Converting type int to type string

  var sendTemp= temperature.toString();

//Publish the processed data client.publish('avirup/temperature',sendTemp); console.log("Sending data of temperature %d", temperature); setTimeout(sendData,1000);

}

sendData();
The code written here is similar to what we used in the Chapter 2, Weather Station (IoT). Here, the difference is that we are not sending it to dweet.io but to the MQTT broker. We're publishing the data obtained to a particular channel in the MQTT broker.
However, to execute this code, you must have the MQTT dependency installed via npm. Type in the following command in the PuTTY console:
npm install mqtt
This will install the MQTT dependency.
In the preceding code, we initially imported the required libraries or dependency. For this case, we need the mraa and the mqtt libraries:
var mraa = require('mraa'),
var mqtt = require('mqtt'),
Then, we need to initialize the analog pin to read the temperature. After that, we convert the raw readings to the standard value.
We declare the client variable, which will handle the MQTT publish operation:
var client = mqtt.connect('mqtt://iot.eclipse.org'),
Here, https://iot.eclipse.org/ is the free broker that we are using.
Next, in the sendData function, the initial temperature processing is computed before the data is published to the channel:
client.publish('avirup/temperature',sendTemp);
The name of the channel is avirup/temperature. Please note the type of sendTemp. The initial processed value is obtained in the variable temperature. Here in client.publish, the second parameter has to be a string. Thus, we store the temperature value as a string type in sendTemp. Finally, we print the temperature into the console.
We have also provided a delay of 1 second. Now run this Node.js file using the node command.
The screenshot is as follows:

As seen in the preceding screenshot, the log is displayed. Now we need to see this data in the Android MyMqtt application.
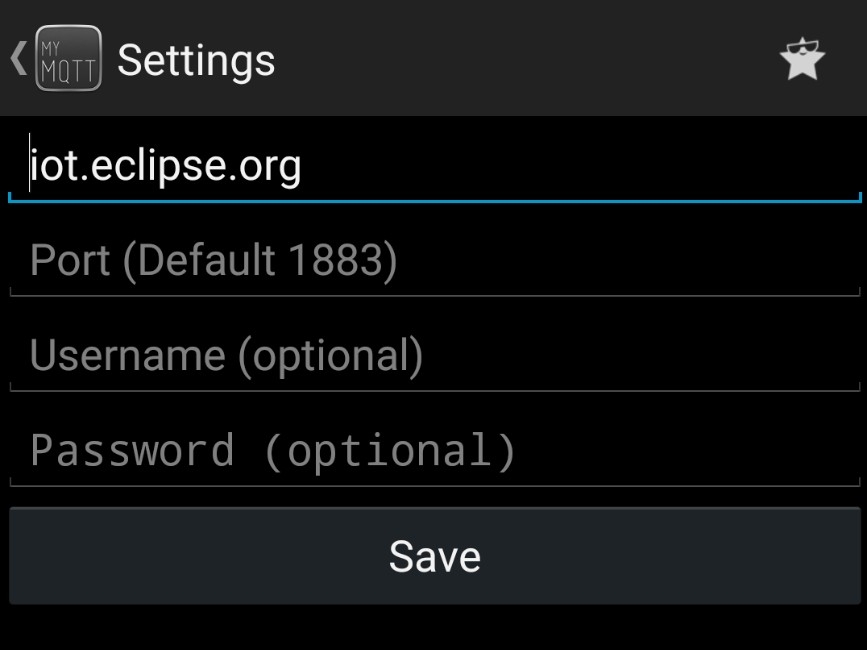
Open up the MyMqtt application in Android and browse to Settings. There, in the field of Broker URL, insert iot.eclipse.org. You will have used this on your Node.js snippet as well:
Next, go to the Subscribe option and enter your channel name based on your Node.js code. In our case, it was avirup/temperature:

Click on Add to add the channel and then finally go to the dashboard to visualize your data:
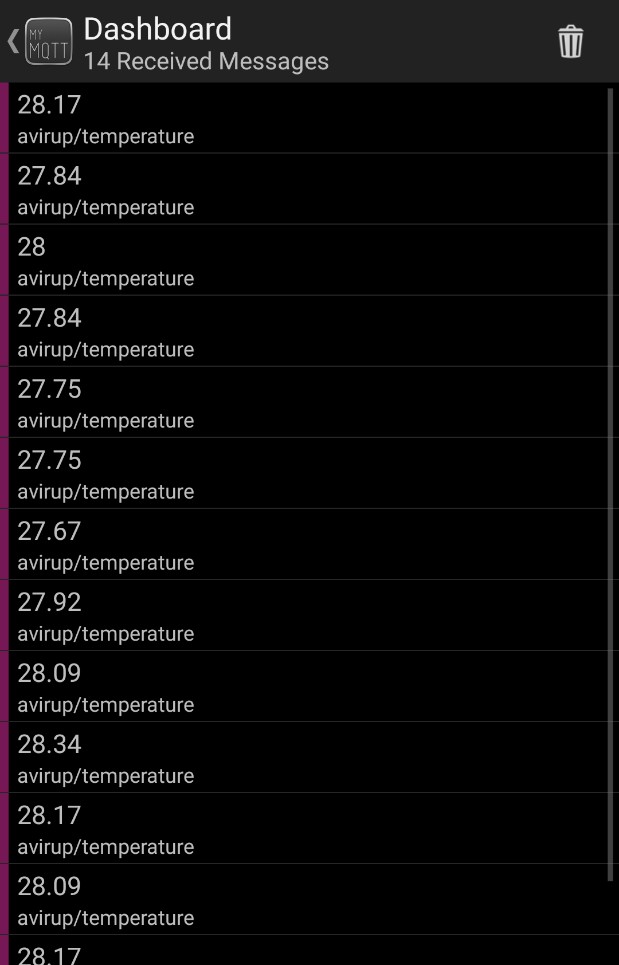
If your code on the device is running in parallel to this, then you should get live data feed in this dashboard.
So, now you can visualize the data that you are sending from Edison.