
In Chapter 3, Intel Edison and IoT (Home Automation), we looked at using a WPF application and MQTT connection, learning that we could control our Intel Edison using MQTT protocol. However, here, we'll be dealing with serial port communication. Since we have already discussed WPF applications and how to create projects, and created an hello world application, we won't discuss the basics in this chapter, and will instead get into the application directly. Our problem statement in this chapter is to switch an LED on and off using a WPF application via serial port communication.
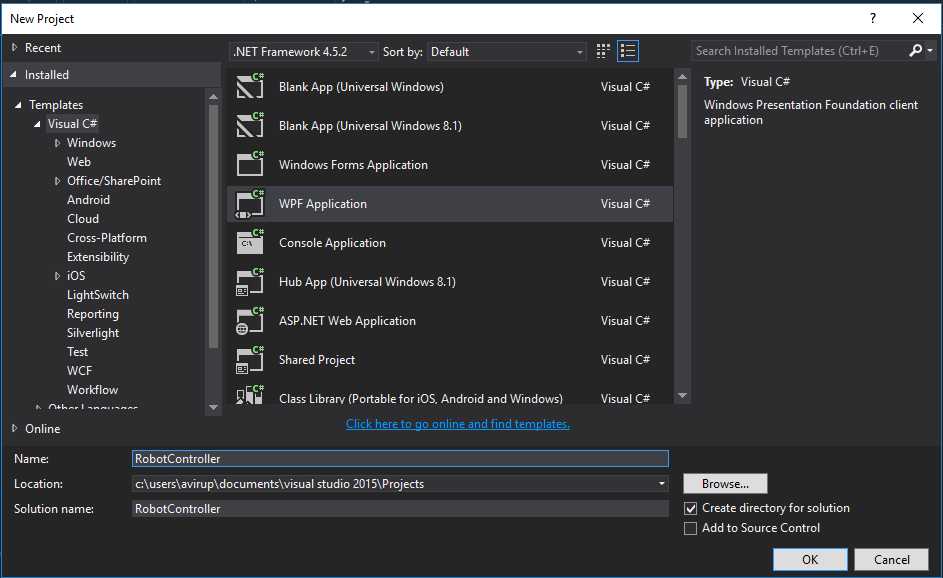
Start with creating a new WPF project and name it RobotController:
Next, in MainWindow.xaml, we'll design the UI. We'll use the following controls:
- Buttons
- TextBox
- TextBlocks
Design your UI as follows:
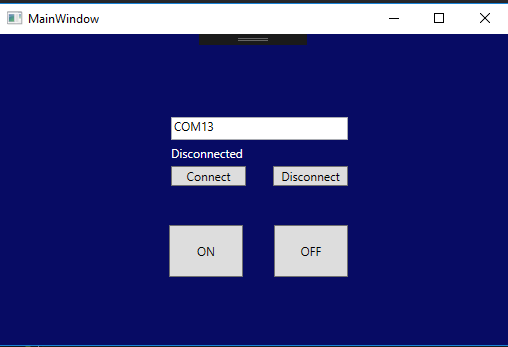
The xaml code for the preceding UI is as follows:
<Window x:Class="RobotController.MainWindow"        xmlns="http://schemas.microsoft.com/winfx/2006/xaml/presentation"        xmlns:x="http://schemas.microsoft.com/winfx/2006/xaml"        xmlns:d="http://schemas.microsoft.com/expression/blend/2008"        xmlns:mc="http://schemas.openxmlformats.org/markup-compatibility/2006"        xmlns:local="clr-namespace:RobotController"        mc:Ignorable="d"        Title="MainWindow" Height="350" Width="525" Background="#FF070B64
  <Grid>
    <Grid.ColumnDefinitions>
      <ColumnDefinition Width="335*"/>
      <ColumnDefinition Width="182*"/>
    </Grid.ColumnDefinitions>
    <TextBlock x:Name="status" HorizontalAlignment="Left"
    Margin="172,111,0,0" TextWrapping="Wrap" Text="Disconnected"
    VerticalAlignment="Top" Foreground="White"/>
    <TextBox x:Name="comno" HorizontalAlignment="Left" Height="23"
    Margin="172,83,0,0" TextWrapping="Wrap" Text="COM13"
    VerticalAlignment="Top" Width="177" Grid.ColumnSpan="2"/>
    <Button x:Name="on" Content="ON" HorizontalAlignment="Left"
    Margin="170,191,0,0" VerticalAlignment="Top" Width="74" Height="52"
    Click="on_Click"/>
    <Button x:Name="off" Content="OFF" HorizontalAlignment="Left"
    Margin="275,191,0,0" VerticalAlignment="Top" Width="74" Height="52"
    Grid.ColumnSpan="2" Click="off_Click"/>
    <Button x:Name="connect" Content="Connect"
    HorizontalAlignment="Left" Margin="172,132,0,0"
    VerticalAlignment="Top" Width="75" Click="connect_Click"/>
    <Button x:Name="disconnect" Content="Disconnect"
    HorizontalAlignment="Left" Margin="274,132,0,0"
    VerticalAlignment="Top" Width="75" Grid.ColumnSpan="2"
    Click="disconnect_Click"/>
  </Grid>
</Window>
By default, we have written COM13; however, that might change. A total of four buttons are added, which are on, off, connect, and disconnect. We also have a TextBlock to display the status. You can tamper with this code for more customization.
Now our job is to write the backend for this code, which will also include the logic behind it.
Let's first create event handlers. Double click on each of the buttons to create an event. The preceding code contains the event handlers. Once done, include the following namespace for the use of the SerialPort class:
using System.IO.Ports;
Next, create an object of the SerialPort class:
SerialPort sp= new SerialPort();
Now navigate to the connect button's event handler method, and here add the code required to connect your app to Intel Edison via a serial port. A try catch block is added to prevent crashes while connecting. The most common reason for a crash is an incorrect port number or the USB is not connected:
try
  {
    String portName = comno.Text;
      sp.PortName = portName;
      sp.BaudRate = 9600;
      sp.Open();
      status.Text = "Connected";
  }
    catch (Exception)
  {
     MessageBox.Show("Please give a valid port number or check your connection");
  }
In the preceding code, we stored the com port number in a string type variable. Next, we assign the object's PortName member with the portName. We also set the baud rate to 9600. Finally, we open the port and write in the status box connected.
Next, we write the code for the disconnect event handler:
try
  {
    sp.Close();
    status.Text = "Disconnected";
  }
    catch (Exception)
  {
    MessageBox.Show("First Connect and then disconnect");
  }
sp.close() disconnects the connection. It's safe to write these under a try catch block.
Finally, we write the code for the on and off buttons' event handlers:
private void on_Click(object sender, RoutedEventArgs e)
  {
    try
      {
        sp.WriteLine("1");
      }
        catch(Exception)
      {
         MessageBox.Show("Not connected");
      }
  }

private void off_Click(object sender, RoutedEventArgs e)
  {
    try
      {
        sp.WriteLine("2");
      }
        catch (Exception)
      {
        MessageBox.Show("Not connected");
      }
  }
In the preceding code, we used the WriteLine method and sent a string. The device, which is connected with the application using a serial port, receives the string and an action may be triggered. This sums up the entire process. The entire code for MainWindow.xaml.cs is provided as follows:
using System;
using System.Collections.Generic;
using System.Linq;
using System.Text;
using System.Threading.Tasks;
using System.Windows;
using System.Windows.Controls;
using System.Windows.Data;
using System.Windows.Documents;
using System.Windows.Input;
using System.Windows.Media;
using System.Windows.Media.Imaging;
using System.Windows.Navigation;
using System.Windows.Shapes;
using System.IO.Ports;

namespace RobotController
{
    /// <summary>
    /// Interaction logic for MainWindow.xaml
    /// </summary>
    public partial class MainWindow : Window
    {
        SerialPort sp = new SerialPort();
        public MainWindow()
        {
            InitializeComponent();
        }

        private void connect_Click(object sender, RoutedEventArgs e)
        {
            try
            {
                String portName = comno.Text;
                sp.PortName = portName;
                sp.BaudRate = 9600;
                sp.Open();
                status.Text = "Connected";
            }
            catch (Exception)
            {

                MessageBox.Show("Please give a valid port number or check your connection");
            }

        }

        private void disconnect_Click(object sender, RoutedEventArgs e)
        {
            try
            {
                sp.Close();
                status.Text = "Disconnected";
            }
            catch (Exception)
            {

                MessageBox.Show("First Connect and then disconnect");
            }
        }

        private void on_Click(object sender, RoutedEventArgs e)
        {
            try
            {
                sp.WriteLine("1");
            }
            catch(Exception)
            {
                MessageBox.Show("Not connected");
            }
        }

        private void off_Click(object sender, RoutedEventArgs e)
        {
            try
            {
                sp.WriteLine("2");
            }
            catch (Exception)
            {
                MessageBox.Show("Not connected");
            }
        }
    }
}
Now we have the application ready to control our Intel Edison. Let's test it out. Open up the Arduino IDE. We'll write a small code for Intel Edison that will read serial data from the application so that the on board LED will turn on and off based on the incoming data.
Write the following code to do the same:
void setup()
  {
    pinMode(13,OUTPUT);
    Serial.begin(9600);
  }
void loop()
  {
    if(Serial.available()>0)
      {
         char c= Serial.read();
         if(c=='1')
         digitalWrite(13,HIGH);
         else if(c=='2')
         digitalWrite(13,LOW);
       }
  }
When you burn this code, go to Visual Studio and run your WPF application. Enter the port number; it must be the same as your Arduino programming port, that is, the serial port. After that, press the on button. The on board LED should glow. It should turn off when you press the off button. Thus, we now have a very basic understanding of how to communicate with Edison using serial port communication via a WPF application. As the chapter progresses, we'll see how to efficiently control a robot with keyboard controls.