Before moving on to the code, let's have a look at the algorithm first:
- Import libraries.
- Initialize input pins.
- Read raw values.
- Process the values.
- Display it to the console.
This is similar to the earlier example, the only difference being that we're going to use three sensors. In this case, the code will be written in Node.js, since at a later stage we'll be pushing it to the cloud, that is, dweet.io:
functiondisplayRes()

{

//Import mraa

var mraa= require('mraa'), var B=4275;
var R0=100000;

//Temperature pin

var tempPin=new mraa.Aio(0);

//Sound pin

varsoundPin= new mraa.Aio(1);

//Smoke pin

varpolPin= new mraa.Aio(2);

//Processing of temperature var a=tempPin.read();
var R=1023/a-1; R=100000*R;
var temperature=1/(Math.log(R/100000)/B+1/298.15)-273.15; temperature = +temperature.toFixed(2);
//Smoke read

varsmokeValue= polPin.read();


//Sound read

varsndRead= soundPin.read();


console.log("Temperature=  ",temperature);console.log("Soundlevel=   ",sndRead);console.log("Smoke level= ", smokeValue); setTimeout(displayRes,500);
}

displayRes();
Before explaining the code, processing has only been performed on the temperature sensor. For the sound level, we'll send raw values because for conversion into decibels, which is a relative quantity, we need to access the sound pressure of two instances. So we will restrict ourselves to raw values. However, we can certainly find a threshold value of the raw readings and use the threshold to invoke an action, such as turning on an LED or sounding a buzzer.
Now, let's have a close look at the code. Most of the code is similar to that of the temperature module. We've added a few more lines for smoke and sound detection:
//Sound pin
varsoundPin= new mraa.Aio(1);
//Smoke pin
varpolPin= new mraa.Aio(2);
In the preceding lines, we declared which analog pins are used for sound sensor input and smoke sensor input. In the following lines we will read the values:
//Smoke read
varsmokeValue= polPin.read();
//Sound read
varsndRead= soundPin.read();
Ultimately, we display the captured values using the console.
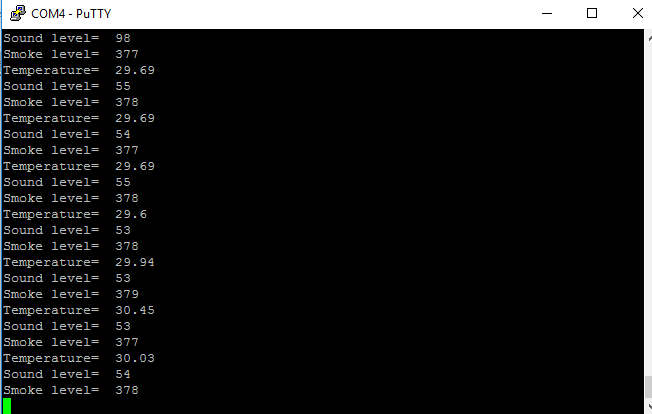
When you run the preceding code in the console, you will get the output from all the sensors. Try to increase smoke around the smoke sensor or speak loudly in front of the sound sensor to increase the value, or keep the temperature sensor near your laptop vent to get a higher reading. The following is the screenshot of the values obtained from the sensors:

Once you obtain the readings, we can push them to the cloud and display them on the dashboard.
Here, if you notice that you are not getting correct readings, then you need to adjust the potentiometer available on the sensor to calibrate it manually. For uploading it to the cloud, we need to impart some changes in the code. Refer to the following code for pushing all the three data obtained to dweet.io:
function dweetSend()
  {
    vardweetClient = require("node-dweetio"); vardweetio = new
    dweetClient();
//Import mraa
    var mraa= require('mraa'), var B=4275;
    var R0=100000;
//Temperature pin
    var tempPin=new mraa.Aio(0);
//Sound pin
    varsoundPin= new mraa.Aio(1);
//Smoke pin
    varpolPin= new mraa.Aio(2);
//Processing of temperature var a=tempPin.read();
    var R=1023/a-1; R=100000*R;
    var temperature=1/(Math.log(R/100000)/B+1/298.15)-273.15;
    temperature = +temperature.toFixed(2);
//Smoke read
    varsmokeValue= polPin.read();
//Sound read
    varsndRead= soundPin.read();
    dweetio.dweet_for("WeatherStation",
      {Temperature:temperature, SmokeLevel:smokeValue,
      SoundLevel:sndRead}, function(err, dweet)
        {
          console.log(dweet.thing); // "my-thing"
          console.log(dweet.content); // The content
          of the dweet
          console.log(dweet.created); // The create
          date of the dweet
        });
      setTimeout(dweetSend,10000);
    }
dweetSend();
In the preceding code, again you will find lots of similarities with the code for temperature. Here, we have performed three read operations and we've sent all the three values respective to the parameter it represents. It's evident from the following line:
dweetio.dweet_for("WeatherStation", {Temperature:temperature, SmokeLevel:smokeValue, SoundLevel:sndRead}, function(err, dweet)
Transfer the code by following a similar process that was discussed before, using FileZilla, and execute it using the node command:

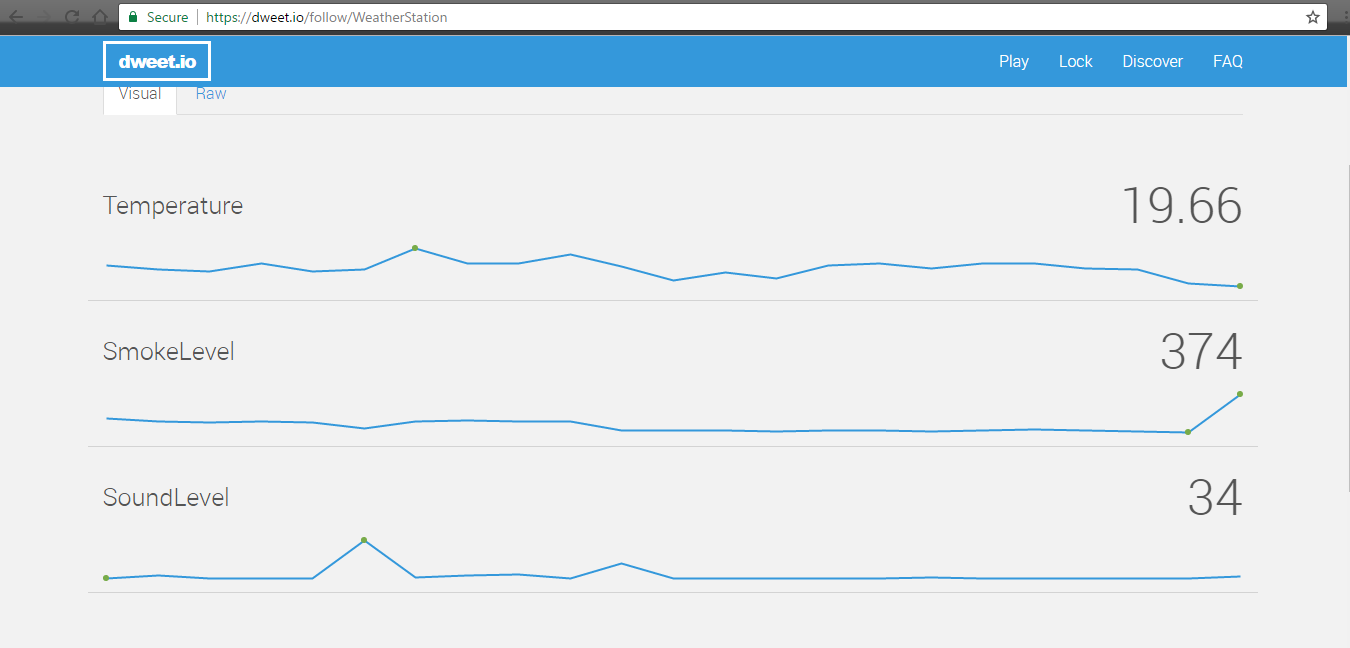
Having a look at the preceding screenshot, it's clear that values are being sent. Now, please note the sound and smoke values. Initially, music was being played, so we got sound values in the range of 20-70. For the smoke sensor, the standard value is around 250-300. In the last reading, I applied some smoke and it shot to 374. Now browse to your dweet.io portal and you will notice the values being updated live:

Once we have things set up on this side, we'll add two more gauges to freeboard.io for visualizations. Log on to freeboard.io and follow the method as explained before for addition of gauges. Be specific when matching the DATASOURCES where you need to specify the parameter:

Once this is done, well, you will have your own weather station ready, and up and running. Once we understand the concepts, it's extremely easy to realize these mini projects.
