
Perform the following steps to begin with the algorithm:
- Import all the necessary packages.
- Set the LED pin.
- Start an infinite loop. From here on, all the parts or blocks will be inside the while loop.
- Store two variables in the path for the .lm and .dic files.
- Record and save a .wav file for 3 seconds.
- Pass the .wav file as a parameter to the speech recognition engine.
- Get the resultant text.
- With an if else block test for the ON and OFF texts and use the mraa library to turn on and off an LED.
The algorithm is pretty much straightforward. Compare the following code with the preceding algorithm to get a full grip of it:
import collections
import mraa
import os
import sys
import time

# Import things for pocketsphinx
import pyaudio
import wave
import pocketsphinx as ps
import sphinxbase

led = mraa.Gpio(13)
led.dir(mraa.DIR_OUT)


print("Starting")
while 1:
         #PocketSphinx parameters
         LMD   = "/home/root/vcreg/5608.lm"
         DICTD = "/home/root/vcreg/5608.dic"
         CHUNK = 1024
         FORMAT = pyaudio.paInt16
         CHANNELS = 1
         RATE = 16000
         RECORD_SECONDS = 3
         PATH = 'vcreg'
         p = pyaudio.PyAudio()
         speech_rec = ps.Decoder(lm=LMD, dict=DICTD)
         #Record audio
         stream = p.open(format=FORMAT, channels=CHANNELS, rate=RATE,
         input=True, frames_per_buffer=CHUNK)
         print("* recording")
         frames = []
         fori in range(0, int(RATE / CHUNK * RECORD_SECONDS)):
               data = stream.read(CHUNK)
               frames.append(data)
         print("* done recording")
         stream.stop_stream()
         stream.close()
         p.terminate()
         # Write .wav file
         fn = "test.wav"
         #wf = wave.open(os.path.join(PATH, fn), 'wb')
         wf = wave.open(fn, 'wb')
         wf.setnchannels(CHANNELS)
         wf.setsampwidth(p.get_sample_size(FORMAT))
         wf.setframerate(RATE)
         wf.writeframes(b''.join(frames))
         wf.close()

         # Decode speech
         #wav_file = os.path.join(PATH, fn)
         wav_file=fn
         wav_file = file(wav_file,'rb')
         wav_file.seek(44)
         speech_rec.decode_raw(wav_file)
         result = speech_rec.get_hyp()
         recognised= result[0]
         print("* LED section begins")
         print(recognised)
         if recognised == 'ON.':
               led.write(1)
         else:
               led.write(0)
         cm = 'espeak "'+recognised+'"'
         os.system(cm)
Let's go line by line:
import collections
import mraa
import os
import sys
import time

# Import things for pocketsphinx
import pyaudio
import wave
import pocketsphinx as ps
import Sphinxbase
The preceding segment is just to import all the libraries and packages:
led = mraa.Gpio(13)
led.dir(mraa.DIR_OUT)
We set the LED pin and set its direction as the output. Next we will begin the infinite while loop:
#PocketSphinx and Audio recording parameters
         LMD   = "/home/root/vcreg/5608.lm"
         DICTD = "/home/root/vcreg/5608.dic"
         CHUNK = 1024
         FORMAT = pyaudio.paInt16
         CHANNELS = 1
         RATE = 16000
         RECORD_SECONDS = 3
         PATH = 'vcreg'
         p = pyaudio.PyAudio()
         speech_rec = ps.Decoder(lm=LMD, dict=DICTD)
The preceding chunk of code is just the parameters for PocketSphinx and for audio recording. We will be recording for 3 seconds. We have also provided the path for the .lmd and .dic files and some other audio recording parameters:
#Record audio
         stream = p.open(format=FORMAT, channels=CHANNELS, rate=RATE,
         input=True, frames_per_buffer=CHUNK)
         print("* recording")
         frames = []
         fori in range(0, int(RATE / CHUNK * RECORD_SECONDS)):
               data = stream.read(CHUNK)
               frames.append(data)
         print("* done recording")
         stream.stop_stream()
         stream.close()
         p.terminate()
In the preceding code, we record the audio for the specific time interval.
Next, we save it as a .wav file:
# Write .wav file
         fn = "test.wav"
         #wf = wave.open(os.path.join(PATH, fn), 'wb')
         wf = wave.open(fn, 'wb')
         wf.setnchannels(CHANNELS)
         wf.setsampwidth(p.get_sample_size(FORMAT))
         wf.setframerate(RATE)
         wf.writeframes(b''.join(frames))
         wf.close()
The final step contains the decoding of the file and comparing it to affect the LED:
# Decode speech
         #wav_file = os.path.join(PATH, fn)
         wav_file=fn
         wav_file = file(wav_file,'rb')
         wav_file.seek(44)
         speech_rec.decode_raw(wav_file)
         result = speech_rec.get_hyp()
         recognised= result[0]
         print("* LED section begins")
         print(recognised)
         if recognised == 'ON.':
               led.write(1)
         else:
               led.write(0)
         cm = 'espeak "'+recognised+'"'
         os.system(cm)
In the preceding code, we initially pass the .wav file as a parameter to the speech processing engine and then use the result to compare the output. Finally, we switch on and off the LEDs based on the output of the speech processing engine. Another activity carried out by the preceding code is that whatever is recognized is spoken back using espeak. espeak is a text to speech engine. It uses spectral formant synthesis by default, which sounds robotic, but can be configured to use Klatt formant synthesis or MBROLA to give it a more natural sound.
Transfer the code to your device using FileZilla. Let's assume that the code is saved by the file named VoiceRecognitionTest.py.
Before executing the code, you may want to attach an LED to GPIO pin 13 or just use the on board LED for the purpose.
To execute the code, type the following:
python VoiceRecognitionTest.py
Initially, the console says *recording, speak on:

Then, after you speak, the speech recognition engine will recognize the word that you spoke from the existing language model:
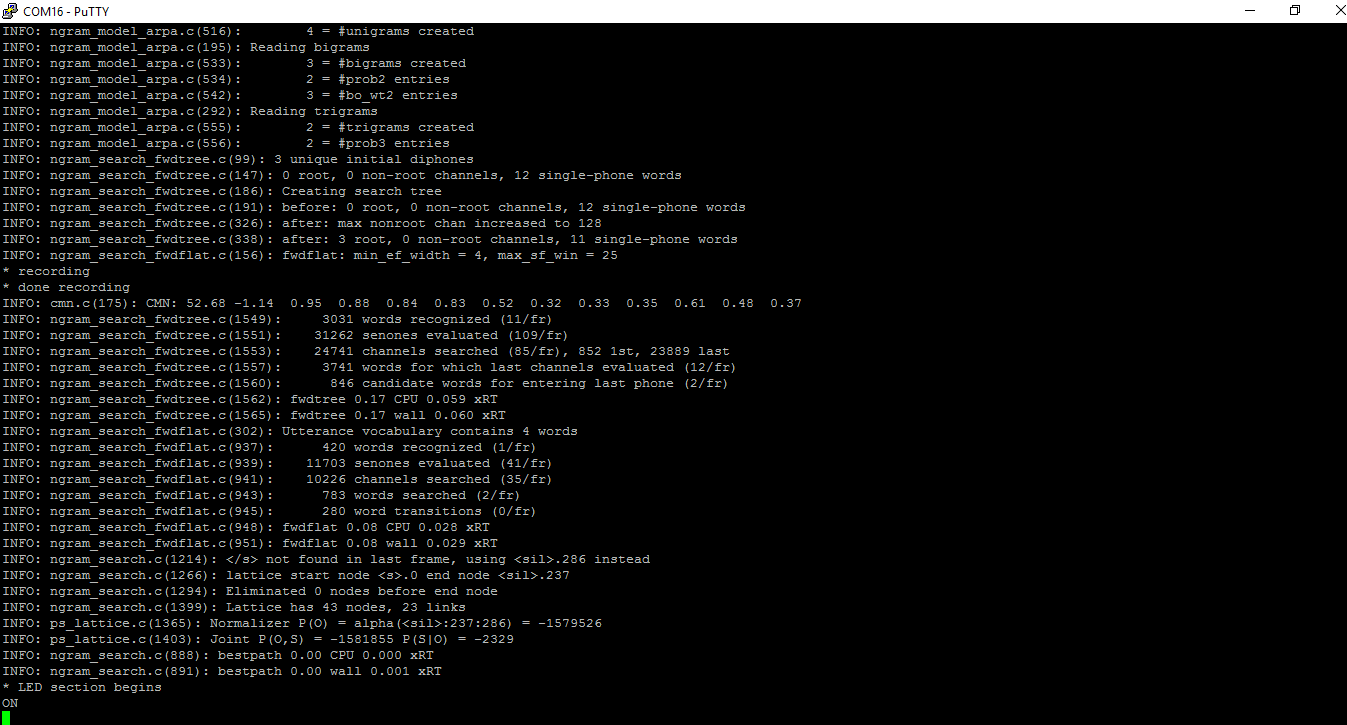
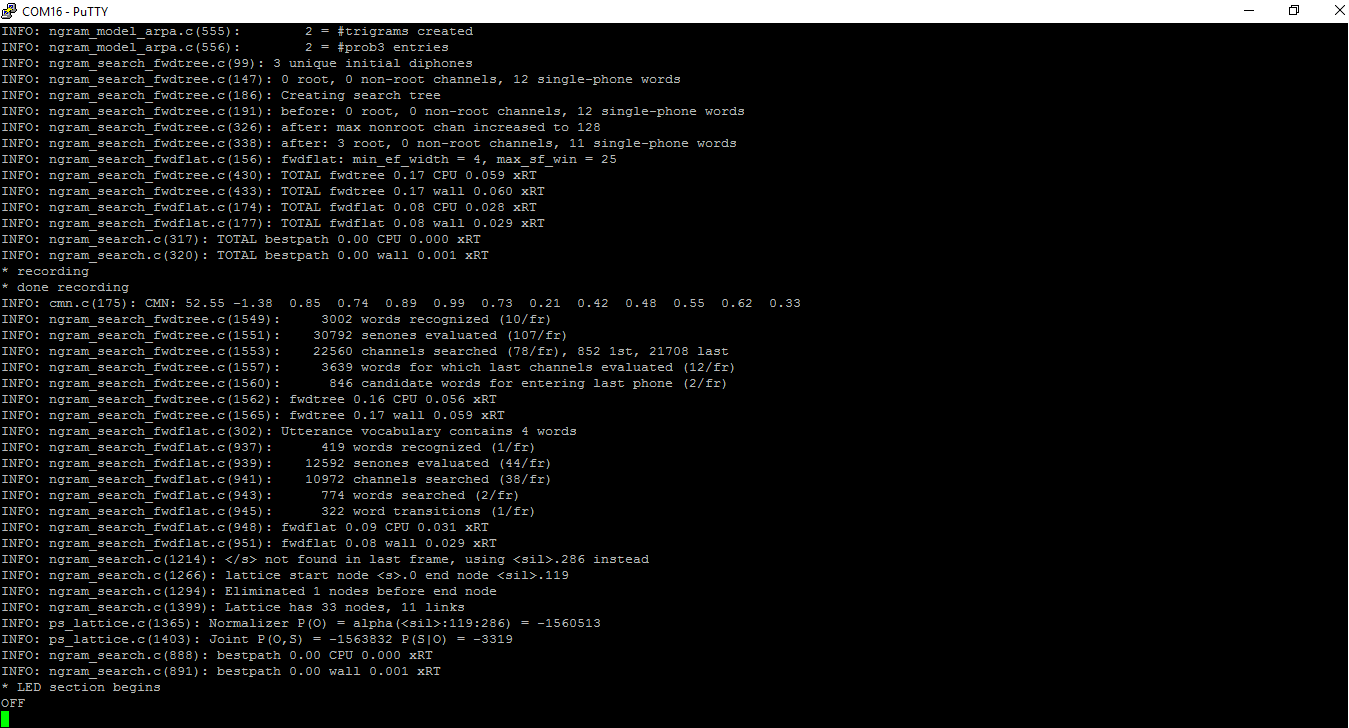
It is noted that on is displayed. That means that the speech recognition engine has successfully decoded the speech we just spoke. Similarly, the other option stands when we speak off on the microphone:
So now we have a voice recognition proof of concept ready. Now, we are going to use this concept with small modifications to lock and unlock the door.