
Now we have a pretty good idea of what all the different parts of the Xcode window do and how they work together. We covered the two sidebars and the debug area in a good amount of detail, but now let's take a closer look at what the main editor can do.
Let's take a look at some of the different configurations for the editor. In your navigation sidebar, you can see a list of files. Right now, the HelloWorld project file is selected. Clicking on a file will make that the active file and open it in the editor. Select the ViewController.swift file and you'll see the editor change to show the source code:

Figure 2.8: The editor view when a .swift file is active
You'll also notice that at the very top of the editor window is a hierarchy bar view starting at the root project (the blue icon), going through folders and files, ending at No Selection. If you click your cursor around at different points in the source file, you'll see that No Selection changes depending on where the cursor is, always being the closest scoped coding block.
For example, if you click at the end of super.viewDidLoad() on line 14, the cursor will move inside of func viewDidLoad(), and the hierarchy will show you that viewDidLoad() is the current method selected. If you click on the viewDidLoad() text in the hierarchy bar, you'll see a list of all the classes and methods in the file. Right now we only have two methods, but when your classes get bigger, this is an easy way to quickly navigate through a source file to find a function.
Next, let's take a look at how the editor responds to some other file types. Just under ViewController.swift in the navigation sidebar is Main.storyboard. Select that file and see how the editor changes completely (it may take a second or two to load). This is the Interface Builder editor window, and this is where we'll be creating our views:
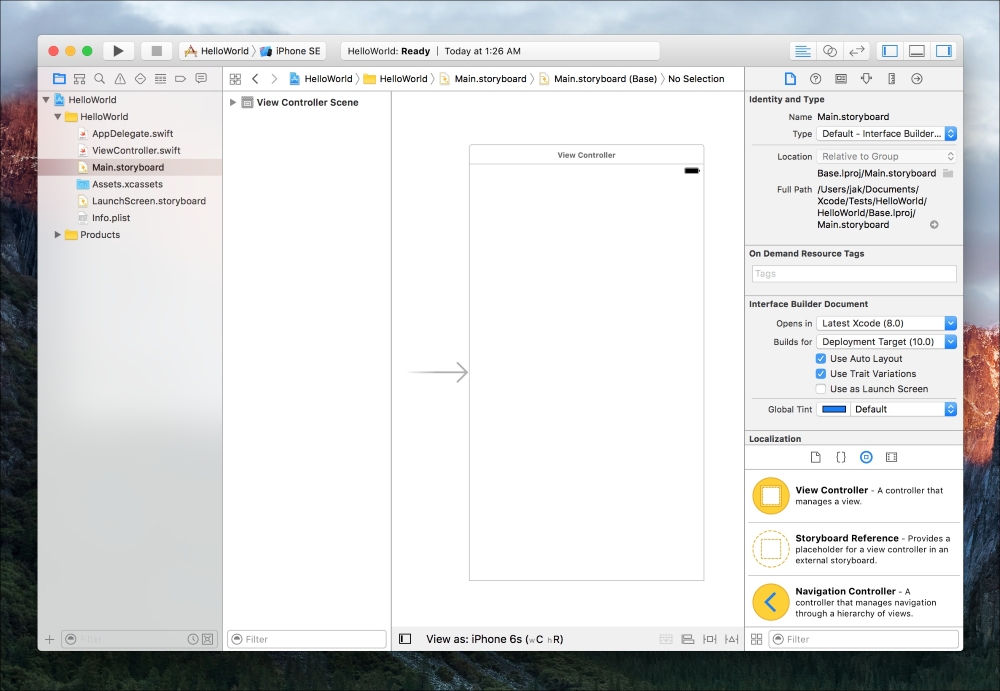
Figure 2.9: The editor view when a .storyboard file is active
Underneath Main.storyboard is Assets.xcassets, which is an asset catalog file. Select that file and again take note of how the editor adapts. Right now, the only item in the asset catalog is the application's icon. If you click on the item named AppIcon, you can see all of the different versions of the icon that the asset needs:
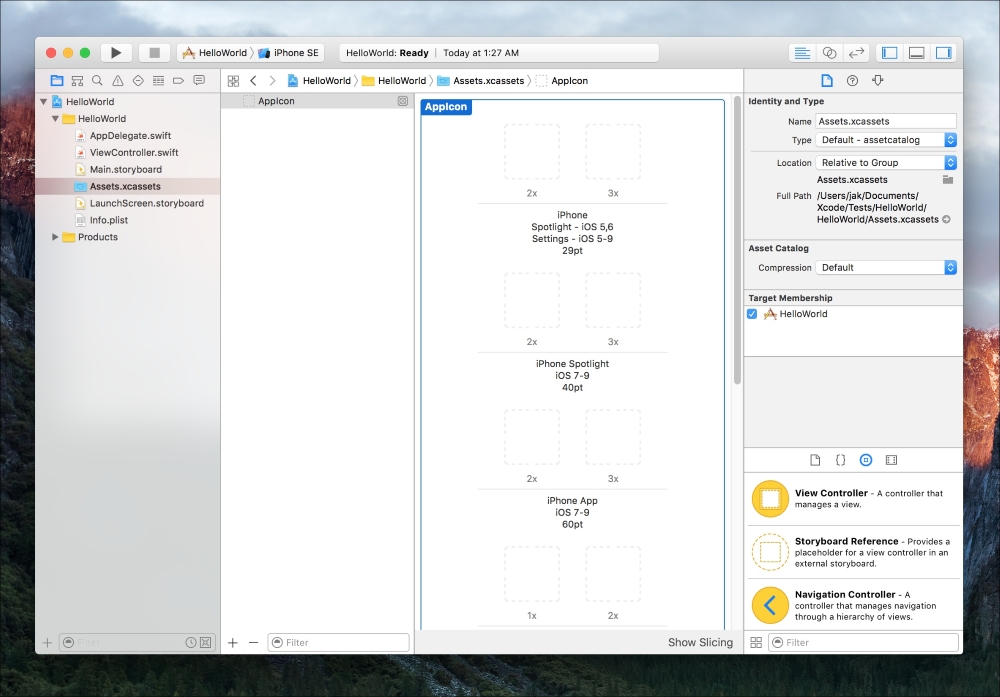
Figure 2.10: The editor view when a .xcassets file is active
One of the most useful features of the Xcode editor is the ability to access documentation right from your source code. To try this out, head back to ViewController.swift. This class is already partially filled out by default, so there is some code in here that we might not understand. For example, on line 14, this function calls another function in its superclass named viewDidLoad(). To see what this does, press and hold the option key; you'll see that your cursor turns into a crosshair. While still holding down option, drag the crosshair over that viewDidLoad() function and you'll see the crosshair turn into a question mark.
Click on viewDidLoad() and a documentation popup will appear:

Figure 2.11: Example of inline documentation references
We've been using the top-right-most grouping of buttons on the Xcode toolbar to show and hide all of the secondary areas, but the group of buttons to their left are just as important. Unlike the secondary area toggles, which can all be turned on and off independently, this set of buttons (which look like a paragraph, two circles, and two arrows) toggle the editor mode, and only one can be active at a time. The default mode (the paragraph icon) is the standard editor which we have been using up to this point. The second icon (two circles) is called the assistant editor. Click on the middle button, and let's see what happens:
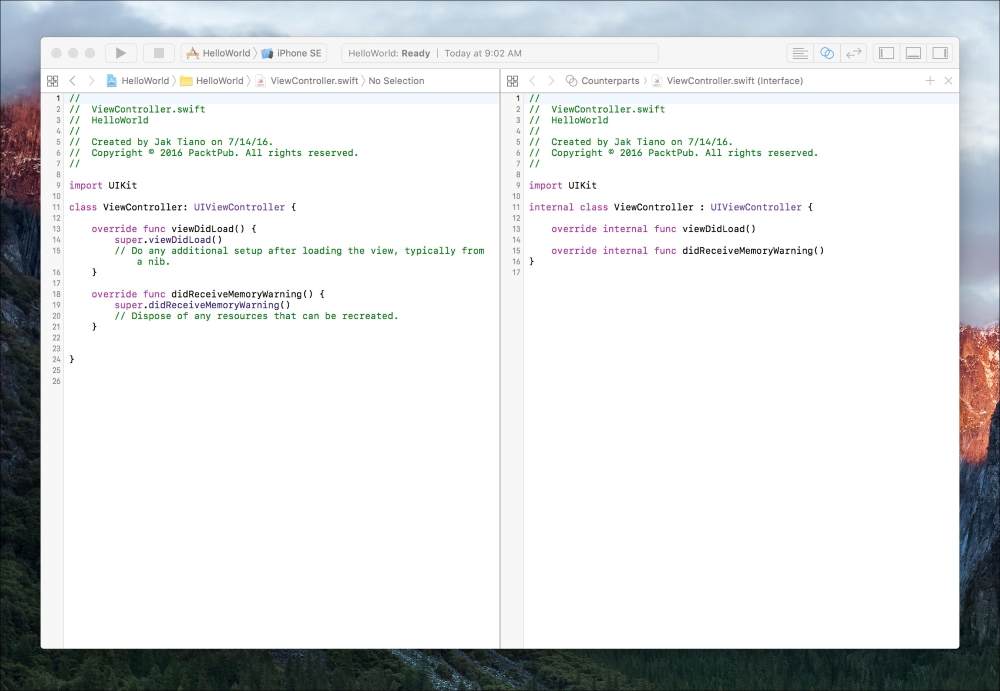
Figure 2.12 The main editor window in assistant editor mode
Whoa! It split our editor in half! (I also hid all of the secondary areas to make it easier to read, but you're free to leave them open.) On the left side of the screen is our original ViewController.swift file, and on the right hand side is… something else? By default in Xcode 8 what you should be seeing here is the Interface view of your swift class. Since Swift doesn't have header files, this is a sort of simulated header file for your swift class, so that you can see all of your functions and variables without worrying about the implementation of those methods. You'll notice that it's read-only, and that you can't make any edits on the right side of the screen. (If you've never used Obj-C or C++, don't worry about what a header file is.
However, that's not all the assistant editor can do! If you look at the top of the assistant (right) side of the editor, you'll see a different type of hierarchy bar. If you click on the part that says Counterparts, you'll see a ton of other categories of related files that are automatically determined by Xcode. Since this is an empty project, there really isn't much here. At the top, you can see that there is an option for a manual mode, so if you really want to open two arbitrary files next to each other, this would be the way to do it.
So this is cool and all, but it's really not that useful to us. Not so fast! Let's see what happens when we open the Main.storyboard file:
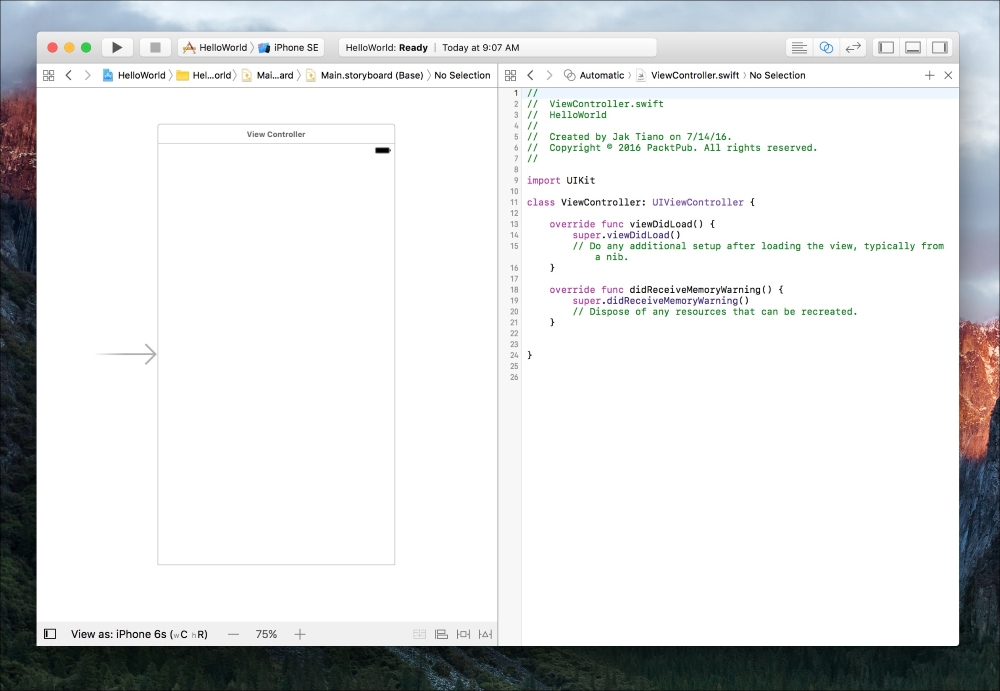
Figure 2.13: The assistant editor being used with a storyboard file
Now this is convenient! On the left side of the screen, we can see the visual representation of our view, and on the right side of the screen we can see the code for our controller. Remember how we talked about the Model-View-Controller, and how the controller needs to update the view? With this setup, we'll be able to build our view alongside our controller, and connect things back and forth with the code. This will be one of the most important uses of the assistant editor, and we'll be back soon to put it to use.
Back to the buttons on the toolbar. The third button (the two arrows) toggles the last mode of the editor, known as the version editor. I'm only touching on it now as a formality, because if you click it in your current project you'll get a No Editor message on the other side of the screen. This is because the version editor helps you see changes in a file that is under version control, which we haven't enabled on this project. We'll spend a lot more time with the version editor, and version control in general, in Chapter 5, Taking Advantage of Source Control in Xcode.