
Like any new programming language, Swift has its quirks. But as with most languages, the building blocks are pretty simple and straightforward. In this section, we're going to start with the features of Swift that nearly every programming language has, so that you can get a feel for how it works. If you've never used any programming language before then there may be some terms you are unfamiliar with, but I suggest you read through and look those up as you read along.
Before you start, open up a fresh playground and code along as you read!
If you break down how software works to the lowest level of granularity, all that really ever happens is that data on your computer is written, manipulated, and moved. When you go up a level of granularity and look at the source code for that software, you'll see a lot of data structures, classes, and functions, but all of these are just efficient and readable vessels for chunks of code that create, manipulate, and save data.
So as it would seem, creating and manipulating data is pretty important. Let's take a look at some of the most common built-in data types in Swift by defining some constants:
let integer: Int            = 0
let floatingPoint: Float    = 0.0
let string: String          = "Hello"
let boolean: Bool           = true
Starting from the top, we have an integer (Int), then a floating point number (Float), then a string (String), and finally a Boolean value (Bool). You'll notice all of the built-in types are capitalized, which may be a little strange if you're coming from Objective-C.
While we're here, let's take a look at how a constant is defined in Swift:
let constantName: DataType = {Value}First, we use the let keyword to signify that we are defining a constant. The next part is our constant's name, which we will use to reference it, followed by a colon. After the colon we define the data type of our constant, and finally we set it equal to its default value. Go to your playground and try to define some of your own constants using the data types we just looked at. (This example won't work: DataType is not a real data type! Replace that with a real data type, such as Int or String).
Since Swift has a strong focus on speed and safety, the use of unchanging constant values is encouraged as frequently as possible. However, we know that won't always be possible, and in cases where a value needs to change we use a variable. Defining a variable is exactly the same as defining a constant, but instead of using let, we use var:
var variableName: DataType = {Value}Now we can manipulate and rewrite the value of this variable as much as we need!
One of the most important features of the Swift programming language is that it is type safe. This means that all of the constants and variables you define must have a type, or else the code won't even compile. In these past few examples, we've defined our variables and constants with explicit types, meaning we wrote the type right next to them to make sure the compiler knows about it. But the Swift compiler is very smart and can also figure out a type by its context, therefore giving it an implicit type. Here's an example:
var value1: Int = 0
var value2 = 0
On value1, we explicitly state that the variable is of the type Int. On value2, we just set an un typed value to 0, but the compiler knows that 0 is an integer and deduces that value2 must be an Int. This is called
type inference. This will usually make more sense when instantiating objects later on, since it's more readable:
var myView = UIView()
Here, it's very clear that myView will be of the type of the UIView class (we'll get to classes soon enough):
var value1, value2, value3: String
You can also declare several variables on one line, and even use emojis as a variable name! (Although, it's really only useful as a novelty; I don't recommend using emojis in real-world code.)
One of the most powerful features of Swift is the way that it handles the absence of a value. So far, we've been using data types that are guaranteed to have a value; later on we'll see how the compiler will require those data types to have a value before an object is finished initializing. This means that you are guaranteed that a variable will have a value, which makes your code safer and less prone to failure.
However, sometimes it's important that a variable doesn't have a value at all. There are many parts of the Cocoa Touch framework that are built around the idea of an object being nil, which in Objective-C means that there is nothing there. Swift takes this concept a step further by requiring that you plan ahead and let the compiler know which variables are capable of not having a value. Because of their functionality of being able to have or not have a value, these are called optionals:
var normalInt: Int = 0
var optionalInt: Int?
The normalInt variable is declared as a standard Int, and assigned a value of 0. However, the optionalInt is defined as the type Int?. The question mark signifies that a value may or may not be present. Since it's optional, we don't assign it a value, and that's okay. Now we have an issue, though: we have a variable running around our code with no value! What happens if we try to use it? Let's see:
normalInt = optionalInt
If we tried to do this, we'd get a compiler error! That's because the compiler isn't sure if there is a value inside optionalInt, and it really, really doesn't want the code to crash when it runs. To use an optional value, we have to check if there is a value inside or not; this is called unwrapping. Here's how we would unwrap an optional:
if let unwrappedInt = optionalInt {
    normalInt = unwrappedInt
}
The if let statement is a special type of if statement which checks whether an optional has a value. In this case, it checks to see whether optionalInt has a value, and if it does it assigns the value to unwrappedInt, which you can then use inside the brackets. However, if optionalInt didn't have a value, the code would be skipped. You can also unwrap multiple optional values at once if they are all needed.
That would look like this:
var normalString: String = ""
var optionalString: String?

if let unwrappedInt = optionalInt, unwrappedString = optionalString {
    normalInt = unwrappedInt
    normalString = unwrappedString
}
Here, the two unwrapping conditions are separated by a comma, and the if branch will only be executed if both values can be unwrapped.
With a normal optional value, you can force it to be unwrapped using an exclamation mark:
normalInt = optionalInt!
However, this can be dangerous, because you are overriding the compiler and telling it that you are sure that the optional value definitely has a value. If you're wrong, the code will crash at runtime. As scary as that sounds, sometimes you are sure.
In cases where a value needs to be assigned after the init function, but will always have a value once it's assigned, you can declare a variable as an implicitly unwrapped optional. This means that you can use the variable like a normal variable, without unwrapping it with an if let statement. To do this, simply declare the variable as such:
var implicitlyUnwrappedInt: Int!
So, instead of using the question mark to denote a standard optional, we use an exclamation mark to show that it should be treated as unwrapped. To use it, we can just do the following:
normalInt = implicitlyUnwrappedInt
You can also at any time set an optional value back to being empty by assigning it to the value nil:
optionalInt = nil
This has just been a brief introduction to optionals in Swift, but we'll be encountering them throughout the book and using them in many different ways.
With an understanding of how to use simple data types, let's now take a look at the different kinds of collection built into Swift. The two most commonly used types of collection are arrays and dictionaries. Both of these are native to the Swift language.
An array in Swift is a simple ordered collection of values of a certain type. If you want your array to be immutable, meaning you can't add/remove/change values, then you define it with a let keywords. To make it mutable (changeable), define it with var:
let immutableArray: [Int] = [1, 2, 3]
var mutableArray: [Int] = [Int]()
In this example, you can see that the immutable array is initialized with default values of 1, 2, and 3, and that it is of the type [Int]. The square brackets around a data type let the compiler know that it is an array, and not just a single value. Beneath that, we did something similar, but instead of giving the mutableArray starting values, we just initialized a new empty array of integers to use later. Using what we learned about type inference in the last section, we could also let the compiler figure out the types and shorten these declarations to the following:
let immutableArray = [1, 2, 3]
var mutableArray = [Int]()
Let's take a look at some of the basic functionality of a Swift array. Adding an element to the end of an array looks like this:
mutableArray.append(1)
mutableArray.append(2)
mutableArray.append(3)
The contents of the array would now look like this: [1, 2, and 3], and if you're typing this into a playground, you should be able to see that in the results sidebar. To remove the last element, you can use dot-syntax to call a function on the array:
mutableArray.removeLast()
You can also use dot-syntax to access the properties of the array, such as count the number of elements the array contains:
mutableArray.count
Or you can even access a Bool value to let you know whether the array is empty or not:
mutableArray.isEmpty
You can access elements in an array by using subscript syntax, where you put the index of the element you are looking for in square brackets after the array variable, like this:
mutableArray[0]
There is plenty more to learn about the Swift arrays, but this should be enough to get us started. Feel free to experiment and look through Apple's documentation.
A dictionary is a collection where every value has a key that can be used to retrieve it. So as an example, if I put the number 05401 in a dictionary with the key zipCode, then later I would ask for zipCode and it would return 05401:
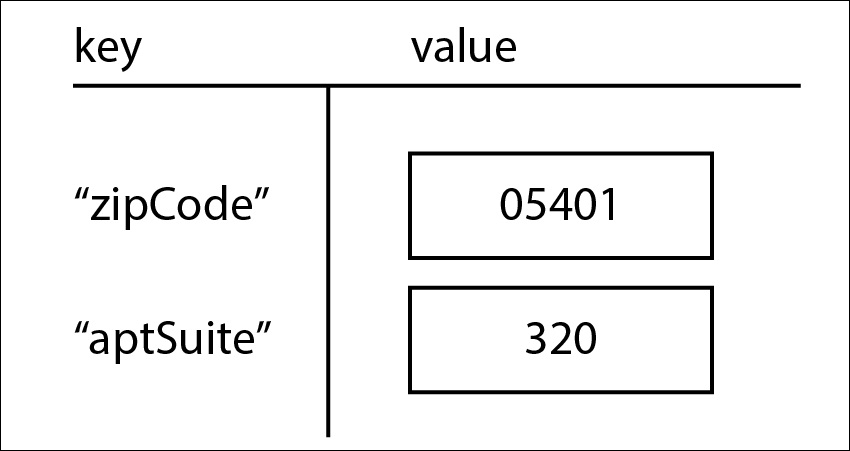
Figure 3.10: Dictionaries use keys which have an associated value
This has many use cases when developing software, and usually has the benefit of being easily human-readable. Let's take a look at how to create a dictionary:
var myDict = [String: Int]()
Here, we created an empty dictionary called myDict, where it uses a String as its key, and stores an Int value. Again, the two parentheses show that we are creating a new object here. To add a value for a key, or to access the value at a key, you can use subscript notation like with an array, but instead of an index you use the key:
myDict["example"] = 12345
let test = myDict["example"]
In the first line, we are creating a new entry in the dictionary with a key of example and assigning its value as 12345. In the second line, we retrieve the value stored at the key example and assign it to our test variable. The test variable will now store the value 12345. Again, there is a lot more to know about the Swift dictionary, but this should be enough to get you started.
With a solid understanding of the different ways to represent data in Swift, we need to now look at the ways that we can control the execution of our code.
Starting with conditional statements, let's look at how Swift handles a standard if statement:
let condition = true

if condition {
    // condition was true
} else if !condition {
    // condition was false
} else {
    // this would honestly never happen
}
At the top, we just declare a simple Boolean called condition and set it to true. Remember, Swift is using type inference to determine that the condition is a Boolean value. The first line of the statement uses the if keyword, followed by the condition, and finishes with a set of curly braces to wrap the branch.
The things to note about Swift's implementation is that parentheses around the condition are not required, but the curly braces always are. In some languages, they are unnecessary for single-line code branches, but in Swift they are mandatory.
Underneath the first if statement is an else if statement. Like other languages, if an if statement's condition is not met, it will fall through to any number of else if statements before terminating at an else statement. So for example, if our condition Boolean was set to false, the first if would fail and the else if condition would pass (Swift uses the exclamation mark to invert a conditional expression/Boolean, like many other languages). Since a Boolean can only be true or false, our final else statement would never realistically be hit, and is only there to show you what it looks like.
Similar to the if is the
guard statement. The primary difference is that if a guard statement's condition is true, code continues after the braces, instead of inside. The primary use case for a guard is to exit code early. In this way, the guard statement is a way of saying make sure these conditions are true before we continue:
let age = 25

guard age > 0 else {
    // invalid age!
    return
}
In this example, we have an age variable. Then we use guard to ensure that the age is greater than 0, since that would be invalid. If the condition fails, then the code block inside the else is executed. There must always be an else statement for a guard.
You can also use guard to unwrap optionals:
guard let myInt = optionalInt, myString = optionalString else {
    return
}
Sometimes this makes more sense than using if let and only using those unwrapped optionals inside the scope of if let.
In addition to the if/guard conditionals, we also have the switch statement. The switch takes a value, matches it against cases until it finds a match, and then executes the code block pertaining to that case:
let value = 1

switch value {
case 0:
    print("value was 0")
case 1:
    print("value was 1")
case 2:
    print("value was 2")
case 3, 4, 5:
    print("value was between 3 and 5")
default:
    print("value was some number")
}
In this example, the value that the switch statement is considering is an integer, 1. It then checks against each case until it finds one that matches. You'll notice one case has multiple matching conditions, separated by commas. If no matches are found, the default case will be executed.
Unlike some other languages, there is no implicit fall-through with cases in a Swift switch statement. That means that you don't need to use break to end a case. In addition, a switch case must be exhaustive, meaning that every possible value is represented. If there are too many values for that to make sense, a default case must be specified at the end.
Swift implements many of the standard types of loop found in most programming languages, such as for, for-in, while, and repeat-while. Similar to conditional statements, they don't require parentheses for their input, but are otherwise comparable to other C-like languages.
In Swift 3, the old C-style for loop has been deprecated. Now, our only option is to use the for loop, which is a very powerful alternative. This is how we can use a for-in loop to run a piece of code 5 times:
for var i = 0; i < 5; i++ {
    // loop code
}
Like most implementations, you have the first expression that runs before the loop starts, the second expression which is the condition for the loop to run, and the third expression that runs on the completion of the loop.
However, in Swift the
for-in loop is a very powerful alternative. Here is that same loop above, but using the for-in method:
for i in 0..<5 {
    // loop code
}
This is much easier to read, since you can see that you are incrementing through a range from 0 to 5, not inclusive (0…5 would be inclusive). Using for-in with collections is even easier:
var sum = 0
var values = [0, 1, 2, 3, 4, 5]
for value in values {
    sum += value
}
Here we declare a small array of integers for testing purposes, named values. Then, in the for-in, we ask it to loop through every element in the values array, and give us access to those elements through the name value. Then we add them to our sum variable. This makes for-in much simpler to use, and much easier to read than a standard for.
The while loop is a very basic loop. At the top is a condition that evaluates to true or
false, and the loop will run forever until the condition is no longer true. We used one earlier in the chapter, but let's take another look:
var time: Float = 0
var position: Float = 0

while time < 1.0 {
    position = time*time
    time += 0.05
}
Here, our condition is that the loop will continue until the time is over one second. When working with while loops, it's important to make sure that the condition can be changed from inside the loop. If, for example, we were not increasing the time variable, the condition would never be false, and the loop would run forever and crash our program.
Finally, we have the
repeat-while, which is the same as the while loop, except that it runs through its code before it checks the condition:
var x = 0

repeat {
    x += 1
} while x < 0
In this example, the condition is always false, but since it is a repeat-while, the code in the loop will run a full cycle before it checks the condition and exits the loop.
Now we know how to define data, check conditions, and loop through logic, but we're missing one final, major piece: functions. Functions are used to group code into logical actions, and Swift makes writing and calling functions very easy. Let's jump right into functions by taking a look at one:
func findAverage(value1 v1: Int, value2 v2: Int) -> Float {
    let sum = Float(v1 + v2)
    return (sum/2.0)
}
We'll break this down piece by piece.
First, the func keyword means that you are beginning a function declaration.
Next, we have the name of the function, which in this case is findAverage.
Inside the parentheses, we have two parameters separated by a comma. Each parameter follows the format externalParameterName localParameterName: Type. So in this case, when calling the function, you will see value1 and value2, but inside the function we refer to the parameters by their short names, v1 and v2.
After the parentheses, we have an arrow (made of the dash and less than signs) and finally the return type of the function. We then use curly braces to contain the logic of the function.
Functions can also have no parameters or return types:
func doNothing() {
    return
}
They can also have default parameter values:
func someFunction(parameter1: Int = 0) {}Or they can have a variable number of parameters:
func someOtherFunction(parameters: Int...) {
    for param in parameters {
        // do something
    }
}
Calling a function is very straightforward. Here are some examples of a function declaration and then its invocation:
// declaration
func findAverage(value1 v1: Int, value2 v2: Int) -> Float {...}

// invocation
findAverage(value1: 3, value2: 5)


// declaration
func someOtherFunction(parameters: Int...) {...}

// invocation
someOtherFunction(parameters: 1,2,3,4,5)
You'll notice that in the both examples, when we call the function, we label the parameters inside the parentheses. The names we use here are the external parameter names. The name is followed by a colon and then the actual value. In the second example, there was a variable number of possible parameters, as indicated by the ellipsis in the function declaration. When we called the function, we just passed it as many values as necessary.
Every function you use, whether written by you or another developer, is going to be different. We'll get plenty of exposure to many different kinds of function over the course of the book, but this should be enough of a primer to get us started.
Before we move on, there are just a few other minor features that we should discuss. When writing code, there are many, many instances where you are going to want to make some notes in your code or test things. Two of your most valuable tools are making comments and printing text to the command line.
Throughout this chapter, I've been using comments to act as notes throughout my code. We also briefly talked about them when talking about rich comments in a playground:
// they look like this

/*
They can also look like this
when they span multiple lines
*/
To make a single line comment, you can use the double-slash, //, to cancel out all code for the rest of the line. To be more specific, you can use the open and close comment symbols, /* and */, to select a certain range for your comment, which can span multiple lines. Here are some examples that show how you can comment only parts of lines of code:
var i: Int // = 0

var j /* : Int */ = 0
Comments can be tremendously useful, not only to explain what your code does, but to turn off a line of your code without having to delete it, then retype it again when you realize it wasn't the problem. The quickest way to comment out a line of code in Xcode is to highlight a line you want commented and use the keyboard shortcut command + /.
I've also snuck a few print statements into this chapter before now. A print statement is a function that takes a String as an argument and then prints that string out to the console. If you remember from Chapter 2, Welcome to Xcode, the console is found in the debug area. Using print() is a good way to test parts of your code by printing out variable contents, or just checking to see if parts of your code have been hit:
var pi = 3.14159
print("The value of Pi is (pi)")
You can also use string interpolation (as seen above) to print out non-string variables. To insert a numeric value into a string, use the backslash character followed by opening and closing parentheses, ( ), and put your variable inside the parentheses.