
With today's always on, always tracking social media apps, using and tracking the user's location has become a standard feature of many apps. In this section we're going to explore a new framework from the inside out, by jumping straight to coding. This framework is CoreLocation, which as the name might imply is going to give us the tools we need to access location services on a user's device.
We're going to be switching back to our Snippets application and adding the functionality for the user to attach their current location to a new snippet when they create it. You can continue to work from your old Snippets project, or if you had any problems with yours you can grab the final version from the resources folder of this chapter, because again, the folder will have the finished work from this chapter.
Apple has always trumpeted iOS's security and respect for user privacy. Before iOS 8, the first time your app tried to access location services, an alert would show up for the user asking them if it was okay to enable location services. However, in iOS 8 and newer, the developer is now responsible for explicitly asking the user for permission to use location services. Before we can access user location data we'll have to do that ourselves, so let's get to it.
There are two types of authorization that we can ask for: when in use and always authorization. These should be pretty self-explanatory. When in use authorization allows us to access location services when the app is active and being used, while always lets our app use location data even when it is running in the background. It can be tempting to just ask the user to always access their location, but some users may wonder why you need access to that information, or be worried about battery life and deny your request.
Note
Here's a tip/warning: if a user denies your request to access location data the first time you ask, the only way for them to change this is to manually go into the settings app and change the toggle for your app. It is very important that you gain the user's trust before asking, since their denial of your request may very well be the last chance you get to ask for permission.
To give the user a good idea of why we need location data in the first place, we can include a description of what location data is being used, for that will be included in the permissions prompt. This is where we'll start with our own permissions setup. Open the Info.plist file like we did in Chapter 7, Integrating Multitouch and Gestures, and add a new row using one of the + buttons. Set the key to Privacy - Location When In Use Usage Description, and set the value to Adds location information to a new snippet when it is created.
What we're doing here is letting the app know that when location permissions of the type when in use are requested, the user should be given our description string so they know why the location is needed.
Next, we're going to head over to the ViewController.swift file and add the code that actually asks for permissions. At the top of the file, add a new import for CoreLocation:
import CoreLocation
Now we can create an instance of CLLocationManager, which is what we are going to use to ask for permissions, and later on use to actually get the user's location. Inside the class, near the top with the other properties, create a new property for the location manager:
var data: [SnippetData] = [SnippetData]()
let imagePicker = UIImagePickerController()
let locationManager = CLLocationManager()
@IBOutlet weak var tableView: UITableView!
We're also going to need to add yet another class extension to our ViewController class extension to implement a protocol, this time the CLLocationManagerDelegate protocol. Our class declaration should now look like this, at the bottom of the file:
extension ViewController: CLLocationManagerDelegate {

}
Now, we need to actually set the delegate of our locationManager to the view controller object, so it knows what object should be handling location requests. In our viewDidLoad() function, we'll add a new line to set the delegate:
override func viewDidLoad() {
    super.viewDidLoad()
    imagePicker.delegate = self
    locationManager.delegate = self

    tableView.estimatedRowHeight = 100
    tableView.rowHeight = UITableViewAutomaticDimension
}
Our location manager should be all set up at this point, and we've added a description string to the Info.plist file. All that we have to do now is request permission to use location services. To do that, we're going to create a small function that first checks to make sure we're not already authorized, and then asks the user if we can use location services when in use. Let's create a function in the main class body called askForLoacationPermissions():
func askForLocationPermissions () {
    if CLLocationManager.authorizationStatus() == .NotDetermined {
        locationManager.requestWhenInUseAuthorization()
    }
}
Here, we first check to make sure the authorization status is Not Determined (because if it is already determined, then we don't need to do anything). If the status is undetermined, then we tell the location manager to request when in use authorization, which will tell the system to present an alert to the user using the description we provided in Info.plist.
Finally, we need to call this function on startup, so we'll put this at the bottom of our viewDidLoad() function:
override func viewDidLoad() {
    super.viewDidLoad()
    imagePicker.delegate = self
    locationManager.delegate = self

    tableView.estimatedRowHeight = 100
    tableView.rowHeight = UITableViewAutomaticDimension

    askForLocationPermissions()
}
If you build and run the app now, you should be greeted with a permissions box like so:
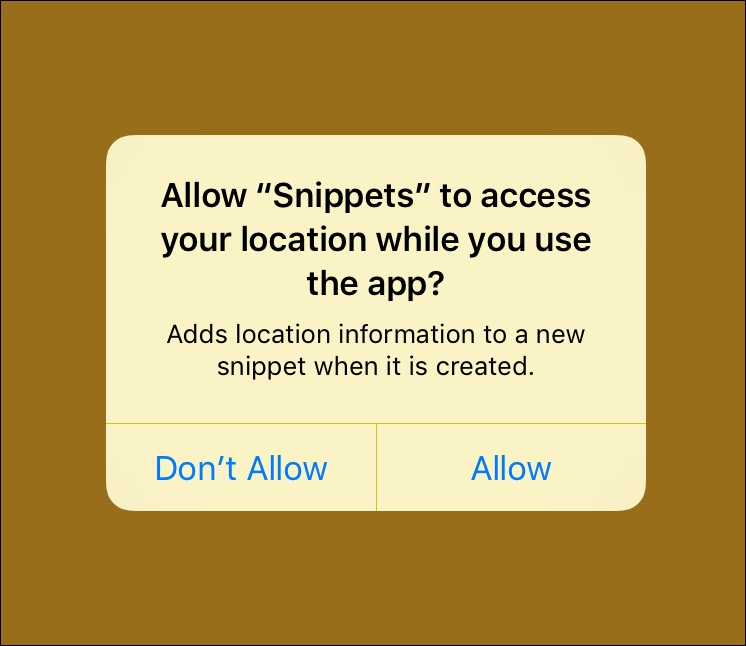
Figure 8.5: Snippets will now ask the user if it can access their location, using the description from Info.plist
If this didn't work, then aside from double checking your code is correct, make sure that everything in the Info.plist file is correct. If the system can't find a valid description key in the Info.plist file, it will ignore your request for permissions! Your entry should look like this:

Figure 8.6: The correct Info.plist entry for location usage permissions (the last row)
Again, make sure that the key says Privacy - Location When In Use Usage Description, and the type is set to string. Spelling mistakes in the value string don't matter, since it will just be displayed to the user as is, but double check the key is spelled correctly.
Alright! It should be a given that you press Allow on that alert window. Now that our app is authorized to access location data, it's time to move on to the exciting parts.
To obtain the user's location, we're going to need to do a few things. First, we need to set the parameters for our location manager. Then, we need to tell it to start updating the user's location. Finally, we need to handle both successful and unsuccessful update cases.
To start, let's go back to our viewDidLoad() function and set some properties for our loactionManager, highlighted as follows:
override func viewDidLoad() {
    super.viewDidLoad()
    imagePicker.delegate = self
    locationManager.delegate = self
    locationManager.desiredAccuracy = kCLLocationAccuracyBest
    locationManager.distanceFilter = 50.0

    tableView.estimatedRowHeight = 100
    tableView.rowHeight = UITableViewAutomaticDimension

    askForLocationPermissions()
}
First, we set the desired accuracy to a constant called kCLLocationAccuracyBest, which sets the desired accuracy of the location manager to its highest setting. After that, we set the distance filter to 50.0. The distance filter tells the location manager how far away from the previous location the user must move in order to update the location (in meters). So in this case we are letting the location manager know that when the user moves 50 meters or more, it should update their location.
Next, we need to tell the location manager to start updating the user's location. To add functionality to the location manager, we're going to start working with the delegate pattern again. We're going to add these delegate methods to the CLLocationManagerDelegate class extension we made earlier.
Note
Remember, the delegate pattern uses a protocol to define a set of functions that a class should implement. Then, the object calls those functions in its linked delegate object, which implements the protocol. Here, the CLLocationManager object has a delegate that follows the CLLocationManagerDelegate protocol, which is the ViewController class.
First, we'll implement the locationManager (didChangeAuthorizationStatus:) delegate function:
func locationManager(_ manager: CLLocationManager, didChangeAuthorization status: CLAuthorizationStatus) {
    if status == .authorizedWhenInUse {
        locationManager.startUpdatingLocation()
    }
}
This function is called in two different scenarios: when the location manager first starts up, and again if the authorization status is ever changed while running. That means that the first time our app starts up this function will be called. In that case, the status will not equal .authorizedWhenInUse, so the location manager will not start updating.
However, once the user gives the app permission to use the location, the function will be called again, and this time it will start updating. Then, every other time you start up the app, the authorization status will still equal .authorizedWhenInUse, and location updates will begin immediately.
Now that the location manager has been told to start updating its location, it will do so based on the parameters we set earlier (every time a change of 50 meters is detected). It's up to us to handle these update events with more delegate functions, one to handle a successful location update, and one to handle an error.
First, we'll implement the locationManager(didFailWithError:) function:
func locationManager(_ manager: CLLocationManager, didFailWithError error: Error) {
    print("Location manager could not get location. Error: (error.localizedDescription)")
}
This gets called when the location manager cannot get a proper location due to an error. To keep things simple, we're just going to print to the console that an error occurred, along with the description of the error. In a final production app, we'd want to handle these errors a bit more elegantly, but this is fine for testing.
Next, we'll actually handle what happens when the location update is successful, with the locationManager (didUpdateLocations:) function:
// main class
var currentCoordinate: CLLocationCoordinate2D?

// CLLocationManagerDelegate extension

func locationManager(_ manager: CLLocationManager, didUpdateLocations locations: [CLLocation]) {
    if let currentLocation = locations.last {
        currentCoordinate = currentLocation.coordinate
        print("(currentCoordinate!.latitude), (currentCoordinate!.longitude)")
    }
}
At the top of our main (non extension) class we're going to declare a new variable, which is an optional CLLocationCoordinate2D type. This data type stores a latitude and longitude coordinate, and we're going to use it to keep track of the most recent coordinate the app has detected.
Then back in the extension, we implement the location update handler. Inside our location update handler, we are being passed in an array of the locations that have been processed, with the most recent location at the end. We use the if let syntax to unwrap the optional value from the end of the array (locations.last) into currentLocation. Since the locations array may be empty, the .last property returns an optional value that we must unwrap. If we are successful in unwrapping the optional value, we then pull the coordinate out of the currentLocation, and use it to update our currentCoordinate variable. Now, at any point in our code we can access the currentCoordinate property to get the most recent valid coordinate.
Following that (in the highlighted code), I made a print statement that outputs the latitude and longitude coordinate to the console so you can see how that works. At this point, you can build and run the project on your device. If you see the latitude and longitude coordinates in the console (shift + command + C), everything worked! Feel free to delete the highlighted print statement.
Okay, so we've imported the CoreLocation framework, gotten permission to use location services, and set up a location manager that updates the most recent location coordinate of the device; now it's time to bring it all back into our SnippetData model! In this case, we are just going to add the location information as metadata to the data model. Later on we may choose to do something fun with it, like display it on a map or find nearby points of interest to display on the snippet, but for now it will live only as data.
First, let's open up our SnippetData.swift file, and make some amendments to our base data type, SnippetData. Before we begin, remember to import CoreLocation at the top of the SnippetData.swift file.
class SnippetData {
    let type: SnippetType
    let date: Date
    let coordinate: CLLocationCoordinate2D?

    init ( snippetType: SnippetType, creationDate: Date, creationCoordinate: CLLocationCoordinate2D? ) {
        type = snippetType
        date = creationDate
        coordinate = creationCoordinate
        print ("(type.rawValue) snippet created on (date) at (coordinate.debugDescription)")
    }
}
At the top of the SnippetData class, we'll add a new CLLocationCoordinate2D? property to hold the optional coordinate data. Then, we'll pass that data in through the init function, and we'll assign it in the body. Finally, we'll add the coordinate data to our debug print statement so we can check to see if it worked later.
Now that the base type is updated, we need to update the text and photo types to also add the coordinate into the init functions:
class TextData: SnippetData {
    let textData: String
    init ( text: String, creationDate: Date, creationCoordinate: CLLocationCoordinate2D? ) {
        textData = text
        super.init(snippetType: .text, creationDate: creationDate, creationCoordinate: creationCoordinate)
        print ("Text snippet data: (textData)")
    }
}
class PhotoData: SnippetData {
    let photoData: UIImage
    init ( photo: UIImage, creationDate: Date, creationCoordinate: CLLocationCoordinate2D? ) {
        photoData = photo
        super.init(snippetType: .photo, creationDate: creationDate, creationCoordinate: creationCoordinate)
        print ("Photo snippet data: (photoData)")
    }
}
Here, you can see that we updated the init functions for both data types to also include the creationCordinate parameter at the end, and that they both pass that data into the initializer for their super class (SnippetData). Now we can pass in a coordinate to any of our SnippetData classes, so let's go update our ViewController, which is where we are actually creating this data!
In the ViewController class, we create new SnippetData objects in two different places: the
createNewTextSnippet() function, and the imagePickerController(didFinish…:) function:
func createNewTextSnippet () {
    guard let textEntryVC = storyboard?.instantiateViewController(withIdentifier: "textSnippetEntry") as? TextSnippetEntryViewController else {
        print("TextSnippetEntryViewController could not be instantiated from storyboard")
        return
    }

    textEntryVC.modalTransitionStyle = .coverVertical
    textEntryVC.saveText = { ( text: String ) in
        let newTextSnippet = TextData(text: text, creationDate: Date(), creationCoordinate: self.currentCoordinate)
        self.data.append(newTextSnippet)
    }

    present(textEntryVC,animated:true, completion:nil)
}
In createNewTextSnippet(), we have to update the line where we create a new TextData object. You can see at the end of its initializer that we are passing in the currentCoordinate property that we created and updated in the last section:
func imagePickerController(_ picker: UIImagePickerController, didFinishPickingMediaWithInfo info: [String : Any]) {
    guard let image = info[UIImagePickerControllerEditedImage] as? UIImage else {
        print("Image could not be found")
        return
    }

    let newPhotoSnippet = PhotoData(photo: image, creationDate: Date(), creationCoordinate: self.currentCoordinate)
    self.data.append(newPhotoSnippet)

    dismiss(animated: true, completion: nil)
}
Again, in the imagePickerController(didFinishPickingMediaWithInfo:) function, we are going to update the initializer of the PhotoData object with the same currentCoordinate parameter.
Now, we've updated our data model to support coordinate data and we updated our controller to track location and pass the data into our data model. If you build and run the app, you should see that when you create a new snippet the console should output the coordinate that the snippet was created at(Figure 8.7):

Figure 8.7: The debug output when creating a new snippet with location data
And that concludes our crash course on CoreLocation! Like I said earlier, now that we've added location information to our data model, later on we can come back and do all kinds of fun things with it. For now, I think we've demonstrated a basic way to integrate some location data in an application. Commit your work, and let's move on.