
Now that we have some theory under our belts, let's put it to good use. In this section, we are going to learn several ways to get an Xcode project set up with version control. Let's launch Xcode and get to work!
To begin, create a new project in Xcode. Choose a Single View Application, and give it any name you like. Make sure your settings look like mine do in Figure 5.5:

Figure 5.5: Our project settings
Once that's done, click Next, and choose a folder to save your project. Before you finish creating your project though, take notice of the checkbox at the bottom of the dialog box (see Figure 5.6):

Figure 5.6: The Git setup checkbox on a new project
You want to make sure you check the box so that Xcode will automatically configure the project folder that it creates as a Git repository. Now, you can click Create and enter your new project.
Note
If you run into any issues with Git from this point on, you should double check that you installed the command-line tools for Xcode. Head back to the beginning of Chapter 2, Welcome to Xcode, to see how we installed them. It's possible that you don't have Git installed properly on your machine.
You'll notice that not much is visibly different. In fact, our project looks exactly the same as all of the new projects we've created previously! Despite this, our project is now completely under Git version control.
As a test, let's head over to the ViewController.swift file. Inside the viewDidLoad() function, let's add a comment to the bottom of the function that just says //test. Now check out the file navigator sidebar: next to our ViewController.swift file name, there should be a little M. This means that Xcode detected a change in that file, and has automatically flagged that file to be staged when we commit later on (the M means the file has been modified).
And that's all there is to it! We've set up a new project with a Git repository, and made sure that it's working. Let's look at a few other ways to get set up before moving on.
Sometimes, you'll start a project without setting up a Git repository, like we just did. There are several ways to get an unversioned project set up with Git. We're going to look at two ways to do this: using Xcode itself, and using the command line.
First, create another new Xcode project with the exact same settings as the last one, except name this one GitPractice2a, and make sure not to check the box that creates a Git repository.
Now, with the project open, all we have to do is go to the menu bar item Source Control, and select Create Working Copy… from the dropdown, and in the resulting dialog box click Create:
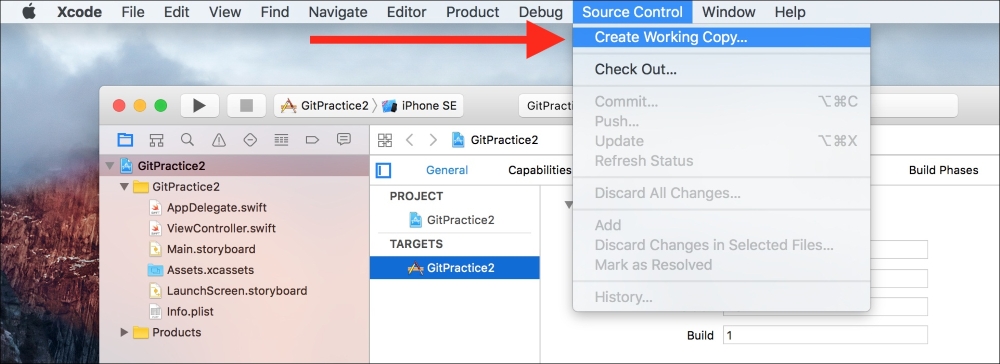
Figure 5.7: Create Working Copy… will turn your project folder into a Git repository
If you go back and modify a file, you should see the M appear, letting you know that Git is properly set up!
At some point, you're going to have to bite the bullet and learn how to use Git from the command line. Why not start early? Now we're going to do the same thing that Xcode just did for us, but manually using command-line tools in Terminal.
First make yet another new project, this time named GitPractice2b (and don't check off the Git box!), then launch the Terminal app. The easiest way to do this is by searching your computer with Spotlight by pressing command + space button, and then typing in Terminal, and selecting the application:

Figure 5.8: Using Spotlight to open the Terminal app
Once we're in the terminal, we want to navigate to the folder that we want to turn into a Git repository. If you've never used the command line before, this might be a little strange, so here's a shortcut: type in cd (which means change directory), followed by a space character. Then, from a Finder window, drag the root folder of your Xcode project into the Terminal window and release it. It should place the file path of that folder into your command line as text!
At this point, your Terminal window should look something like in Figure 5.9 (keeping in mind that your file path will be different):

Figure 5.9: A change directory command in the Terminal app
Press enter on your keyboard to execute the command and change your command line's scope to that of the Xcode project folder. If it worked, the beginning of your current line should be something like this: {ComputerName}:GitPractice2b {User}$, where each piece in curly brackets matches your settings.
Now that we're inside our project folder, we want to turn it into a Git repository. Luckily, that's very simple! Type in the command git init, press enter, and we've done it!
However, that's not all we have to do. We also want to perform our first commit, so that our repository has a starting point. If we think back to the diagrams from earlier though, you'll remember that we need to stage our files before we commit anything. Since all of the files begin as unversioned, we want to add all of the files to the staging area. The command is pretty straightforward: git add. We also need to specify which files should be added, but in this case we can just add a . to the end of the command to tell it that we want all the files. So, our final command should read git add . then press enter.
To make sure that we added all of our files to the staging area, use the command git status to see what changes are set to be committed. If your git status command gives you results that look like Figure 5.10, that means you successfully added all of the files to the staging area:
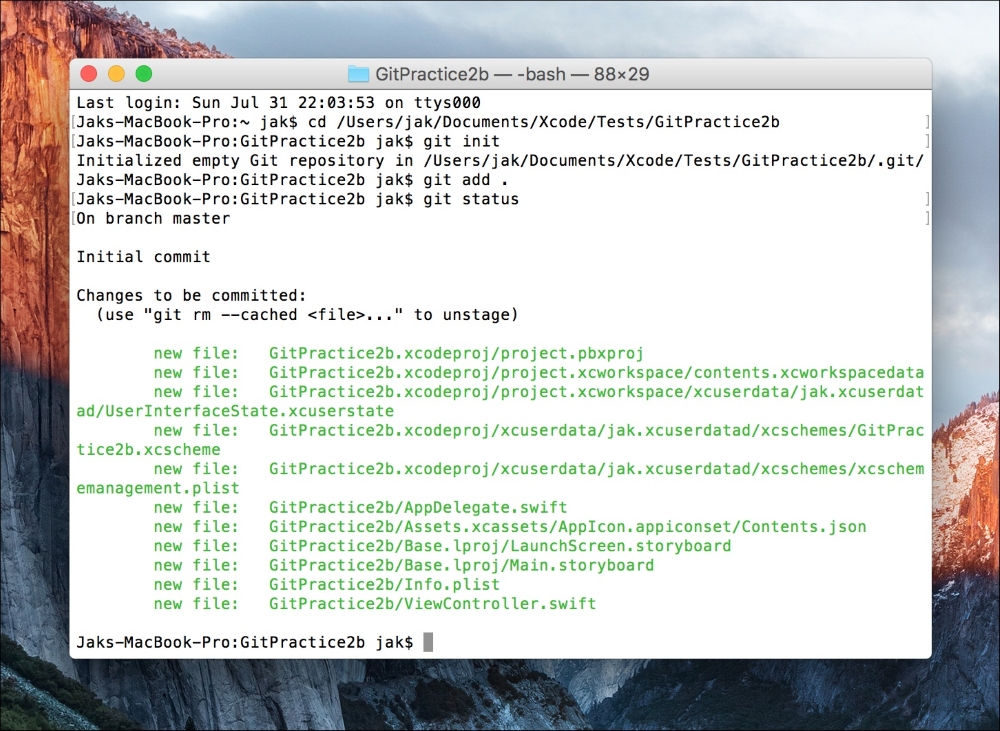
Figure 5.10: The files were successfully staged
To make our initial commit, we are going to use the git commit command. When making a commit, we always need to include a message describing what we did. To add this commit message, we'll use the -m flag, followed by our message in quotes. The final command should look something like this:
git commit –m "Initial commit"
Finally, type exit into your Terminal window, hit enter, then quit.
Note
If you accidentally only typed git commit and hit enter, Terminal will launch vi, a command line text editor and force you to write a commit message. First press the I key to enter insert mode, then type a small commit message. Next, press esc, followed by :wq, then press enter. Don't worry about it… just remember to use the -m flag to make a commit message from the standard command line. Now your Xcode project should be under Git version control.
Head back to Xcode where our project should now be under version control. Xcode is a little slow, though, so you'll need to quit Xcode and then relaunch the project for it to notice the new Git properties of our project. Once you do that however, you'll notice that we get our little M's when we modify and save files. Success!
For this last part, we're going to use a remotely hosted Git repository. To do this, we're going to use a free service called GitHub. GitHub is one of the most popular Git hosting services in the industry, and it's a great resource for collaborative coding.
Go ahead and register an account on GitHub now if you don't already have one (https://github.com/). Once your account is all set up, create a new repository and set it up so that it looks like the one as follows:
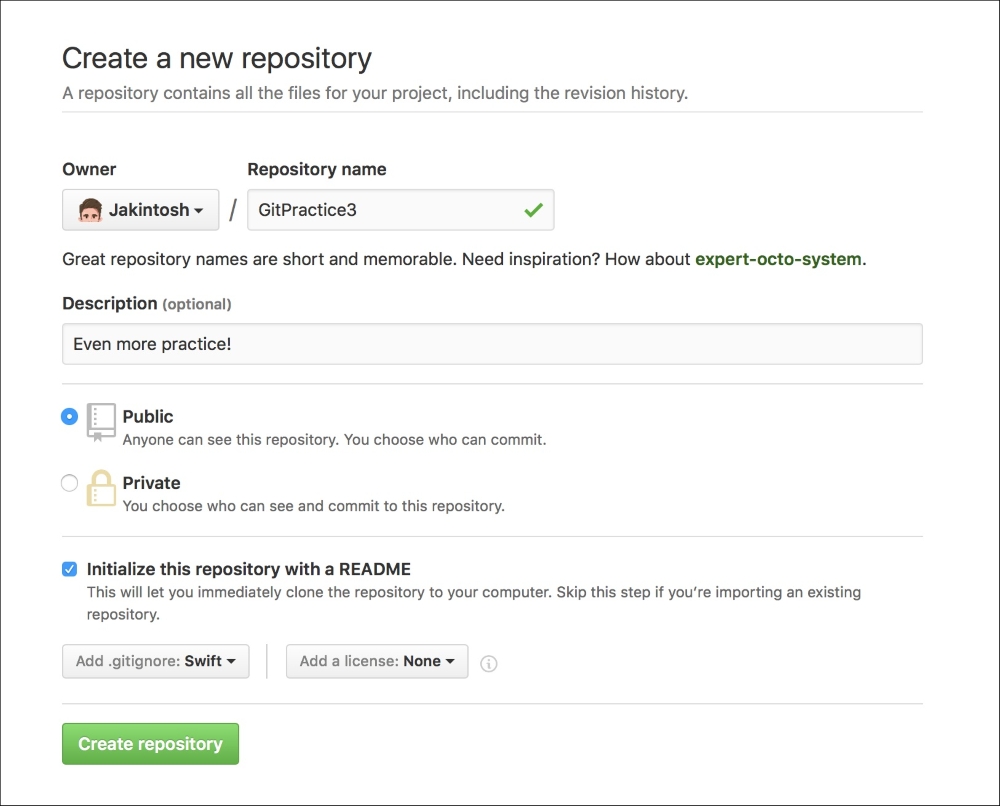
Figure 5.11: Creating a new GitHub repository
You'll notice that there is a new element here that we haven't yet talked about: a .gitignore file. A .gitignore file is a hidden file in your Git repository that tells the repository to ignore certain files. There are many reasons why you wouldn't want to place some files under version control, and the .gitignore is where you list those files. When creating a new repository on GitHub, you can chose from a bunch of premade .gitignore files, and you can see that I chose one that is made for Swift:
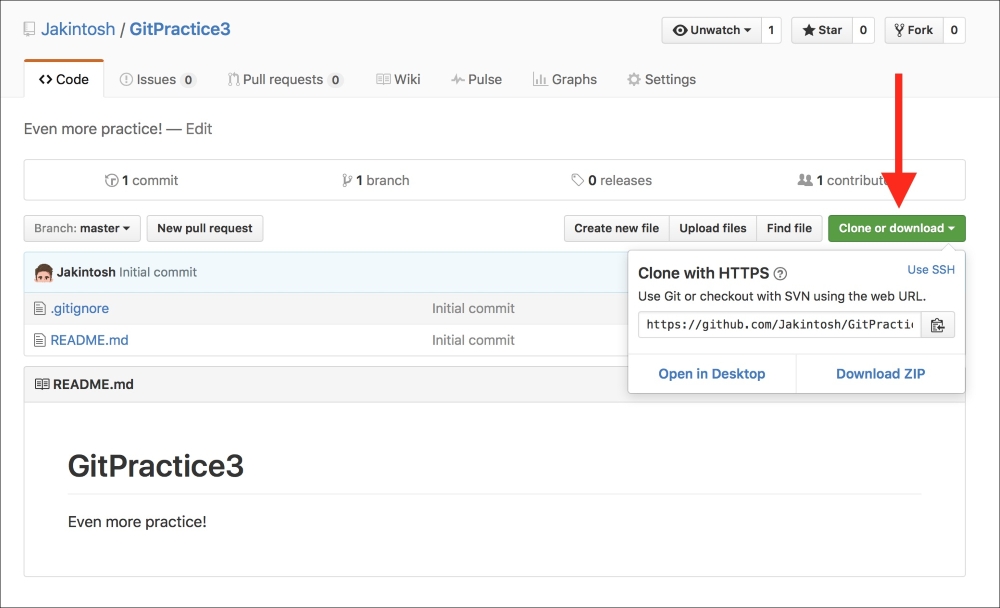
Figure 5.12: Finding the repository link on GitHub
Once you've configured the repository, hit the green Create Repository button to finish creating it. Now you should be brought to the repository's page. We want to find the link to the repository so that we can access it in Xcode. If you click the green Clone or download button (Figure 5.12) on the repository overview page, you should see a link to the repository. Make sure you select the HTTPS version of the link, before copying it to your clipboard:
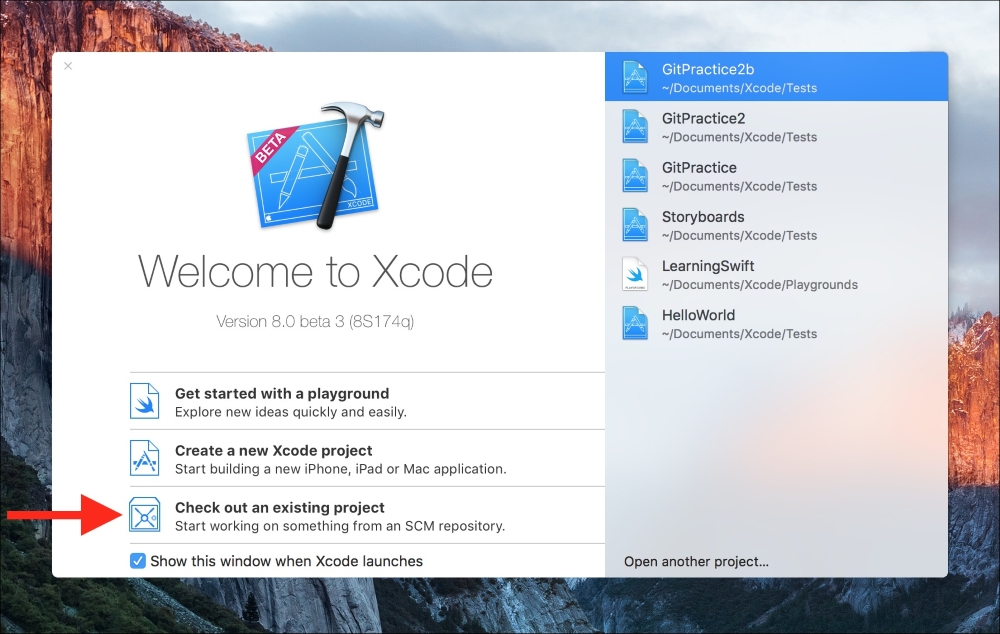
Figure 5.13: Checking out a Git project from Xcode
Back in Xcode, let's go to the startup window, and select the Check out an existing project button (Figure 5.13). This will allow us to use the link we copied from GitHub to access our repository straight from GitHub. In the checkout window, paste in the link from GitHub, click on the Next button, and select a location to save the project. This will download the repository, but since it's empty, we still need to create the Xcode project that will go in it:
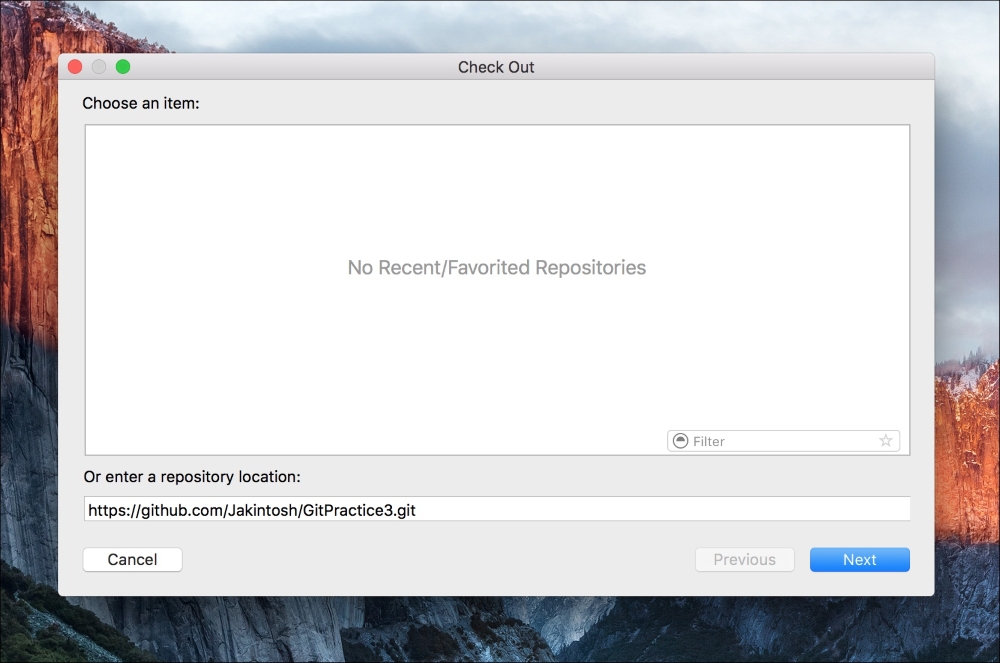
Figure 5.14: Pasting the link from GitHub to check out the project from Xcode
One last time, let's create a new project (single view application) named GitPractice3, and save it into the folder that we just pulled down from GitHub. In the last step, the checkbox should be greyed out, letting you know that the folder is already a Git repository. Click
Create, and you're finished!
We've now covered many different ways to configure a new or existing project to use Git. Now let's see what we can do with it in Xcode!