
Now that you have a good understanding of navigating Xcode on your own, let's head back to the file that was open when we first started our project. In the project navigator, this is the very topmost file; it has a blue icon, and is named the same as your project:
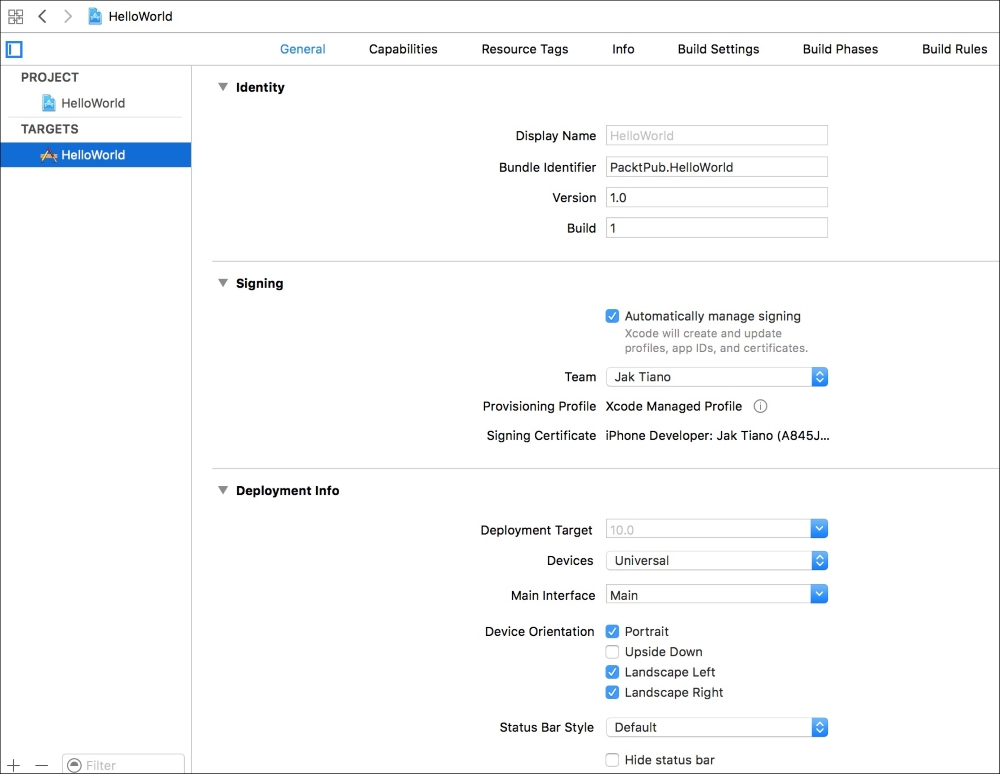
Figure 2.14: The General tab of the project settings file
This file represents your project's settings. There are a lot of important sections in the project settings file that you'll have to interact with in pretty much every project, from app icons, to iCloud capabilities, to custom compiler settings. In this section, we're going take a tour of the most commonly used parts of the project settings file.
Like many of the other windows we've explored, you'll notice that the editor for the project settings is split into two columns. On the left, you can see the projects and targets in your app, and on the right are the actual settings. Let's look at the left sidebar for now.
The PROJECT heading seems pretty self-explanatory, but what is a target? Let's take a quick detour to understand this.
Essentially, a target is a set of instructions needed to create a single build. It describes for the compiler what all the source files are, the build settings, and any resources or frameworks to include. In our current project, we only have one app target, which will build an iOS app. However, if wanted to also make a build for the Apple Watch, we'd need to create and configure a new app target (actually, we'd need a few). We'll be trying that later on in the book!
Sometimes you can even create a single Xcode project that builds to iOS and OS X, like with SpriteKit. In that case, you could have all of your game's SpriteKit logic and assets shared, but have the platform specific interface code separated. Then in your app targets, you could specify which source files to use, and make sure each one builds for a different platform. Then you'd have a single project that shares assets to build for two completely different platforms!
What's important to understand for now is that each target has its own settings. So in this sidebar, you'll need to select each build target and configure each one separately. When you create a new target, you'll be selecting from presets so they'll be heavily pre-configured, but it's important to comb through yourself and make sure they are set up properly.
Generally, you won't really be changing a lot of the project's settings; what you're actually configuring are the project's TARGETS settings. Go ahead and click on the HelloWorld project under the Project heading on the sidebar. Notice how there's a lot less going on here? Now let's go back to the HelloWorld app target and take a look at what we can do here.
Along the top of the editor view for the project settings file is a row of different tabs for groups of configuration options. The General tab gives you the ability to set some, well, general settings for your app. Most of this page isn't very dangerous, and it's a good idea to run through it before starting to write any code.
Starting at the top, we have the Identity section. In here, you'll see the Bundle Identifier we gave our project during setup. If you messed it up, the good news is that you can change it here! This might be useful if you get a new website while making an app, or change its name part way through development. We've also got some text fields to set the Version and Build numbers. We're going to leave these at 1.0 and 1, respectively, but if you were working on an update to an existing app, this is where you would set that information.
After the Identity section is the Signing area. By default, you should have the Automatically Manage Signing checkbox enabled. This makes Xcode take care of all code signing responsibilities. Make sure your team is selected from the dropdown. If you are registered as an individual developer, this should be your name.
The next section is called Deployment Info. This section allows you to change settings regarding the way the app will run on a device. The first item is the Deployment Target, which means the lowest version of iOS that the app will run on. Right now it's set to 10.x, and we're going to leave it there, but in a real-world environment, you will almost always need to target older devices. The next option is Devices, which is the same option we set when creating the project. Next is Main Interface, which lets you choose the default storyboard file to use when your app is loaded. By default, it is set to Main.storyboard, but if you wanted to create a new storyboard file you could make it the default here. The next four checkboxes for Device Orientation will either enable or disable those orientations for your app. For example, if you only left portrait checked, the app wouldn't auto-rotate to any other orientation. The next option, Status Bar Style, lets you change the visual style of the status bar, while the last two checkboxes, Hide status bar and Requires full screen, explain themselves.
Below the deployment settings is a small section where you can set up your App Icons and Launch Images. Earlier, when we were in the Assets.xcassets file, we saw that we had an AppIcon asset in there. You can add as many icon assets as you want, and this first drop-down menu lets you pick which one you want to use for the actual app icon. The next two options have to do with the launch screen for your app. By default, the launch screen is determined by the contents of LaunchScreen.storyboard, a file in the root of your project. If you wish to use images instead of a storyboard, you can click the Use Asset Catalog button, and if you want to change the storyboard that is used, you can select it from Launch Screen File.
The last two sections let you import embedded binaries and link frameworks and libraries. We won't be using these features right now, but if you wanted to include a framework that someone else has built, you could use the little + buttons in the lower-left corner of these sections to add them to the target's build resources. We'll start covering this in Chapter 8, Exploring Common iOS Frameworks.
When building an application, sometimes you want to tap into some iCloud or system services to make your app work better with the Apple ecosystem, or just provide a better experience for the user. Since having all of these services on by default would waste a ton of resources, you need to manually enable the capabilities you want to use in your app. You can do this from the Capabilities tab, found next to General in the navigation tab bar along the top of the editor:
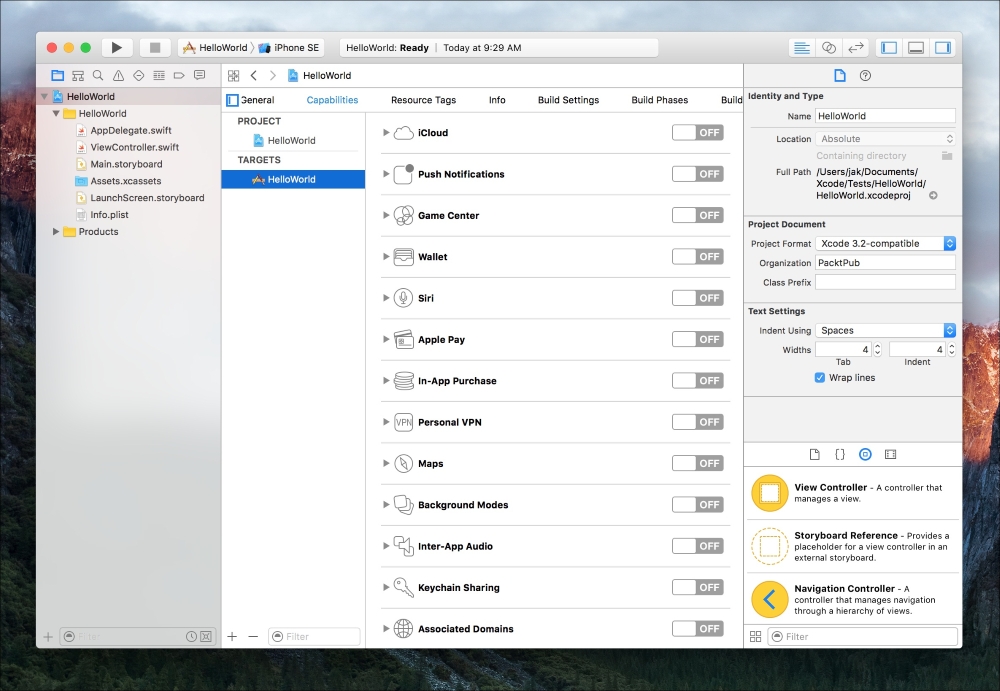
Figure 2.15: The Capabilities tab of the project settings file
Here, you can see a list of the many capabilities that you can enable for your app. By clicking on the drop-down arrow to the left of each icon, you can get a good idea of what each service does. To enable a capability, just flip the switch on the right side of that capability's row. Some common capabilities you might use are the iCloud, Push Notifications, Game Center, and In-App Purchase capabilities.
We've looked at a ton of settings for our project and targets so far, but there are always more miscellaneous settings than can ever be fit into a predetermined menu! For those settings, we have the Info tab. The first section is all we're concerned with, titled Custom iOS Target Properties. As the name implies, this is where we can set custom properties for the app target we are currently editing:
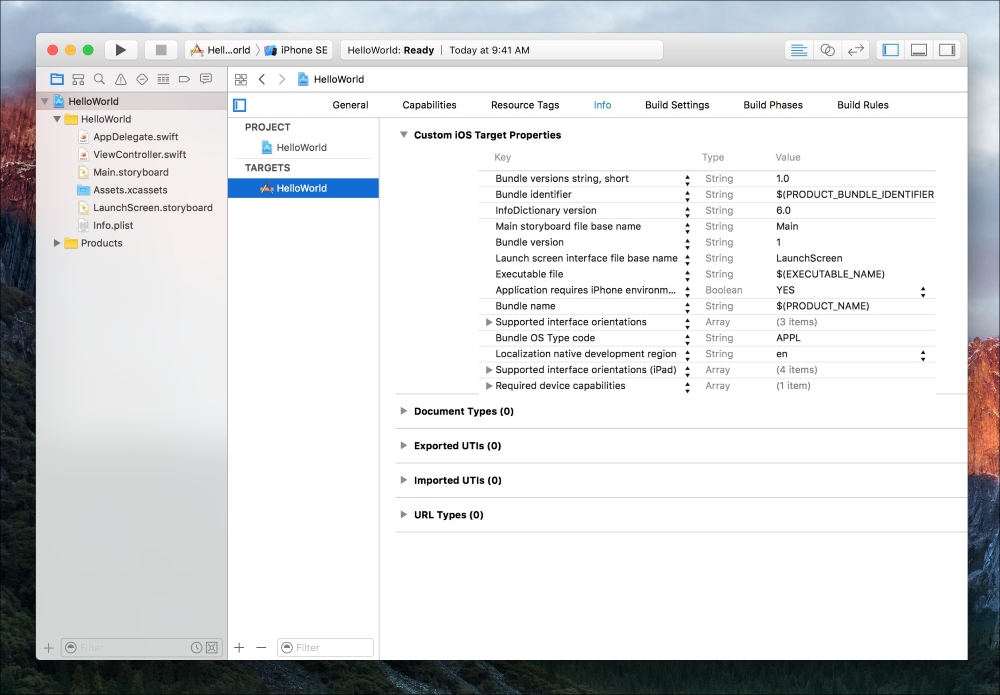
Figure 2.16: The info tab of the project settings file
This section uses a key-value dictionary to set the value for different settings. You can see that there are a handful of custom properties already in the dictionary, and some are even borrowing from other parts of our target settings; for example, the Supported interface orientations item is just pulling from the Deployment Info section of the General tab.
If you select any of the fields in the list, you'll see + and – buttons appear in the center. If you click the + button, it will create a new entry beneath it. You'll see that it will bring up an autocomplete form to select one of the many custom properties you can set. We aren't actually going to set a custom property right now, so you can go ahead and click the – button on that new entry to delete it.
There are far too many custom properties for it to make any sense to talk about them here. What's important is that you know where they are and how to modify them.