The path is the tool in Prezi that helps you arrange the order you will move through your presentation. In PowerPoint, you can only move from one slide to the one immediately following or preceding it. If you're moving through paths in Prezi, you still go in order, but you can move anywhere in the Prezi, rather than being forced to stay in close spatial proximity to the last point on your path. Additionally, it is possible to revisit a previous point in the path without having to duplicate the content in order to expand on or emphasize something that may already have been covered. In addition, you can stop following a path at any time and choose to freely scroll or zoom around the canvas.
Paths are incredibly important in Prezi because this is the tool that actually allows us to create the motion for which Prezi is so well known:
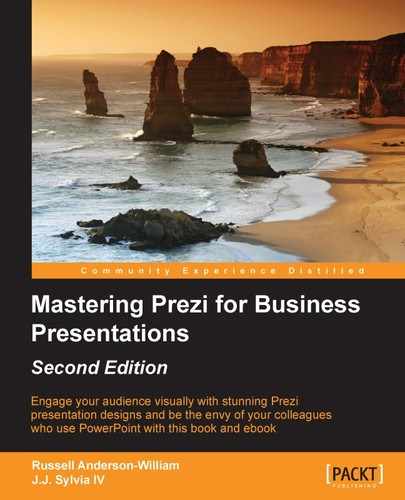
This presentation is available at: https://prezi.com/hddprjo5hc5a/running-amooc/
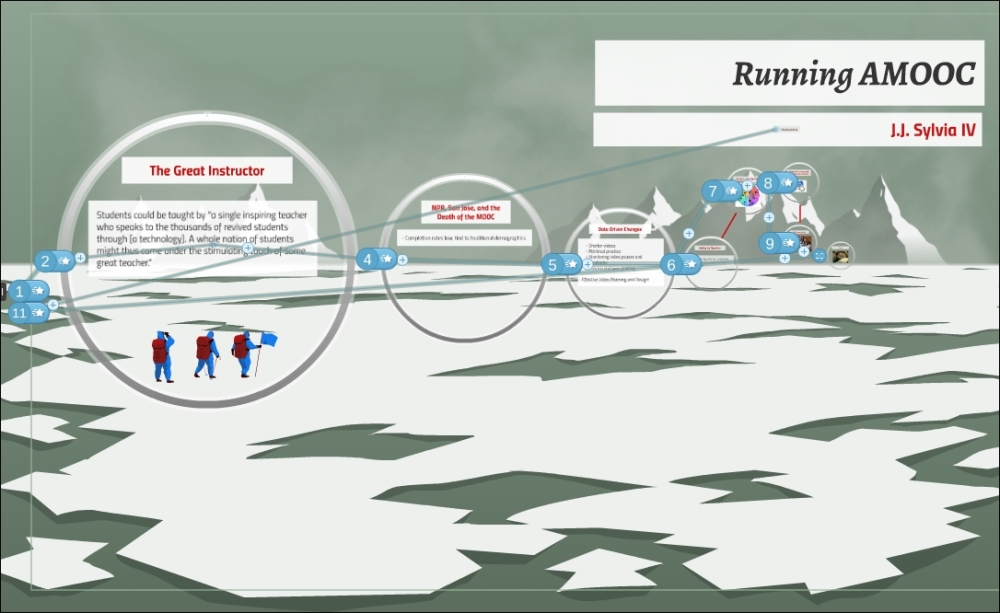
In the preceding example, each number represents the order of the path that has been created. The first point is a frame that surrounds the entire presentation. So when this presentation is started, you would see everything pictured, as shown in the preceding screenshot. Step 2 of the path is the first circular frame. In moving from path step 1 to path step 2, Prezi automatically creates a zoom effect, as it moves from the full view, shown in the preceding image, to just the frame, as shown here:
The spinning effect can be created in a similar fashion. If you rotate the element in one of the paths of the step, Prezi will rotate the entire canvas as it moves between the path points so that the content is displayed upright. This creates the spin effect.
Note the rotated content here:

The very first thing we would suggest when opening a template is clicking on the Edit Paths button and taking a look at how the Prezi flows. The whole reason you're using a template is because you're pushed for time, but you should know how many frames you need and how many different areas you'll want to focus on in your presentation before you get started. If you do, then you can adjust the paths, add new path points, or delete some that are there already.
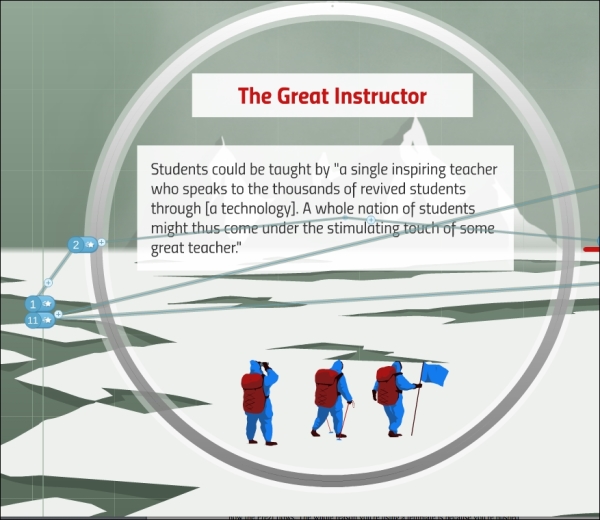
To add a path, you can simply click on any frame or content. When you hover over one of these elements before clicking on it, it will show a slightly lighter path step, as step 13 appears here. Once you click, it adds it as a new step at the end of your current path:
If you want that step in the path placed somewhere else, you can simply drag and drop it in the path editor on the left-hand side of the screen:

In the preceding example, I can simply click and hold on the thumbnail for the new step, that is, step 13 , and then drag and drop it above any of the other steps.
Tip
If you're trying to get the view just right, you may want to click on the Add current view button instead of clicking on a particular frame or piece of content. This is particularly useful if you don't actually want a frame to appear as part of your presentation and don't need to create an invisible frame.
There are two quick and easy ways to remove any path point. You can simply drag the point off the frame or content it's currently on to a part of the screen where there isn't any other content, or you can hover over the path preview and click on the red cross button to remove it.
Many of the master Prezis that are created rely on this basic path functionality to create good effects. It's well worth the time to explore all the ways you can utilize paths in your own Prezi, keeping in mind the Prezi frame of mind that we discussed.