One thing we all struggle with when creating presentations is finding the right image to deliver our message. You know exactly what you want to say, and if you could just find the right image to accompany your words, then your whole presentation will have a much bigger impact on its audience.
The problem is, of course, that we all have tight (and usually unrealistic) deadlines to meet, and we are probably trying to work on several different projects at once. There isn't enough time in the day to spend it looking at images, but you do want your Prezi to look great.
The following are a few ways of finding the right images, starting with the least time-consuming methods. If you live on some strange planet other than earth and have the luxury of time to seek out the perfect images, you'll definitely want to take a look at the latter half of this section. For the rest of us earthlings, to whom time is precious, I'm sure you'll find some useful tips at the start.
If you're very lucky, you'll already have all the images that you need for your presentation, and all you need to do is load them into Prezi. In that case, you need to take the following easy steps:
- Click on Insert on the Prezi menu.
- Click on Image.
- Click the Select files… button that appears on the right-hand side of your screen:

- Click on Open to insert the file into Prezi.
When you're using your own imagery, there are file size restrictions that you'll need to be aware of. Prezi cannot accept any images larger than 2880 x 2880 pixels. Most image editing software will display the number of pixels to you, but you can also find this by viewing the details or properties of the image by right clicking the filename. However, you can upload images larger than this and Prezi will offer to resize them for you.
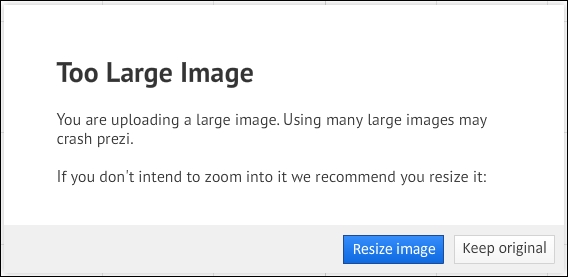
It is possible to select Keep original and upload the large file as it is; however, you should use caution when taking this route as it can cause problems with editing and even zooming, later on.
The most time-efficient method for finding new imagery is, without a doubt, by starting in Prezi itself and using the Insert image function:
- To access this function, click on Insert on the Prezi menu.
- Then click on Image to open the Insert image dialogue box on the right, as shown in the following screenshot:

- If you look closely, you can see that that there is a drop-down arrow next to the box where you can search terms, and if you click it, you get several options, as pictured here:

- You can select any of the options, but if you're looking for the widest variety of sources for images, you'll want to select All sources.
- This will bring in results from images that have been used in other Prezis as well as those from a Google image search. Simply enter a keyword into the search box.
Tip
Pre-licensed image checkbox
The checkbox marked Show only images licensed for commercial use should be ticked. Removing the checkmark will allow copyrighted images to appear in your search. These images cannot be used unless you gain permission from the image owner, usually at a cost. This is especially important when creating images for businesses and not personal or academic use.
- Enter the word Chocolate into the search box and click on the magnifying glass button to perform a search.
- You'll then see a series of images linked to that keyword, which you can scroll through and then insert by either double-clicking or dragging and dropping onto the canvas, as in the following screenshot:

Tip
The zoom test
If you see an image that you like, insert it and use the zoom button to take a closer look at the image. If you zoom in a little and the image starts to lose quality and is pixilated, then it has probably been saved at a very low resolution.
Always zoom in and check the quality of the image you're using, especially if you know you're going to zoom into it at some stage in your Prezi.
There's no doubt that using the Search images on the web function is the fastest way to find images for your Prezi, but it does have its limitations. Here are some of the things you won't be able to do:
- Check the image dimensions, that is, width and height in pixels
- See whether the image is a
.jpeg,.gif, or.pngfile - Your search will only return raster images
If you have a bit more time available when searching for imagery, you might decide to open a web browser and run a Google image search outside of Prezi. If so, the tips in the following sections will definitely help.
Most non-Masters will simply go to the Google images home page, type in a keyword and click search. Those of us in the know, however, will normally always click on the cog wheel option on the right-hand side of the screen, which allows us to access the Advanced search option and fine-tune our search before selecting an image. See the following screenshot:

This can actually save you time in the long run because you can be very clear about what you want to see.
Some options I would definitely take advantage of in the advanced image search are:
- Image size: This should be set to larger than 800 x 600 pixels. Chances are that these images won't be pixilated as much when zoomed into in Prezi.
- Type of image: This should be set to Photo to save you from scrolling through hideous clip-art images.
- Usage rights: This should be set to free to use or share, even commercially. This mirrors the copyright issues within Prezi we discussed earlier:

- Colors in image: This is extremely useful if you're trying to create a particular style throughout your Prezi and want all imagery to use the same color scheme.
- File type: This can be set to only look for PNG, JPG, or GIF formats, which are useful if, for example, you want to take advantage of transparent backgrounds in PNG files.
If you decide not to use the advanced search option and simply type your keyword, cross your fingers, and hope for the best, then make sure you look at the following image before saving and inserting an image into Prezi:

By simply rolling your mouse over one of the images in your Google search, you can reveal some key information about that image file. For our purposes, the dimensions will be the most important.
The file also has a dimension of 1200 x 934 pixels. This means it should be large enough to do some zooming in on it within Prezi, if we'd like to.
If getting that perfect image in your prezi is important to you (as it should be), then there are other sources you may want to turn to other than Google images. The web has hundreds of online image libraries just waiting to be tapped into. If you still want your images completely free, then www.freeimages.com, www.morguefile.com, and www.flickr.com are definitely worth checking out. There are also some outstanding premium resources available that give the highest quality images taken by professional photographers. Obviously, such resources aren't going to be free, but if you're building your Prezi for business use, I'm hoping you might have some budget for a small spend to get your Prezi looking great.
Here are some things you should know about using online image libraries.
A simple online search for image library will bring up the most popular resources. These will no doubt include the following:
There are obviously many other that you may wish to look into, but if you are going to invest in the right image, then make sure you get the biggest bang for your buck and compare the following before signing up to any of these sites:
- Is there a "pay per download" option? You don't want to be paying a monthly subscription unless you're a designer and need tons of images regularly.
- Do you get access to any free images when signing up?
- How expensive are the highest resolution images?
When you read that these online resources need to be paid for, you might have instantly thought, "Oh well, I'll skip this part", and I wouldn't have thought any less of you. However, I'm glad you're still reading this because there are some major benefits that these resources can bring to your Prezi designs:
- Time-saving: These sites make their money by giving you fast access to the images you want, so the advanced search facilities are usually very detailed and you won't end up scrolling through hundreds of images that aren't related to your original search.
- Vector images: All of these libraries will allow you to search for vector images as well as raster. This is obviously a massive advantage if you're planning to zoom in on images and want to keep everything looking great.
- Other media: Although their main focus might be imagery, these resources will no doubt stock video, music, and animations as well. All of which can really bring your Prezi to life, which we'll discuss in later chapters.
To summarize this section, the following chart shows you the three methods mentioned previously and the effects that using each of them will have on your Prezi design.
|
Method for finding imagery |
How this affects your Prezi |
|---|---|
|
Fastest method of finding imagery but only searches for raster imagery without displaying the file type or size | |
|
Google image search online |
Allows for a more advanced search, but it means that you have to save the image outside of Prezi and then insert it, which can take time |
|
Online image library |
Will have a price attached but gives the option of searching for vector and raster images that have been produced by professional photographers and/or designers, giving your Prezi a stunning look and feel |